9. E-PTW
Settings -> e-PTW:
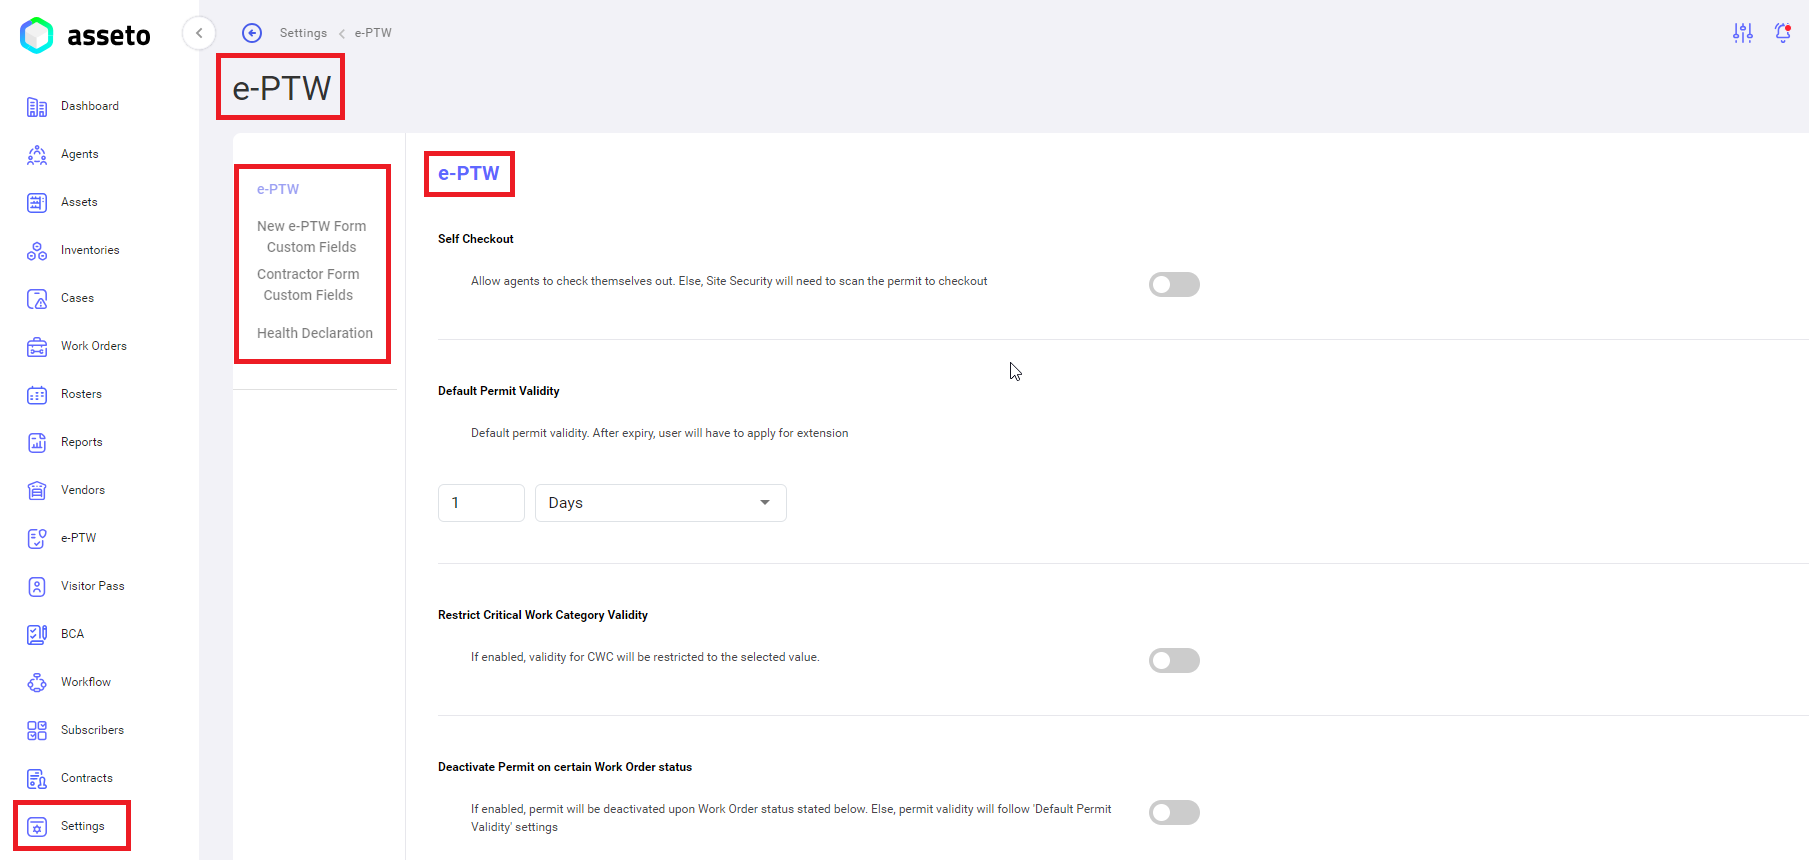
User can configure e-PTW configuration, New e-PTW Form Custom Fields, Contractor Form Custom Fields, Health Declaration. Options are available as menu on left side, e-PTW is highlighted by default.
i. Settings -> e-PTW -> e-PTW
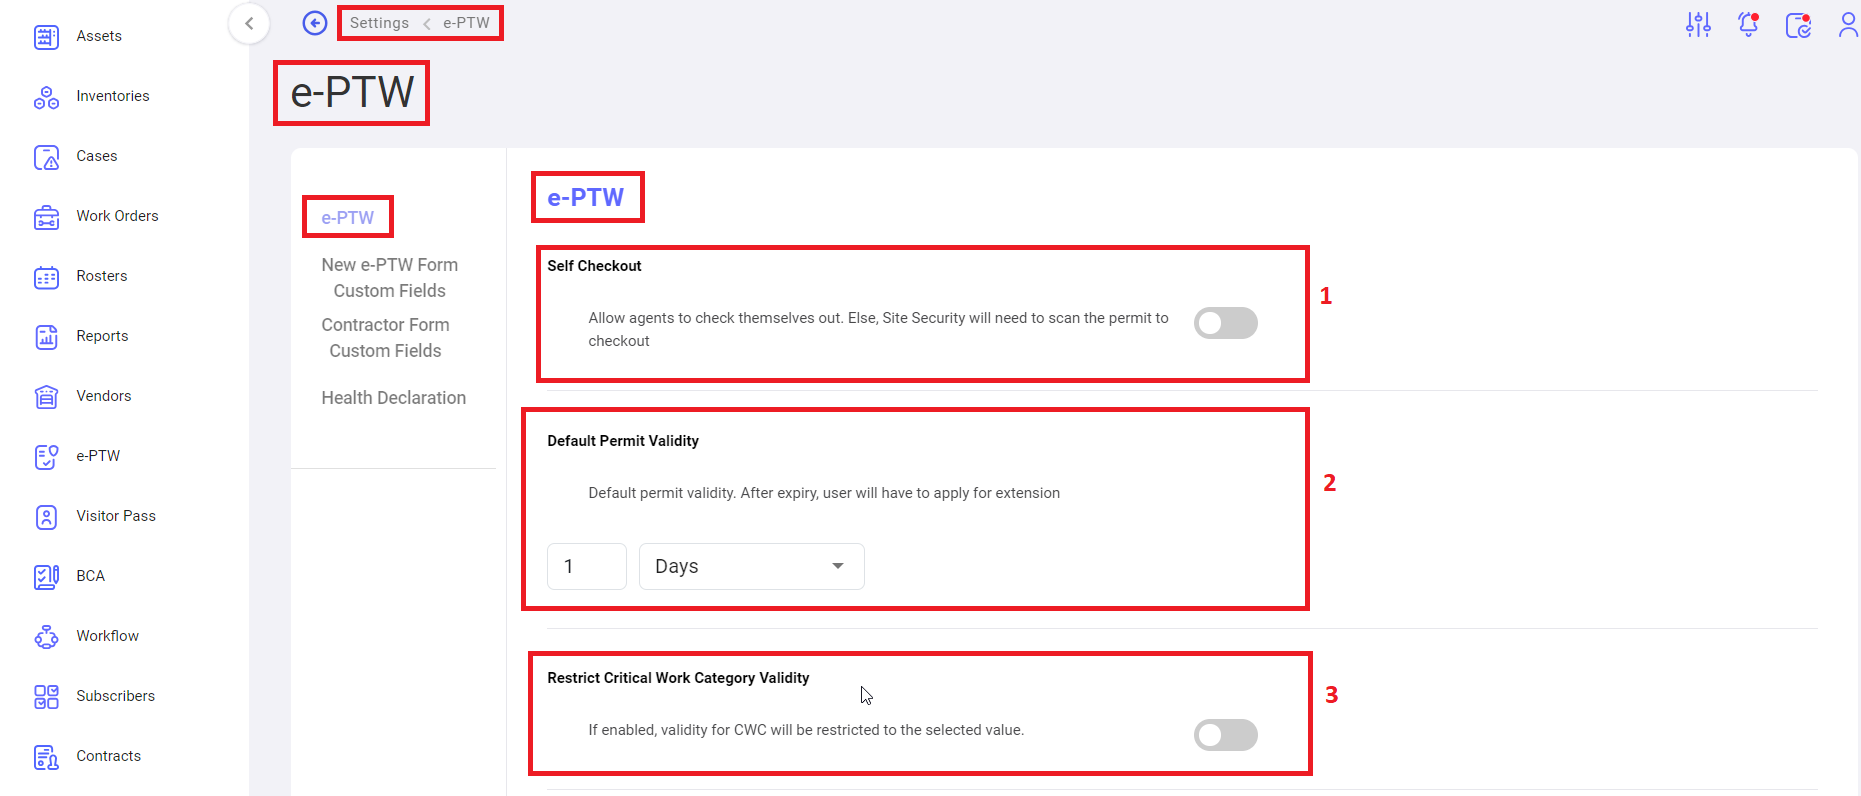
1. Self Checkout: user can enable/disable this status, whether to allow agents to check themselves out. Else, site security will need to scan the permit to checkout.
2. Default Permit Validity: user should provide duration for default permit validity. After expiry, user will have to apply for extension.
3. Restrict critical work category validity: when the status is enabled, validity for CWC will be restricted to the selected value.
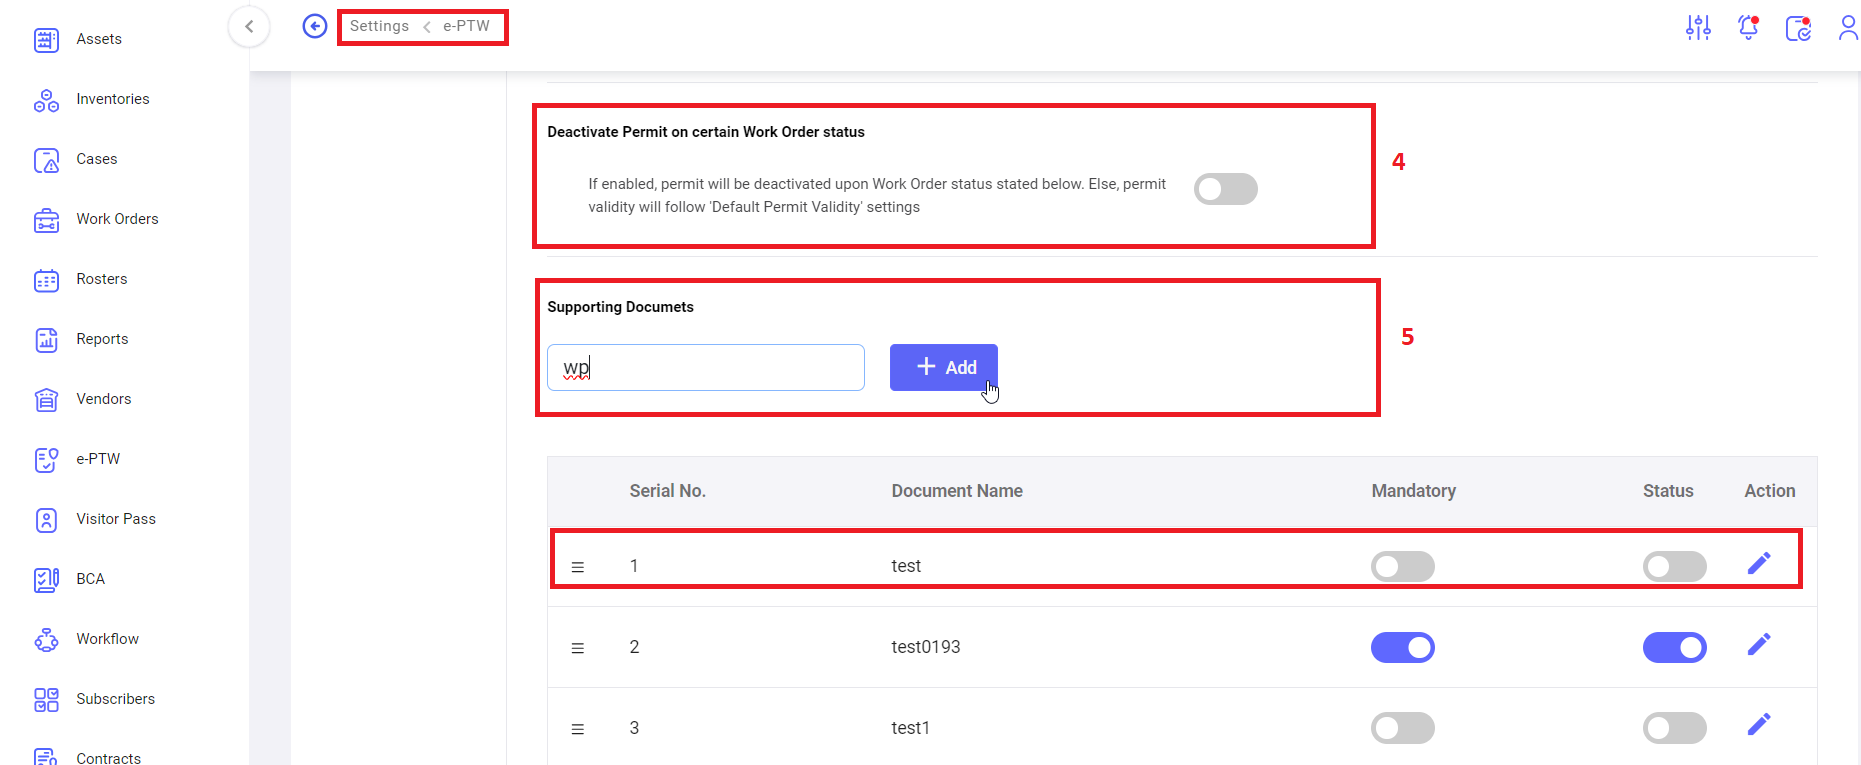
4. Deactivate permit on certain work order status: when the status is enabled, permit will be deactivated upon work order status stated below. Else, permit validity will follow ‘default permit validity’ settings.
5. Supporting Documents: to add the supporting documents for the work permit. Added documents displaying below table, here user can enable/disable the status of the document and edit the document.
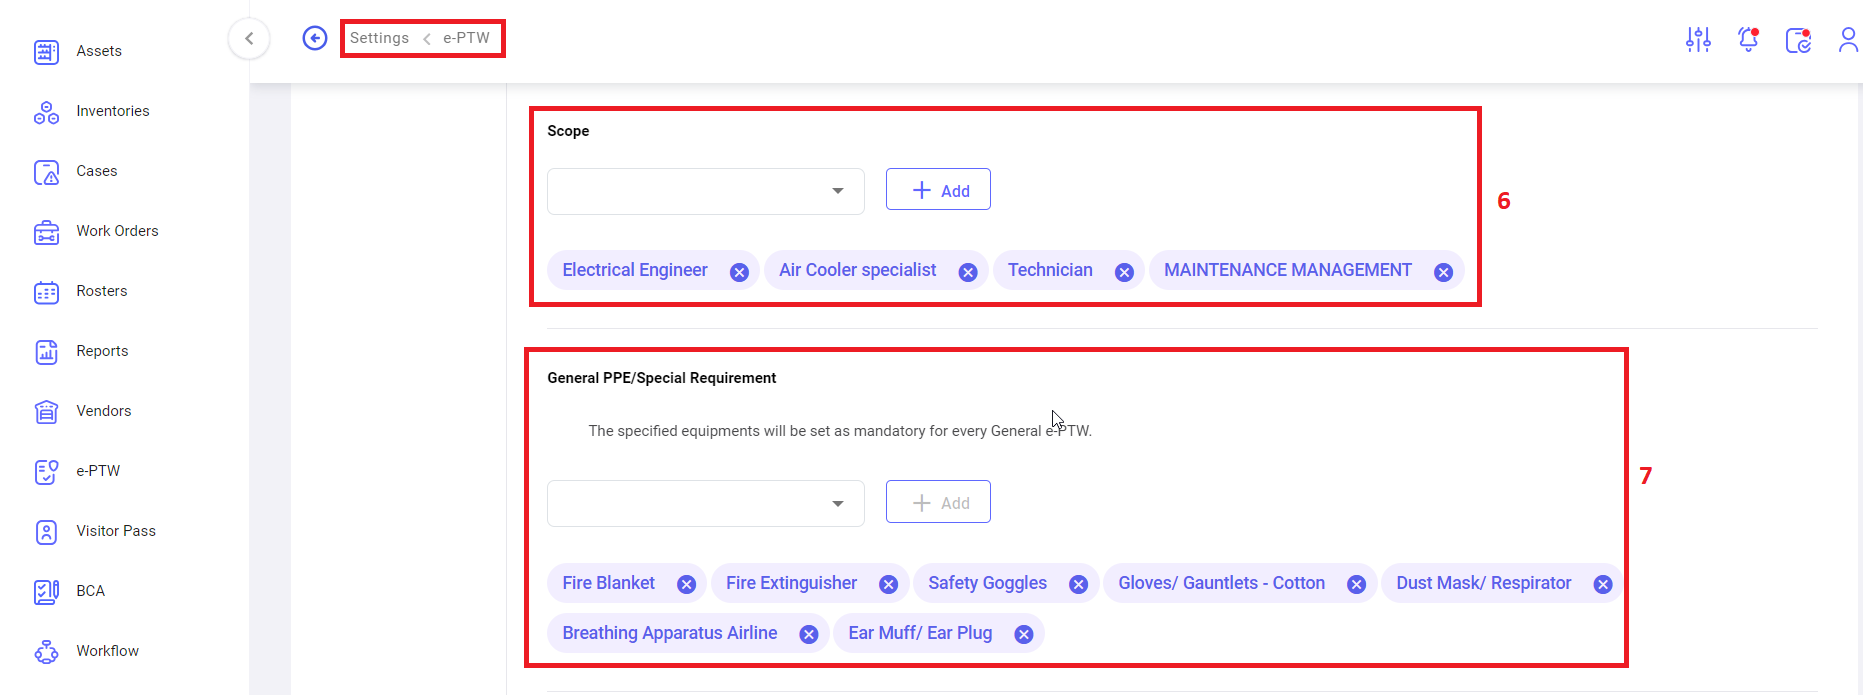
6. Scope: Scopes will be listed in the drop-down menu. Users can select the scope & click on Add option. Scopes added by users are shown below the Scope field and user can remove the specific scope (by clicking on close icon).
7. General PPE/Special Requirement: The specified equipment’s will be set as mandatory for every general e-PTW.
· Equipment’s will be listed in the drop-down menu. Users can select the equipment & click on Add option. Equipment added by users are shown below the equipment’s field and user can remove the specific equipment (by clicking on close icon).
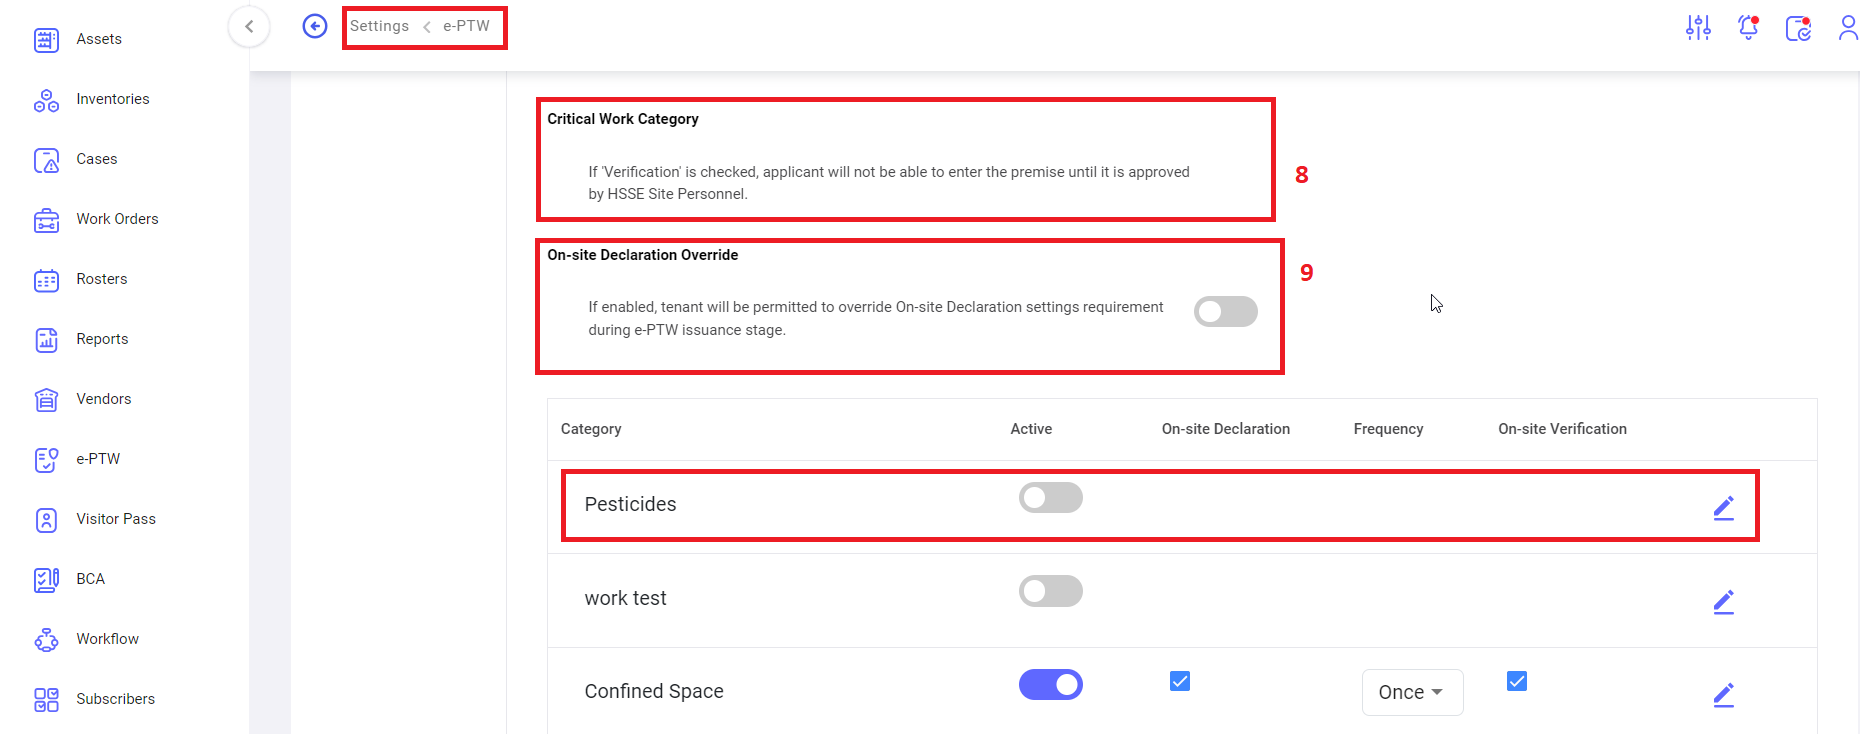
8. Critical work category: if ‘verification’ is checked, applicant will not be able to enter the premise until it is approved by HSSE site personnel.
9. On-site declaration override: if enabled, tenant will be permitted to override on-site declaration settings requirement during e-PTW issuance stage.
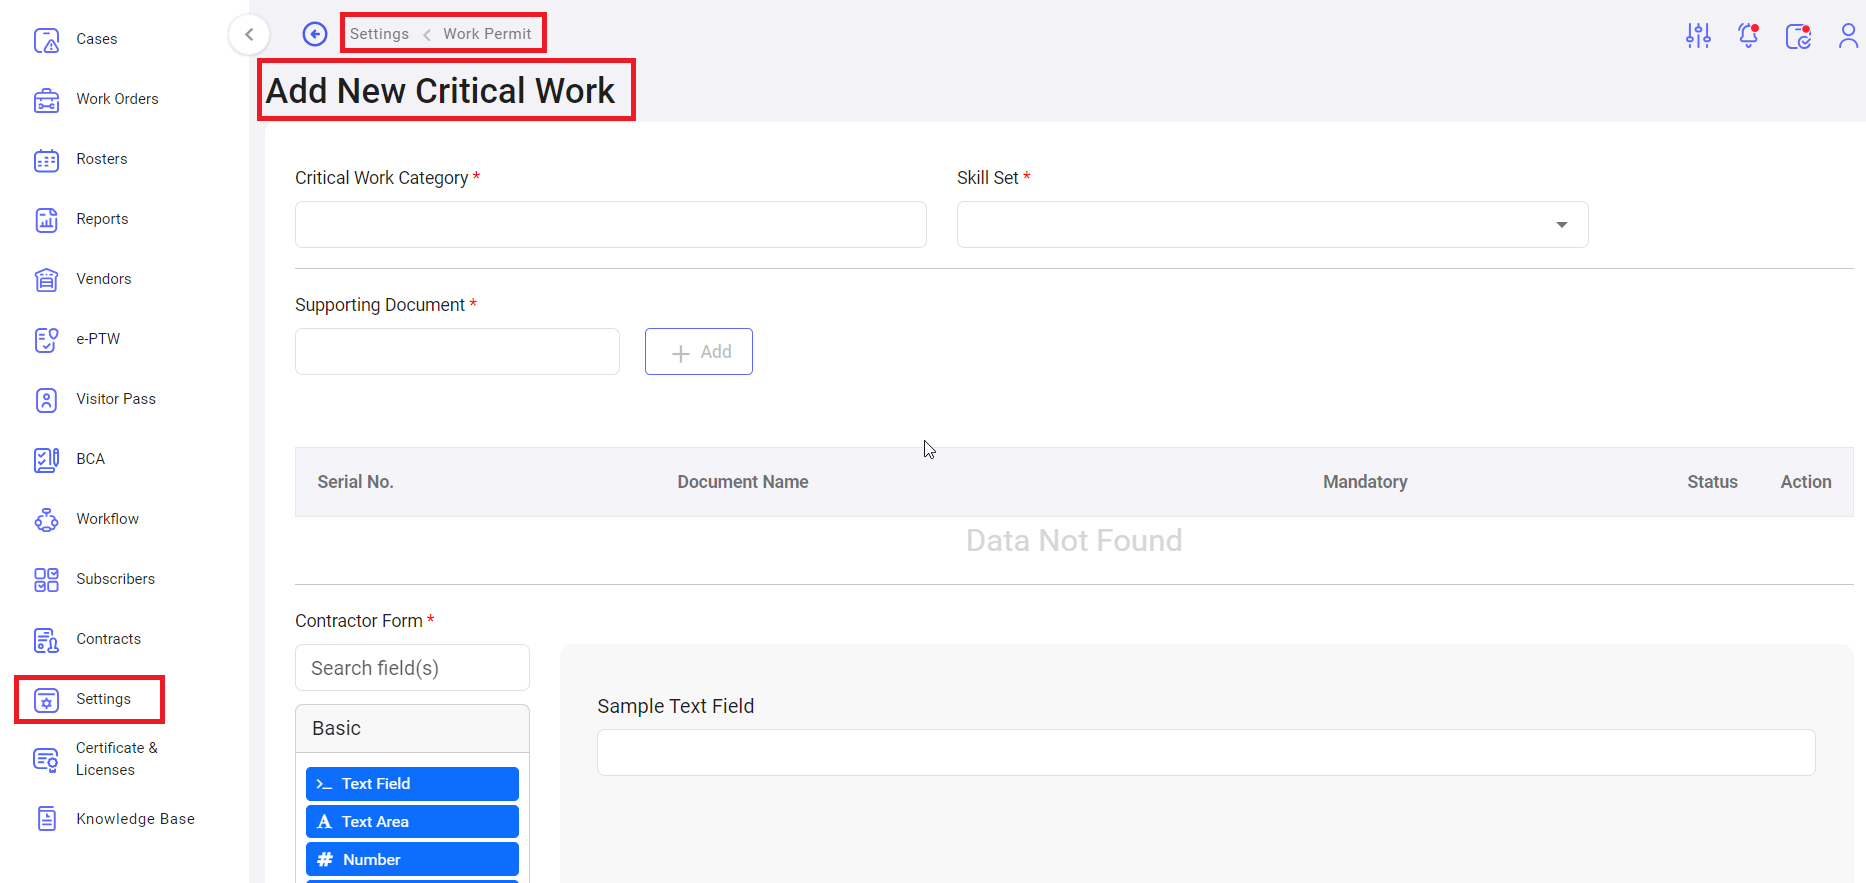
Click on “add new” button to add the new critical work, following page will be open.
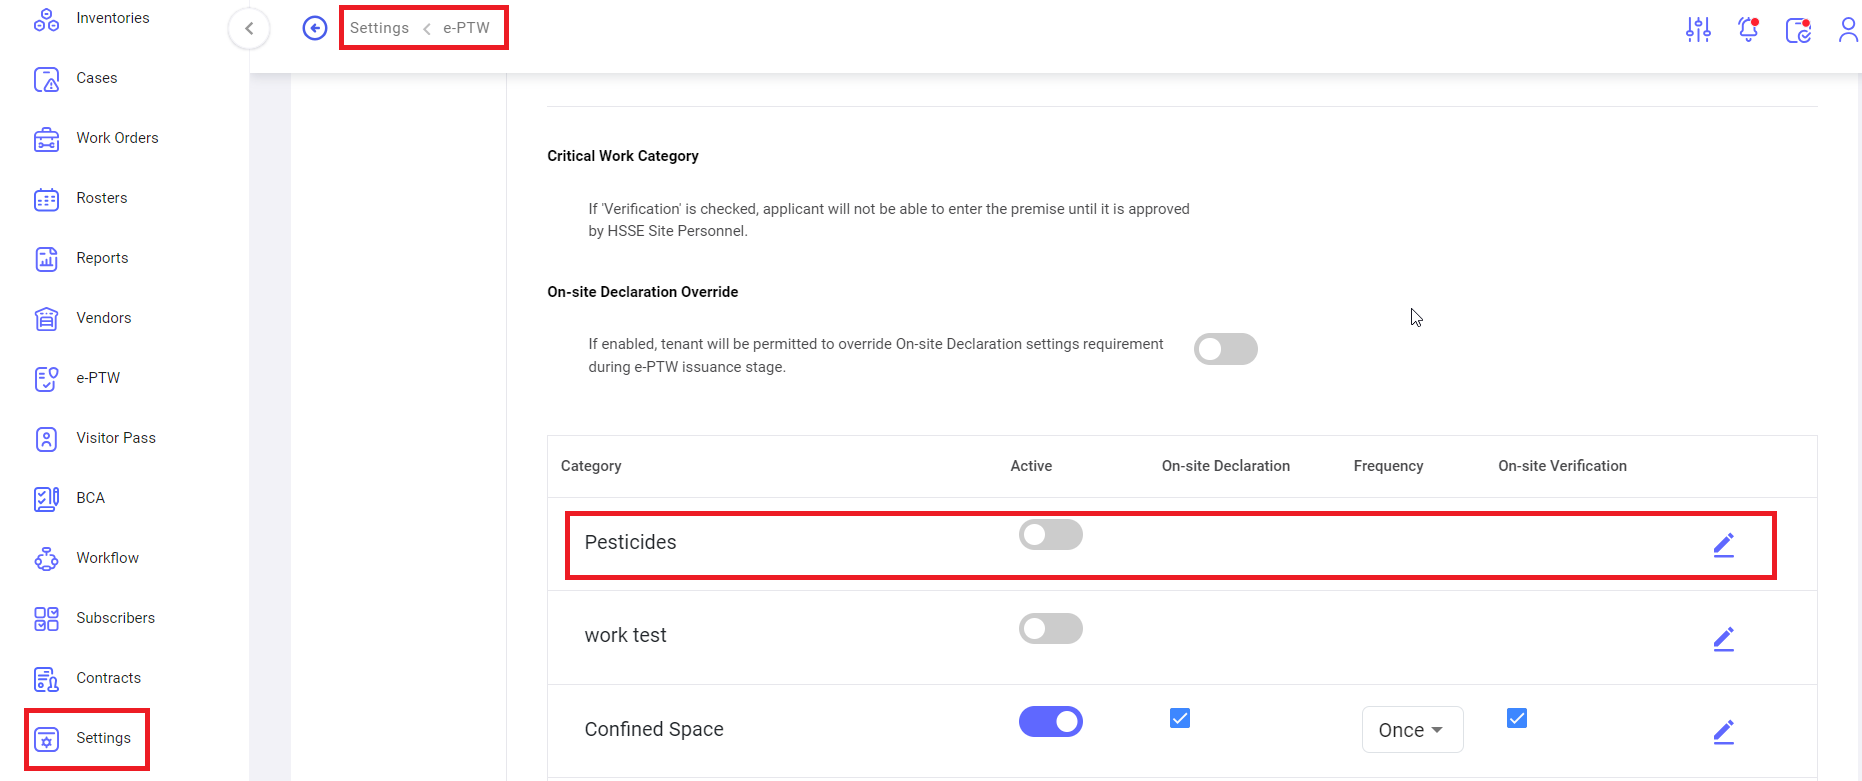
Fill the all-mandatory fields and click on save. Saved critical work order will display in the table as shown by following screenshot.
Status: user can activate/deactivate the status of new critical work.
Edit: user can edit the new critical work details.
10. Location without site Security: e-PTW QR code verification is not required for locations specified in the table shown by above screenshot.
To add the location, click on “Add New” button, enter the details and click on “save” button.
ii. Settings -> e-PTW -> New e-PTW Form Custom Fields
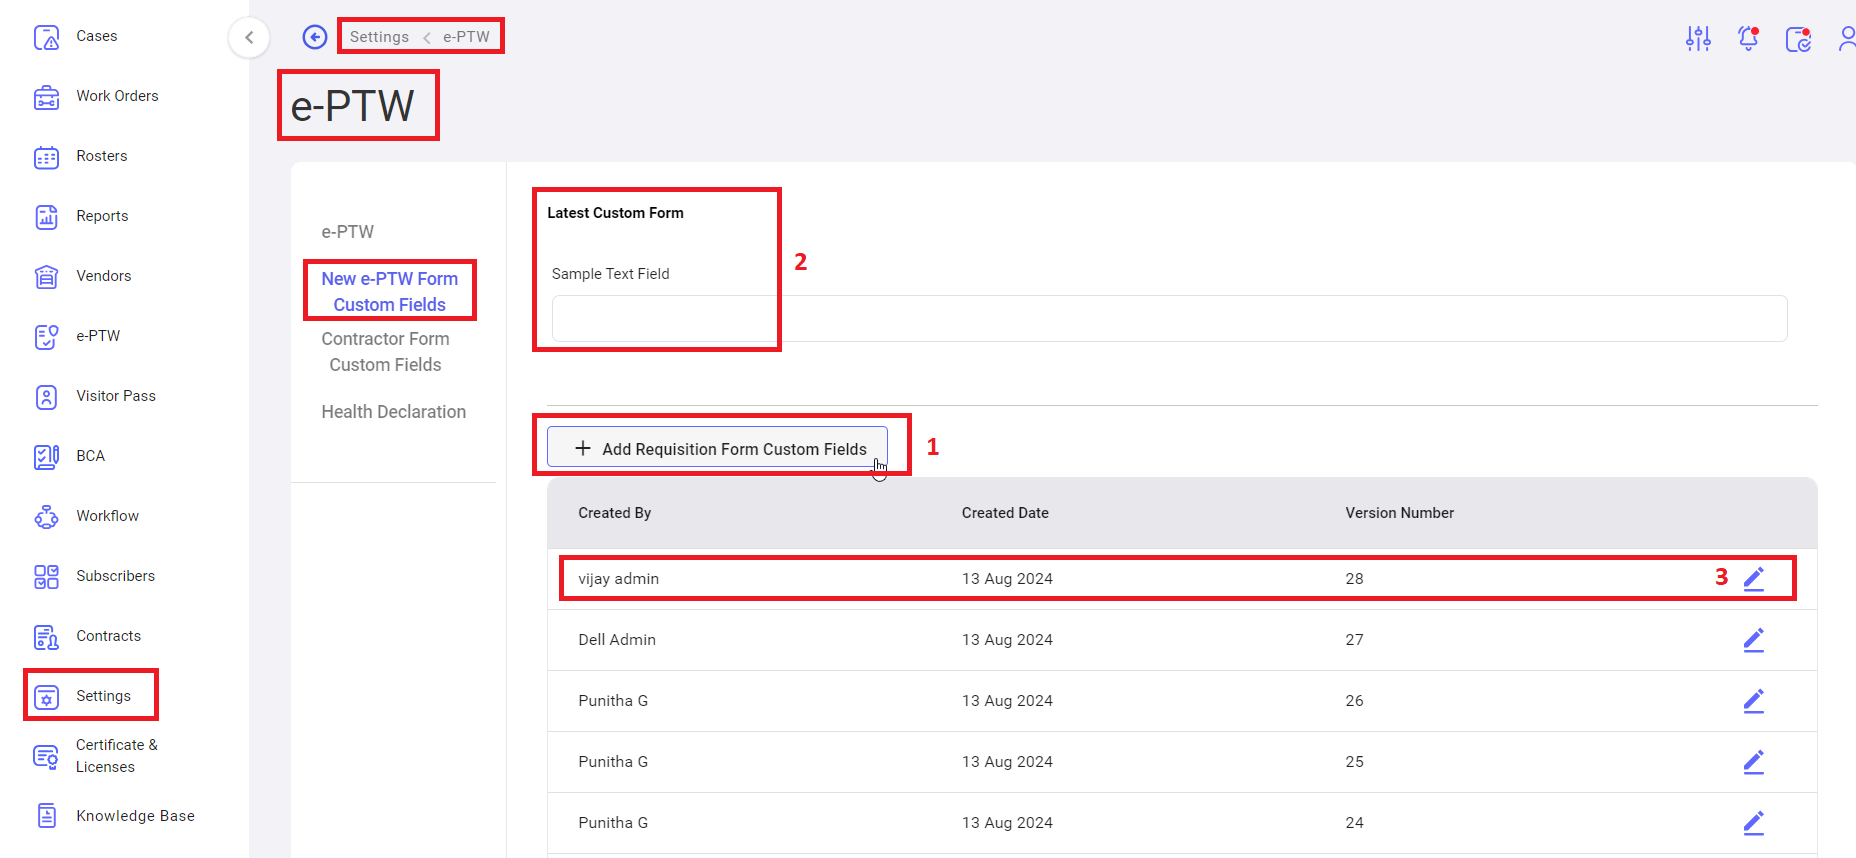
1. Add requisition form custom fields: to add the requisition form custom fields click on this button, system navigate create new page. Add all the details and click on submit button.
2. Latest custom form: user can view latest custom form.
3. Edit: to edit the custom form.
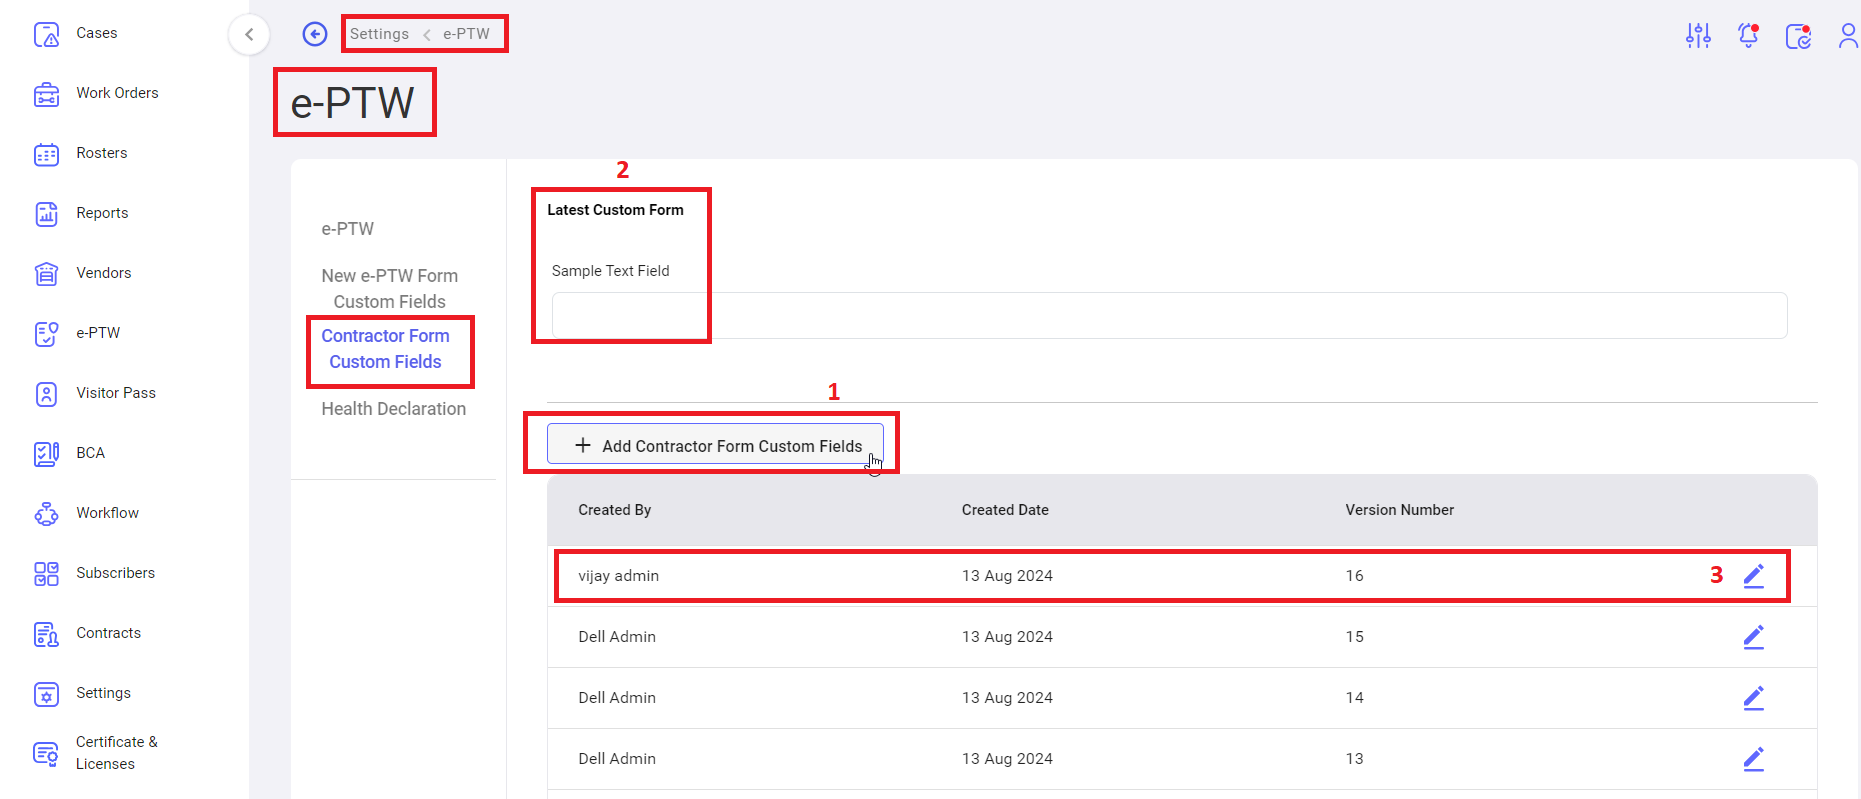
iii. Settings -> e-PTW -> Contractor Form Custom Fields
1. Add Contractor form custom fields: to add the Contractor form custom fields click on this button, system navigate create new page. Add all the details and click on submit button.
2. Latest custom form: user can view latest custom form.
3. Edit: to edit the custom form.
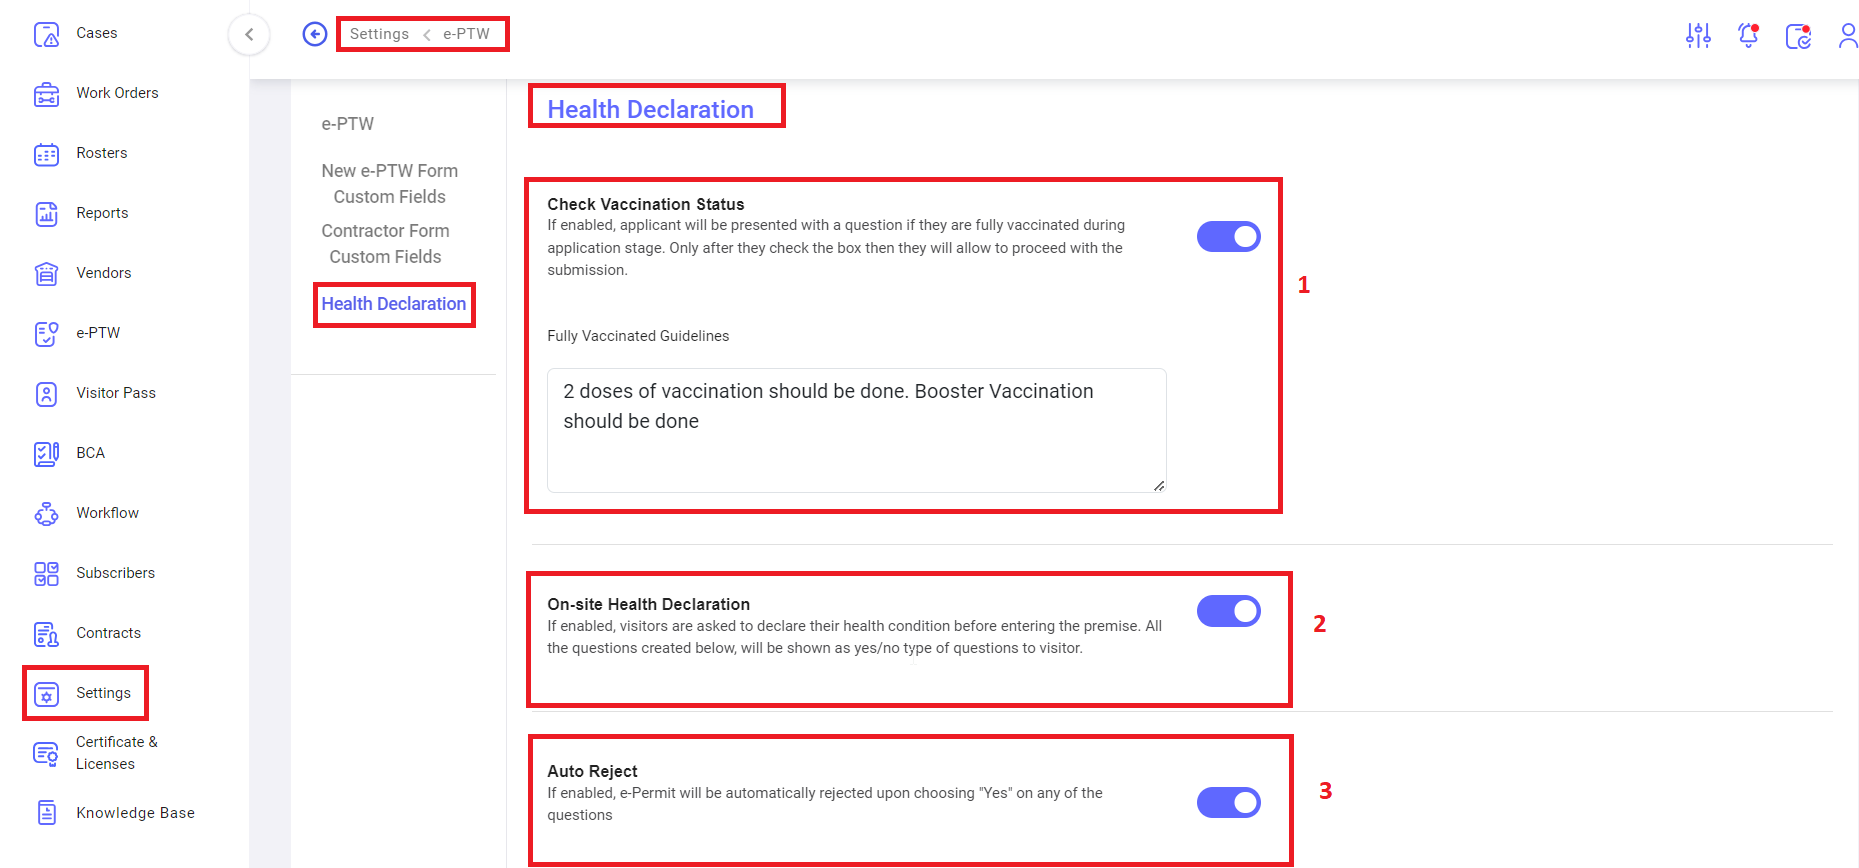
iv. Settings -> e-PTW -> Health Declaration
1. Check Vaccination status: If enabled, applicant will be presented with a question if they are fully vaccinated during application stage. Only after they check the box then they will allow to proceed with the submission.
· Fully vaccinated Guidelines: Here user can add/remove fully vaccinated guidelines.
2. On-site Health Declaration: If enabled, visitors are asked to declare their health condition before entering the premise. All the questions created below, will be shown as yes/no type of questions to visitor.
3. Auto Reject: If enabled, e-Permit will be automatically rejected upon choosing "Yes" on any of the questions.
4. Add New: to add/configure the question, added questions are display in the above table. Delete option available for to delete the question.




No Comments