4. Assets
Settings -> Assets:
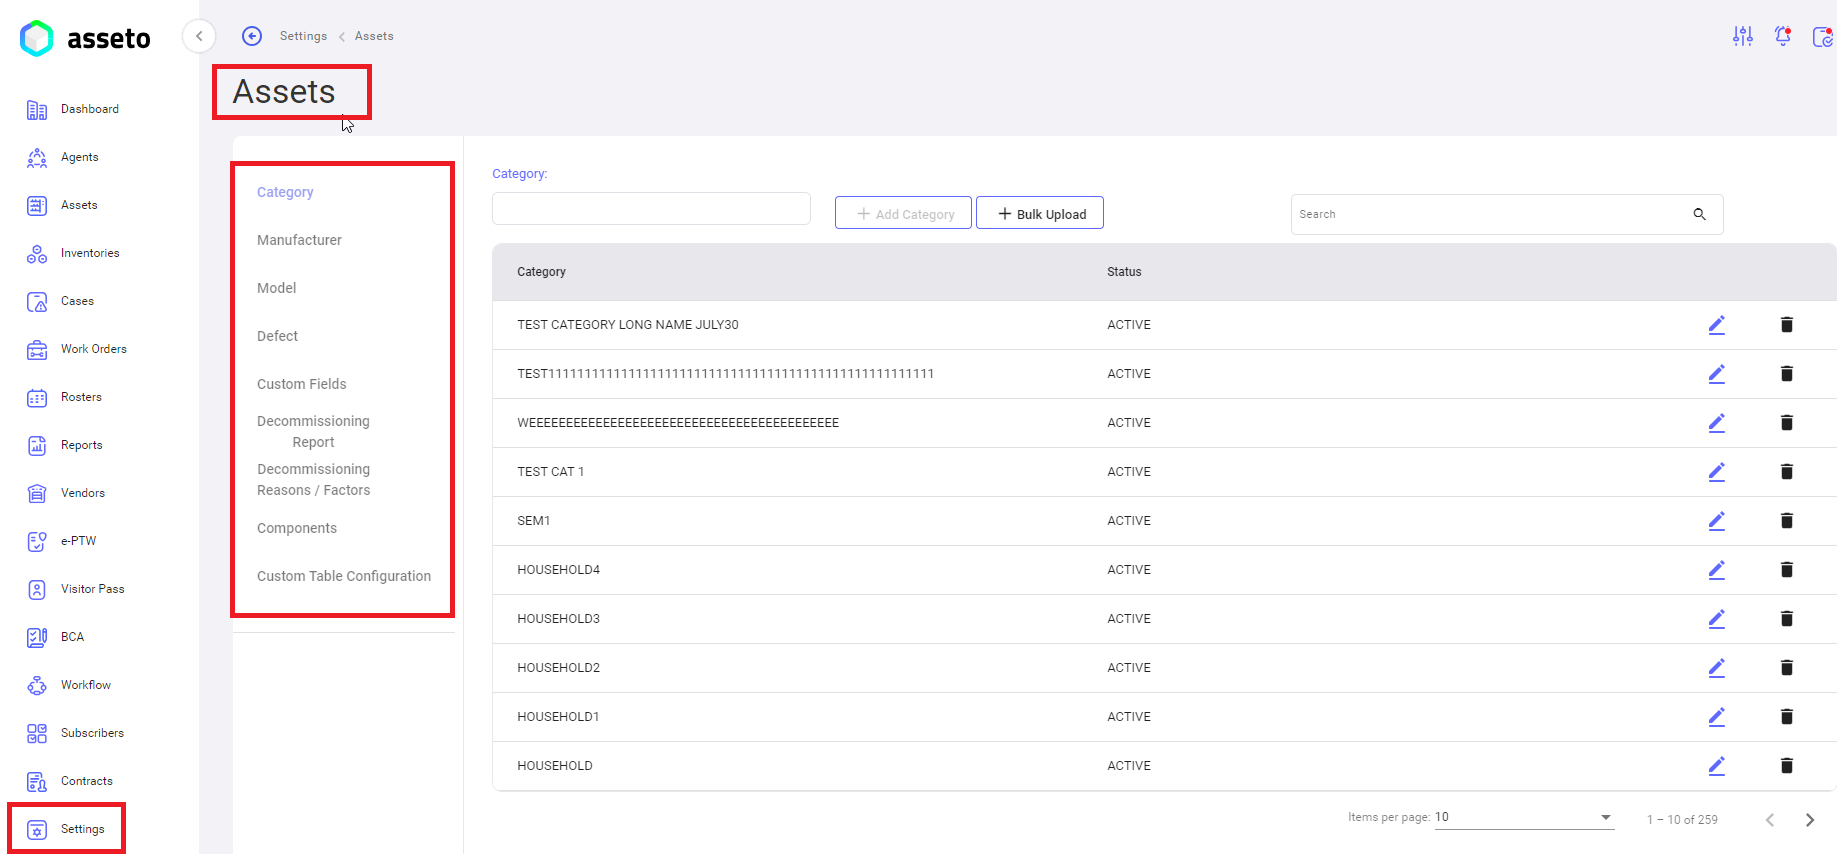
User can configure Category, manufacturer, model, Defect, custom fields, decommissioning report, decommissioning reasons/facts, components and custom table configuration. Options are available as menu on left side, Category is highlighted by default.
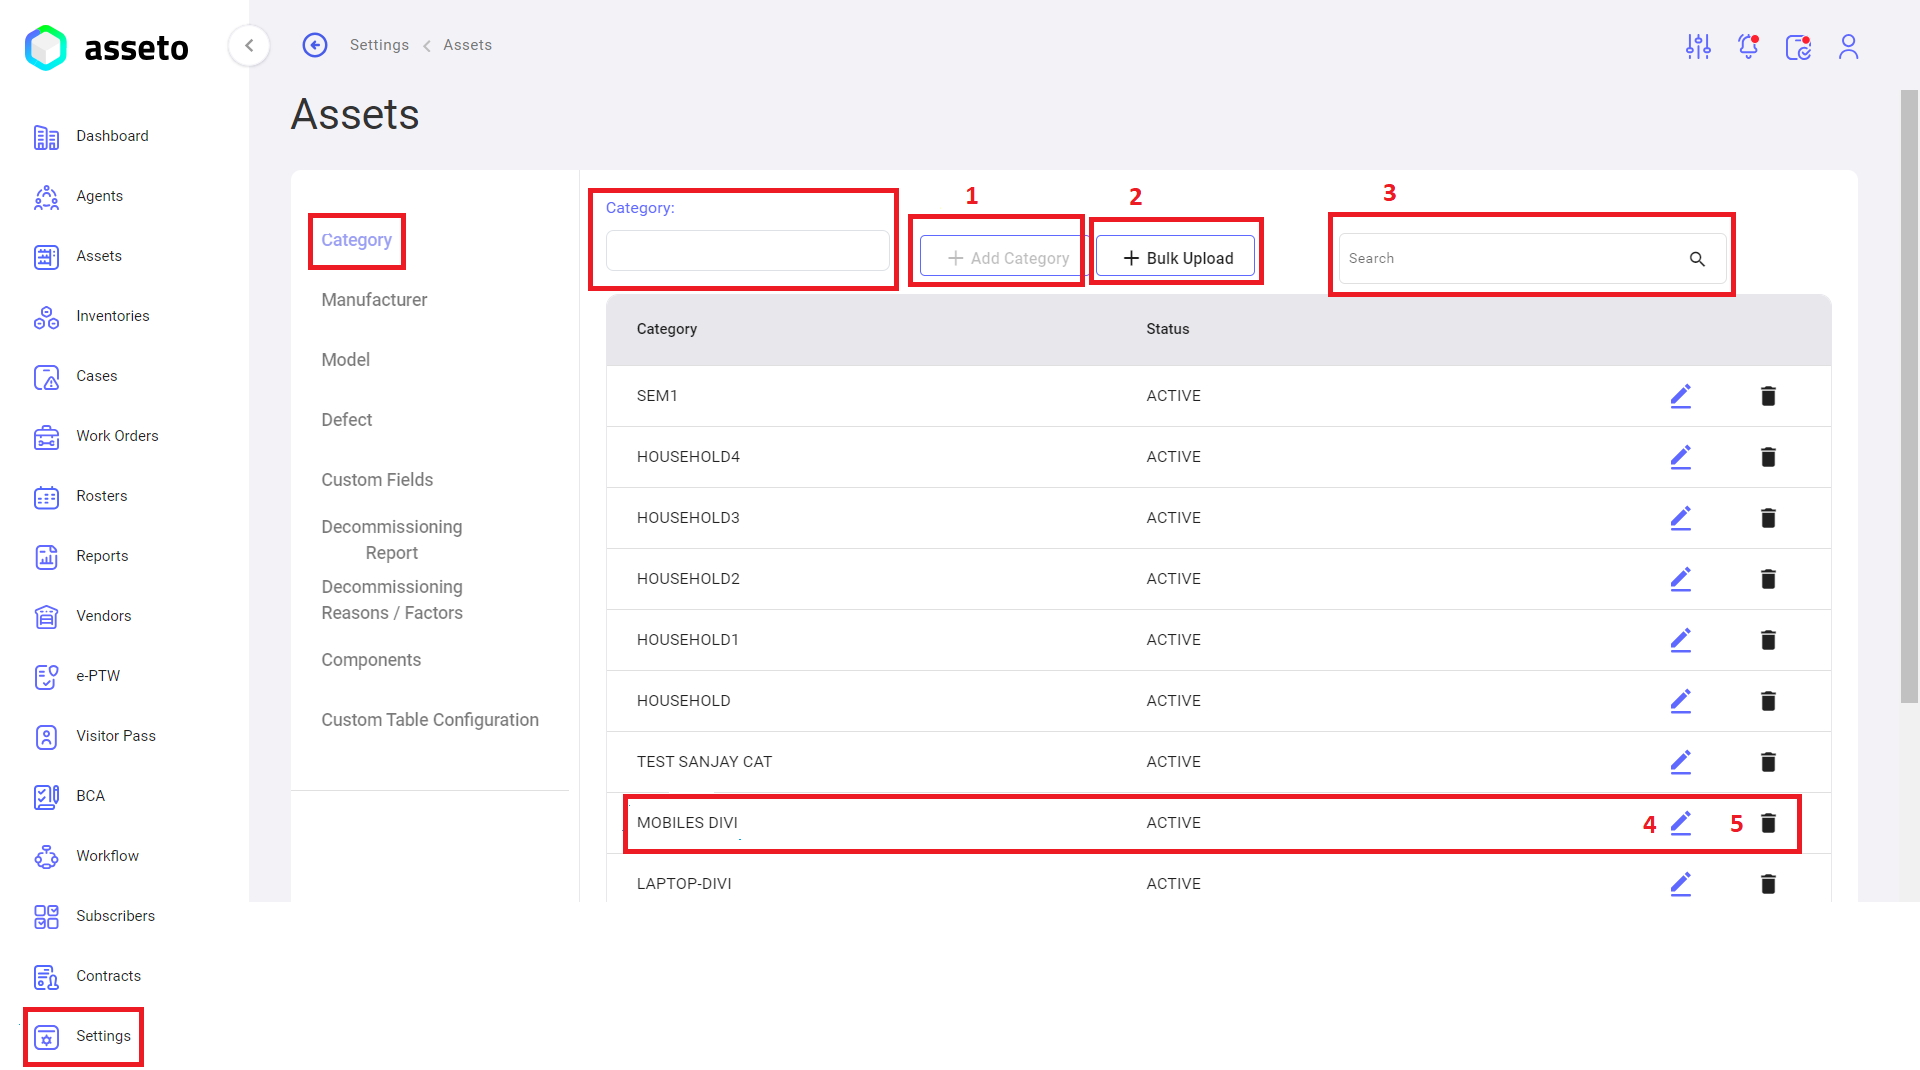
i. Settings -> Assets -> Category
1. Add Asset Category: Here you can type Category name in the text box and click on “add category” button to create individual Category.
2. Asset Category Bulk Upload: Click on bulk upload button to create multiple Categories at a time, download csv file and fill the data then upload.
3. Search: you can search for any category with category name.
4. Edit Asset Category: Here you can edit category which is created earlier by clicking on edit icon available each row of category list.
5. Delete Asset Category: Here you can delete the already created category by clicking on delete icon available each row of category list.
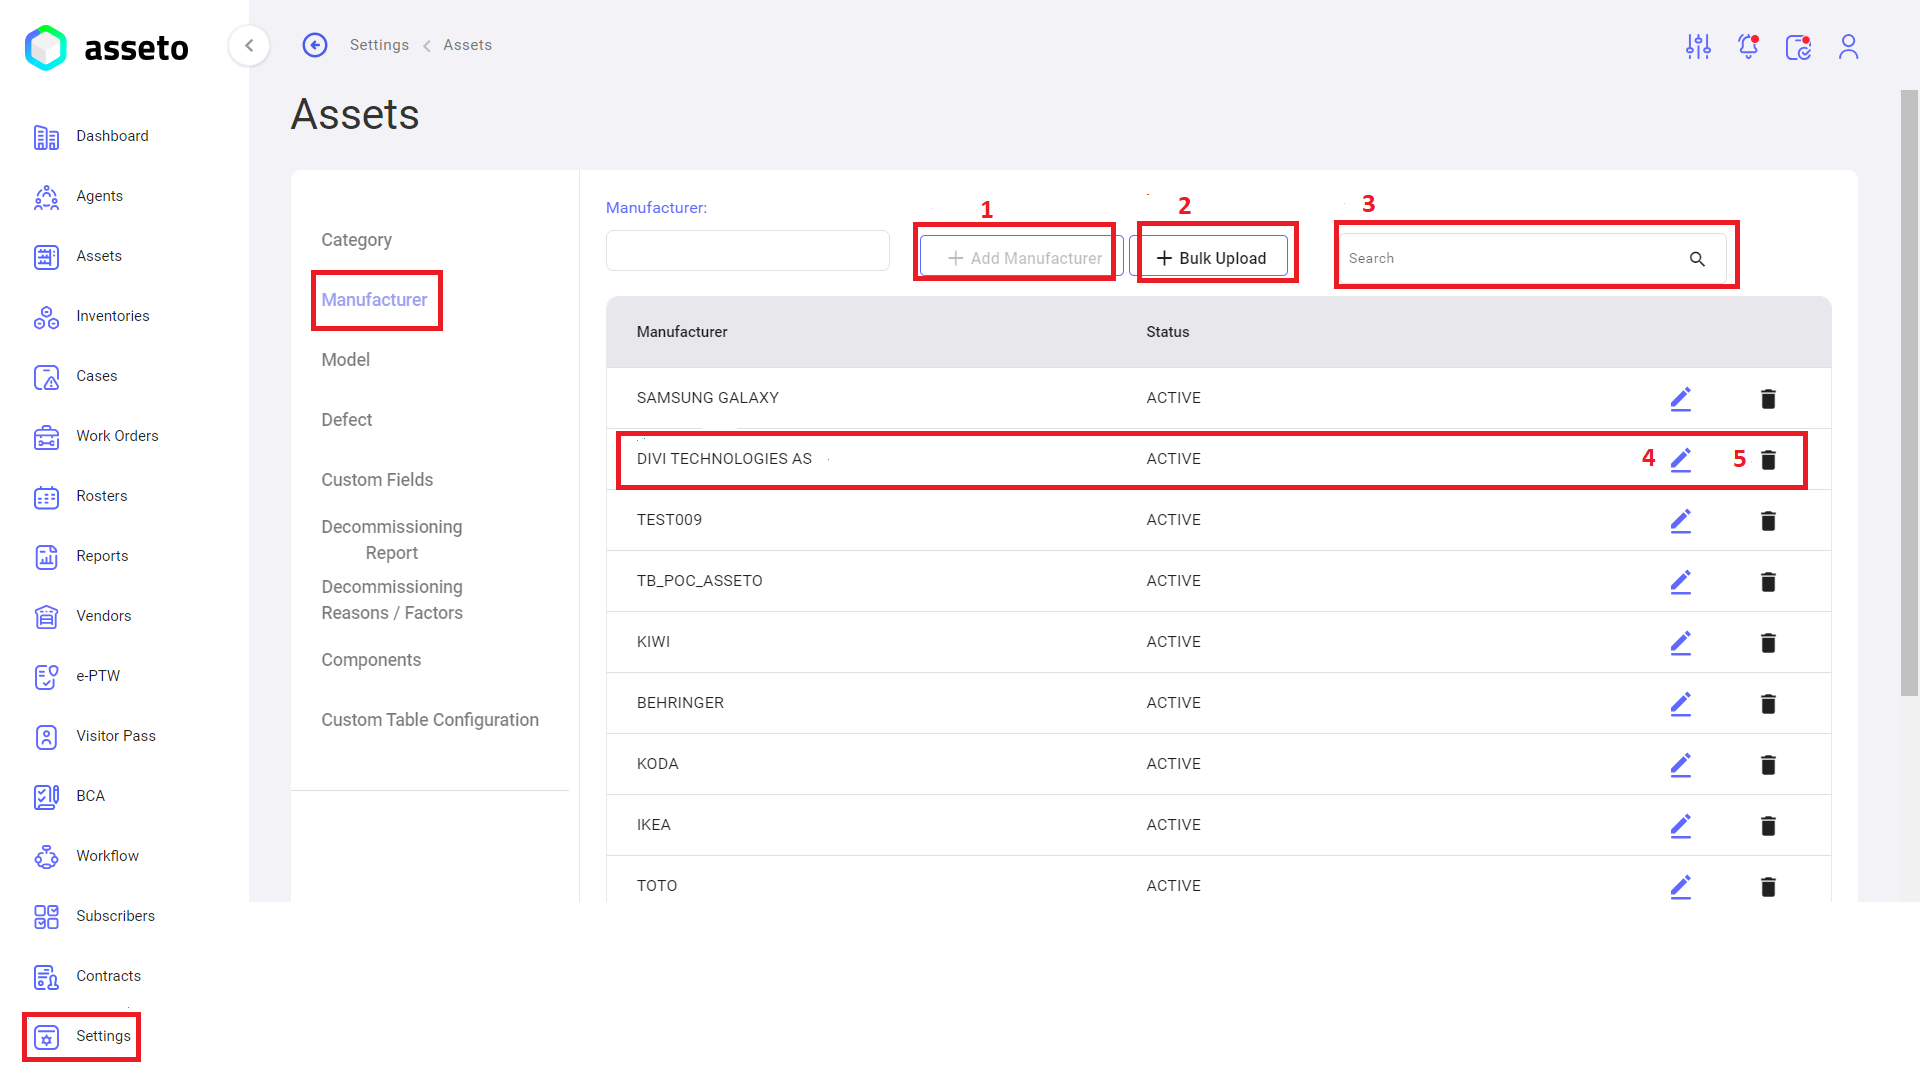
ii. Settings -> Assets -> Manufacturer:
1. Add Manufacturer: Here you can type Manufacturer name in the text box and click on “add manufacturer” button to onboard individual manufacturer.
2. Bulk Upload Manufacturer: Click on bulk upload button to onboard multiple Manufacturer’s at a time, download csv file and fill the data then upload.
3. Search: you can search any manufacturer with manufacturer name.
4. Edit Manufacturer: Here you can edit the already created Manufacturer by clicking on edit icon available each row of Manufacturer list.
5. Delete Manufacturer: Here you can delete the already created Manufacturer by clicking on delete icon available each row of Manufacturer list.
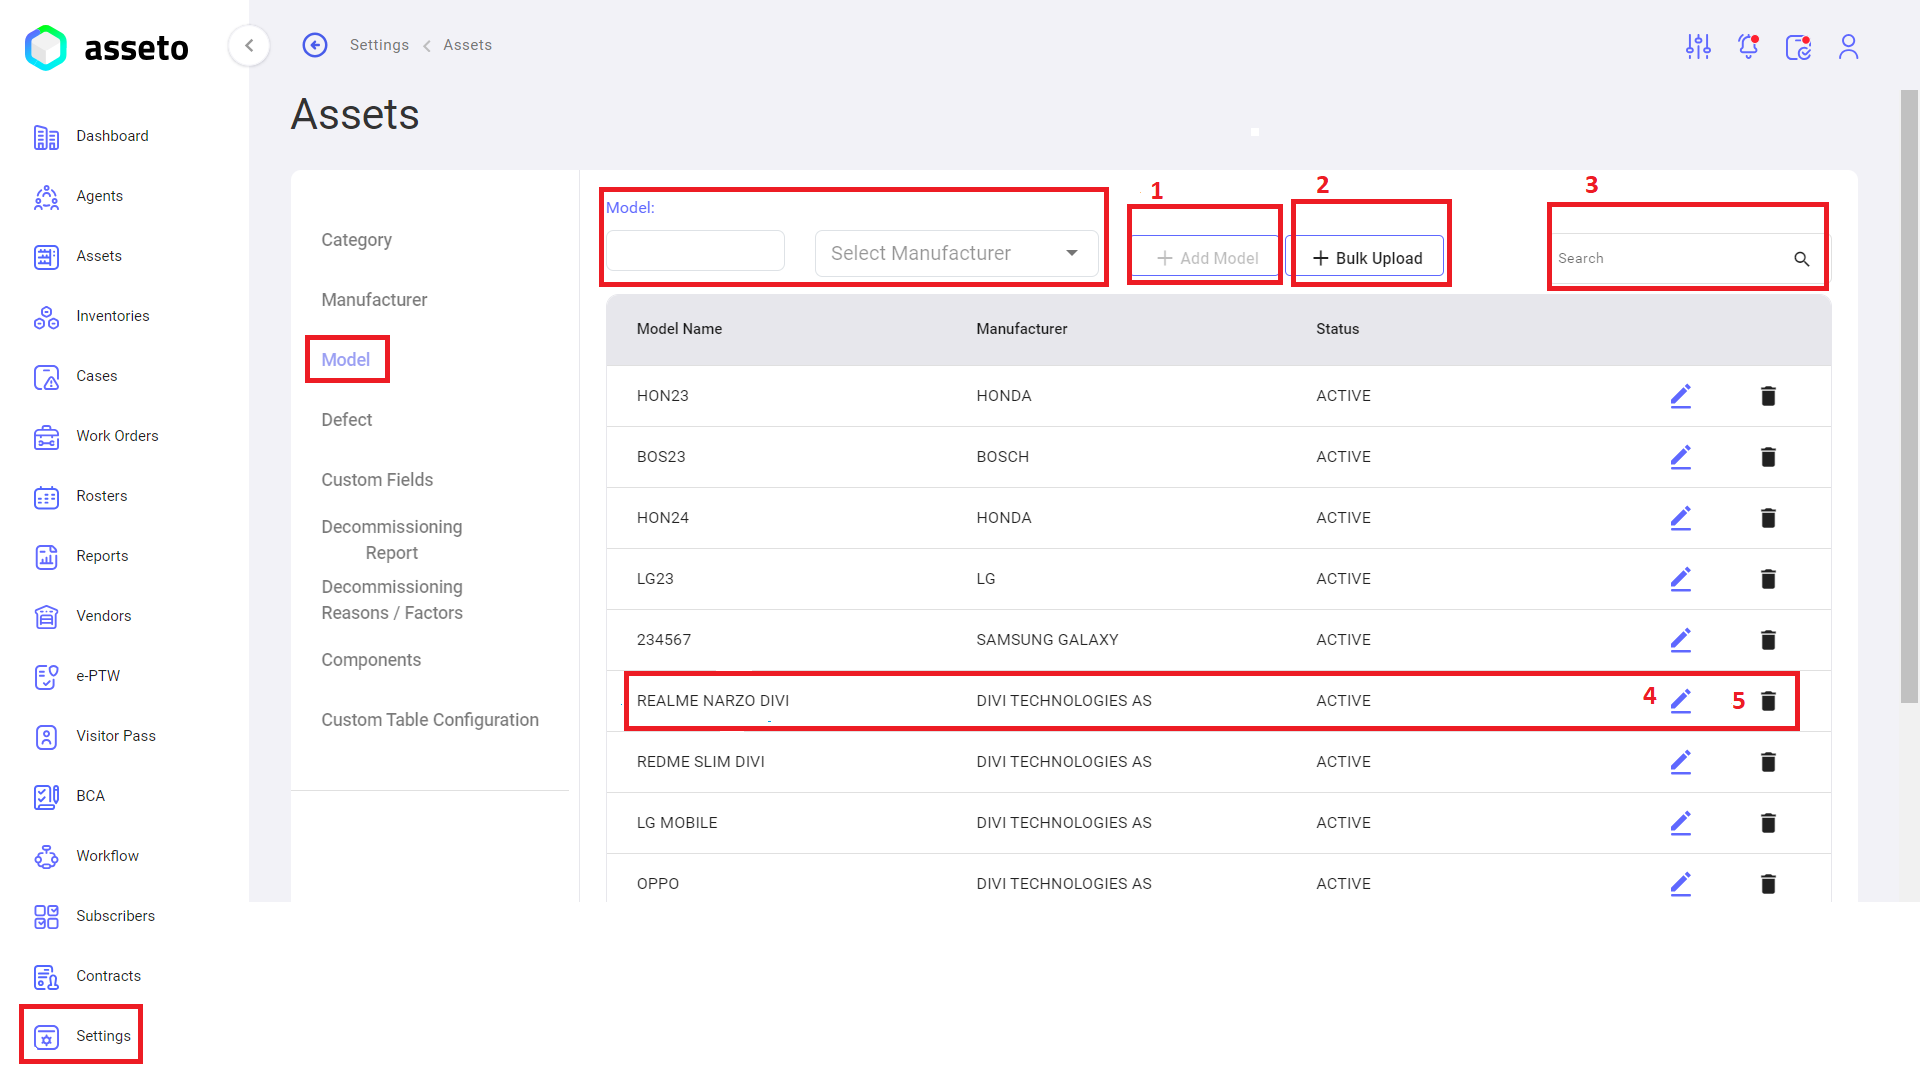
iii. Settings -> Assets -> Model:
1. Add Model: Here you type asset model name in the text box and select manufacturer then click on “add model” button to create a new model.
2. Bulk Upload Model: You can create multiple models at a time by clicking on bulk upload button, download csv file and fill the data then upload.
3. Search box: You can search any model with model name results will be displayed in below table.
4. Edit Model: You can edit the already created model names by clicking on edit icon available in each row of model list.
5. Delete Model: You can delete the already created model names by clicking on delete icon available in each row of model list.
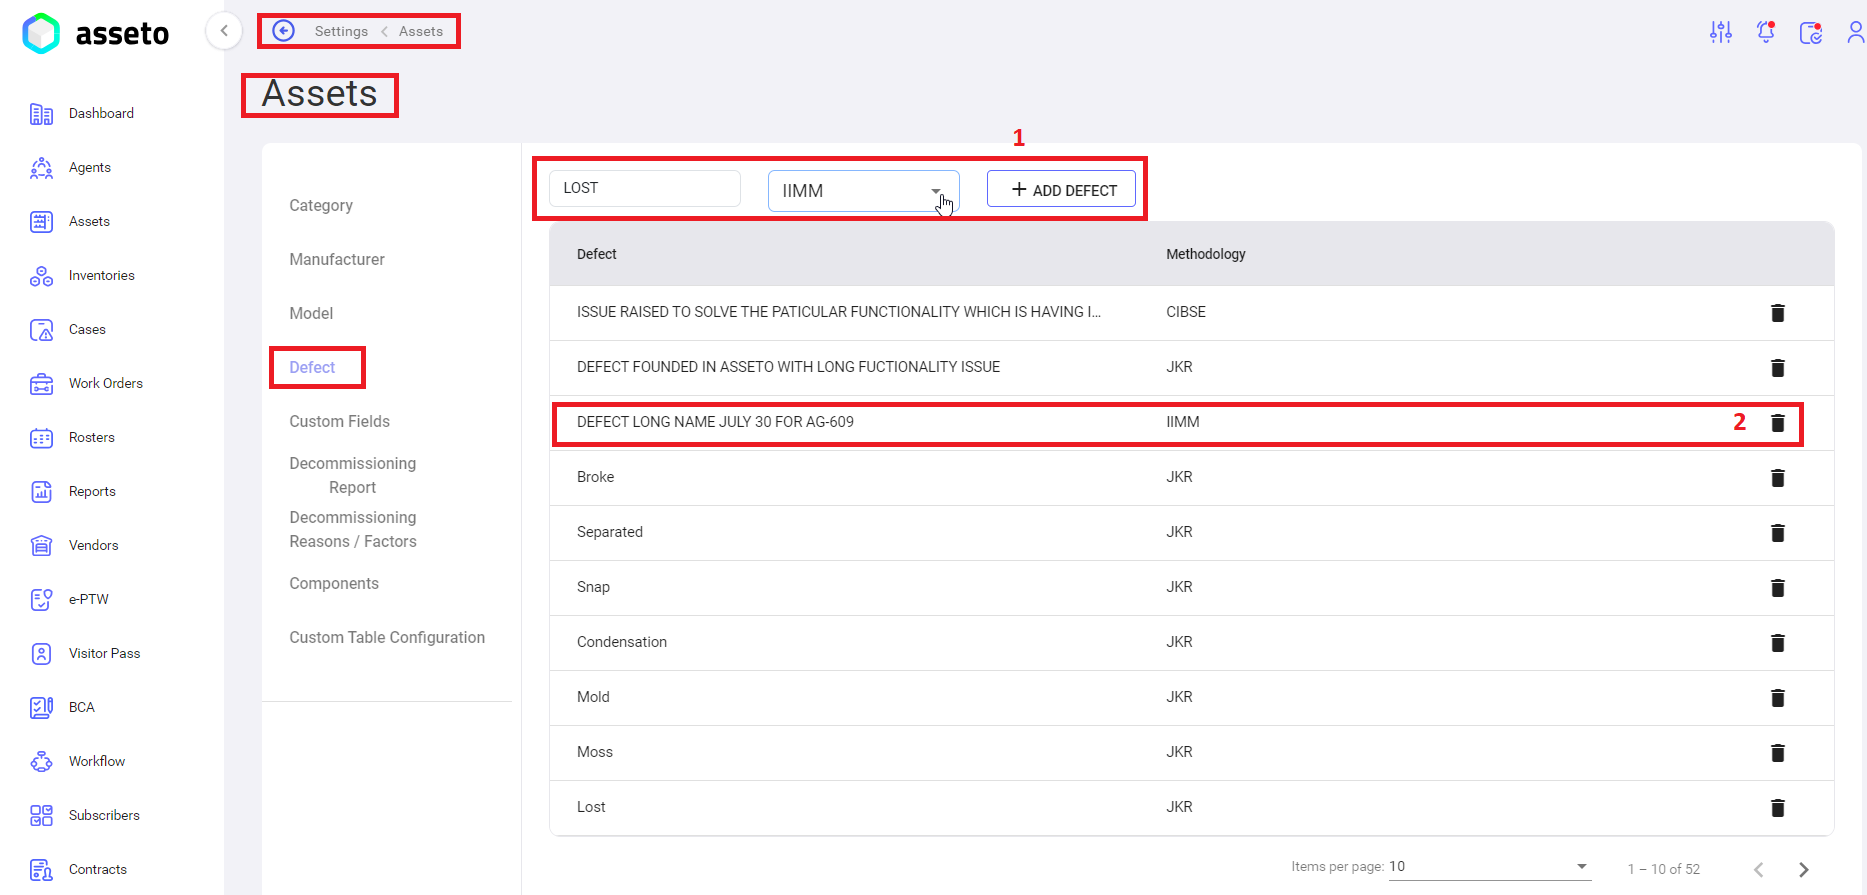
iv. Settings -> Assets -> Defect:
1. Add Defect: fill the defect name in the text box and select one methodology from dropdown then click on “Add Defect” button to save the defect. Saved defect will be display in the first row of the table.
2. Delete Defect: click on delete icon to delete the selected defect.
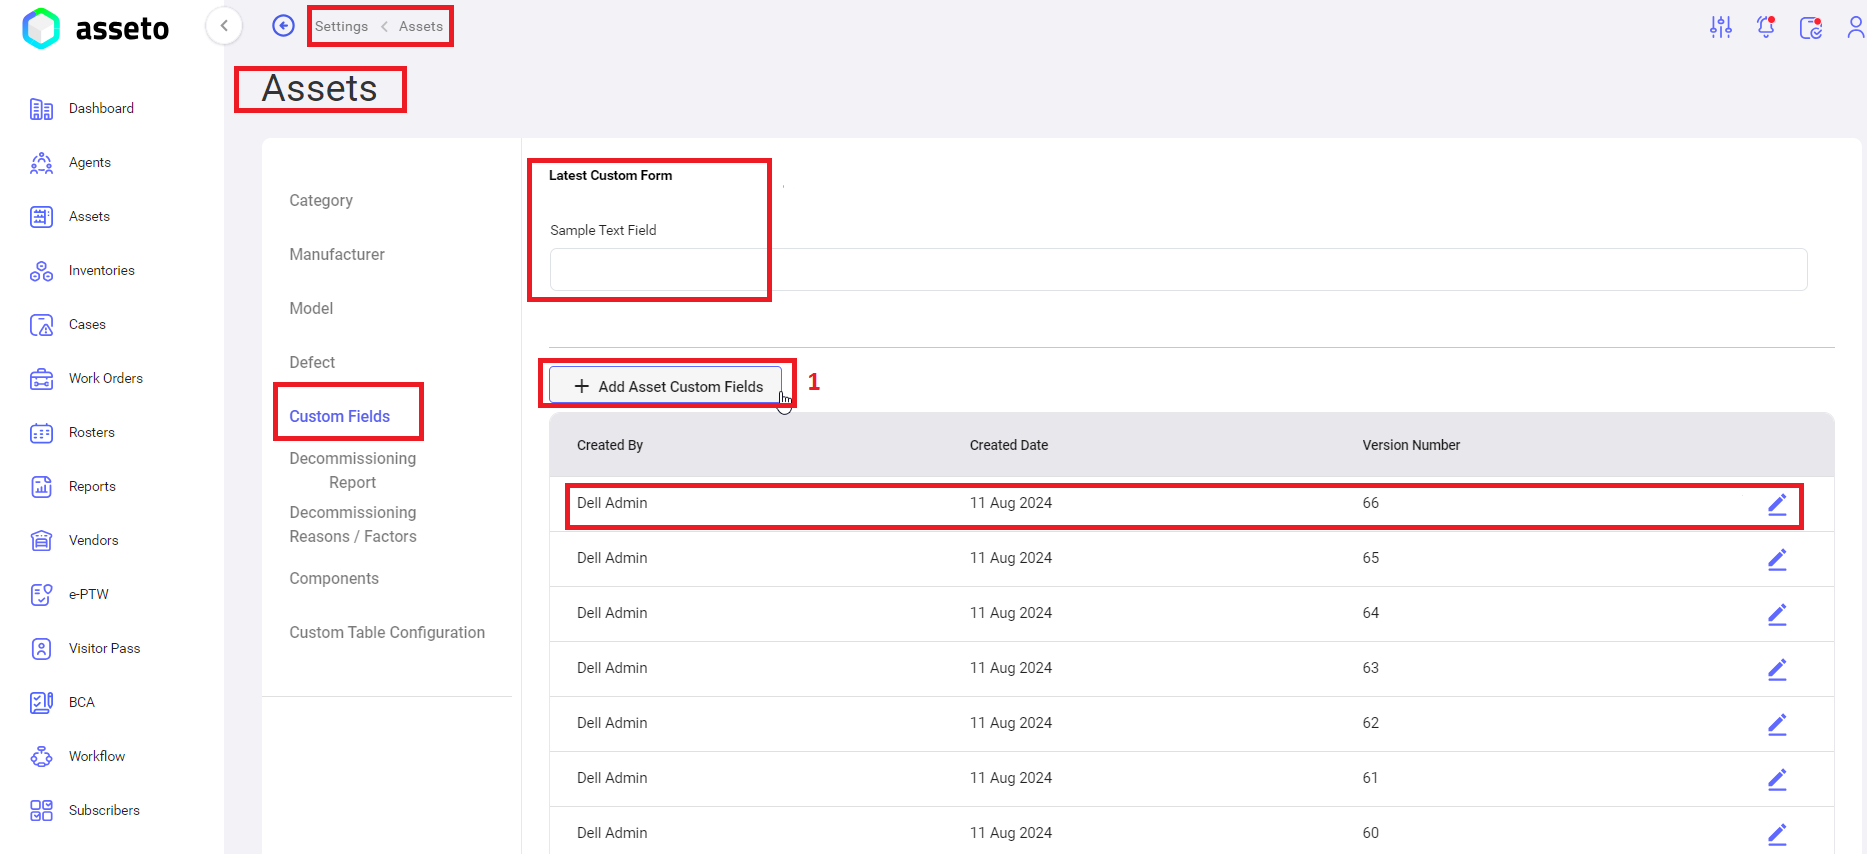
v. Settings -> Assets -> Custom Fields:
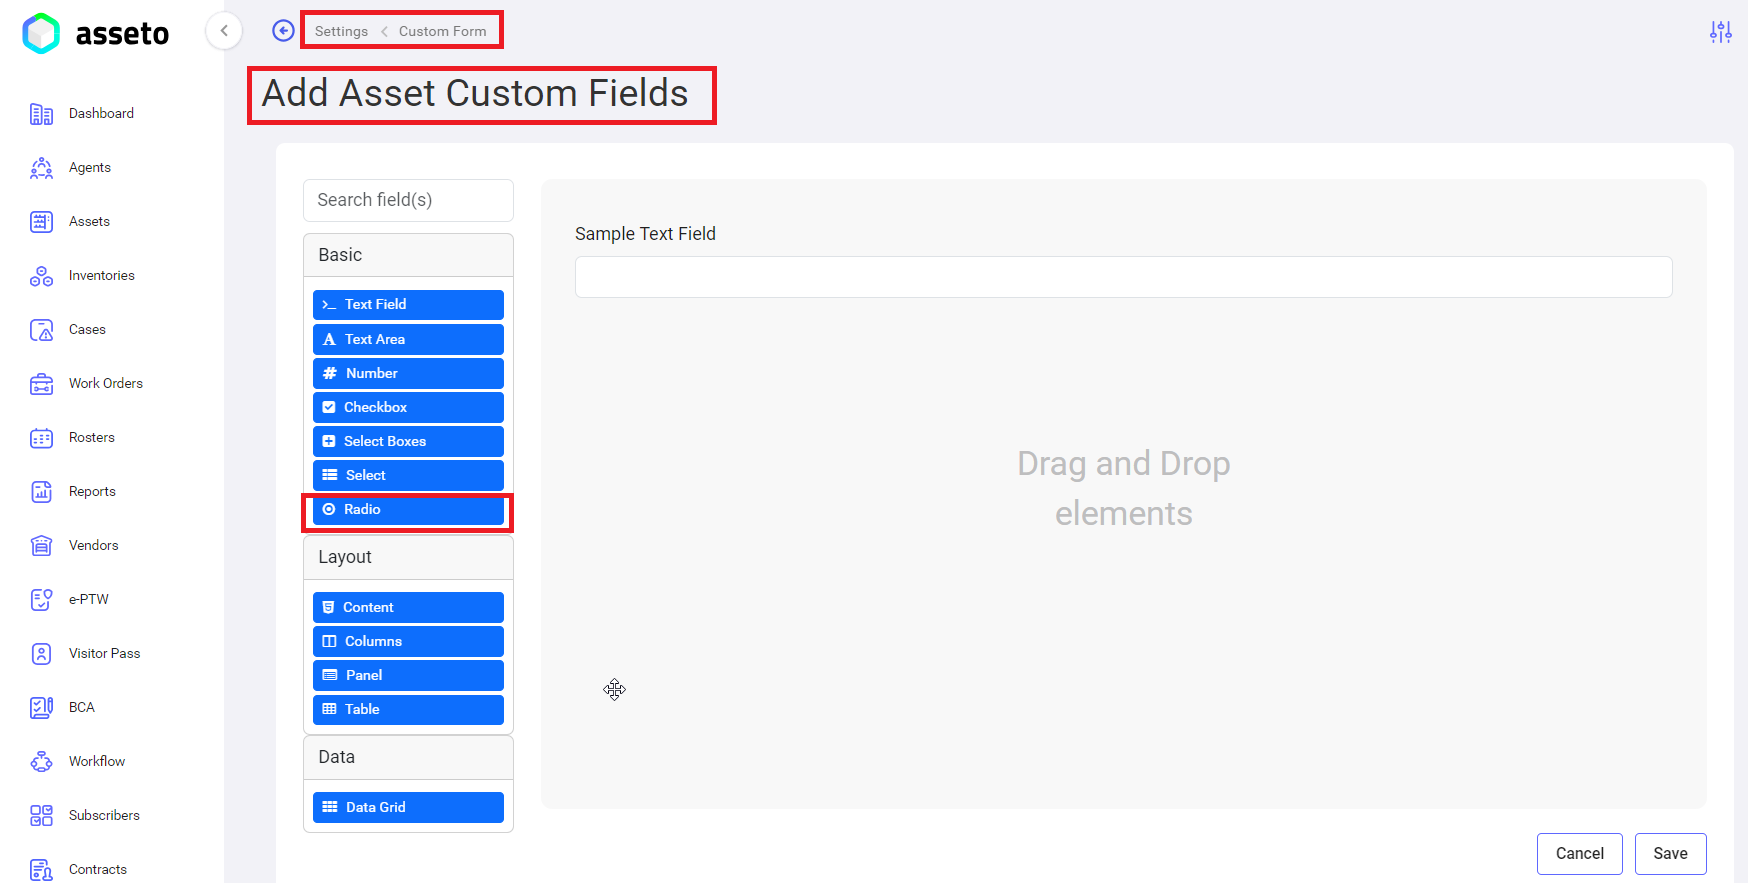
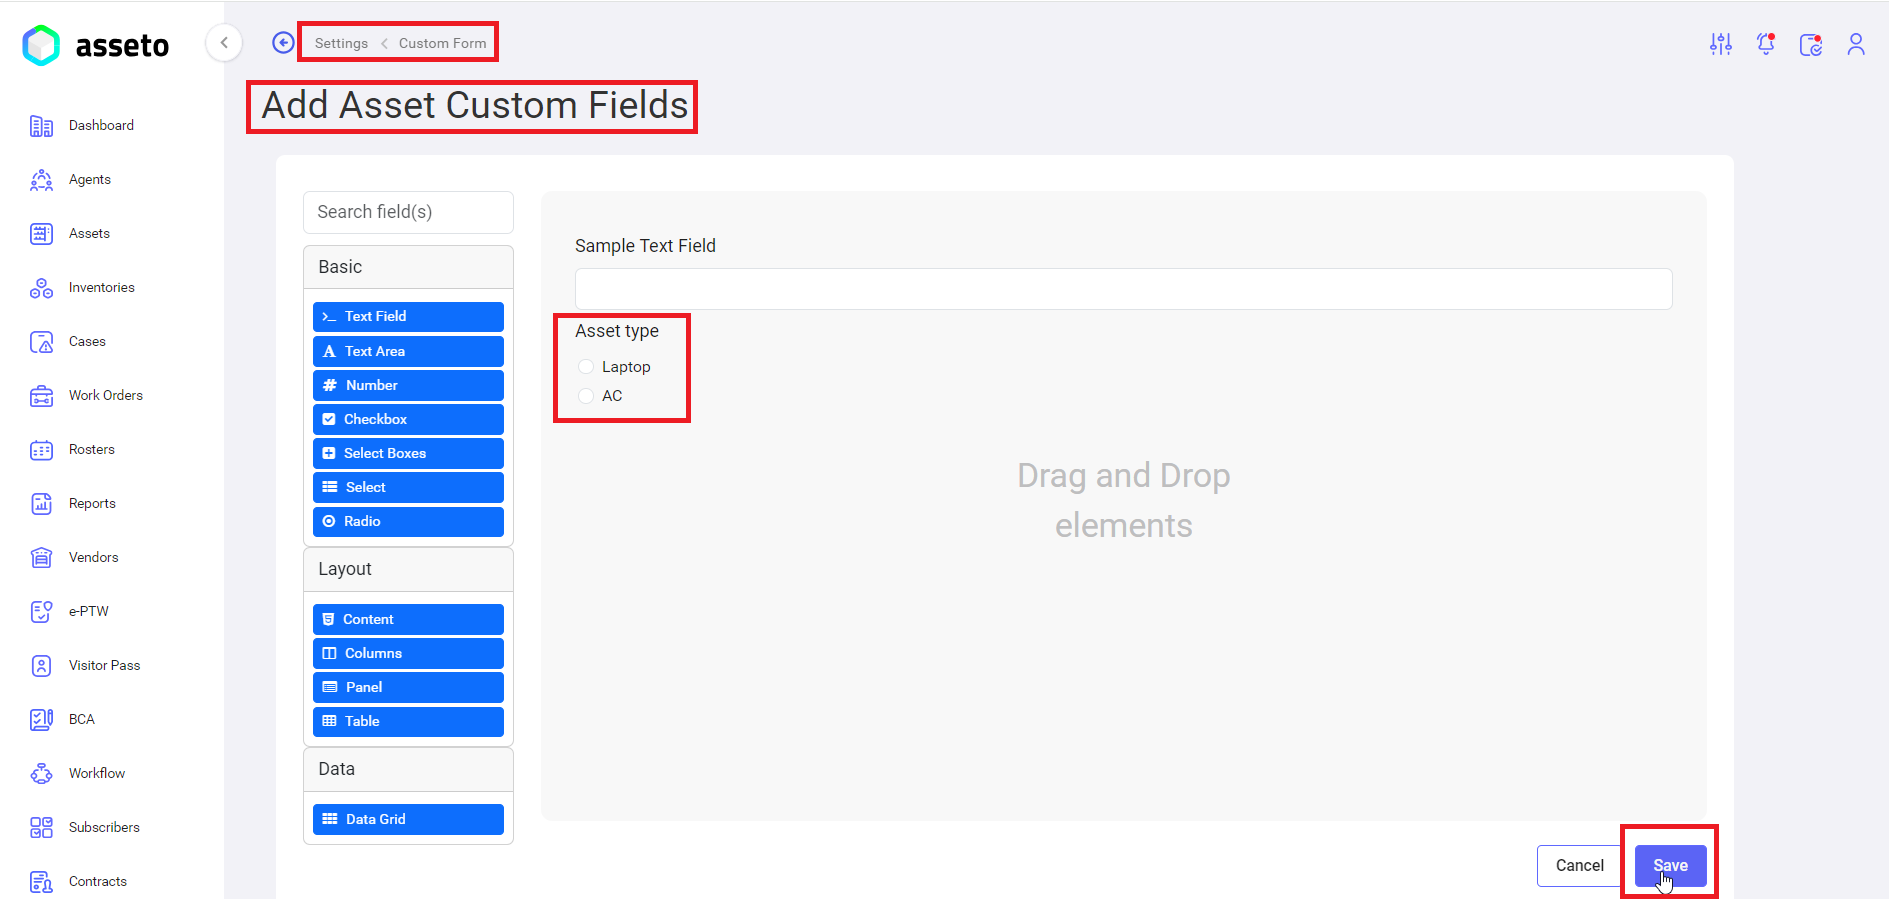
- Add Asset Custom Fields: to add custom fields, click on “Add Asset Custom Fields” page will open as shown by following screenshot.
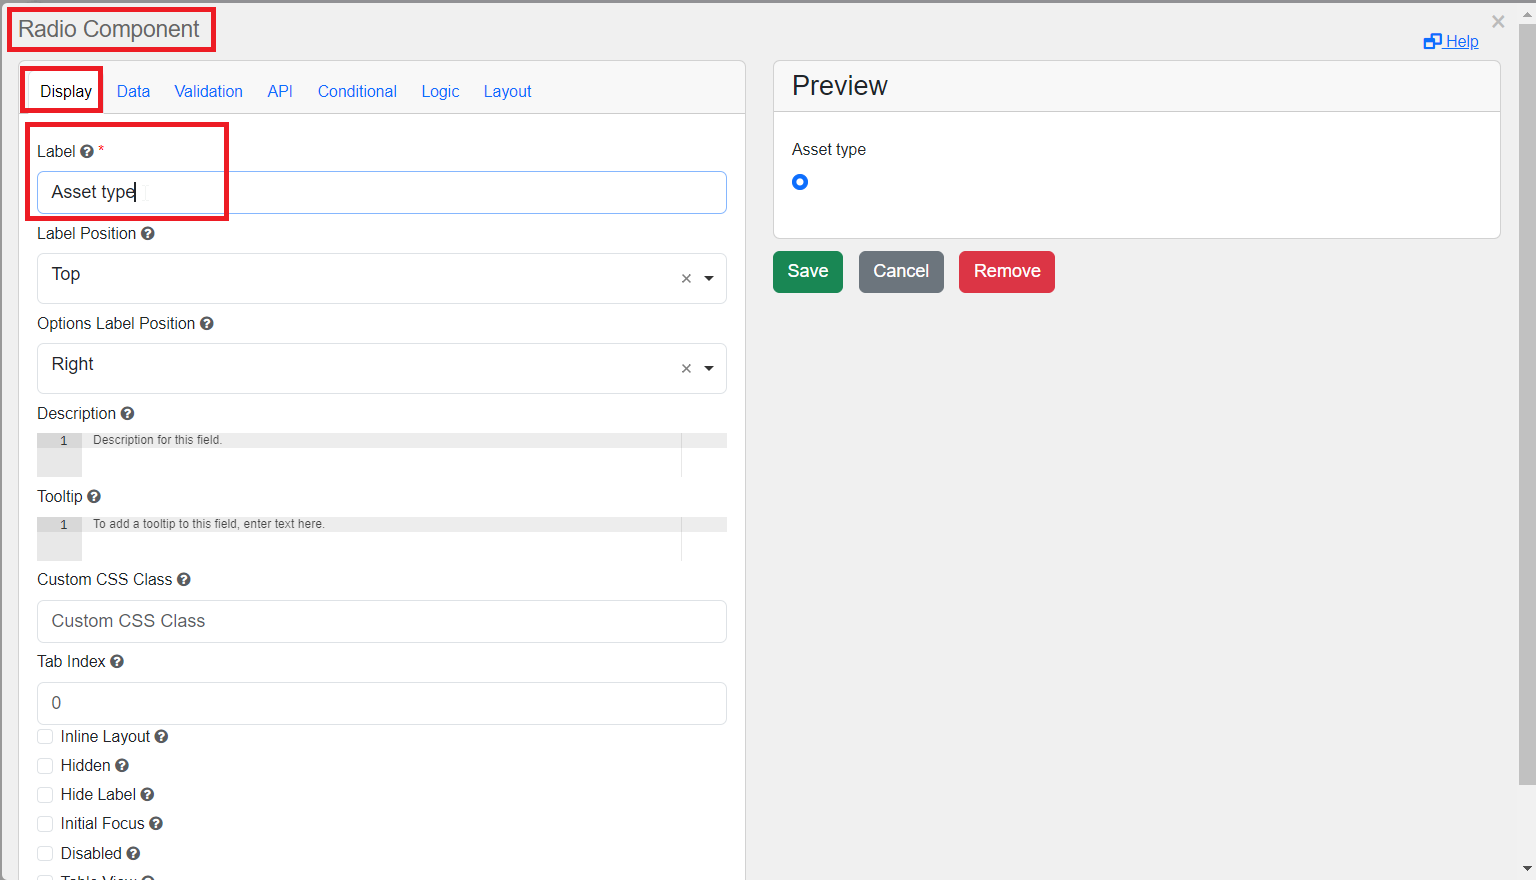
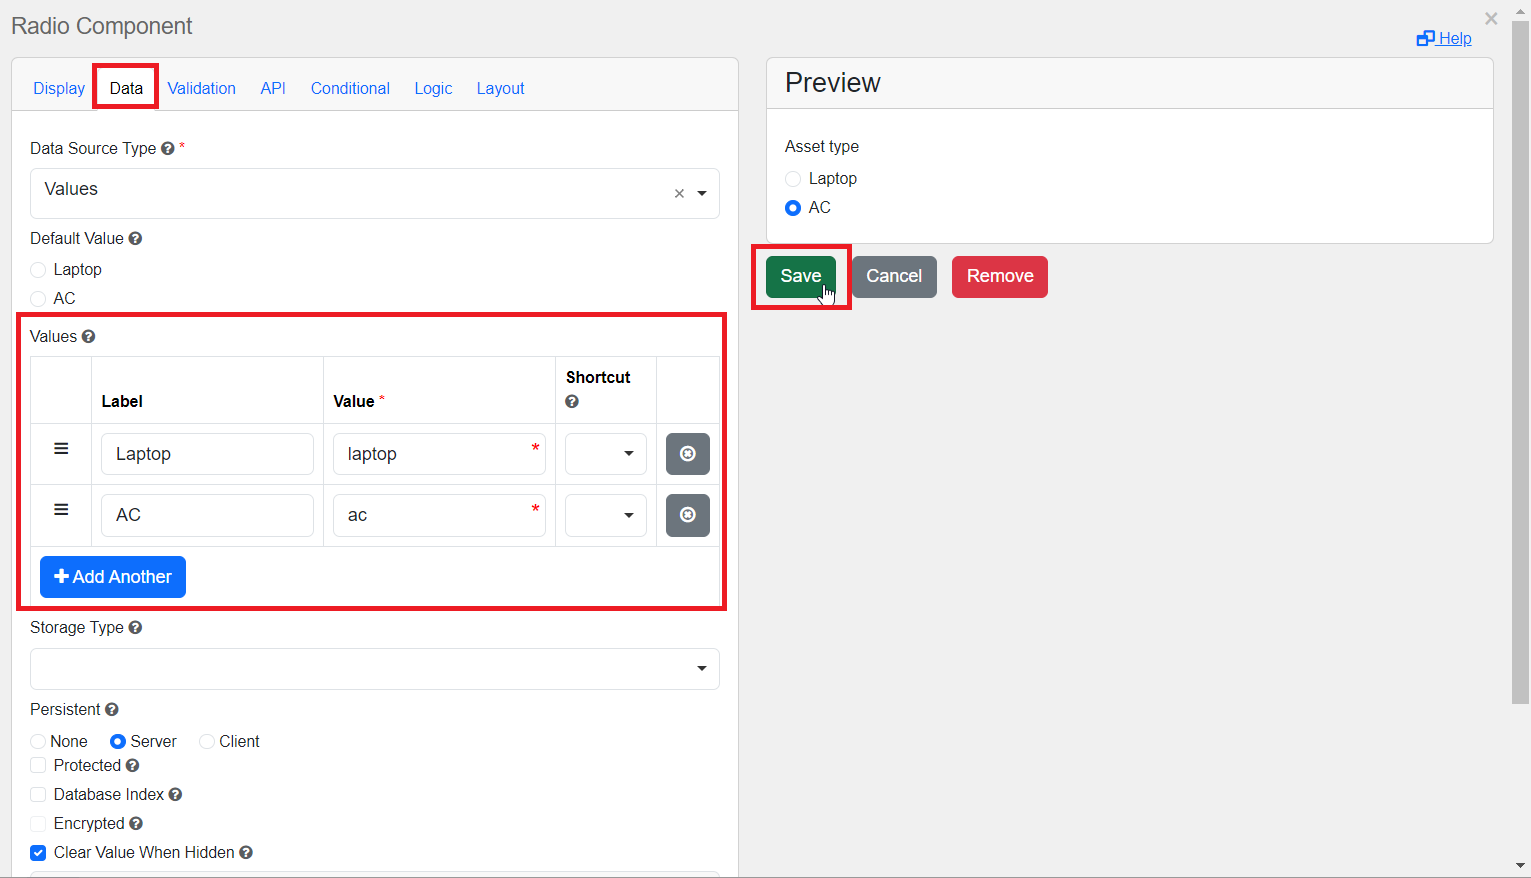
Step1: drag and drop the one of the elements from the list following page (highted with ‘Display’ section) will open to select label name.
Step2: click on ‘Data’ section, to set the data into selected label and click on save button.
Step3: Again, system will navigate to “Add Asset Custom Fields” page, click on “save” button.
Confirmation message “New Version of the form has been created” will be display and system navigate to dashboard.
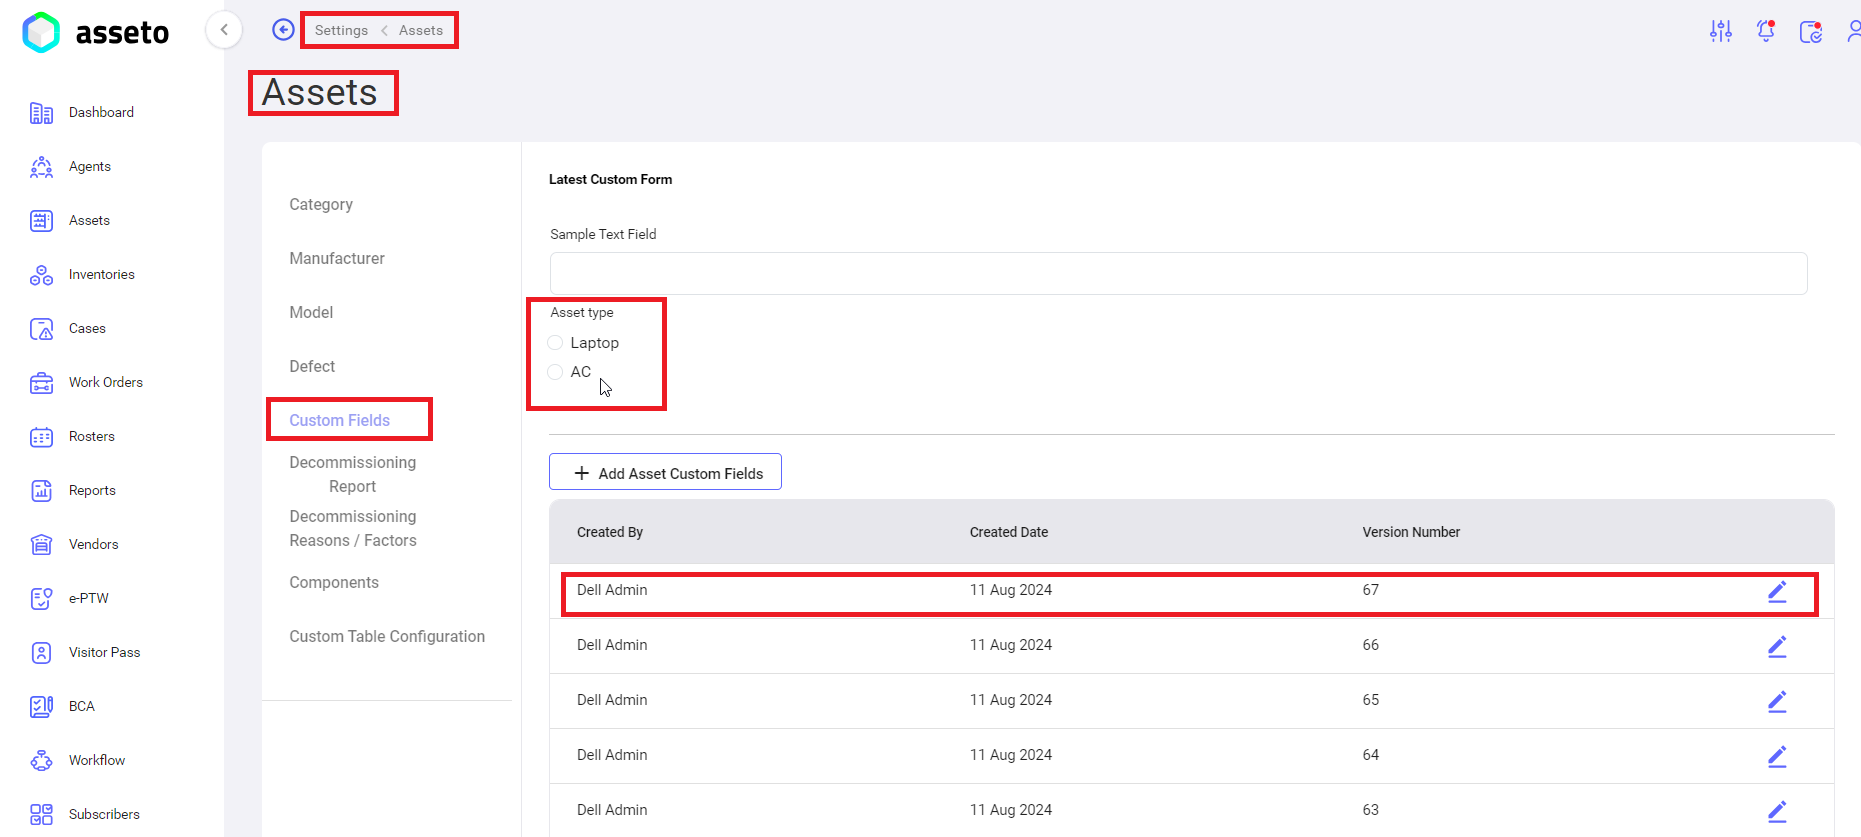
Newly added custom fields will display top of the table as shown by the following screenshot.
2. Edit Custom fields: Custom fields are display in the list, click on edit icon to edit/update the custom field.
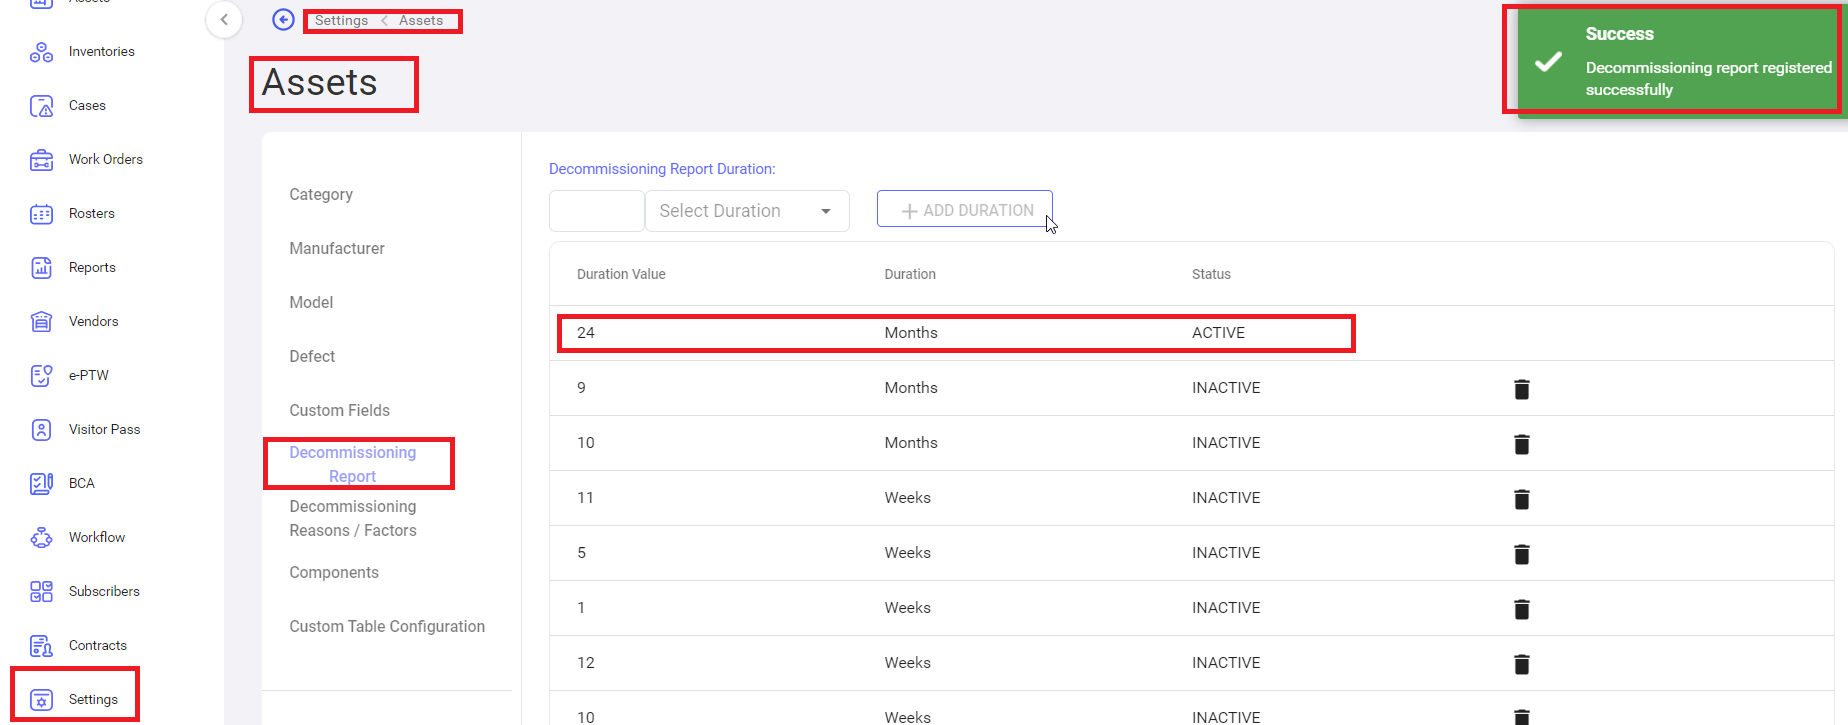
vi. Settings -> Assets -> Decommissioning Report:
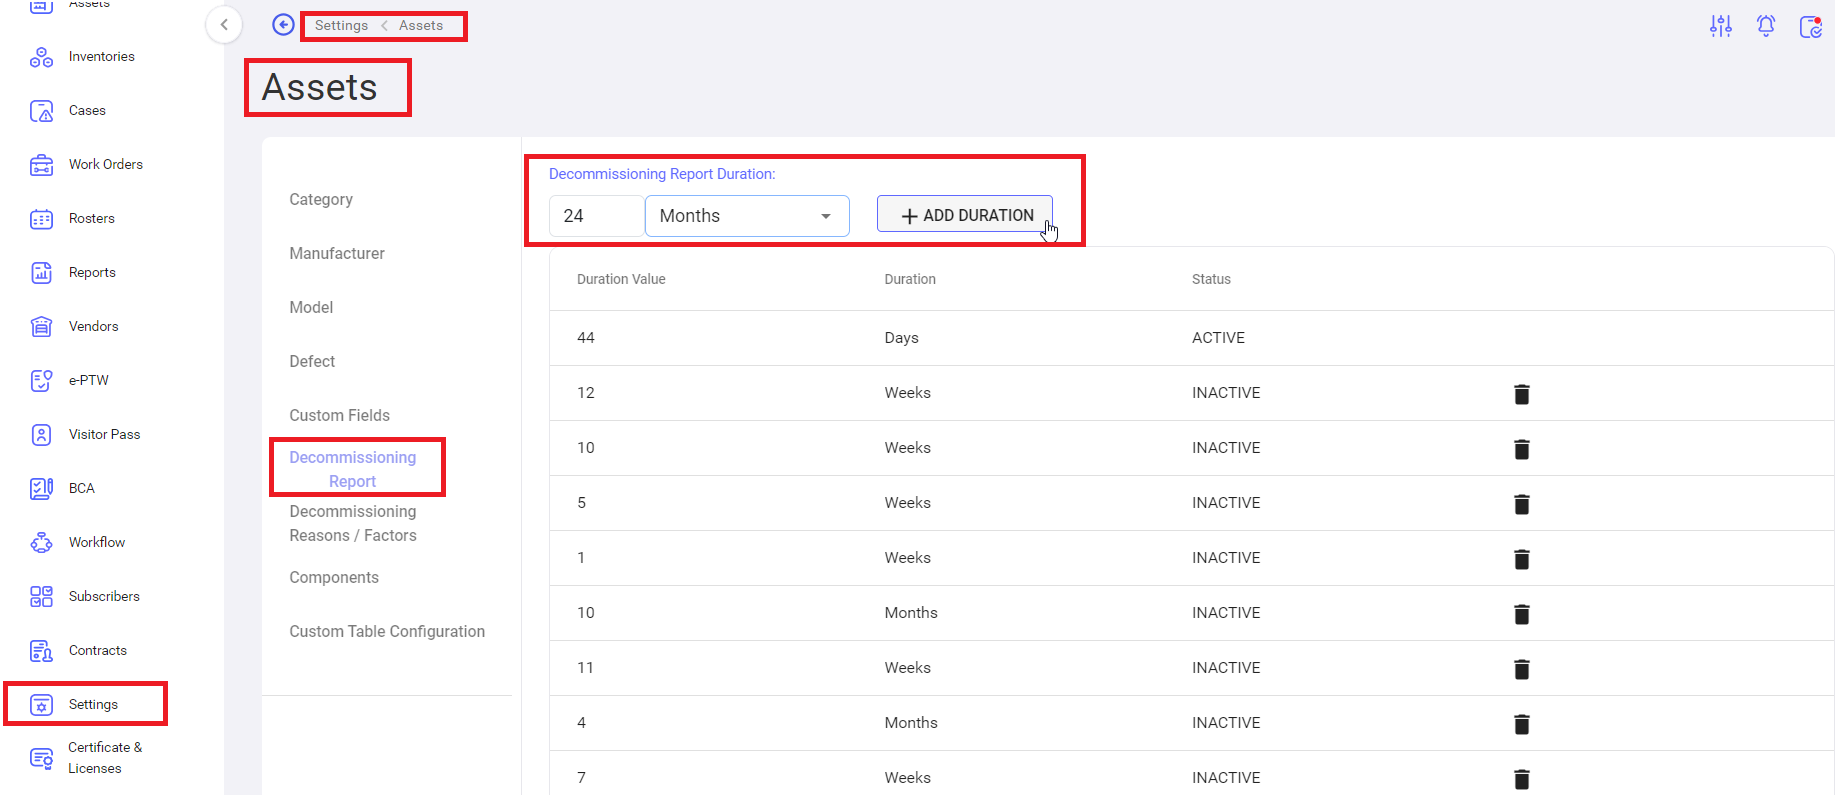
1. Add Duration: Choose different combination of duration (should not match with existing combination, system will display error message like,” Decommissioning Report combination already exist”).
2. Provide duration and click on “Add Duration” button, confirmation message “Decommissioning Report registered successfully” display and saved duration will be display in the first row of the table.
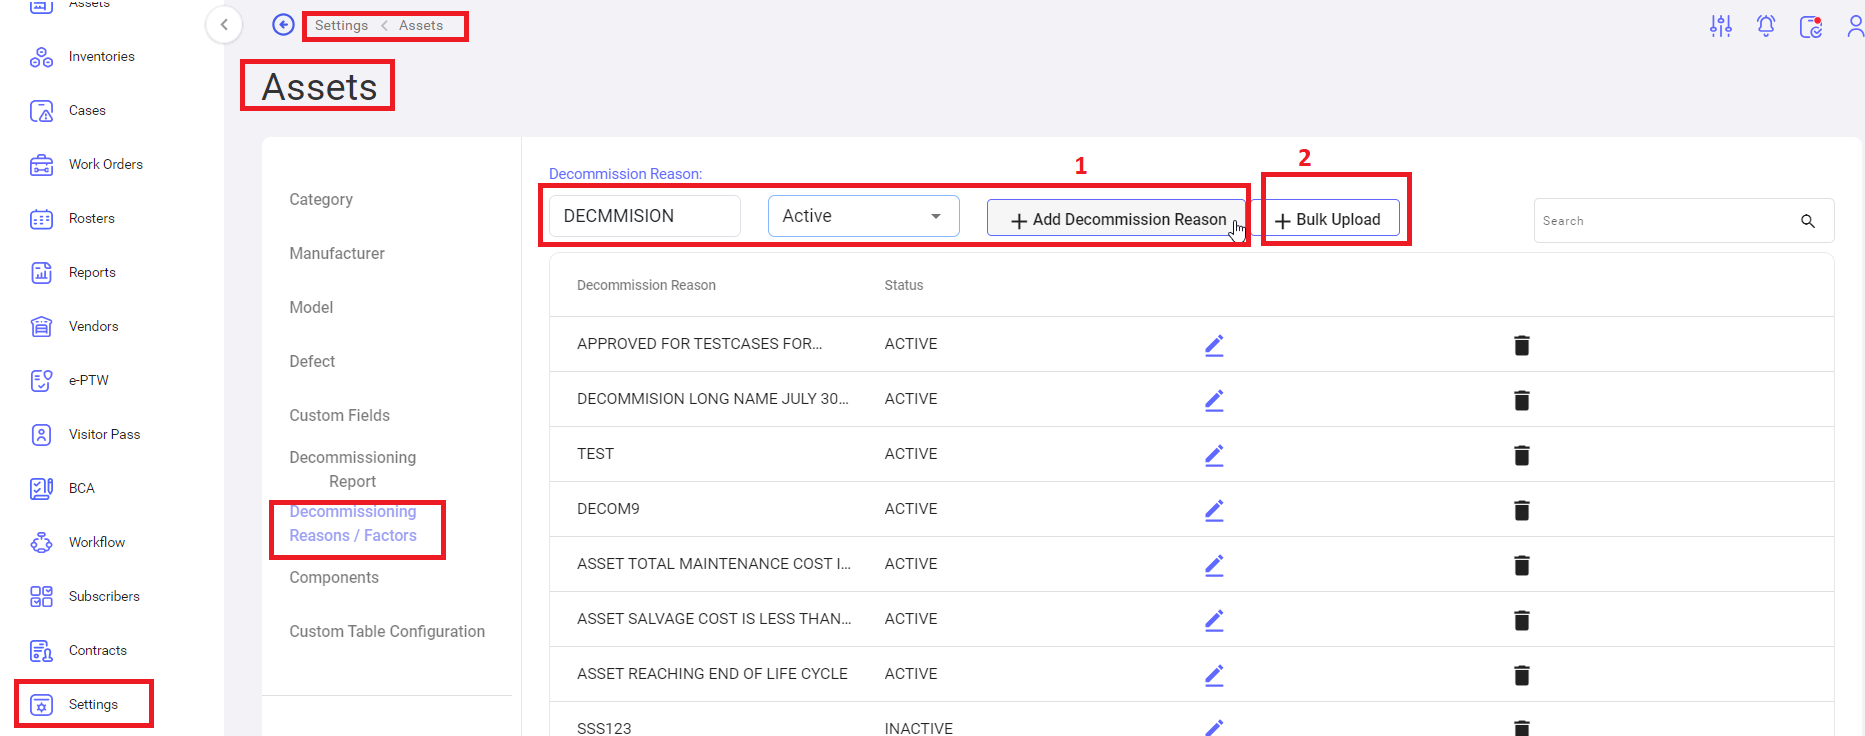
vii. Decommissioning Reasons/Factors
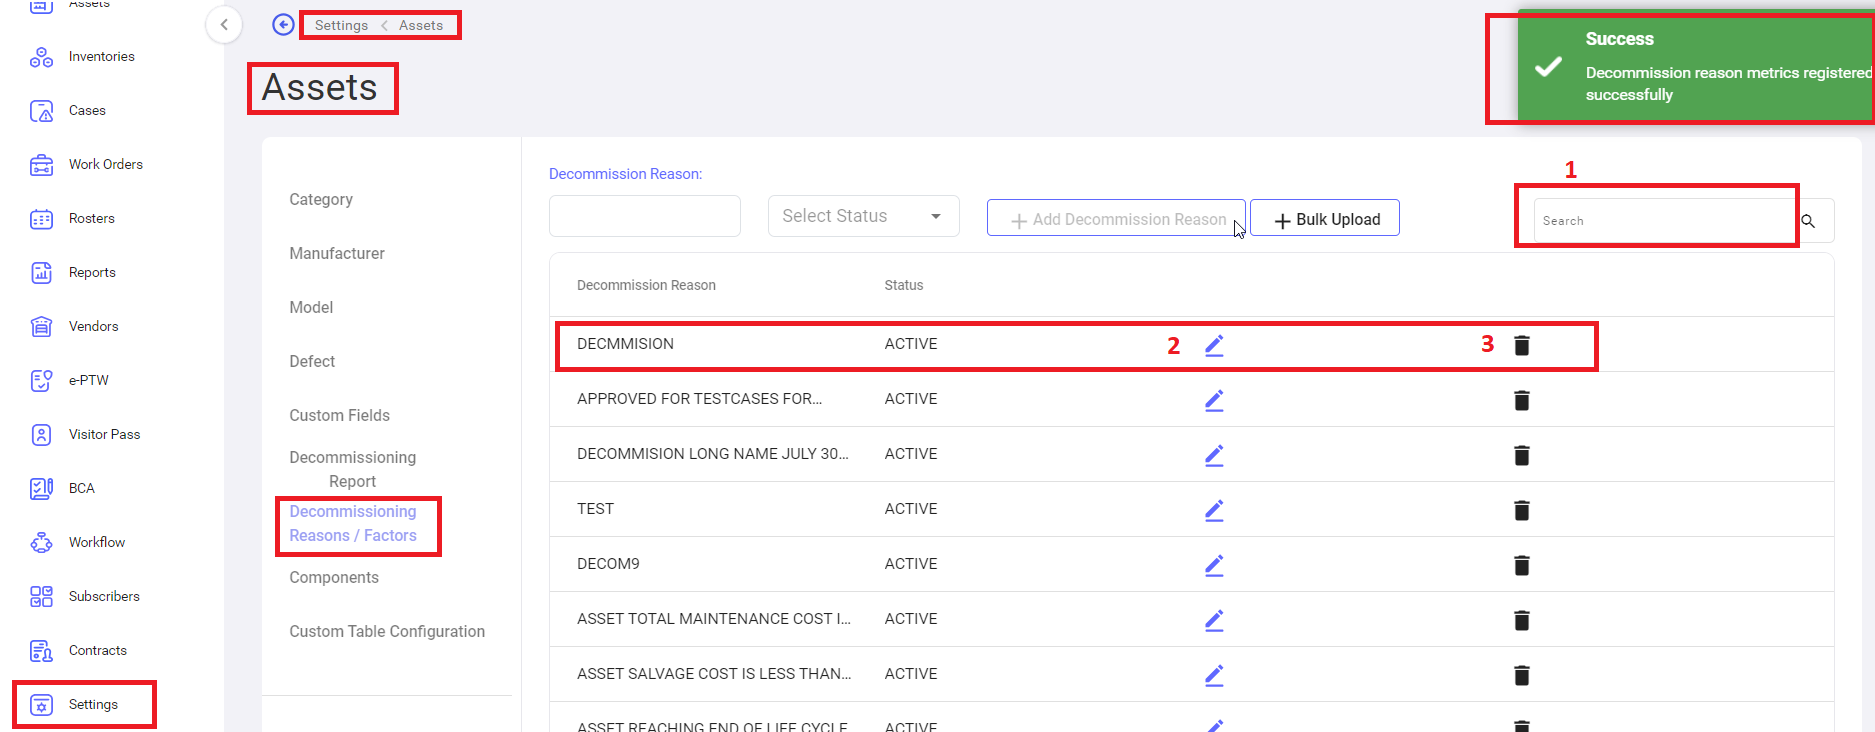
- Add Decommission Reason: to add the decommission reason, fill the reason in the text box and select one status from dropdown then click on “Add Decommission Reason” button. Confirmation message “Decommission Reason matrix added successfully” display
- Bulk Upload: to add multiple Decommission Reason’s in a bulk.
1. Search: To search the Decommission Reason.
2. Edit: To edit/update the Decommission Reason.
3. Delete: To delete the Decommission Reason.
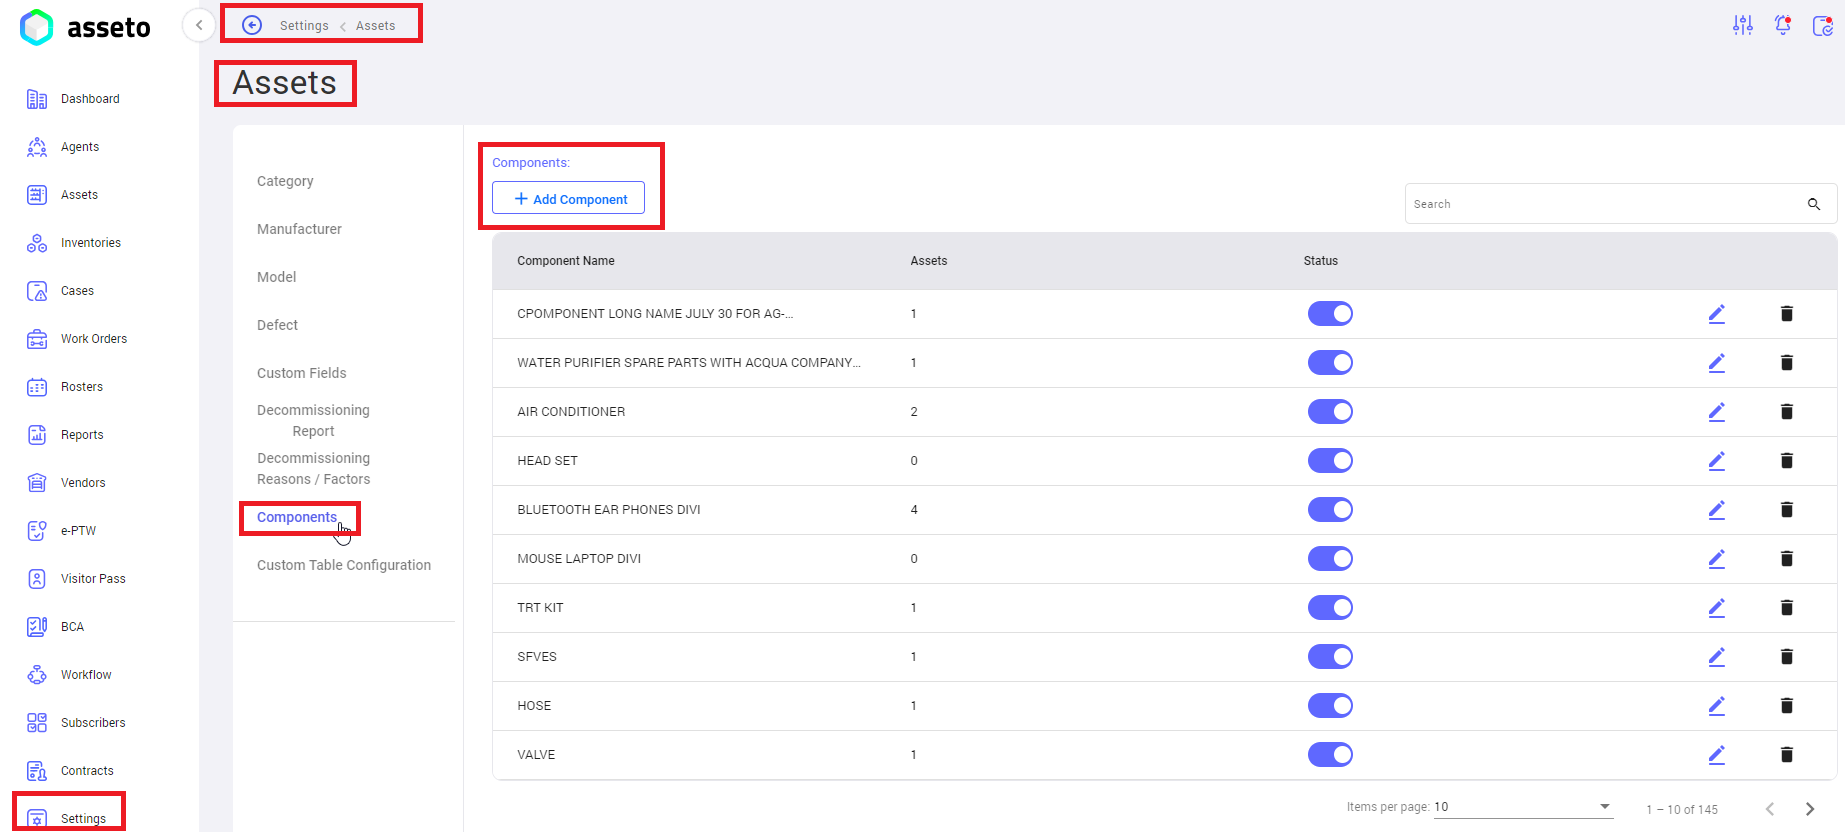
viii. settings -> assets -> Components
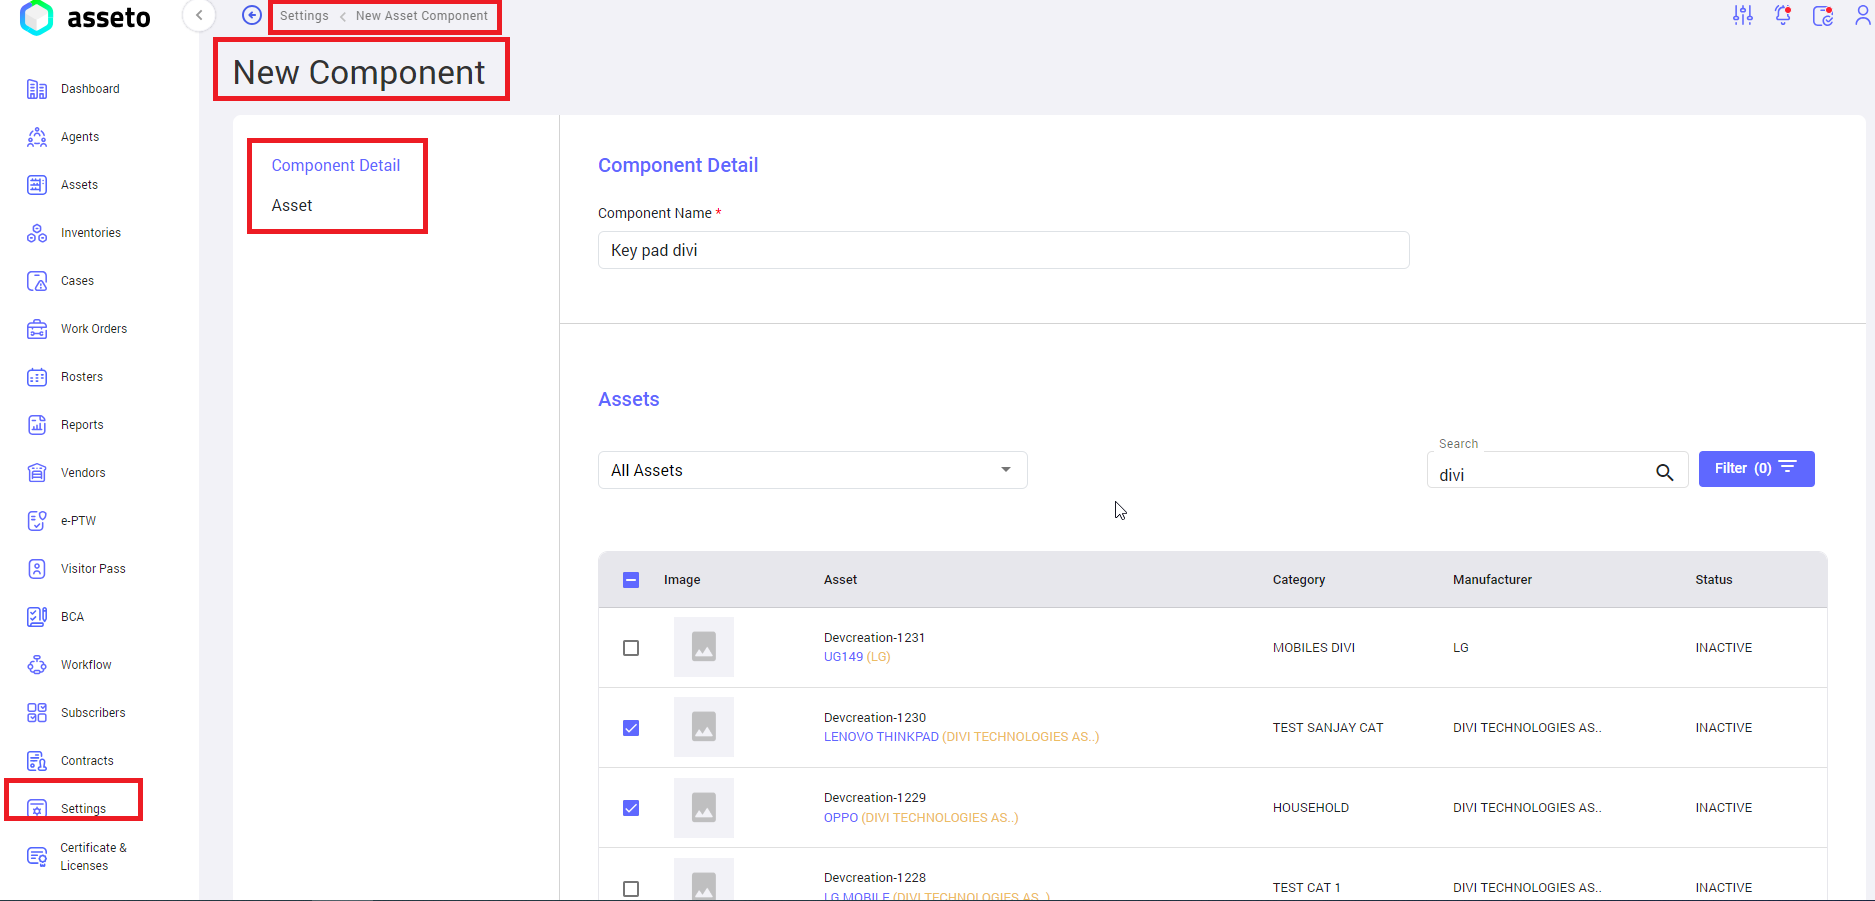
Need to configure Components in settings, attach those components to assets while creating BCA project.
Click on the “Add component” button, to create a new component.
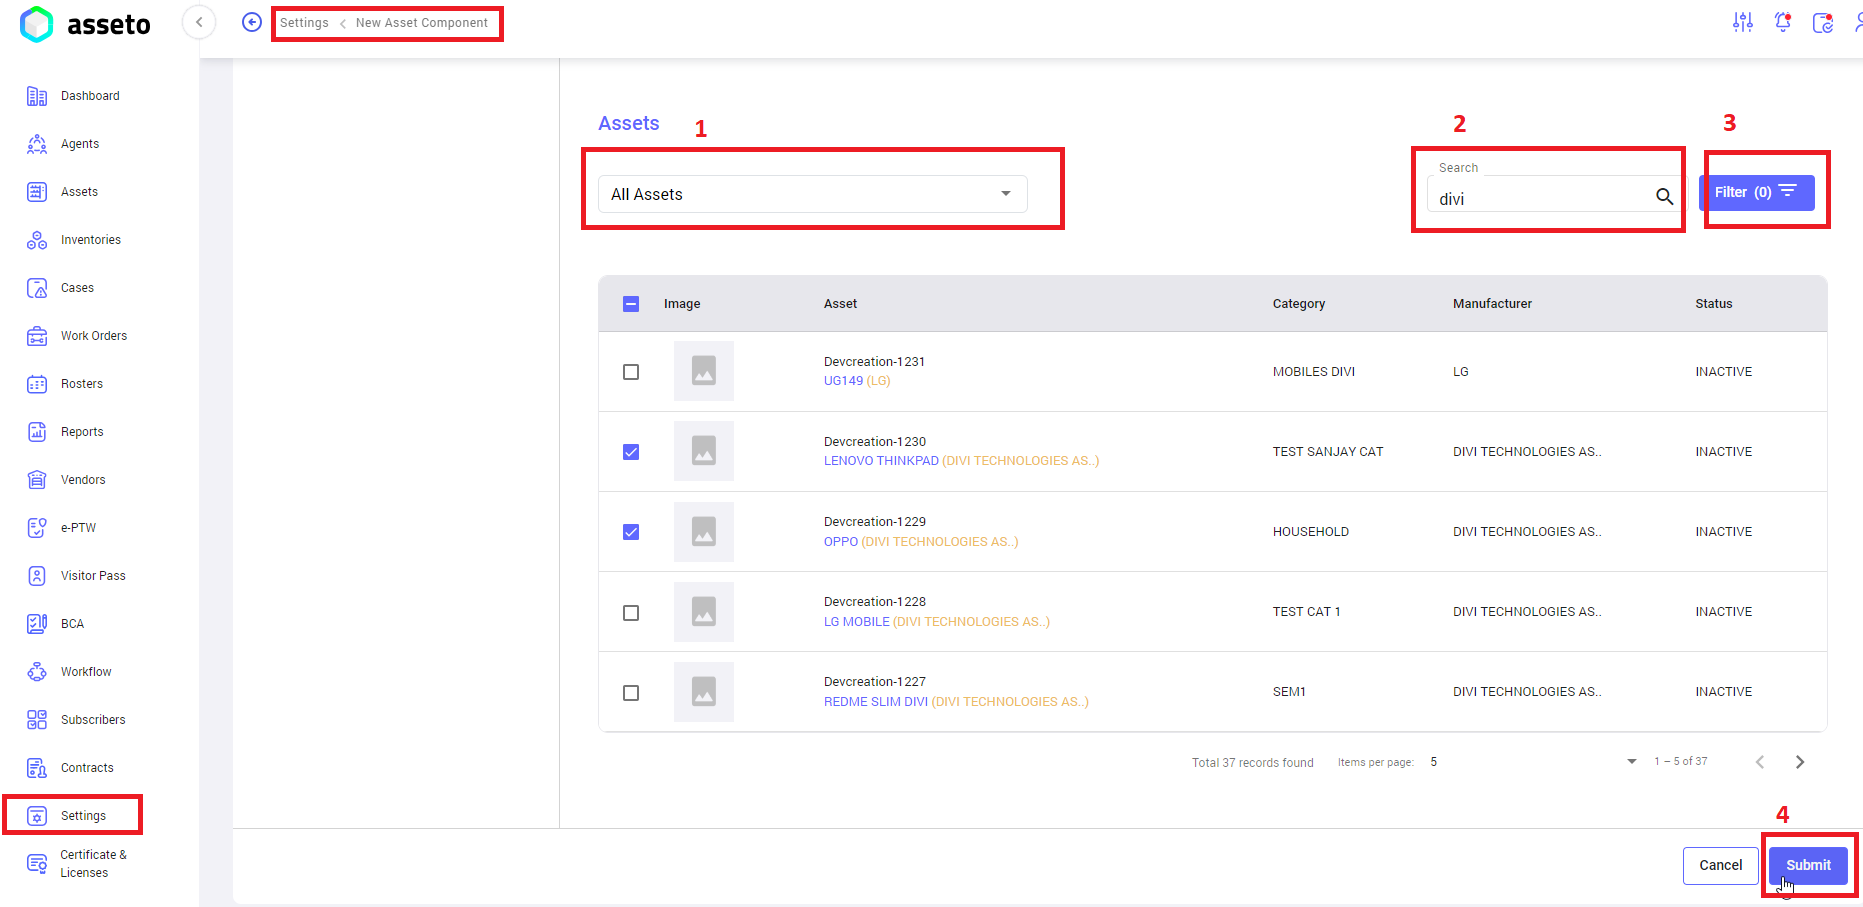
Provide component name and select assets.
1. All assets: Dropdown to select assets.
2. Search: to search the filter with name.
3. Filter: to filter out the assets by asset category, manufacturer, model.
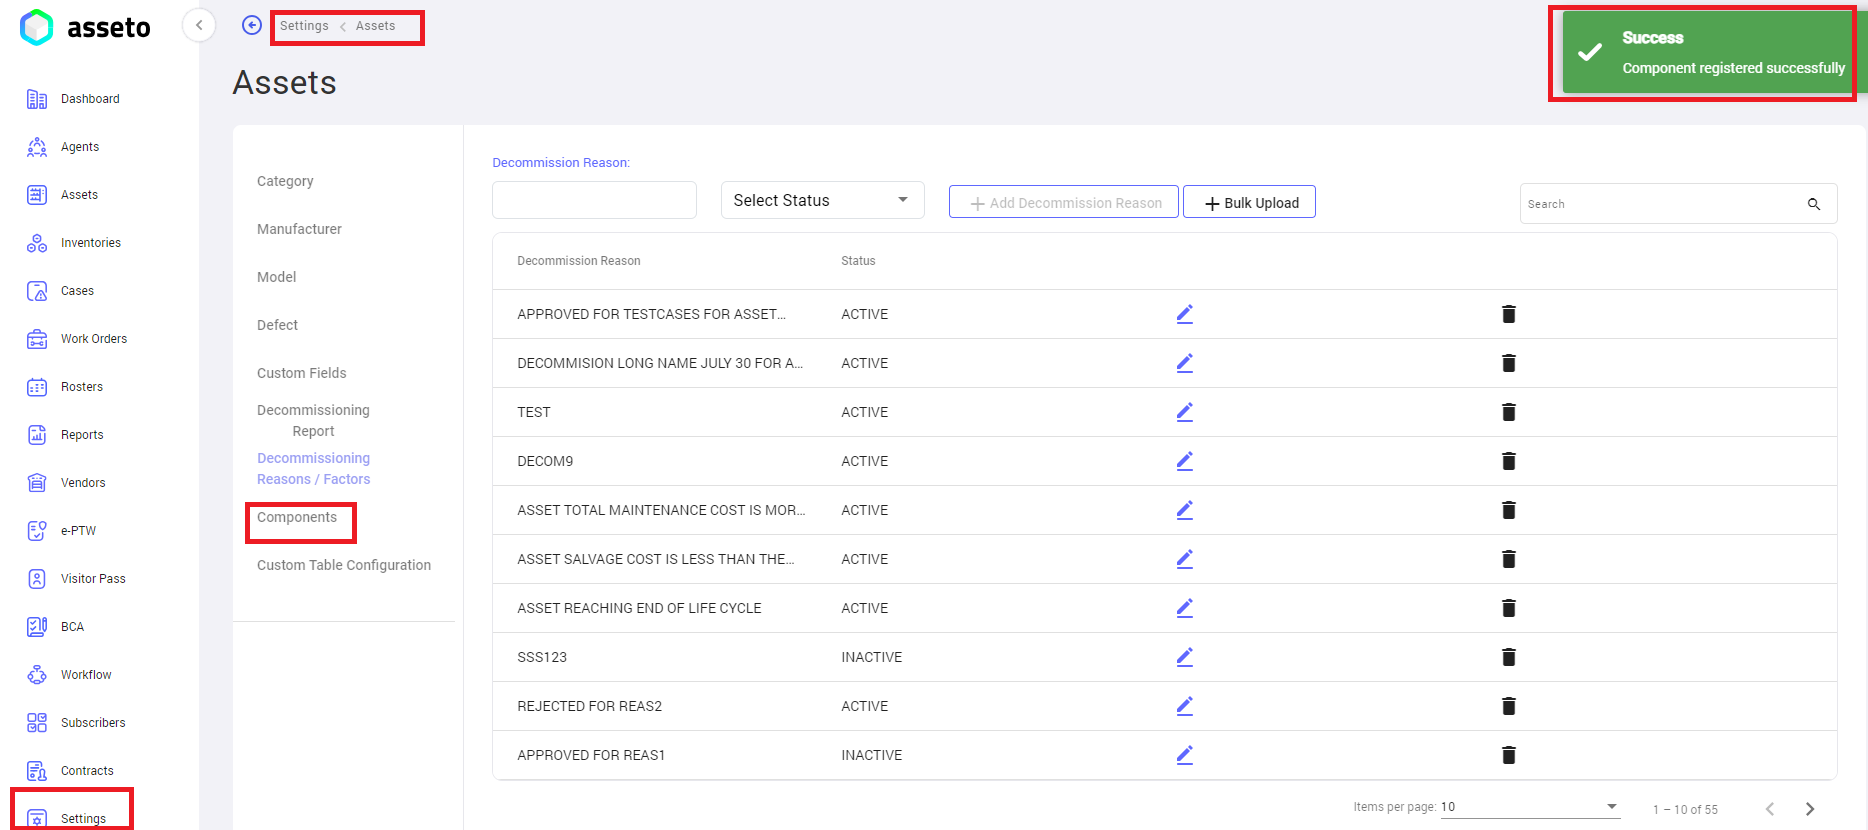
4. Submit: Click on the “submit” button, confirmation message “component registered successfully” will be display.
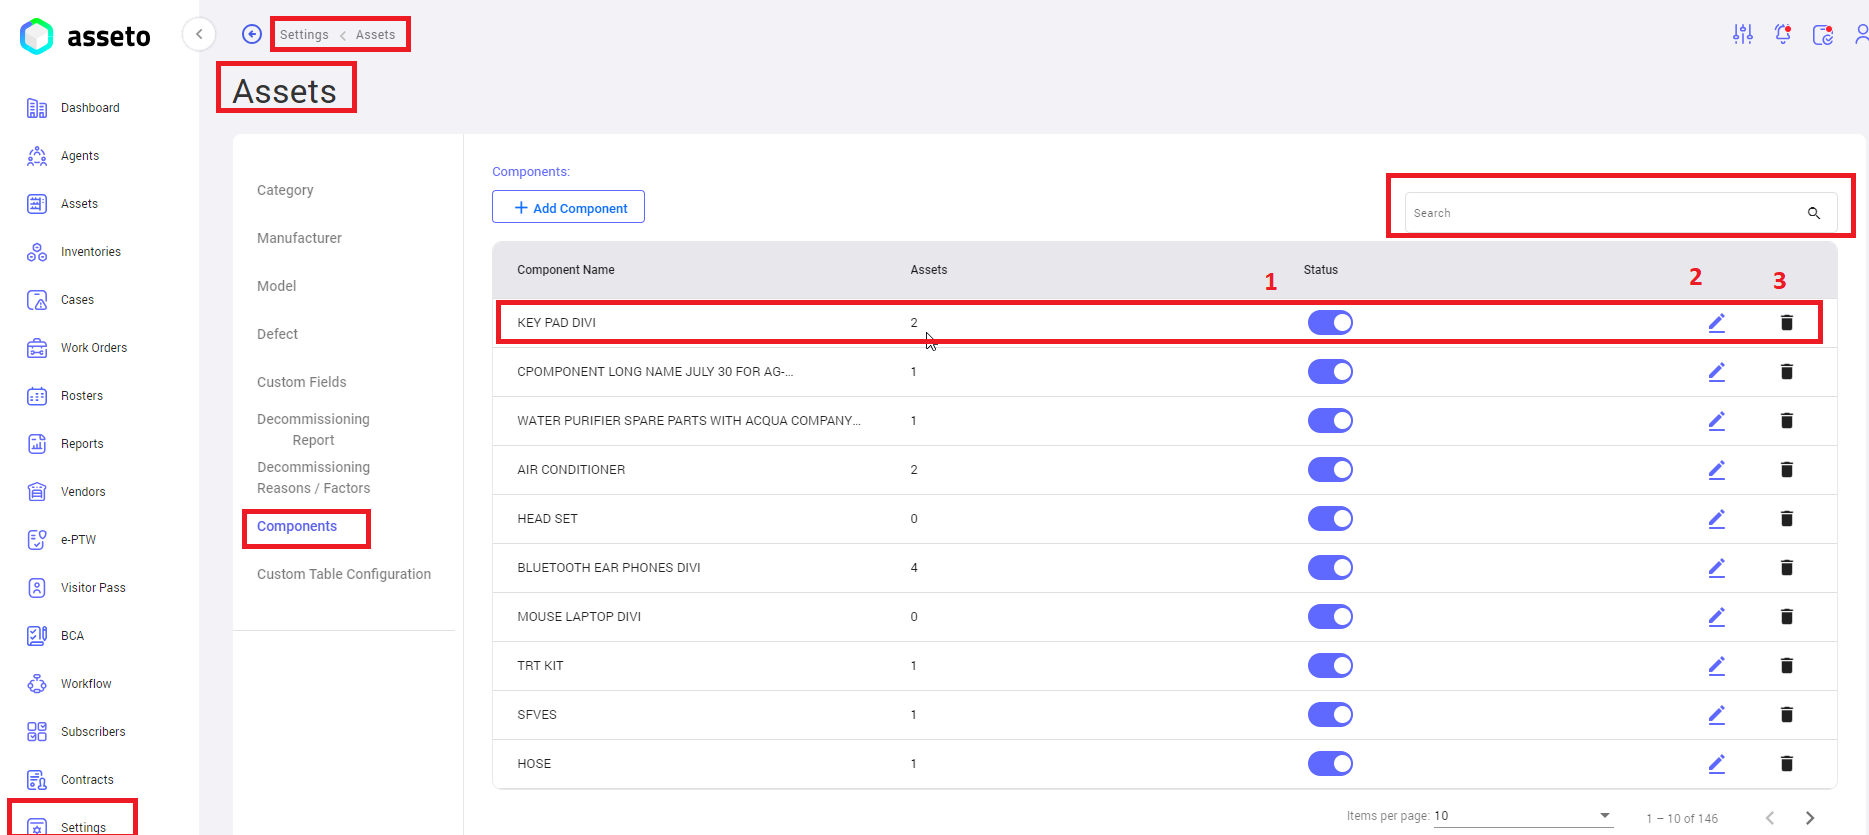
Added component will display in first of component list.
1. Status: by default, component status is active, user can change the status as active or inactive.
2. Edit: to edit/update component details.
3. Delete: to delete the component.
4. Search: to search the components with names.
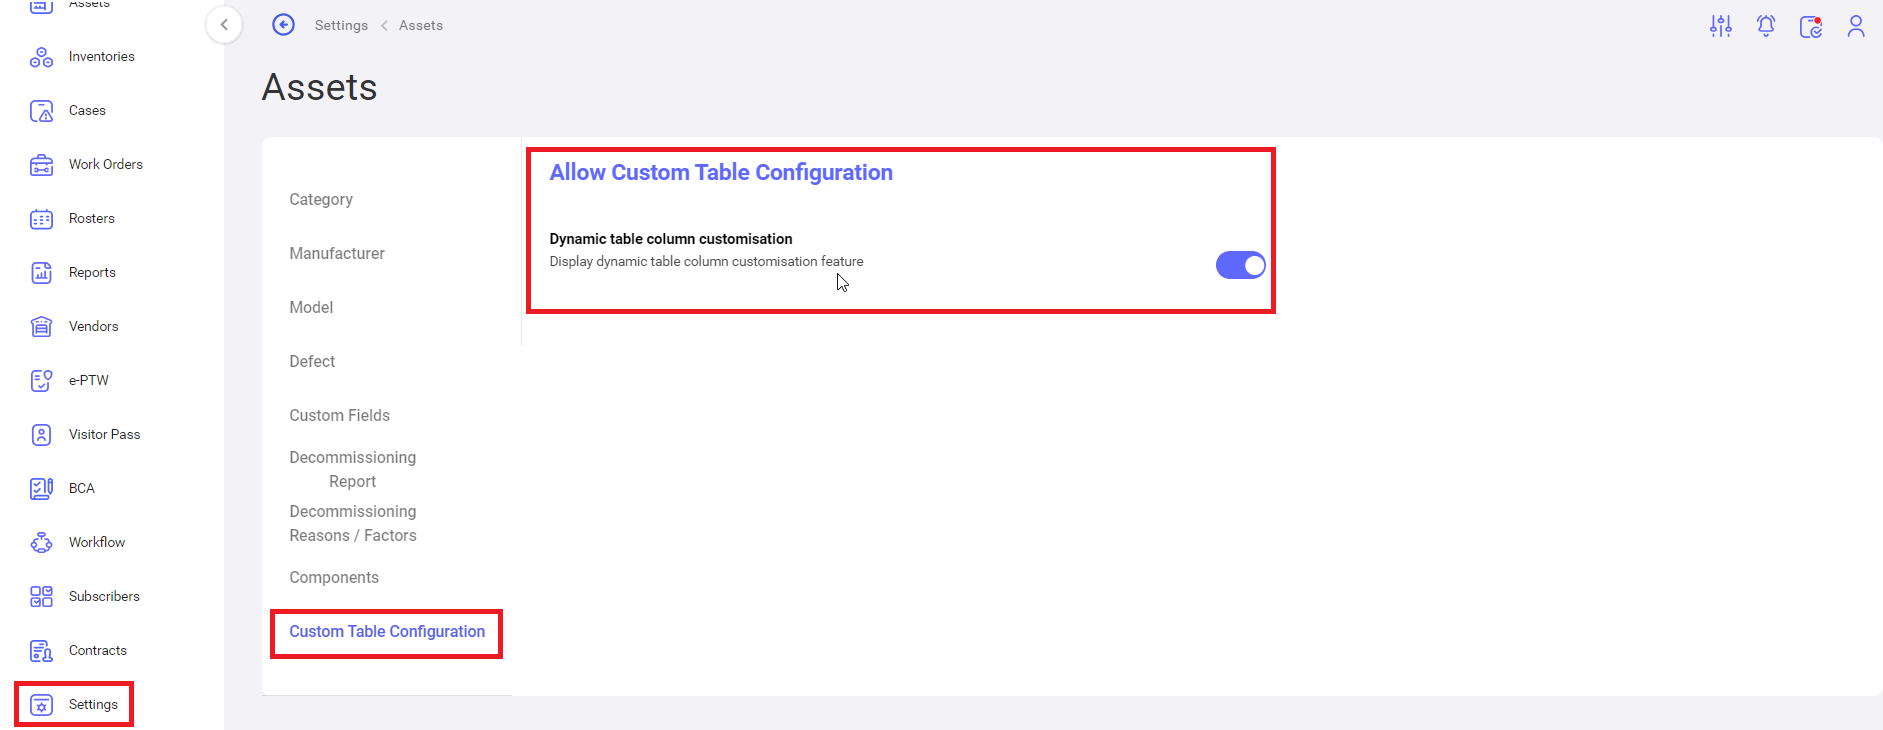
ix. Settings -> Assets -> Custom Table Configuration
By using this feature user can activate (statuses are: Active and Inactive) display dynamic table column customization feature as shown by the following screenshot.

No Comments