8. Inventories
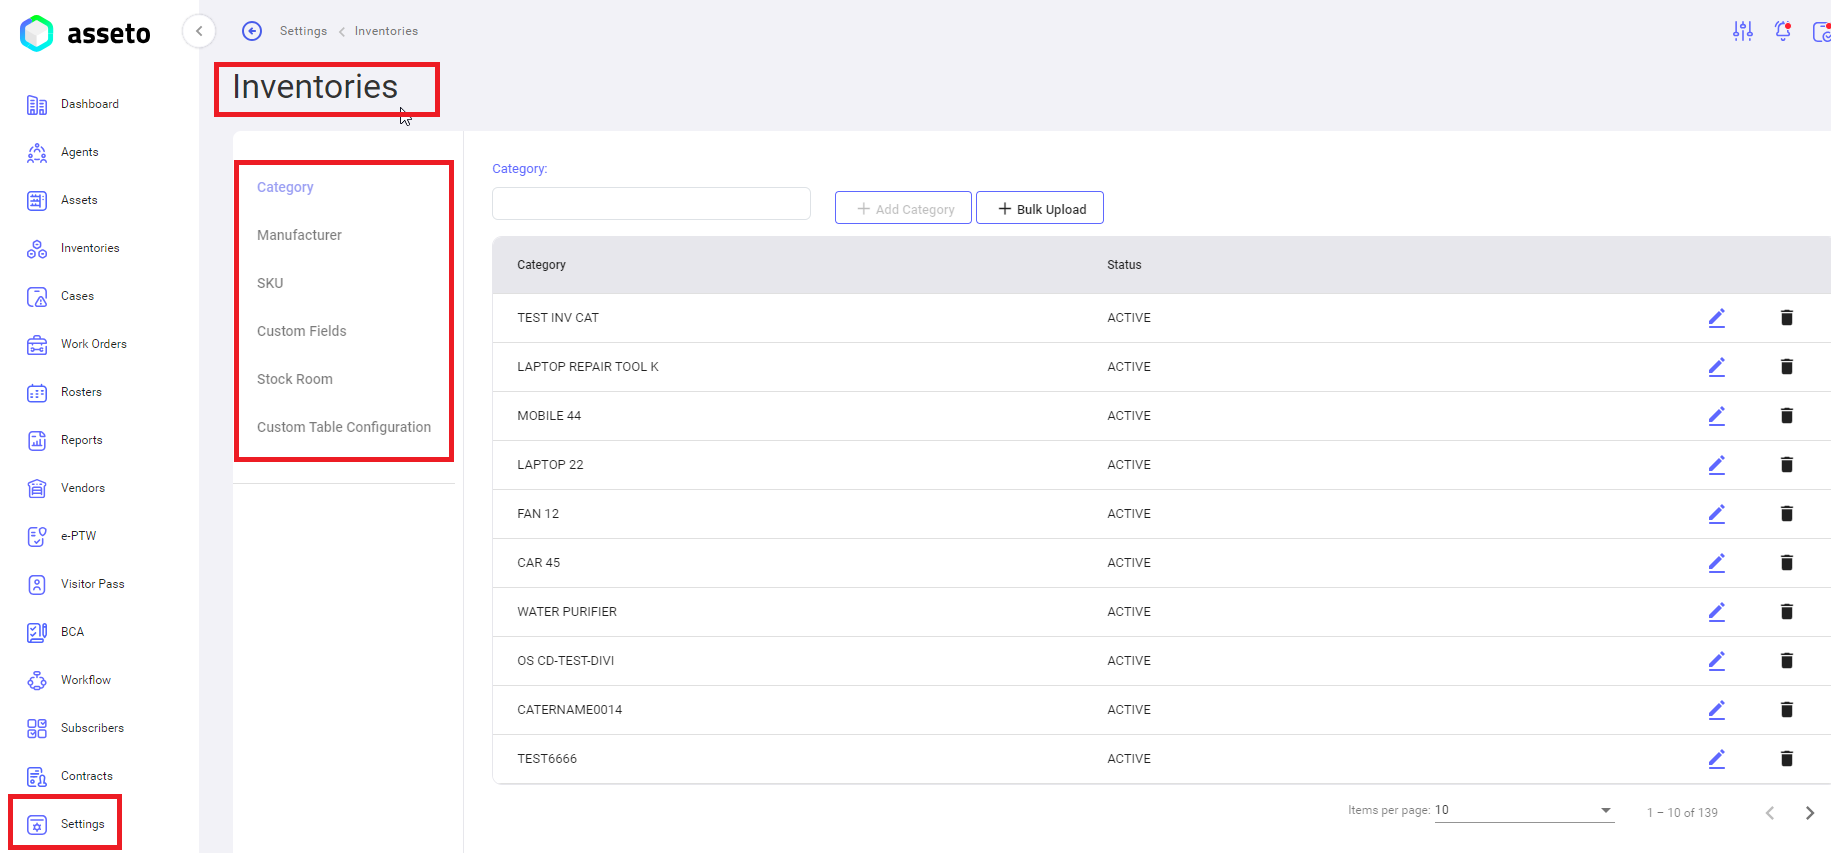
Settings -> Inventories:
User can configure inventory Category, manufacturer, SKU, Custom fields, stock room and custom table configuration. Options are available as menu on left side, Category is highlighted by default.
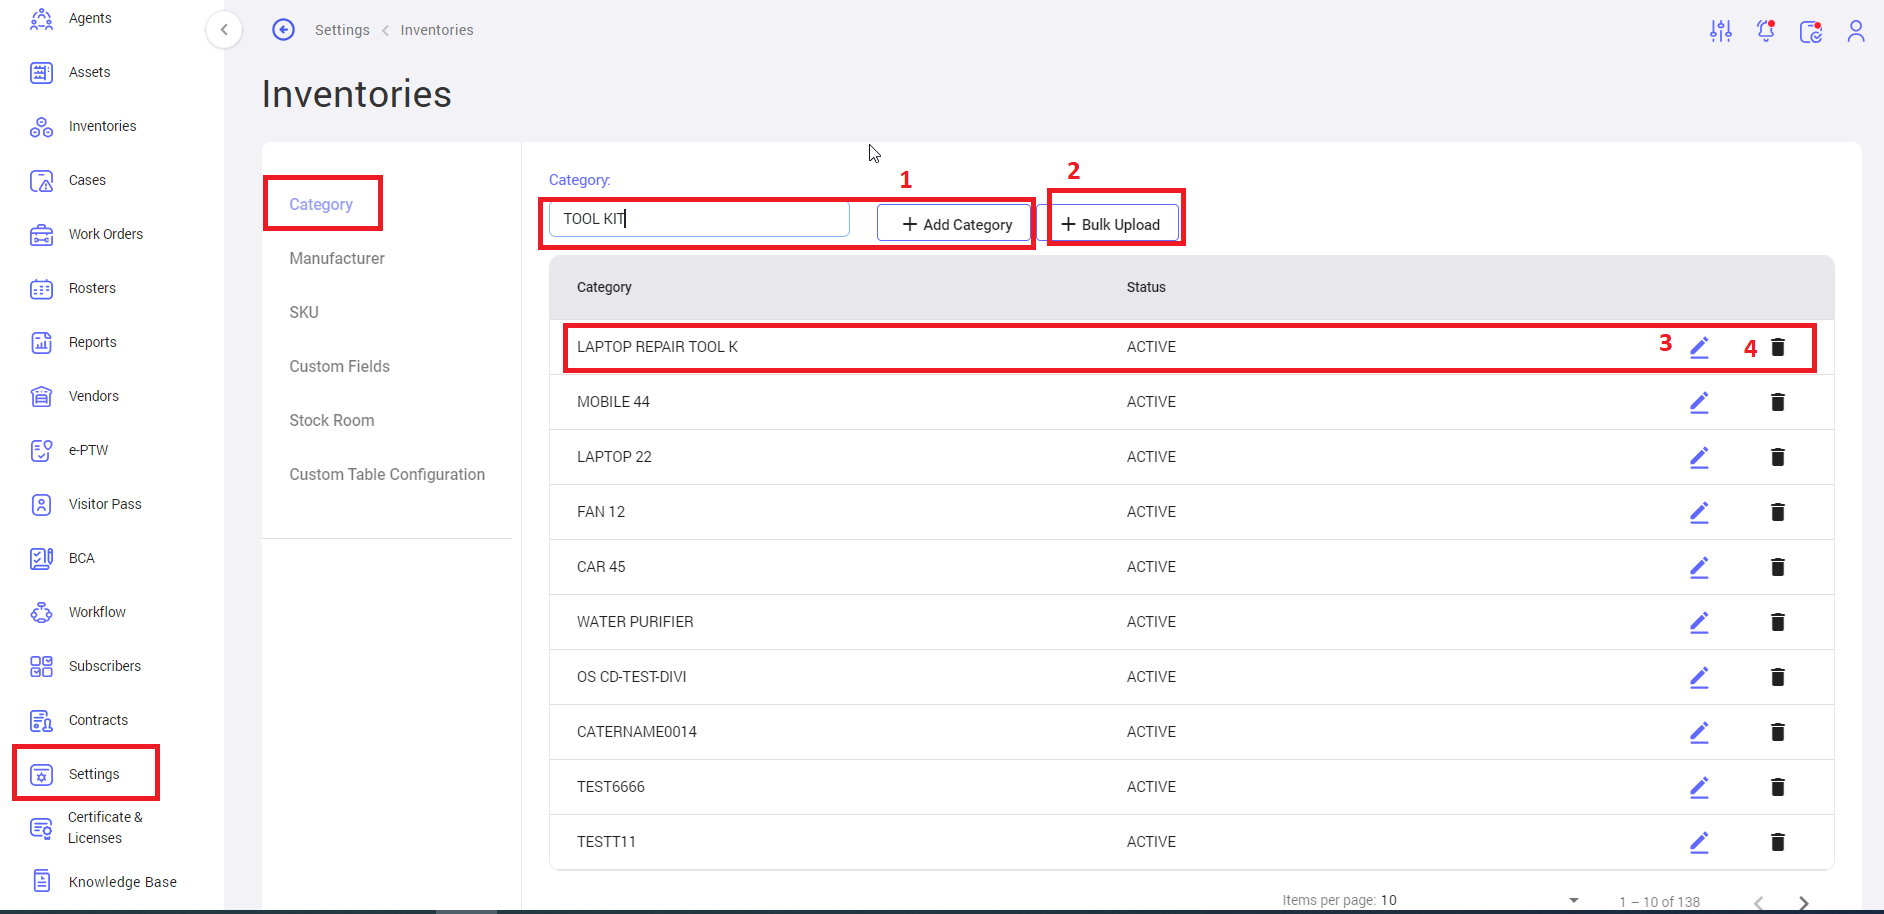
i. Settings -> Inventories -> Inventory category:
1. Add Category: type category name in the text box and click on “Add category” button to add the individual category.
2. Bulk Upload: click on bulk upload button to create multiple categories at a time, download csv file and fill the data then upload.
3. Edit Category: Here you edit already created category by clicking on edit icon available in each row of categories list.
4. Delete Category: Here you delete already created category by clicking on delete icon available in each row of categories list.
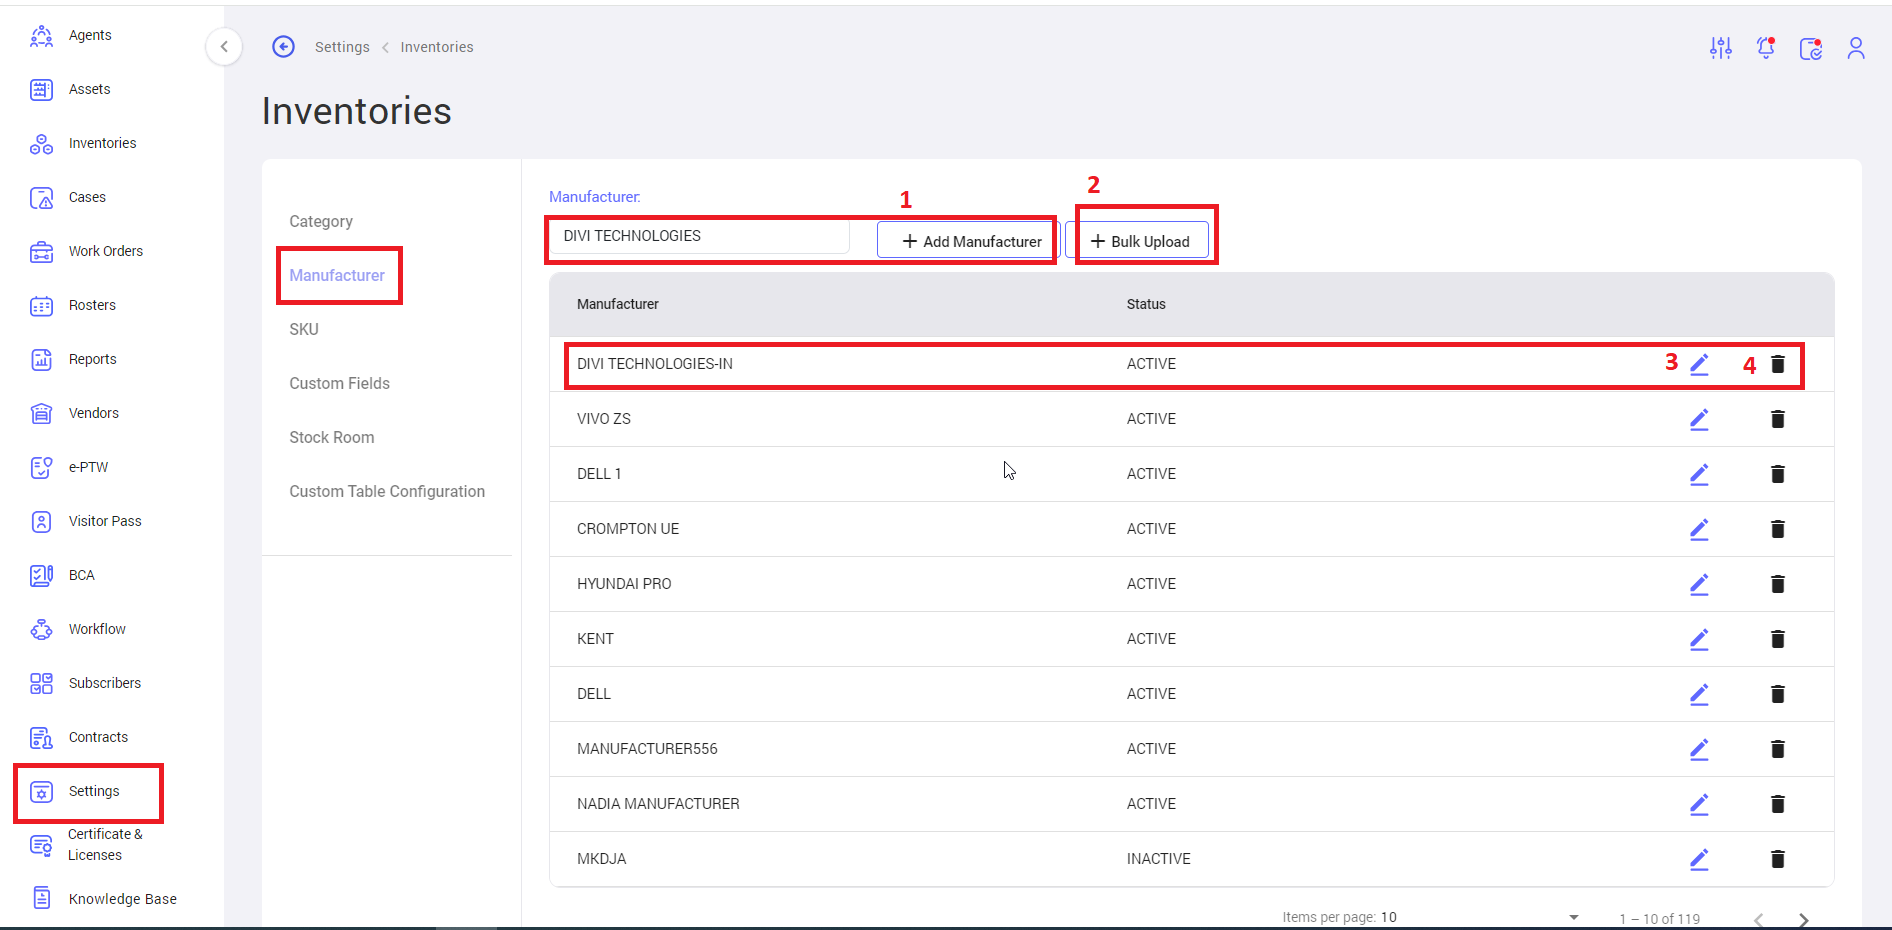
ii. Settings -> Inventories -> Manufacturer
1. Add Manufacturer: type manufacturer name in the text box and click on “Add manufacturer” button to add the individual manufacturer.
2. Bulk Upload: click on bulk upload button to create multiple manufacturers at a time, download csv file and fill the data then upload.
3. Edit Manufacturer: Here you edit already created manufacturer by clicking on edit icon available in each row of manufacturer list.
4. Delete Manufacturer: Here you delete already created manufacturer by clicking on delete icon available in each row of manufacturer list.
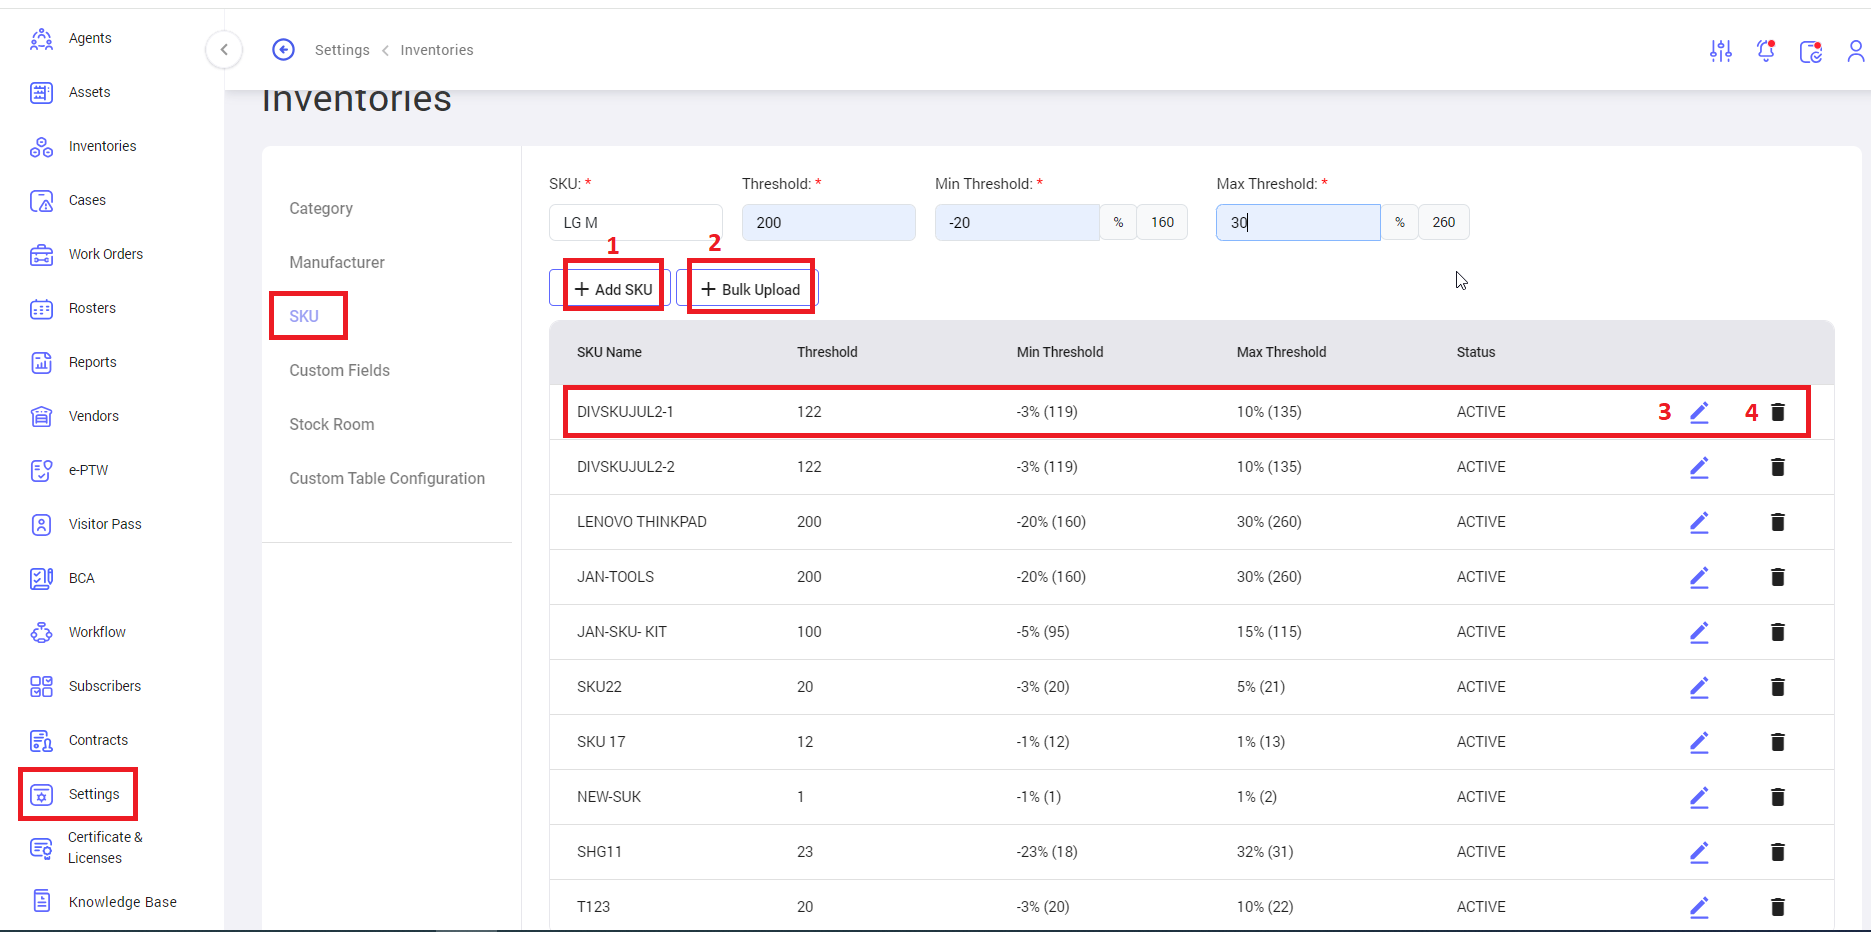
iii. Settings -> Inventories -> SKU
1. Add SKU: type SKU name, Threshold, Min Threshold and Max Threshold in the related text boxes and click on “Add SKU” button to add the individual SKU.
Note: Every inventory having individual SKU, for every inventory type we have to create separate SKU in settings.
2. Bulk Upload: click on bulk upload button to create multiple SKU at a time, download csv file and fill the data then upload.
3. Edit SKU: Here you edit/update already created SKU by clicking on edit icon available in each row of SKU list.
4. Delete SKU: Here you delete already created SKU by clicking on delete icon available in each row of SKU list.
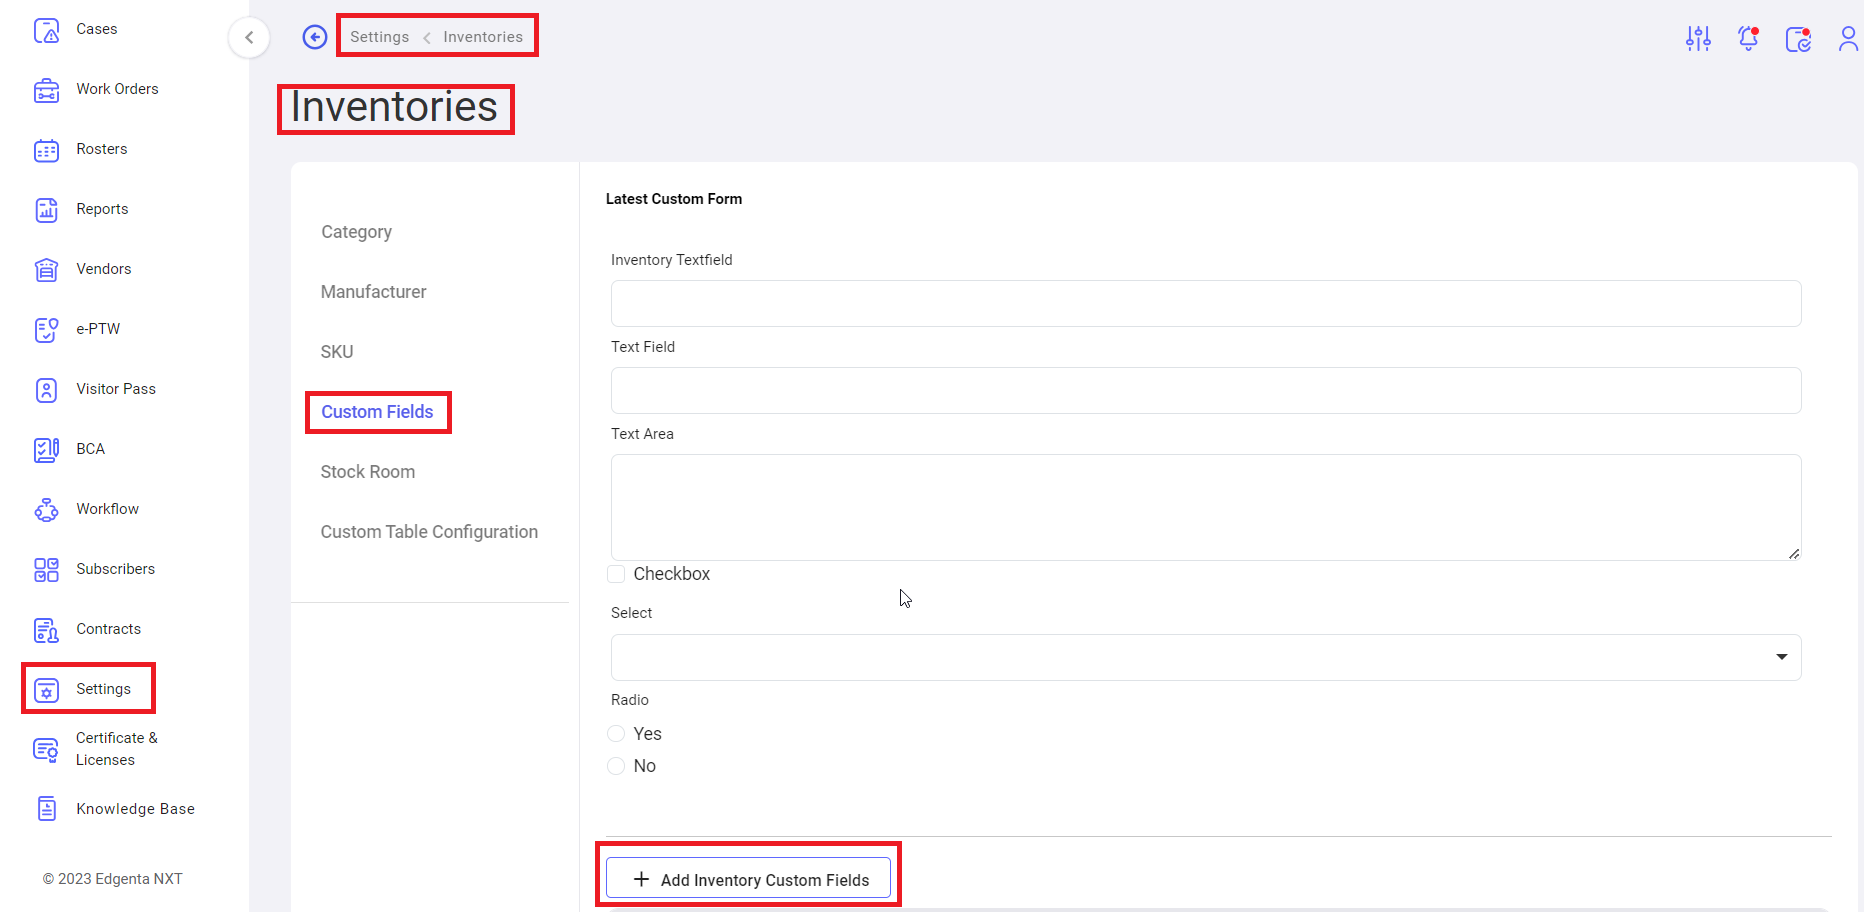
iv. Settings -> Inventories -> Custom Fields
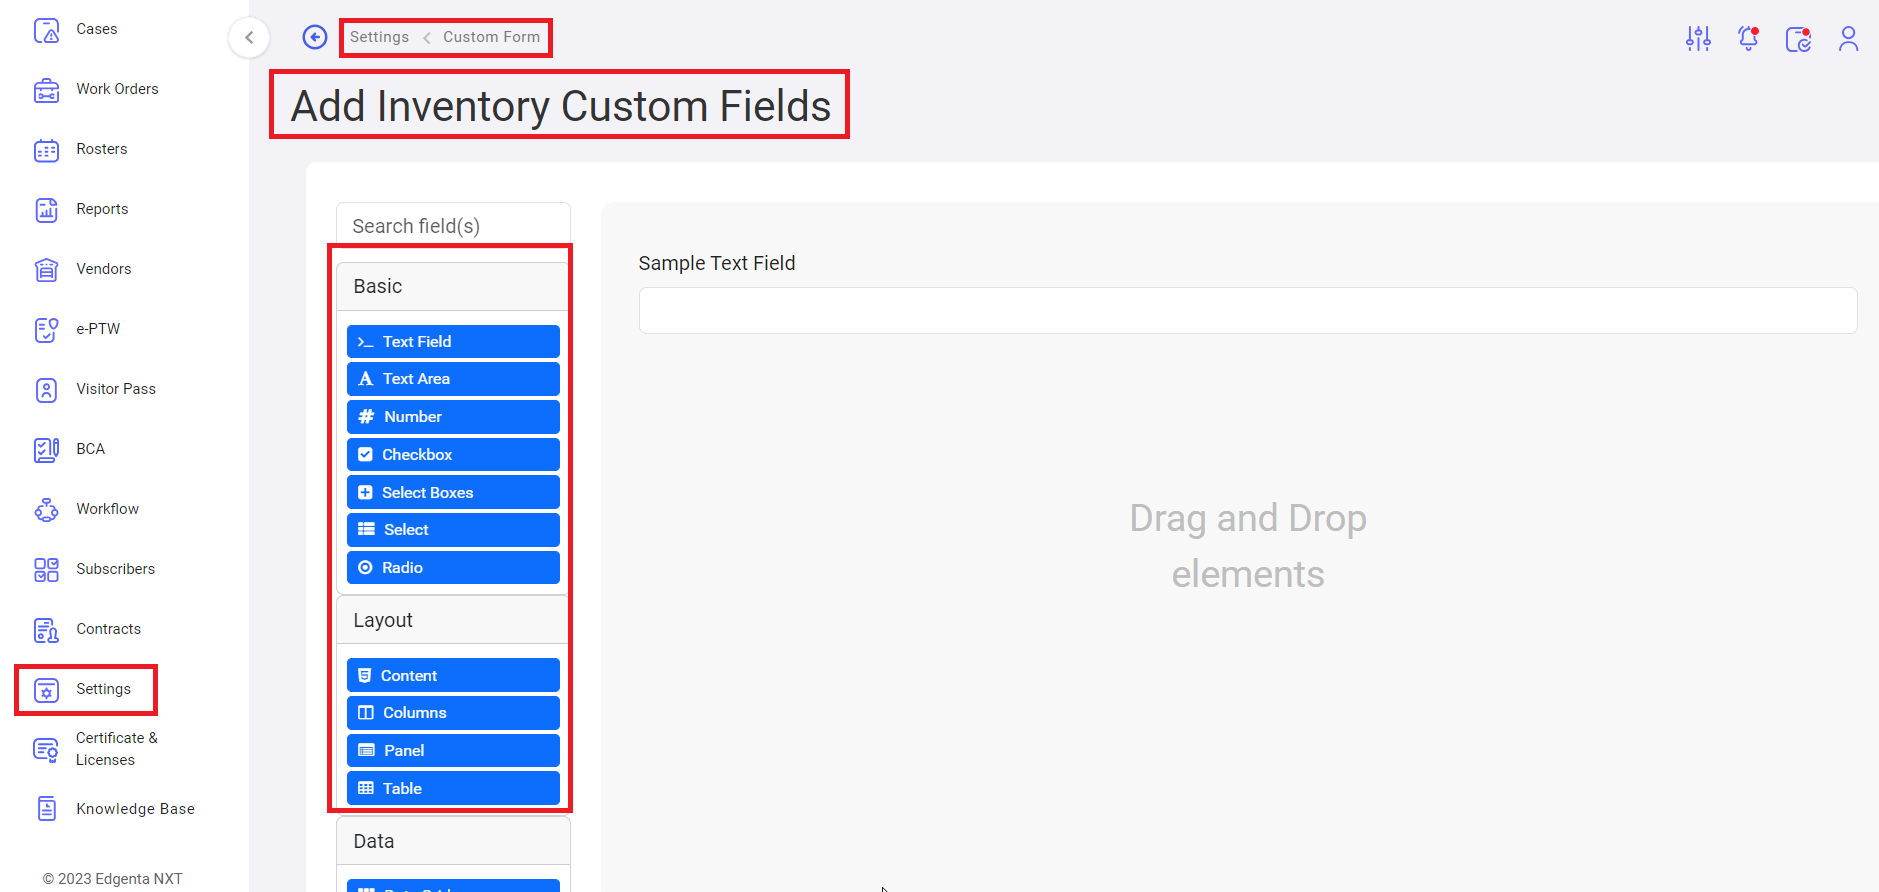
Add Inventy Custom Fields: to add custom fields, click on “Add Inventory Custom Fields” page will open as shown by following screenshot.
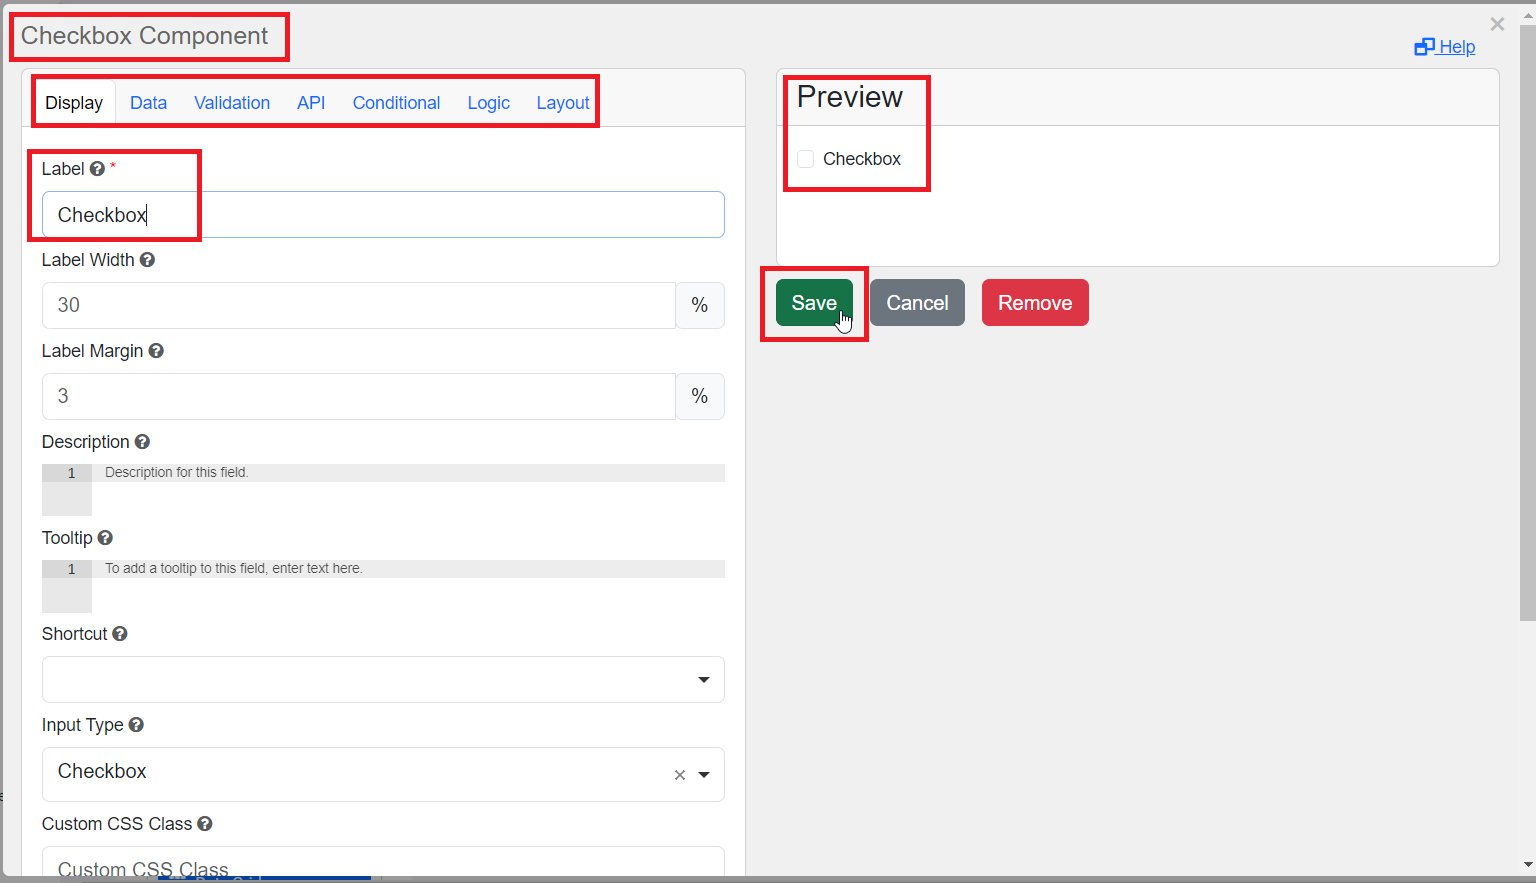
Step1: drag and drop the one of the elements from the list, following page (highted with ‘Display’ section) will open to select label name.
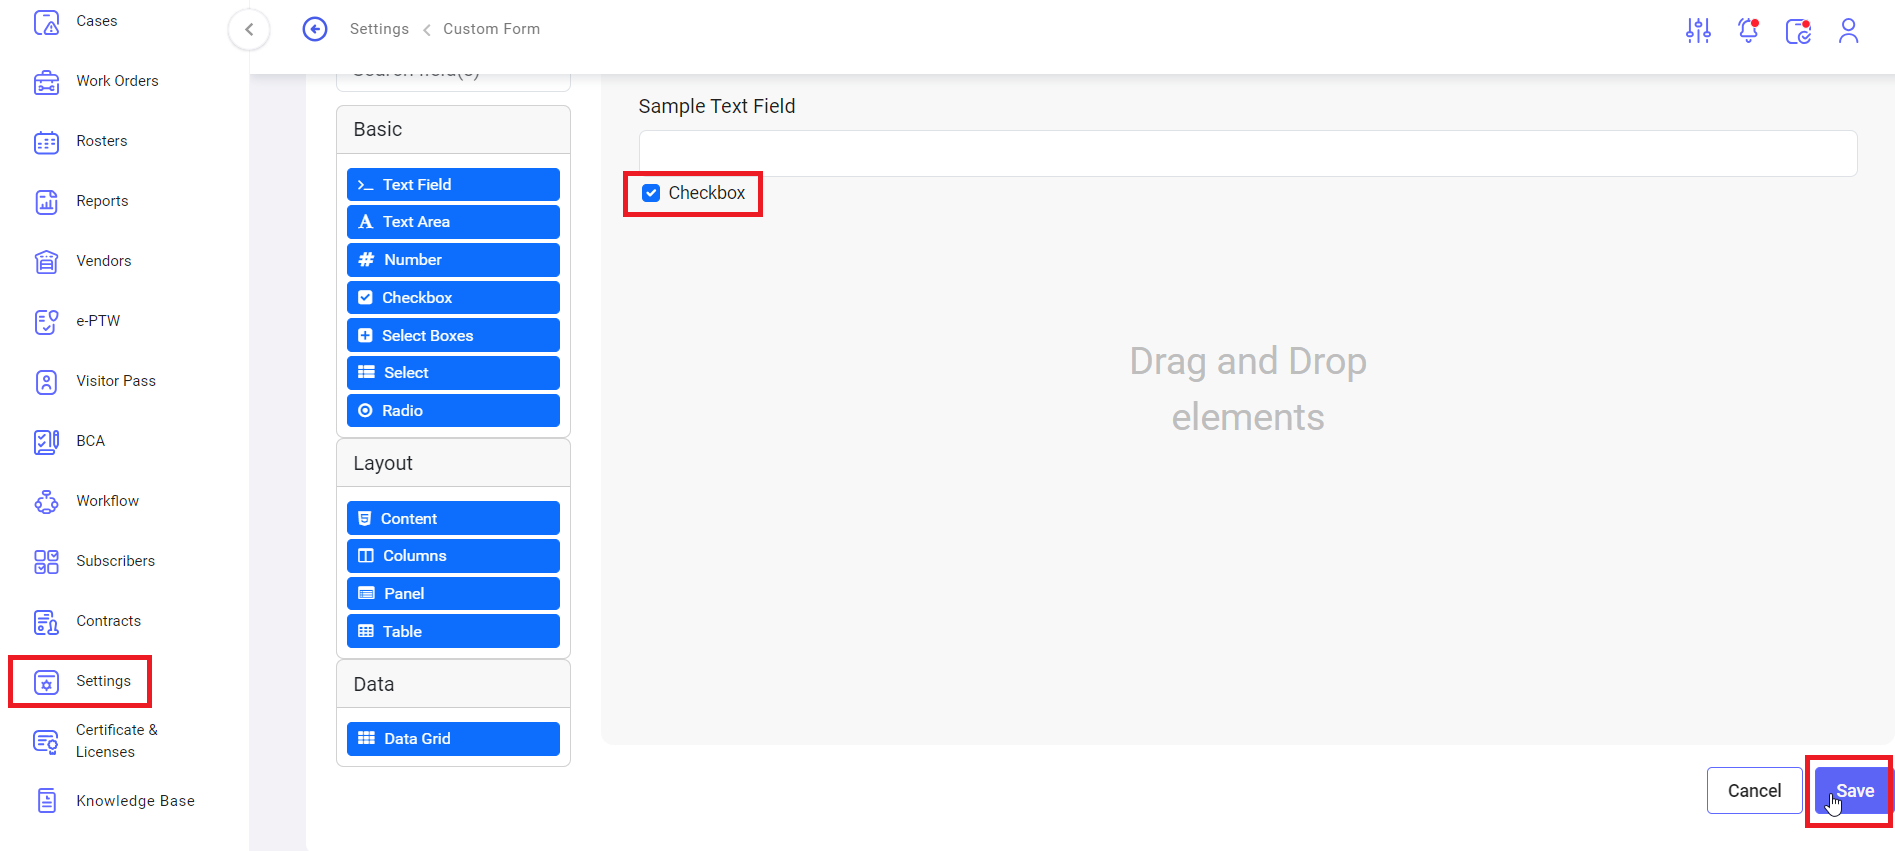
Step2: click on ‘Data’ section, to set the data into selected label and click on save button.
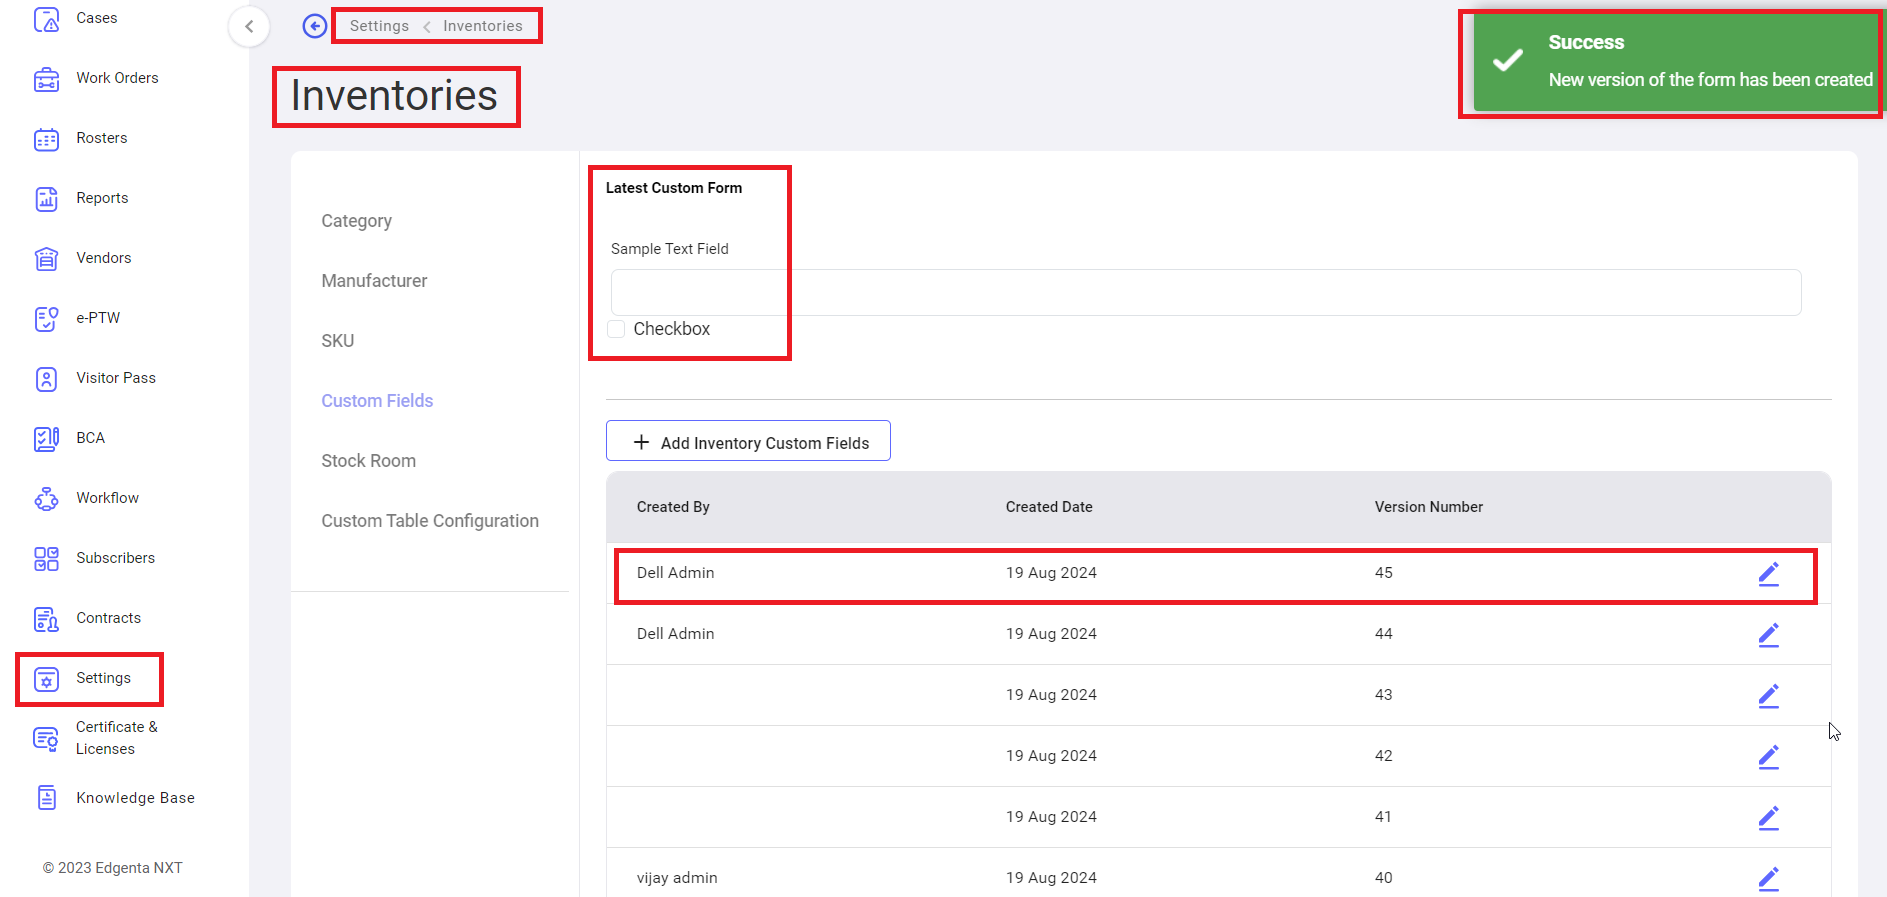
Step3: Again, system will navigate to “Add Inventory Custom Fields” page, click on “save” button. Confirmation message “New Version of the form has been created” will be display and system navigate to custom fields dashboard.
Newly added custom fields will display top of the table as shown by the following screenshot.
Edit Custom fields: Custom fields are display in the list, click on edit icon to edit/update the custom field.
v. Settings -> Inventories -> Stock Room
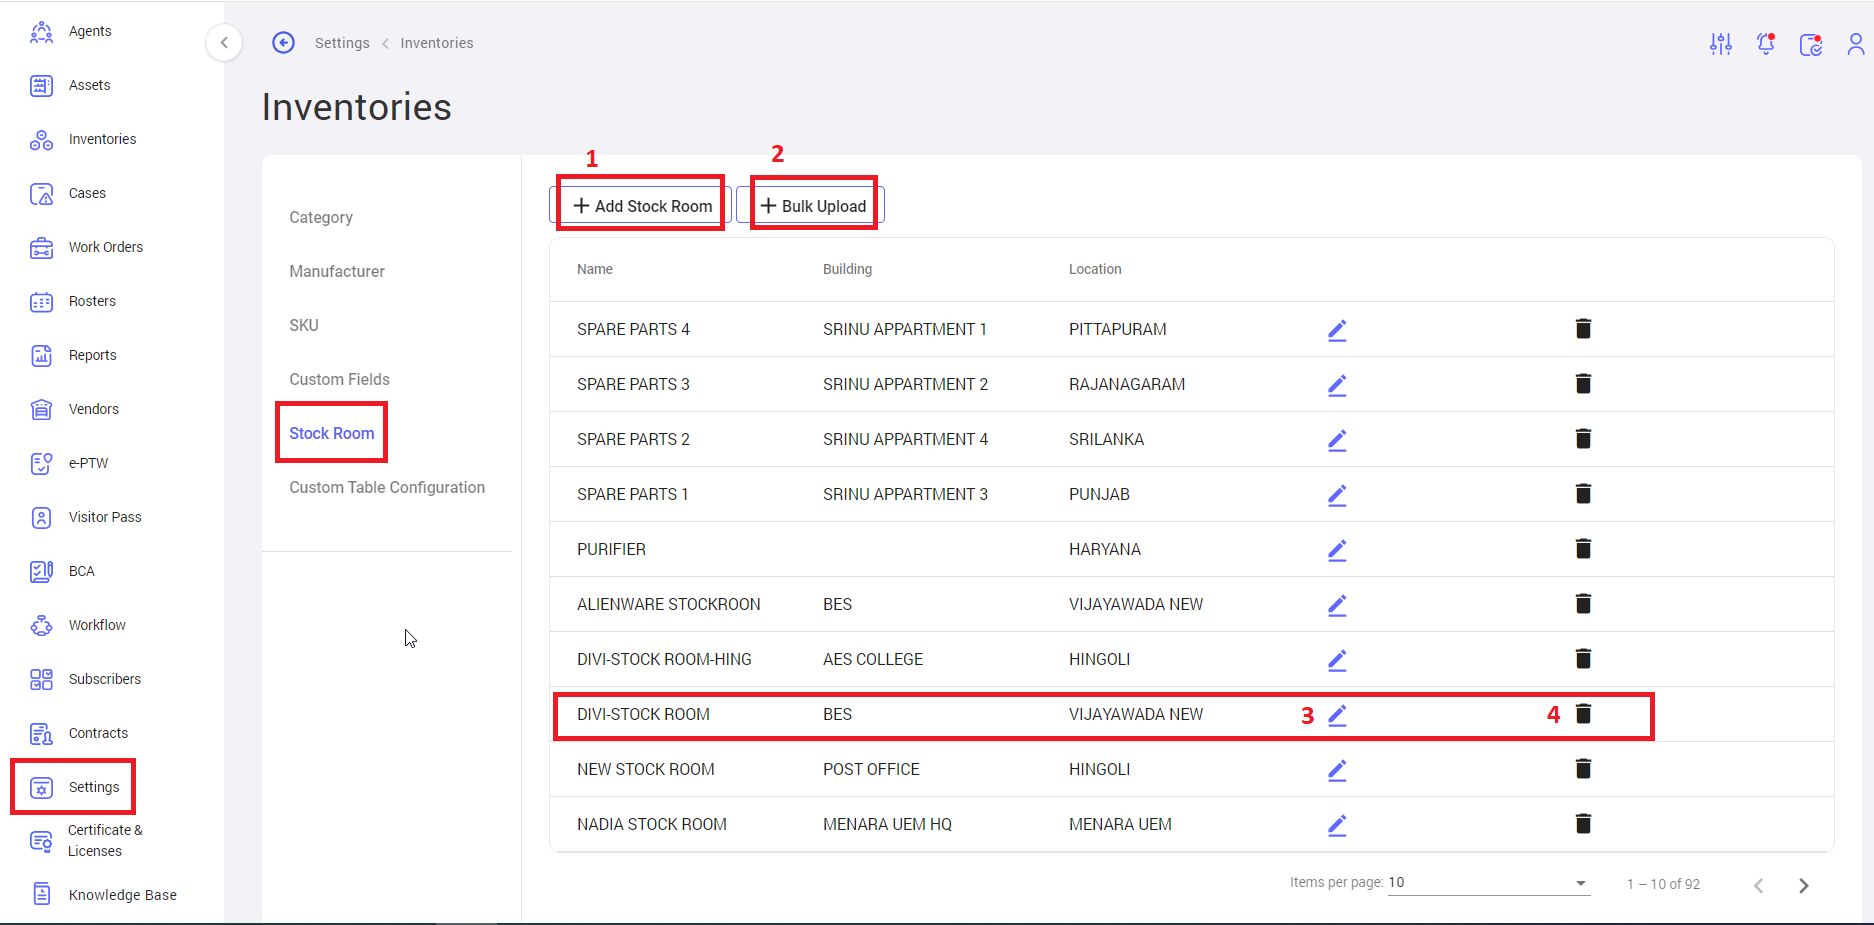
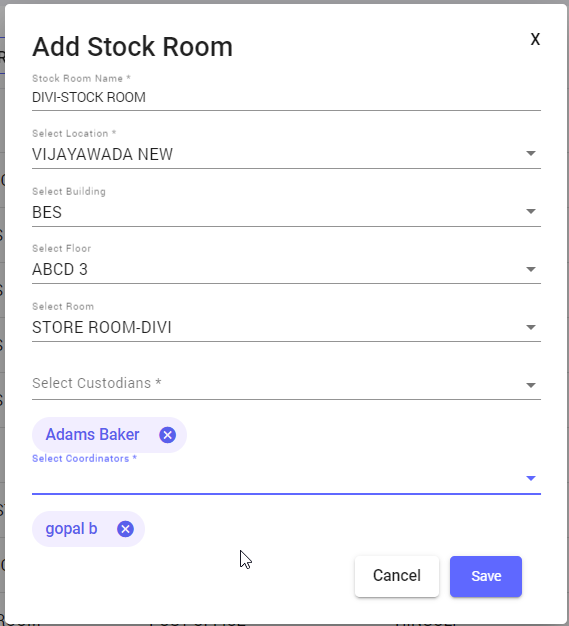
1. Add Stock Room: click on “Add Stock Room” button to add the individual Stock Room following page will be display. Fill the all-mandatory fields then only save button will be enabled, click on save button to create stock room.
Note: Every inventory having individual Stock Room, for every inventory type we have to create separate Stock Room in settings.
2. Bulk Upload: click on bulk upload button to create multiple Stock Room at a time, download csv file and fill the data then upload.
3. Edit Stock Room: Here you edit/update already created Stock Room by clicking on edit icon available in each row of Stock Room list.
4. Delete Stock Room: Here you delete already created Stock Room by clicking on delete icon available in each row of Stock Room list.
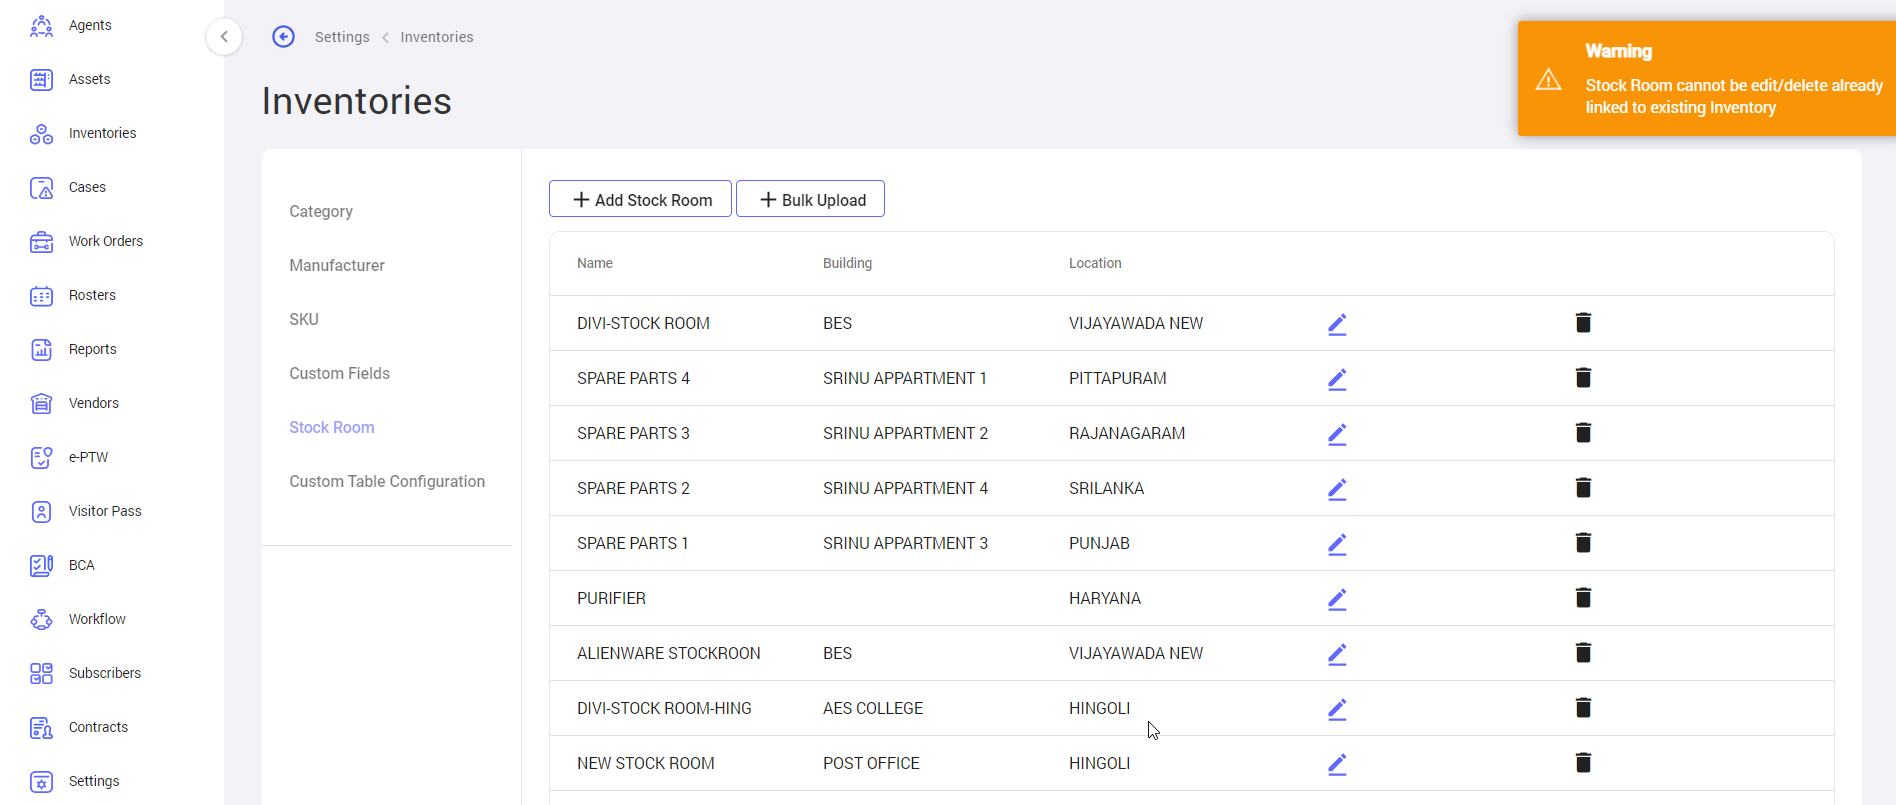
Note: you cannot edit/update details in stock room if it is linked to an existing inventory, system display warning message as shown by following screenshot.
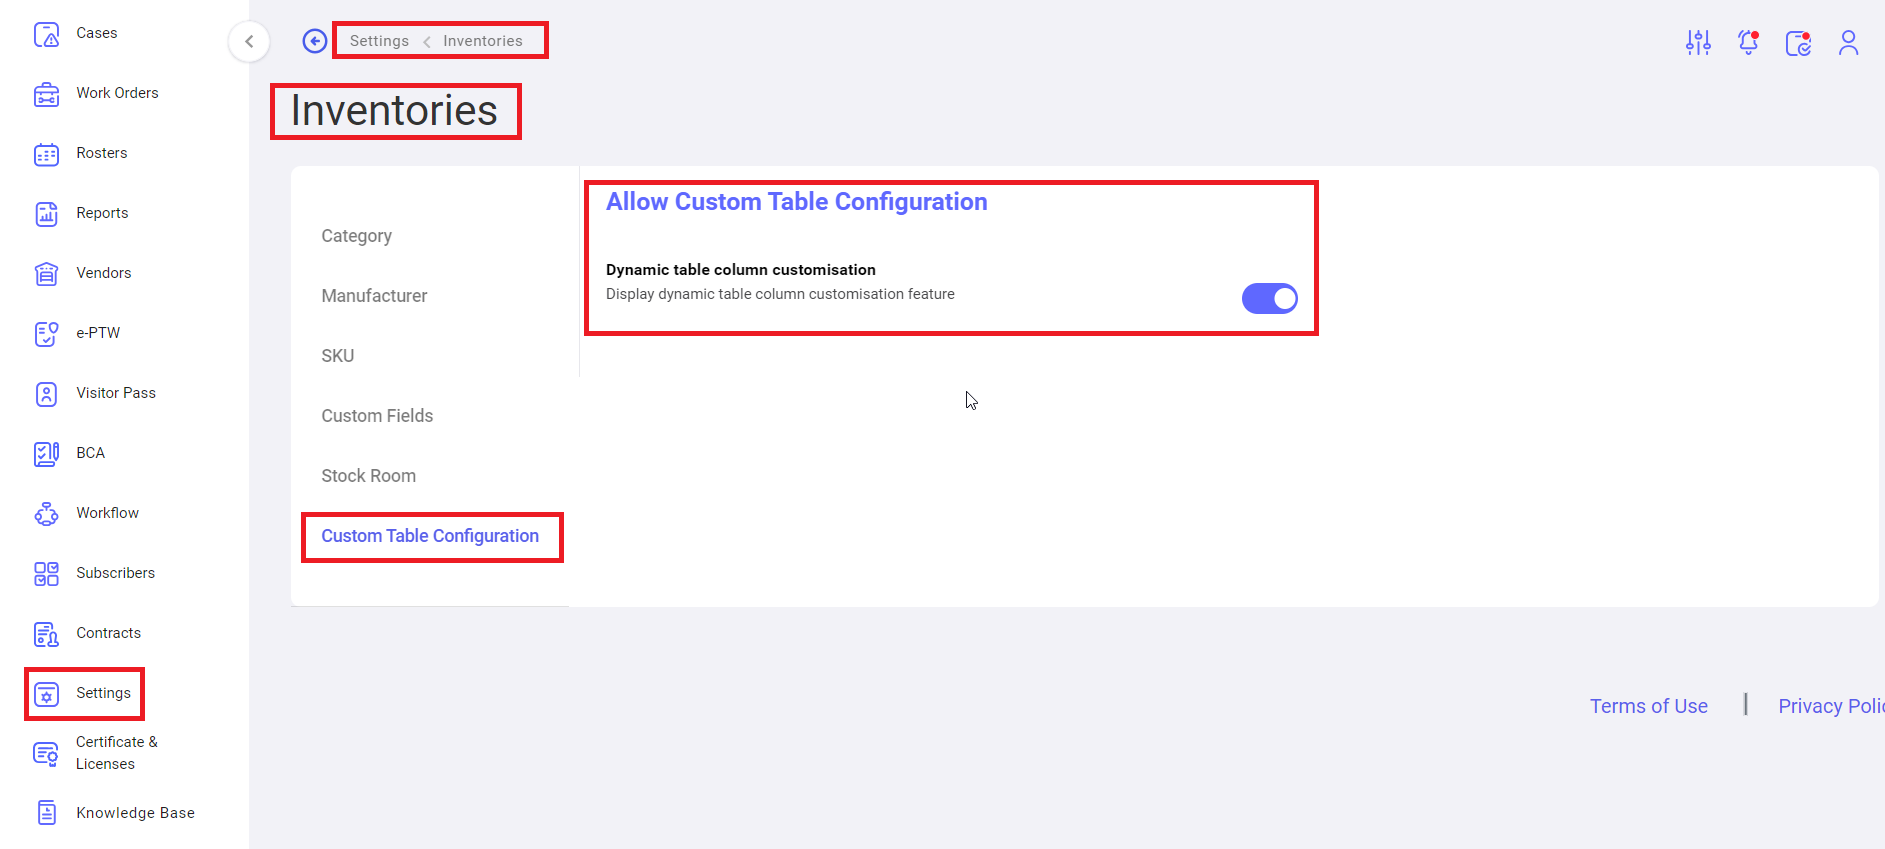
vi. Settings -> Inventories -> Custom Table Configuration
Here user can enable/disable the “Display dynamic table column configuration feature”.
No Comments