2. Pre-requisites
Location Config:
Configure roles by navigating to Settings >> My Organization. Location configuration includes region, section, floor and room.
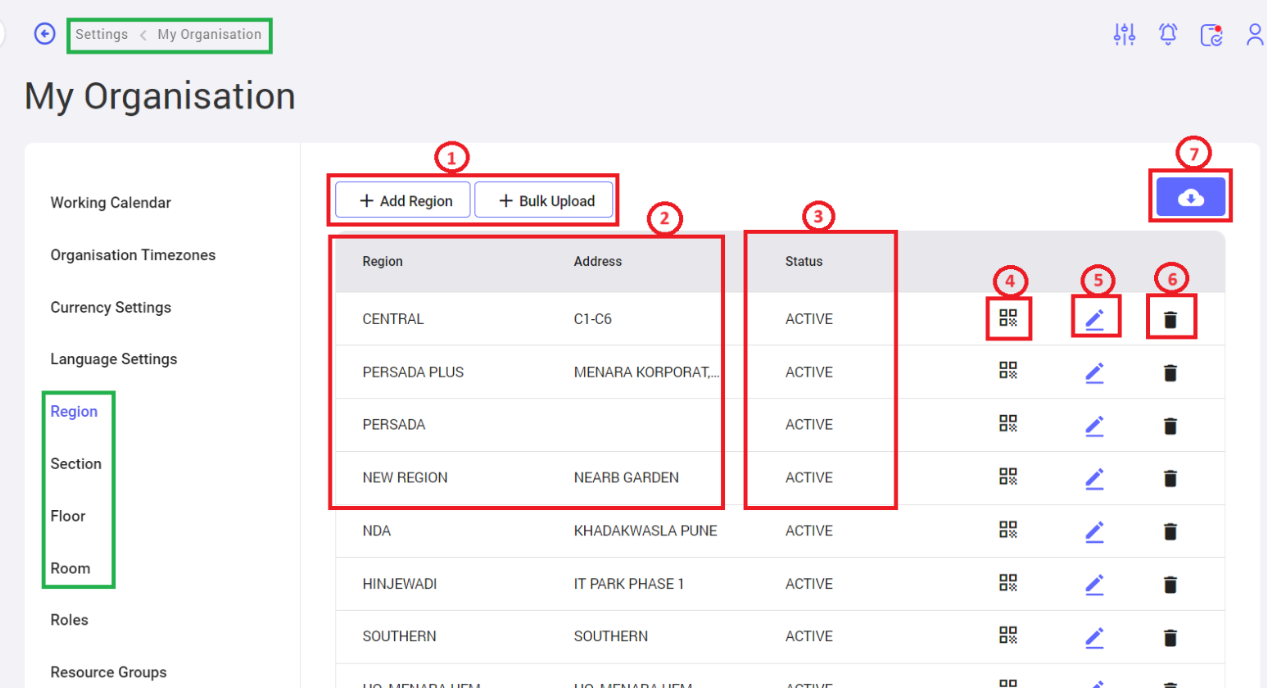
- Add Region & Bulk Upload: These options are used to add individual regions or add regions in bulk.
- List View: To display list of regions configured.
- Status: To describe the status of the region. Whether active or inactive.
- QR Code Icon: To view the QR code.
- Edit: To edit specific region.
- Delete: To delete specific region.
- Download Icon: To download QR code list with or without image:
Resource Group Config:
Configure Resource Group by navigating to Settings >> My Organization >> Resource Groups.
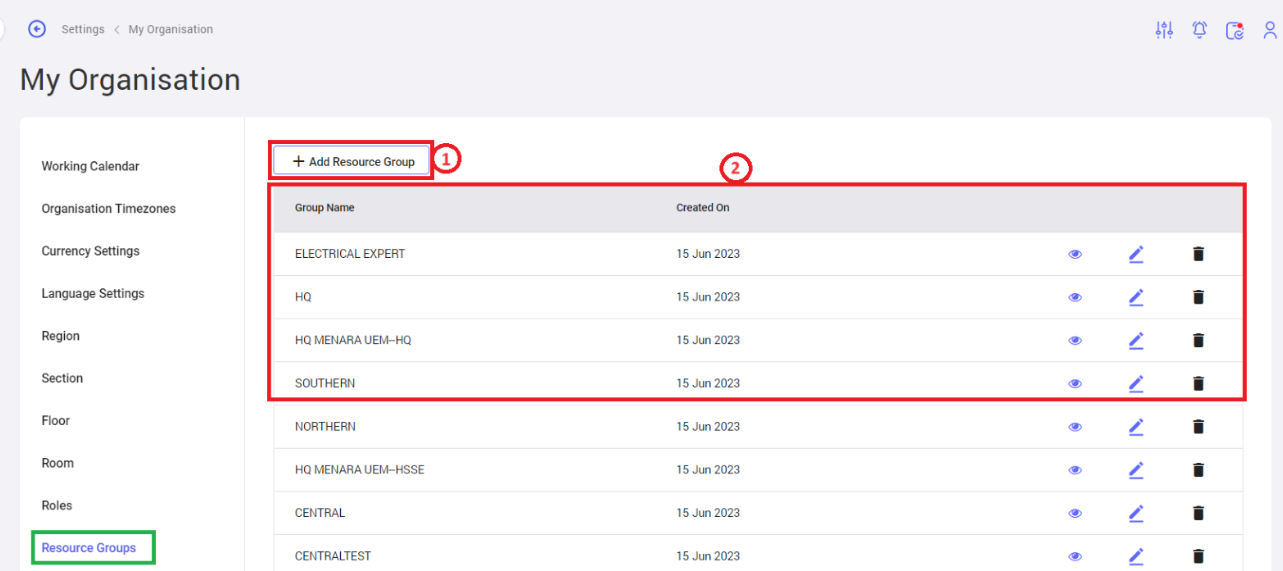
- Add Resource Group: Create a Resources group with location & Agent skill sets parameters. Tag this Resource groups to Agents, so that based on the location that the coordinator selects during WP initiation, Agent's list will auto-populate in the drop-down.
- List View: List of Resource groups displayed in the dynamic table with creation date, view icon (to view the details), edit icon (to edit), delete icon (to delete).
Role Config:
Configure roles by navigating to Settings >> My Organization.
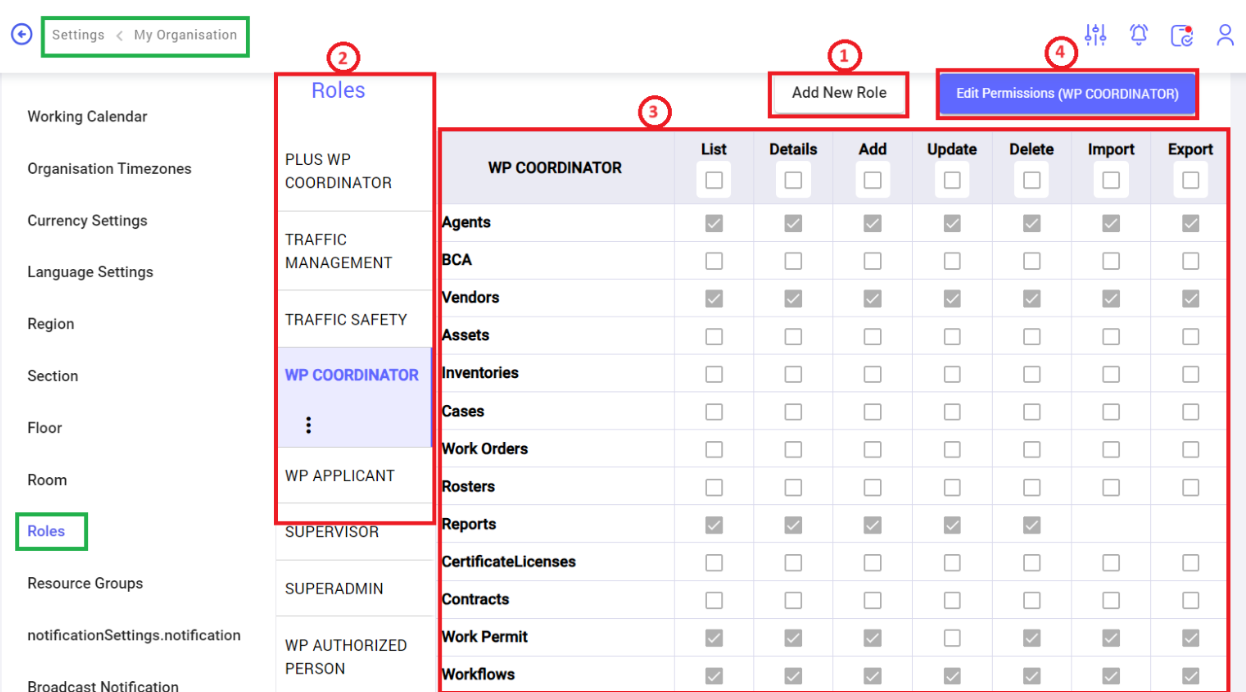
- Add New Role: To add a new role, click on to this option. Users can define the role name they need & select the role type for that role.
- Roles: Display the list of roles configured.
- Modules Access: To provide access to specific modules to perform specific actions. Here Permissions can be provided for list view, details view, add, update, delete, import and export.
- Edit Permissions: Edit Permissions enables edit functionality on permission access portion. It also provides save & cancel buttons to save changes or cancel changes.
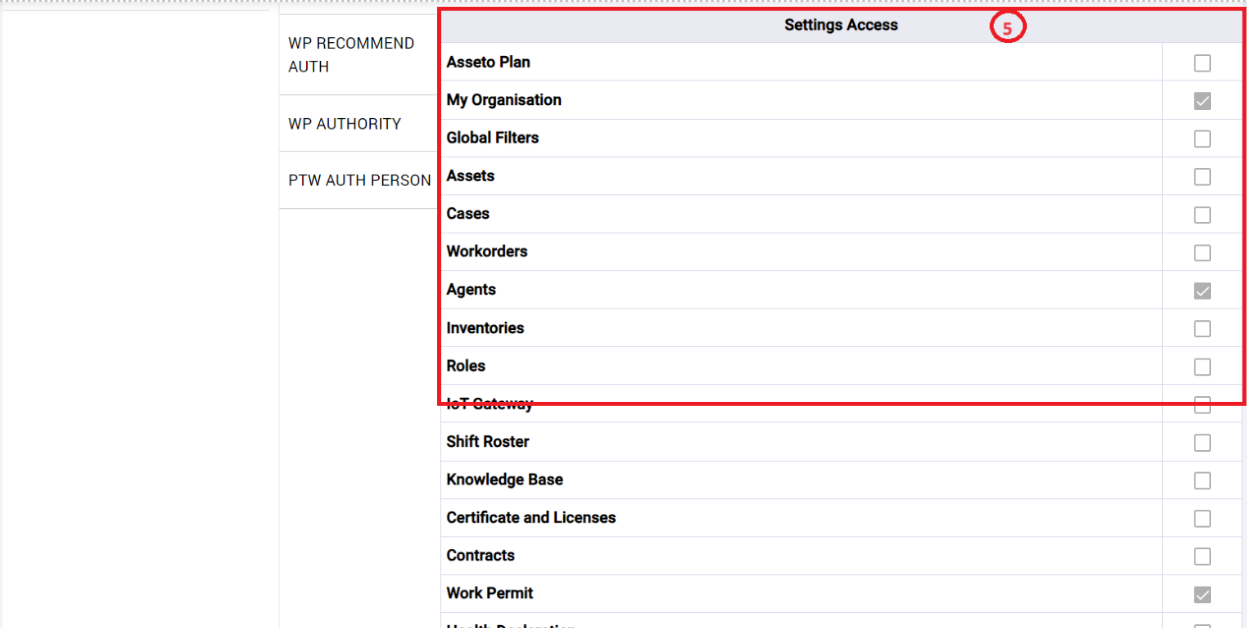
- Settings Access: To provide settings access to the specific role.
Scope Config:
Configure scope by navigating to Settings >> Work Permit.
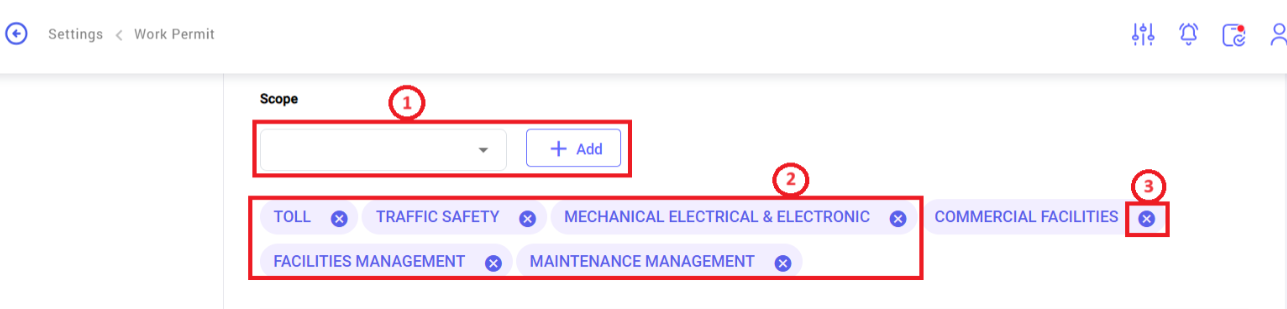
- Add Scope: Scopes will be listed in the drop-down menu. Scope drop-down shows the list of skill sets configured in settings. Users can select the scope & click on Add option.
- Scopes: Scopes added by Users are shown below the Scope field.
- Cancel Icon: To remove the specific scope.
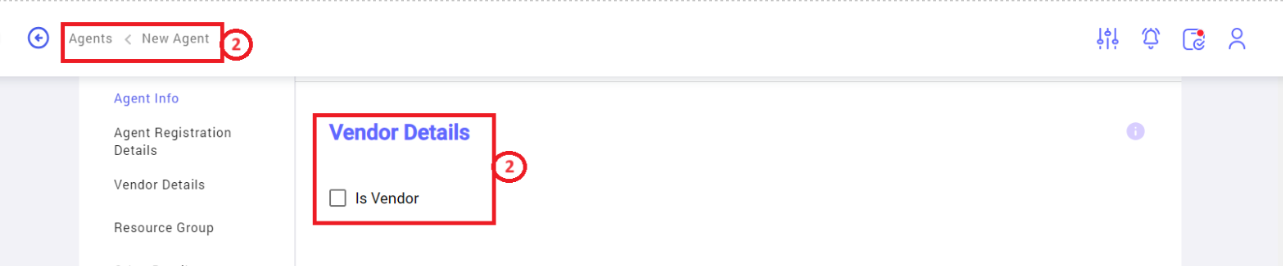
Vendor Config:
Configure Vendors from 2 sources. The details are given below.
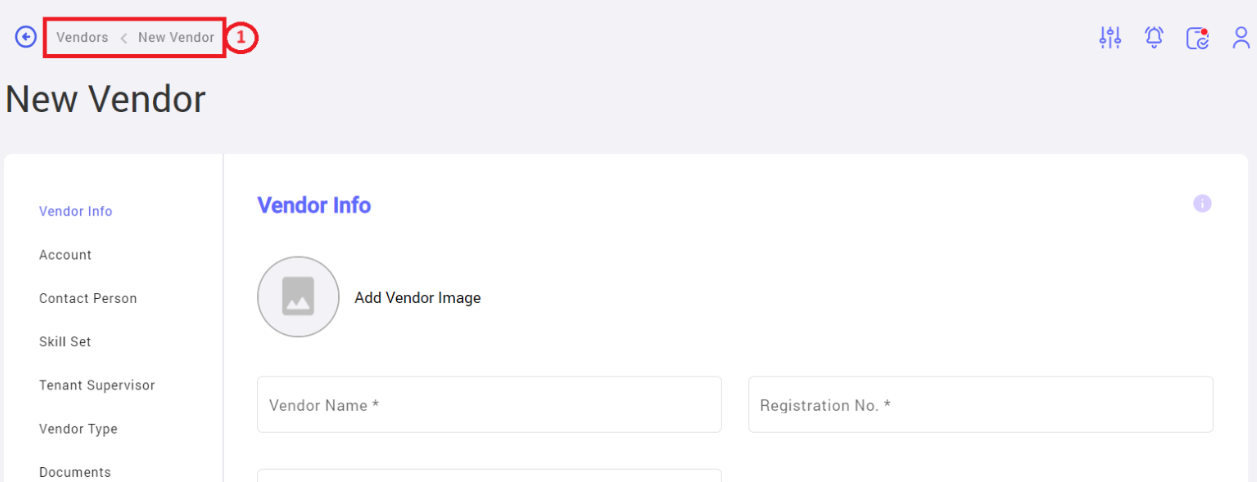
- Vendor Module: Vendor can be configured by navigating to the module, Vendors >> New Vendor. Key in all the required inputs & save.
- Agents Module: Vendor also can be configured from Agent module. Select the “Is Vendor” check box from Agent creation page. The Agent is an application is also considered as a Vendor.
Workflow Config:
Configure Workflows related to WP / PTW triggers by navigating to Workflow >> New Workflow.
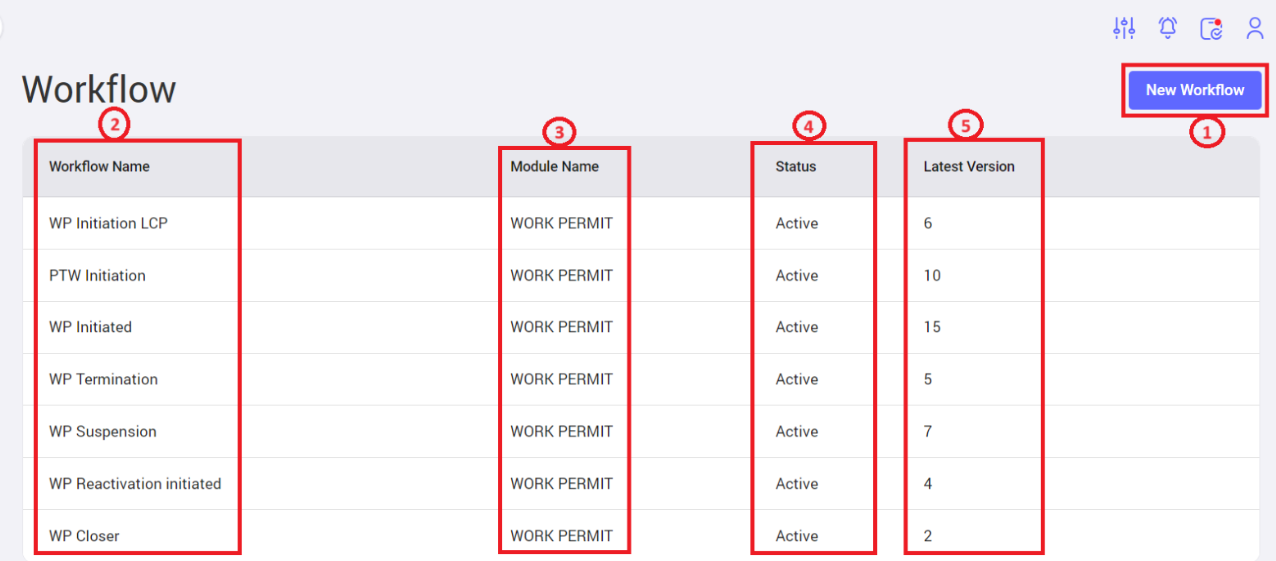
- New Workflow: To create a new Workflow.
- Workflow Name: To display the name of the workflow the User defined.
- Module Name: The module selected by the User to build the Workflow. Select Work Permit to create workflow.
- Status: To describe the status of the Workflow. Whether active or inactive. The Workflow will trigger only if it is in an active status.
- Latest Version: To display the Version number of the Workflow. Latest version of the Workflow will trigger on User action.
PTW Category Config:
PTW Category can be configured by navigating to Settings >> Work Permit >> Work Permit Option.
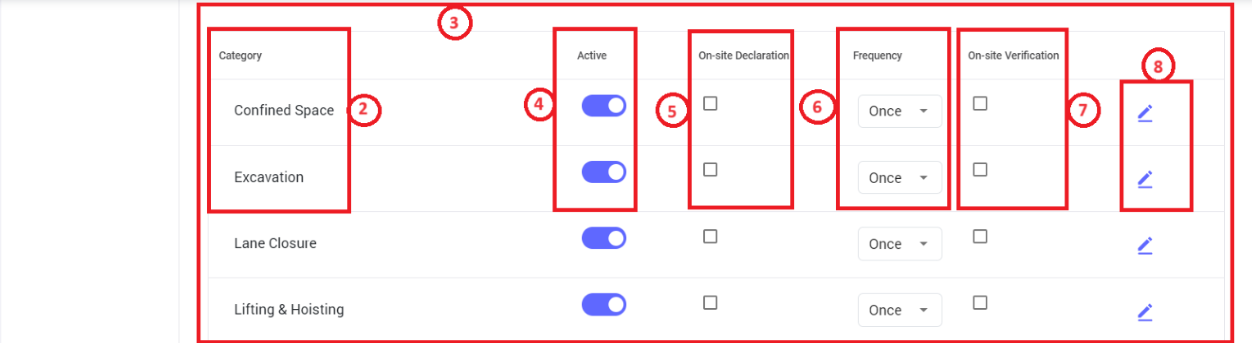
- Add New: To create a new category.
- Category: To view the Categories configured.
- List View: To display the list of categories configured in settings with related information.
- Status: Toggles describe the status of the category. Active & Inactive are the statuses available.
- On Site Declaration: To describe on-site declaration for specific PTW category Required or not.
- Frequency: To view the frequency for specific category type. Once & daily are the current options available.
- On-site Verification: To describe on-site verification for specific PTW category Required or not.
- Edit Icon: To edit the specific Category configuration.
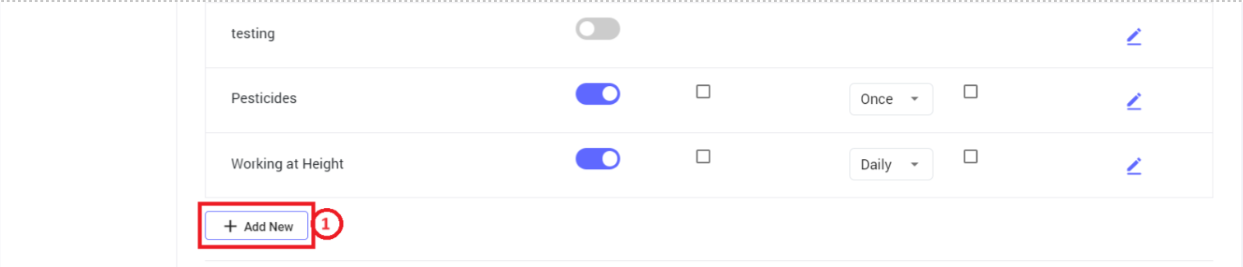
Support Document List Config:
Support Document List can be configured by navigating to Settings >> Work Permit >> Work Permit Option.
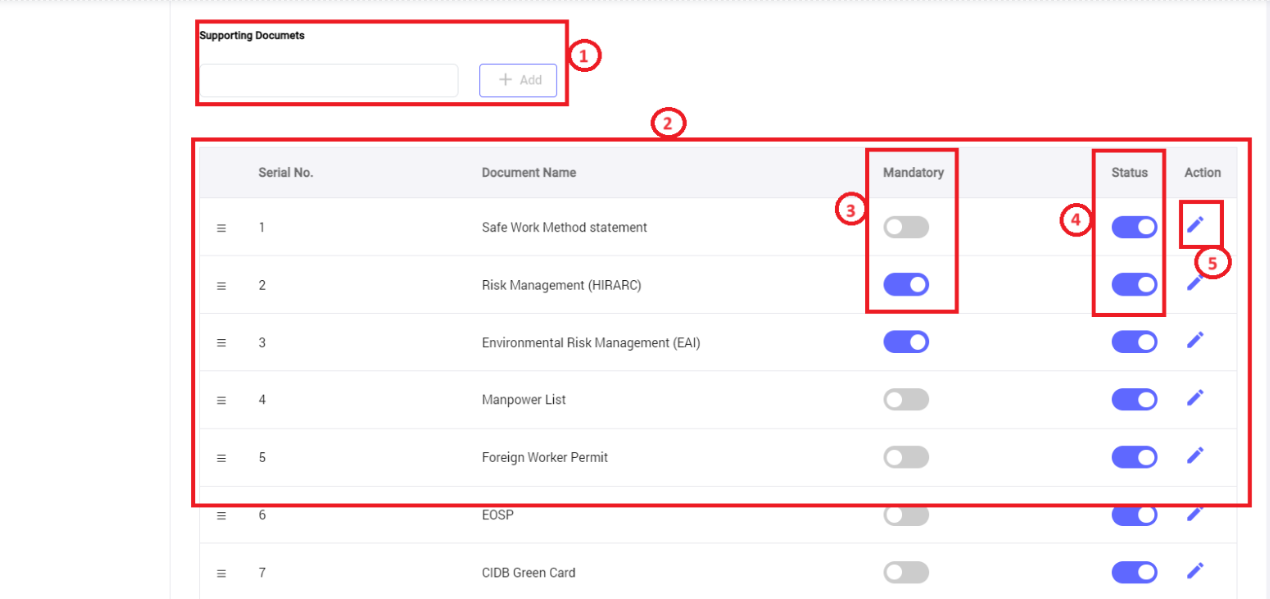
- Add Option: Used to add new Support document name.
- List View: To display all Support documents names in a dynamic table.
- Mandatory: To describe whether the specific support document upload is mandatory or optional.
- Status: If the toggle is enabled, the support document will be visible on Contractor form. If disabled, the specific document will not be displayed.
- Edit Icon: To edit specific support document details.
No Comments