12.2 Pre requisites to create New BCA Project
Need to configure Location, Components in settings, attach those components to assets while creating BCA project. Create agent with assessor role in agents module and onboard assets in assets module
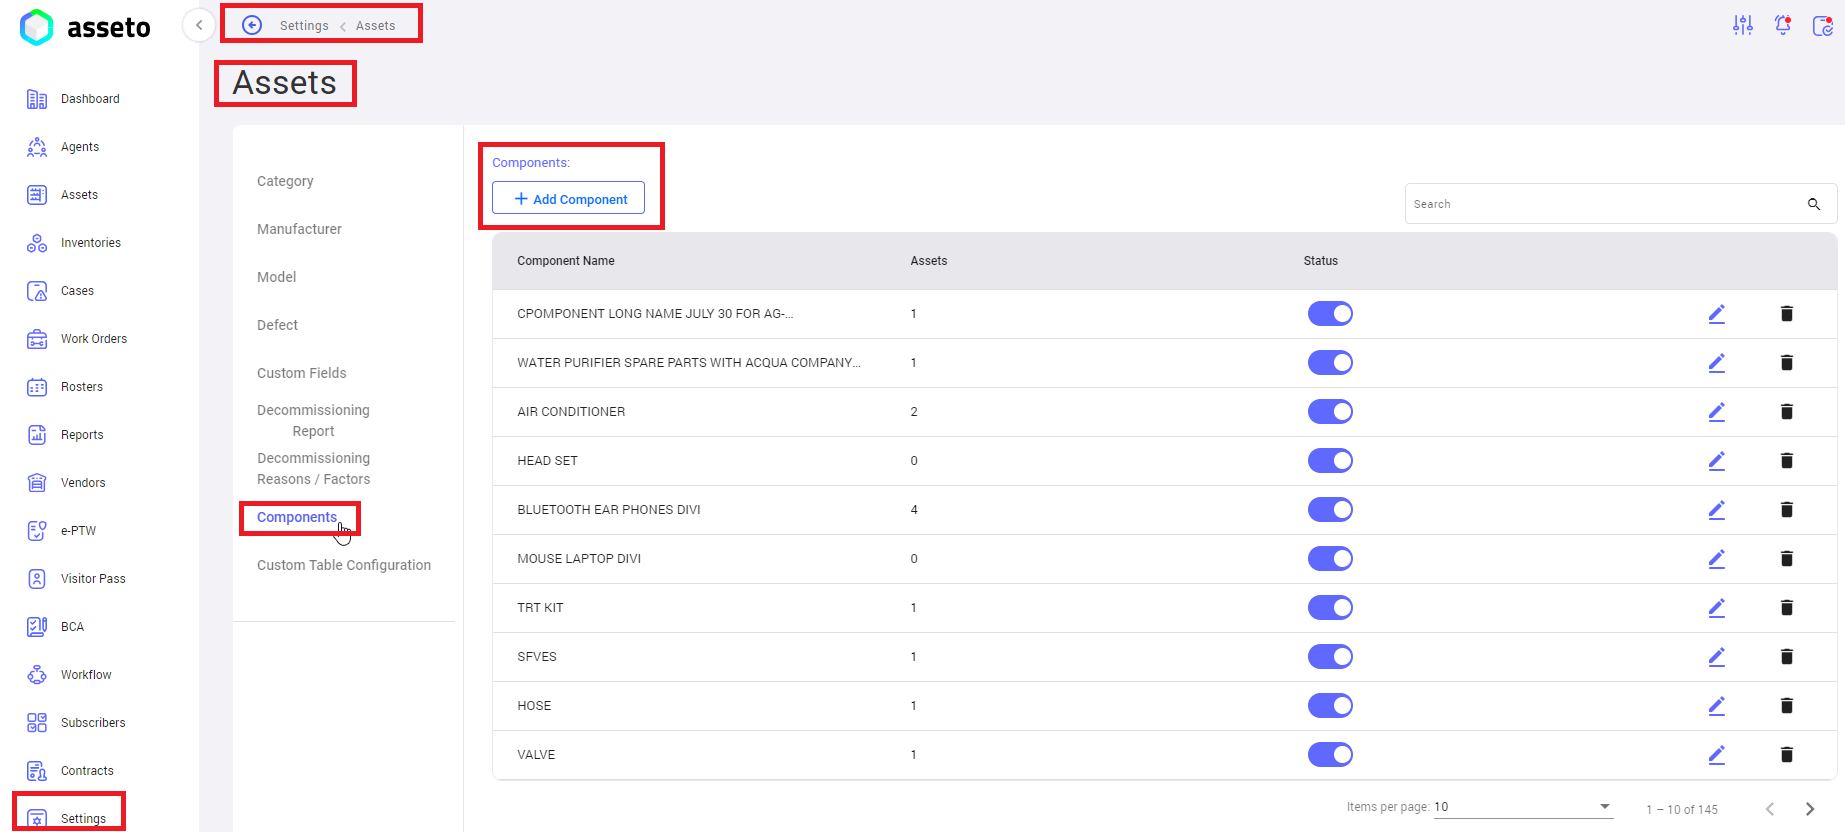
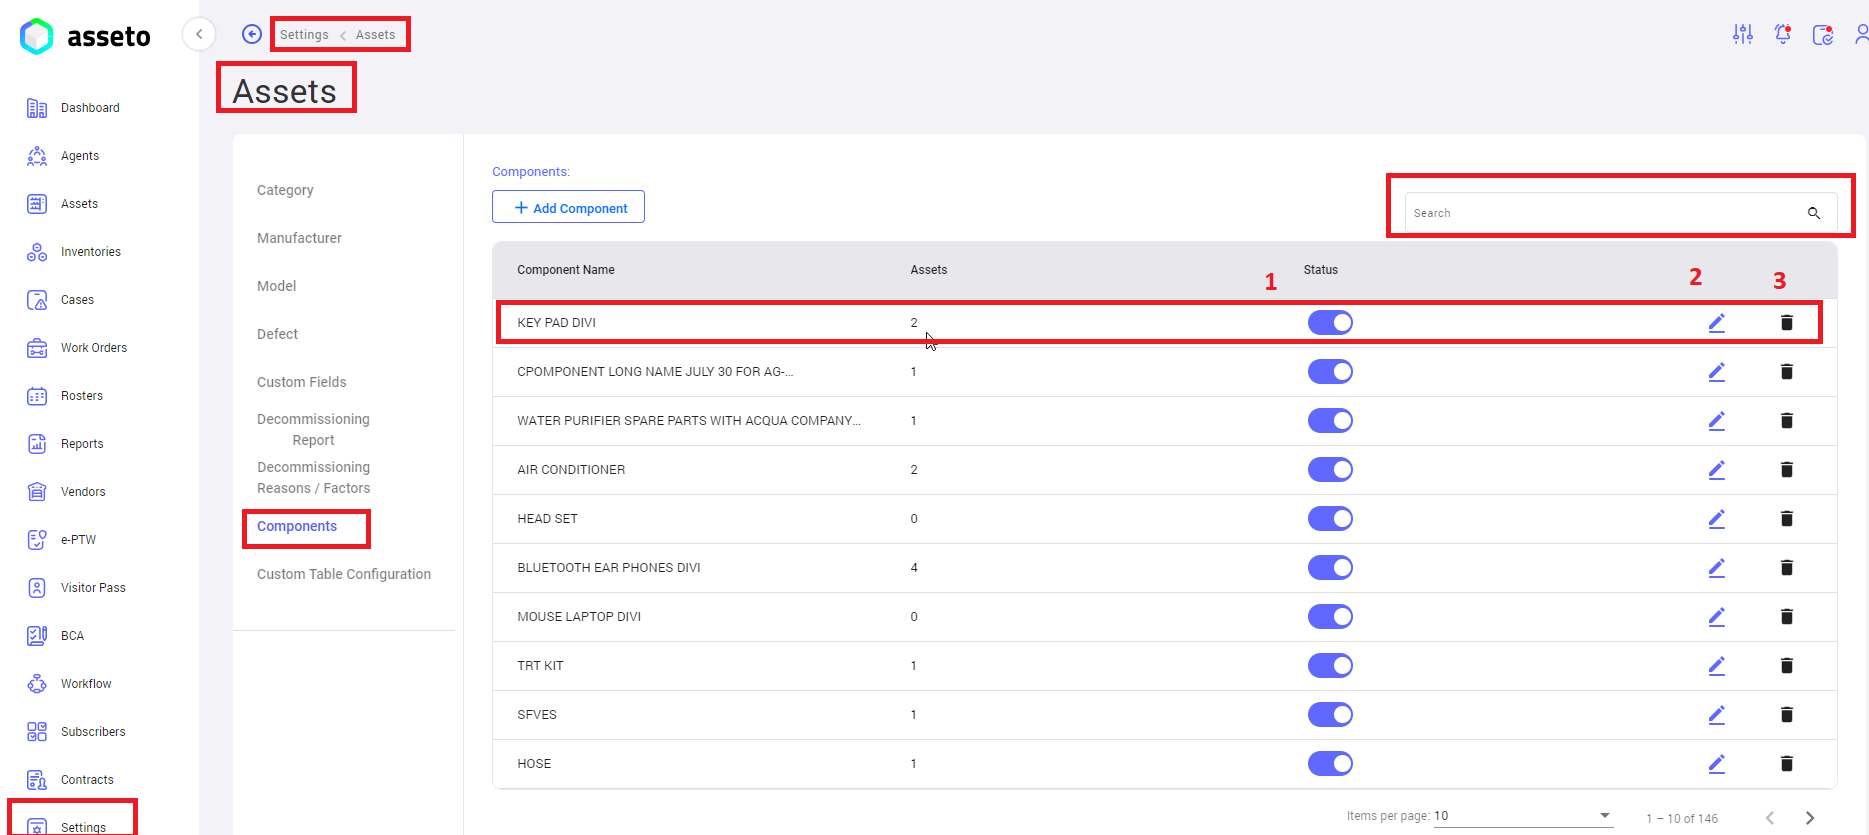
i. settings -> assets -> components
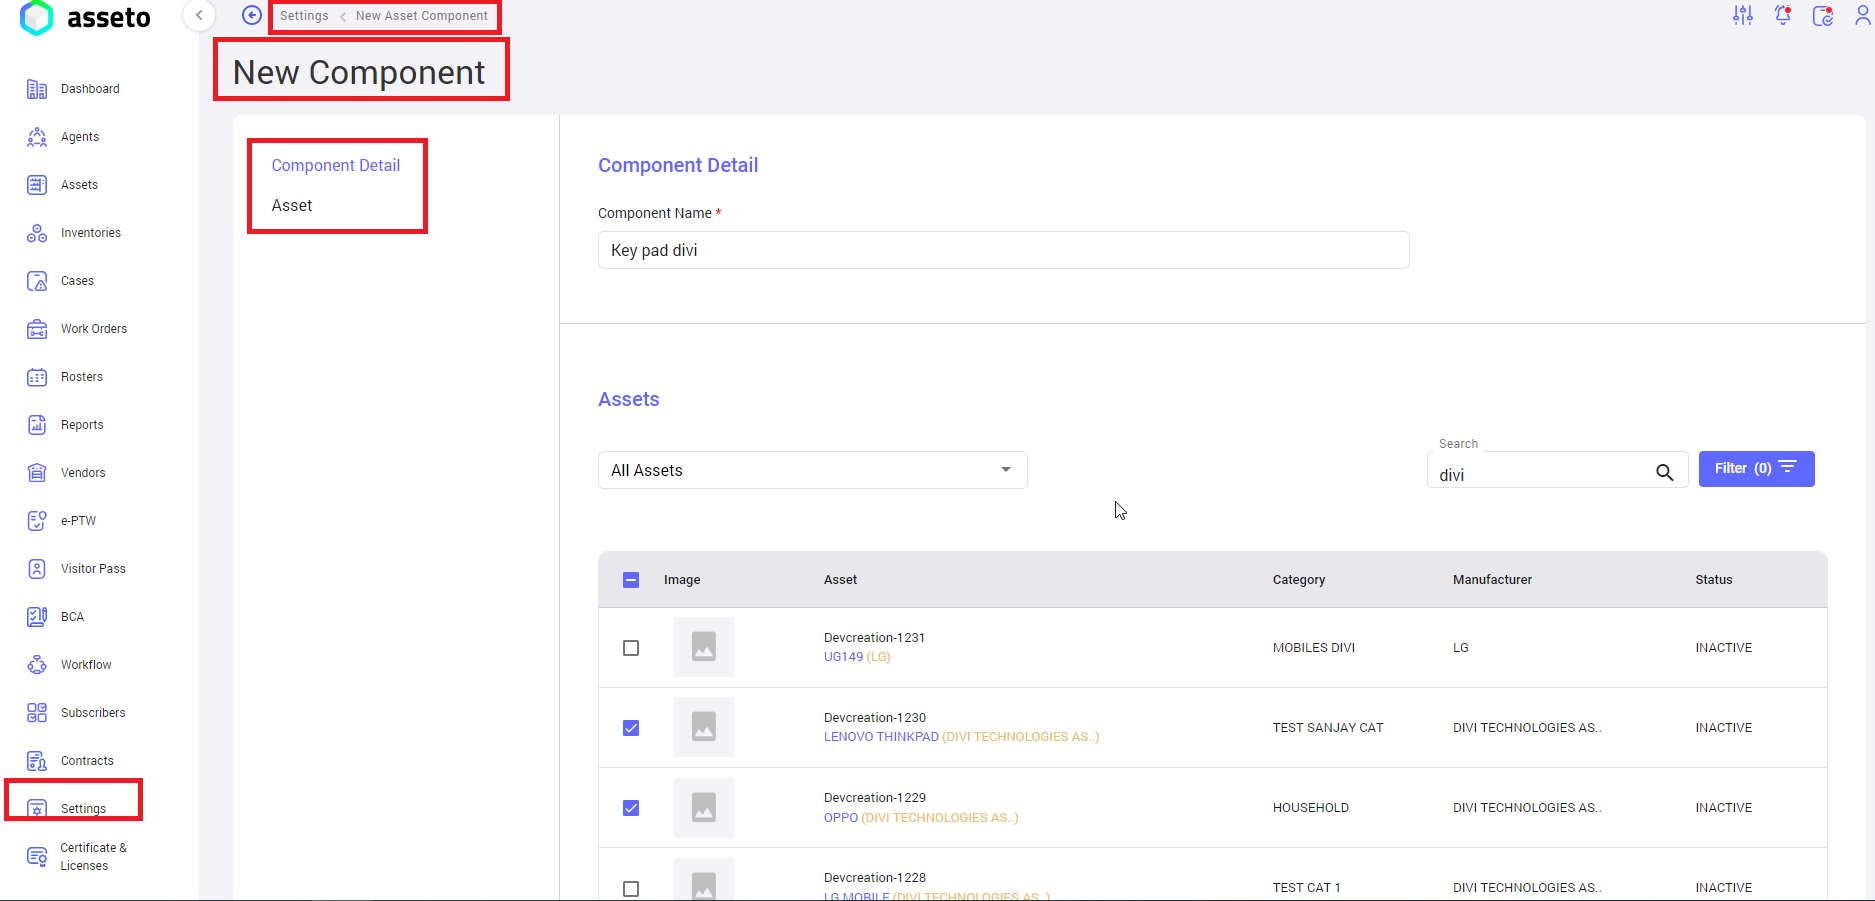
Click on the “Add component” button, to create a new component.
Provide component name and select assets.
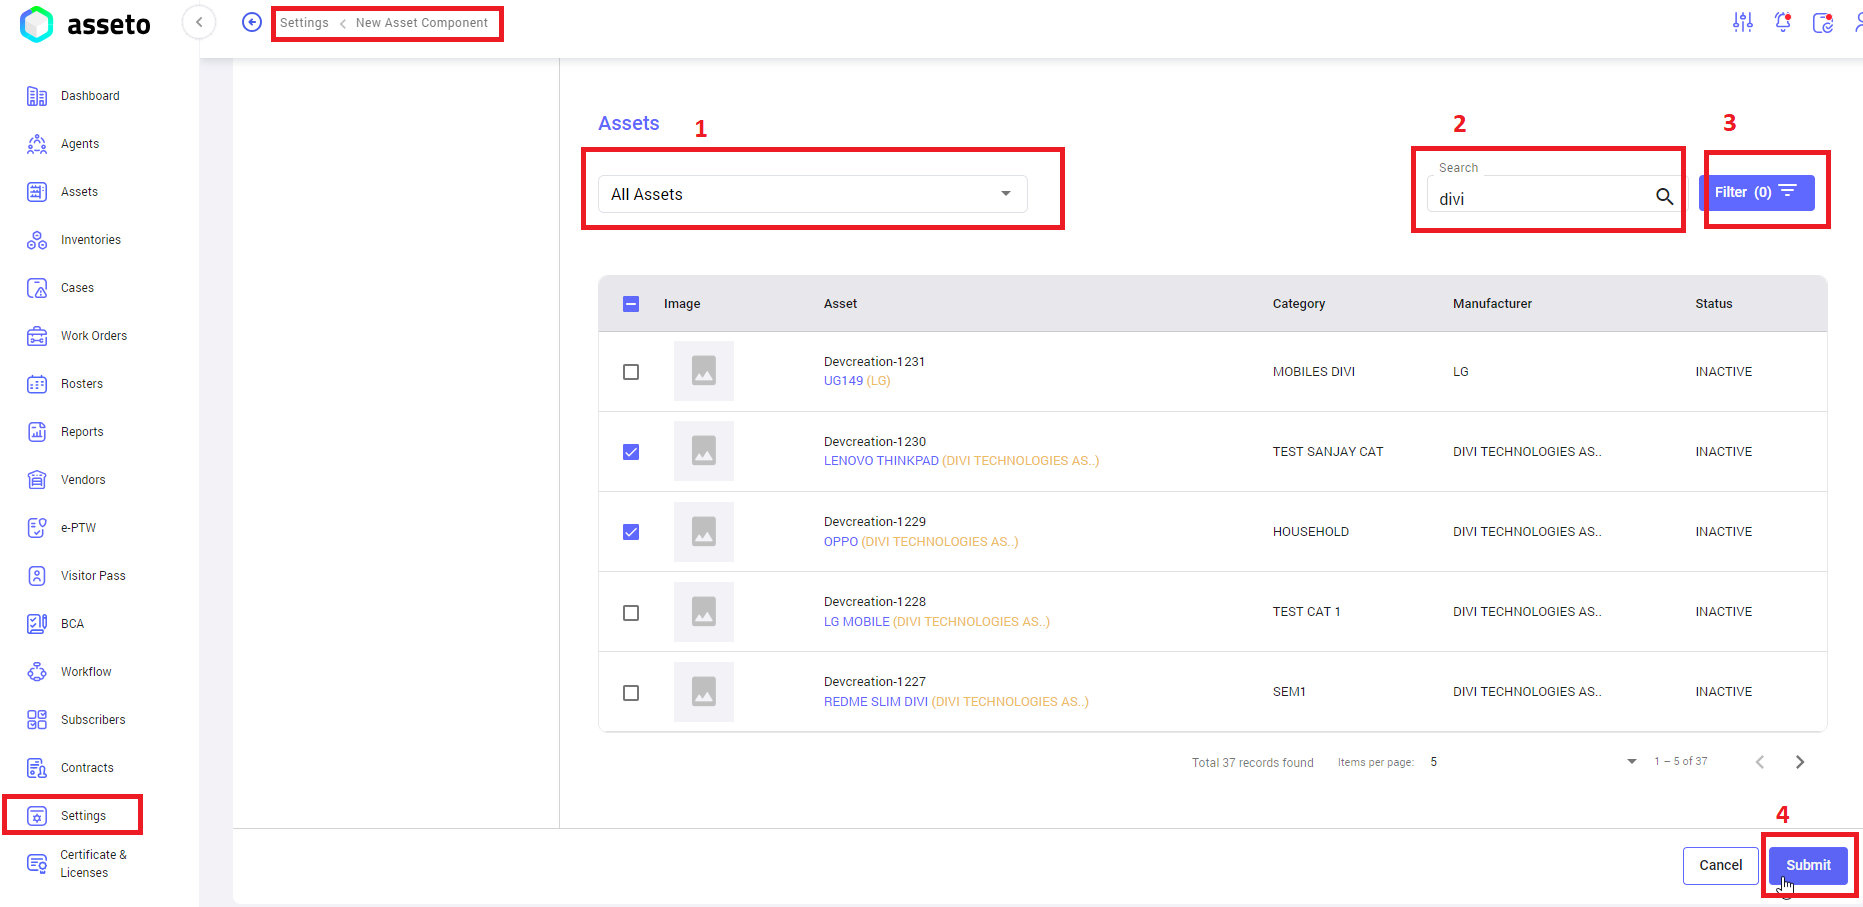
1. All assets: Dropdown to select assets.
2. Search: To search the filter with name.
3. Filter: To filter out the assets by asset category, manufacturer, model.
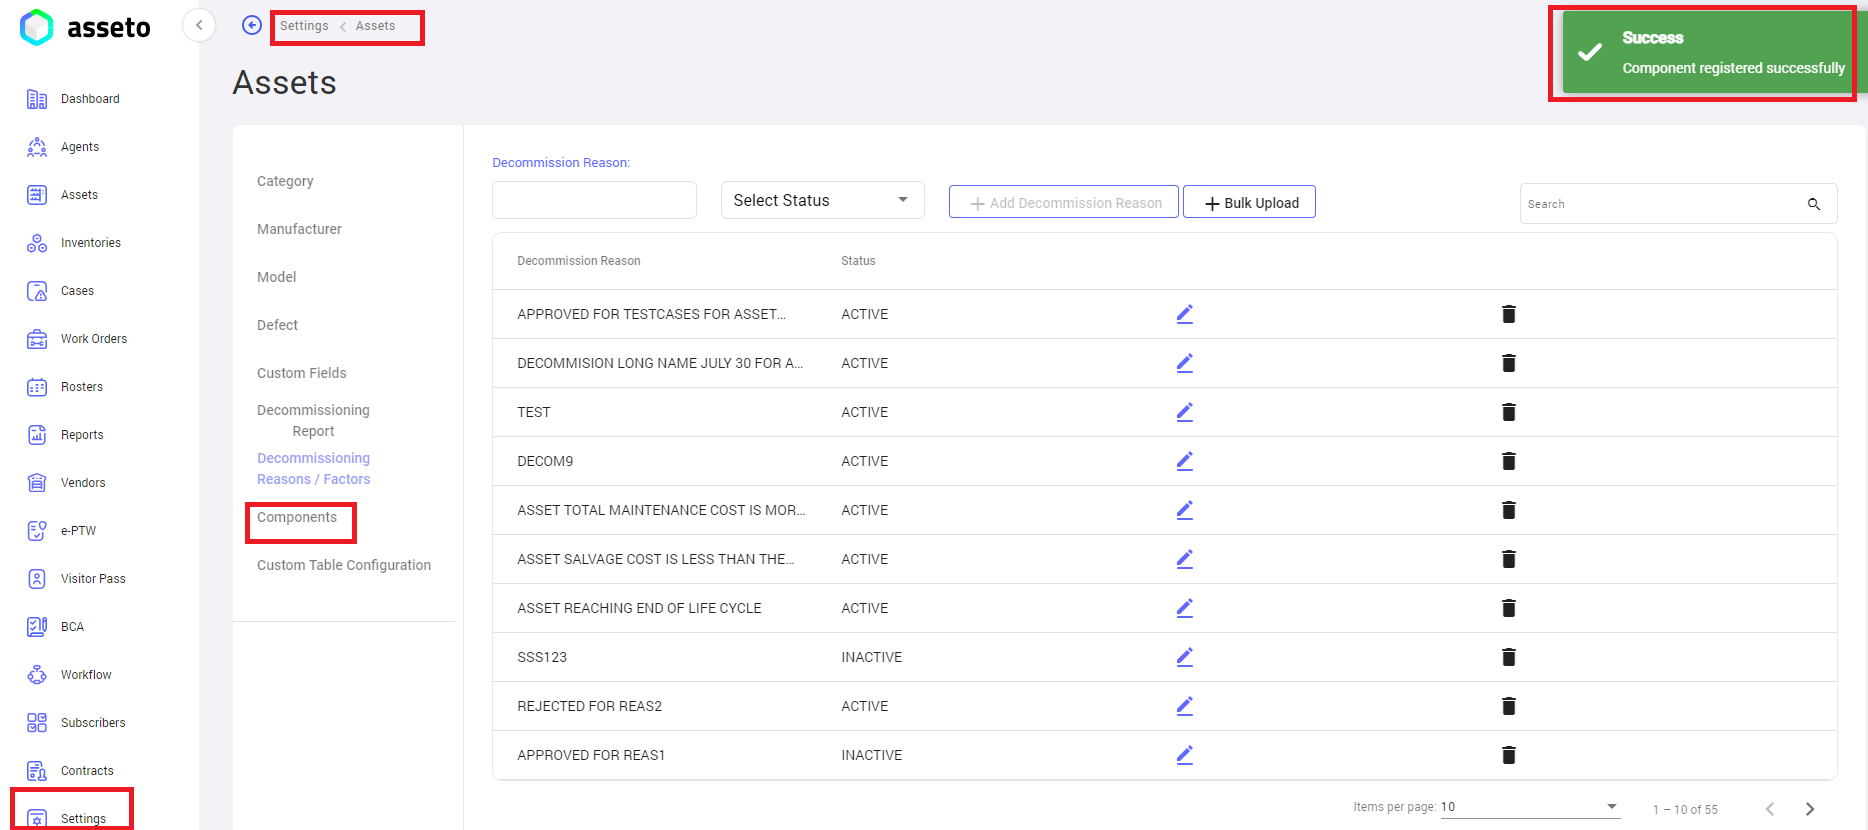
4. Submit: Click on the “submit” button, confirmation message “component registered successfully” will be display.
Added component will display in first of component list.
1. Status: By default, component status is active, user can change the status as active or inactive.
2. Edit: To edit/update component details.
3. Delete: To delete the component.
4. Search: To search the components with names.
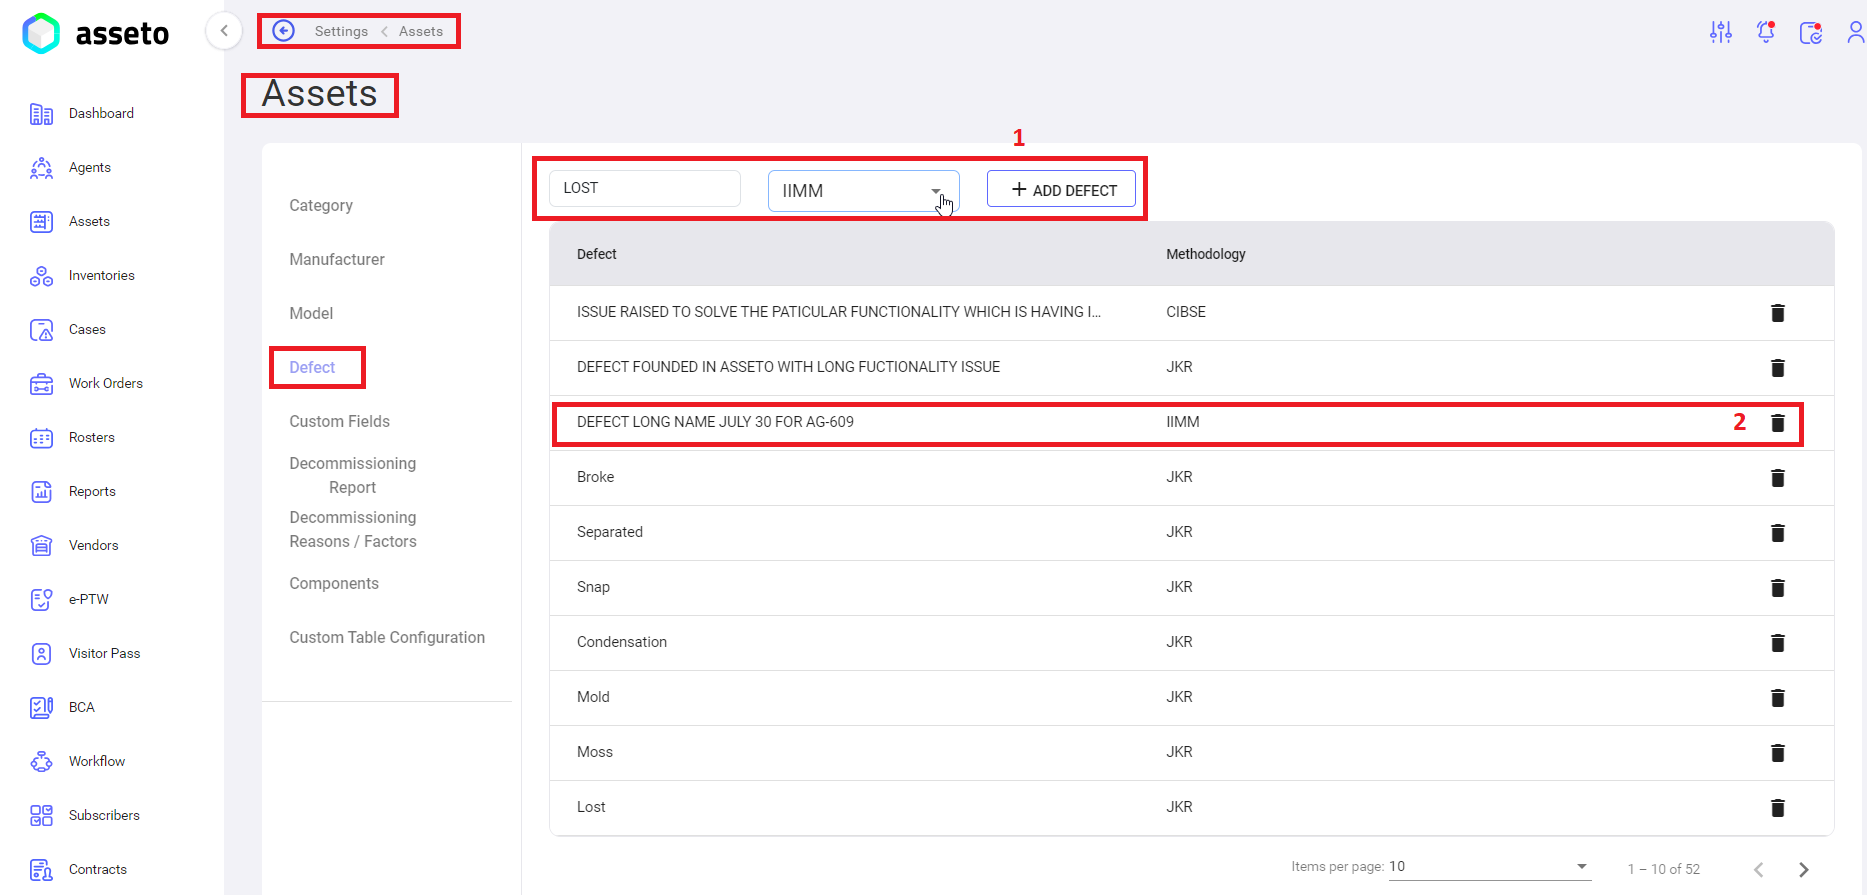
ii. Settings -> assets -> Defect
1. Add Defect: fill the defect name in the text box and select one methodology from dropdown then click on “Add Defect” button to save the defect. The saved defect will be displayed in the first row of the table.
2. Delete Defect: click on delete icon to delete the selected defect.
iii. Go to Settings open My Organization to Configure Location, Building, Room, Floor.
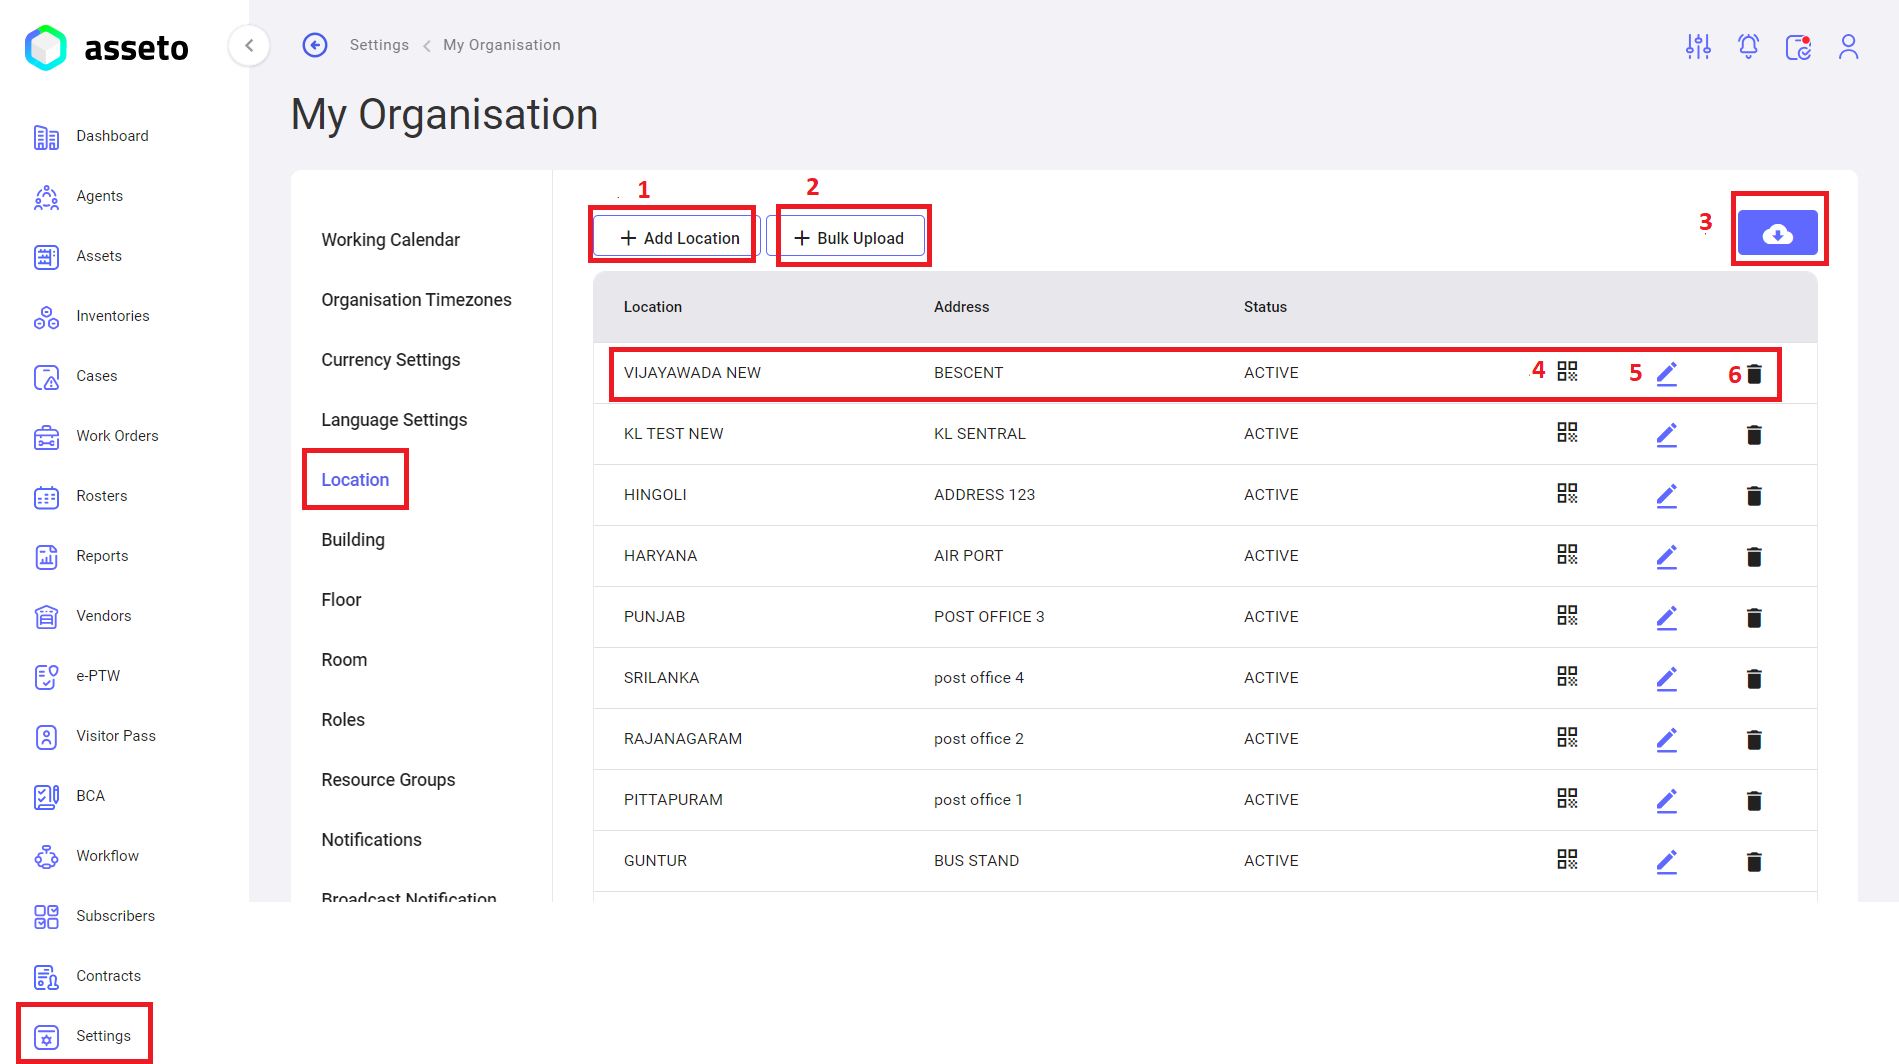
Settings -> My Organization -> Location:
1. Add Location: Click on the add location button to create individual location.
When you click on “add location” button following page will appear, fill the mandatory fields then only save button will be enabled. Click on the save button, your location details will be saved and displayed in the table first row.
2. Bulk Upload Location: Click on bulk upload button to create multiple locations at a time, download csv file and fill the data then upload.
3. Export button: To download QR list (locations), you can export as with image or without image.
4. QR: Click on QR icon and Scan QR to view that location
5. Edit Location: Here you edit already created locations by clicking on edit icon available in each row of Location list.
6. Delete Location: Here you delete already created locations by clicking on delete icon available in each row of Location list.
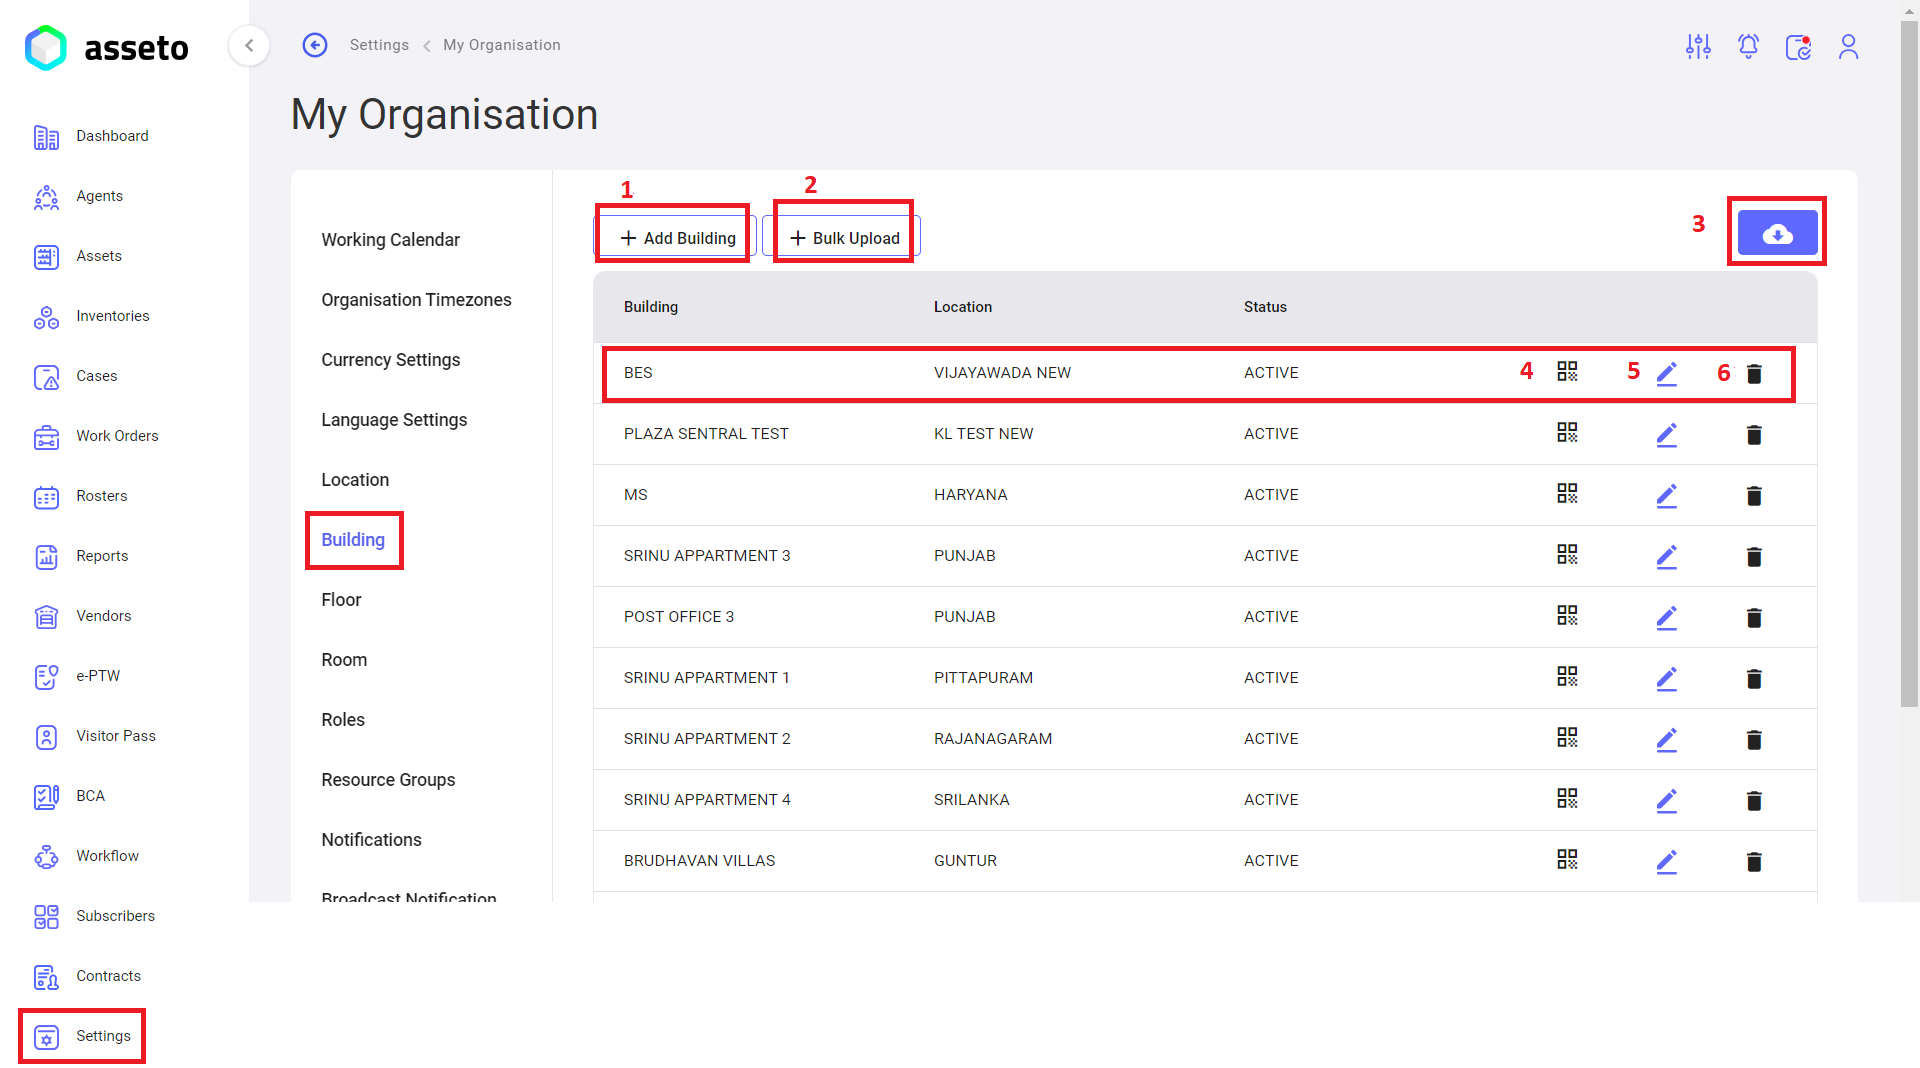
Settings -> My Organization -> Building:
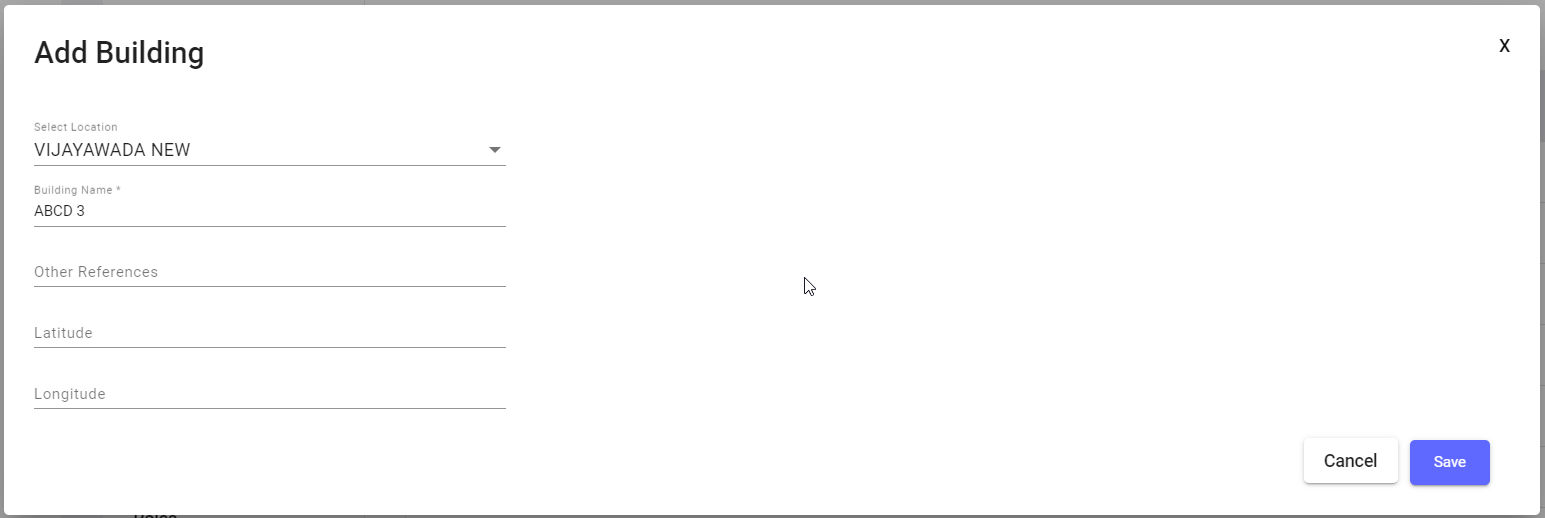
1. Add Building: Click on the add building button to create an individual building name.
When clicking on “add building” button following page will appear, fill the mandatory fields then only save button will be enabled. Click on the save button your building details will be saved and displayed in the table first row.
2. Bulk upload Building: Click on bulk upload button to create multiple buildings at a time, download csv file and fill the data then upload.
3. Export button: To download QR list (buildings), you can export as with image or without image.
4. QR: Click on QR icon and Scan QR to view that building name with location.
5. Edit Building: Here you can edit already created building names by clicking on edit icon available in each row of building list.
6. Delete Building: Here you can delete already created building names by clicking on delete icon available in each row of building list.
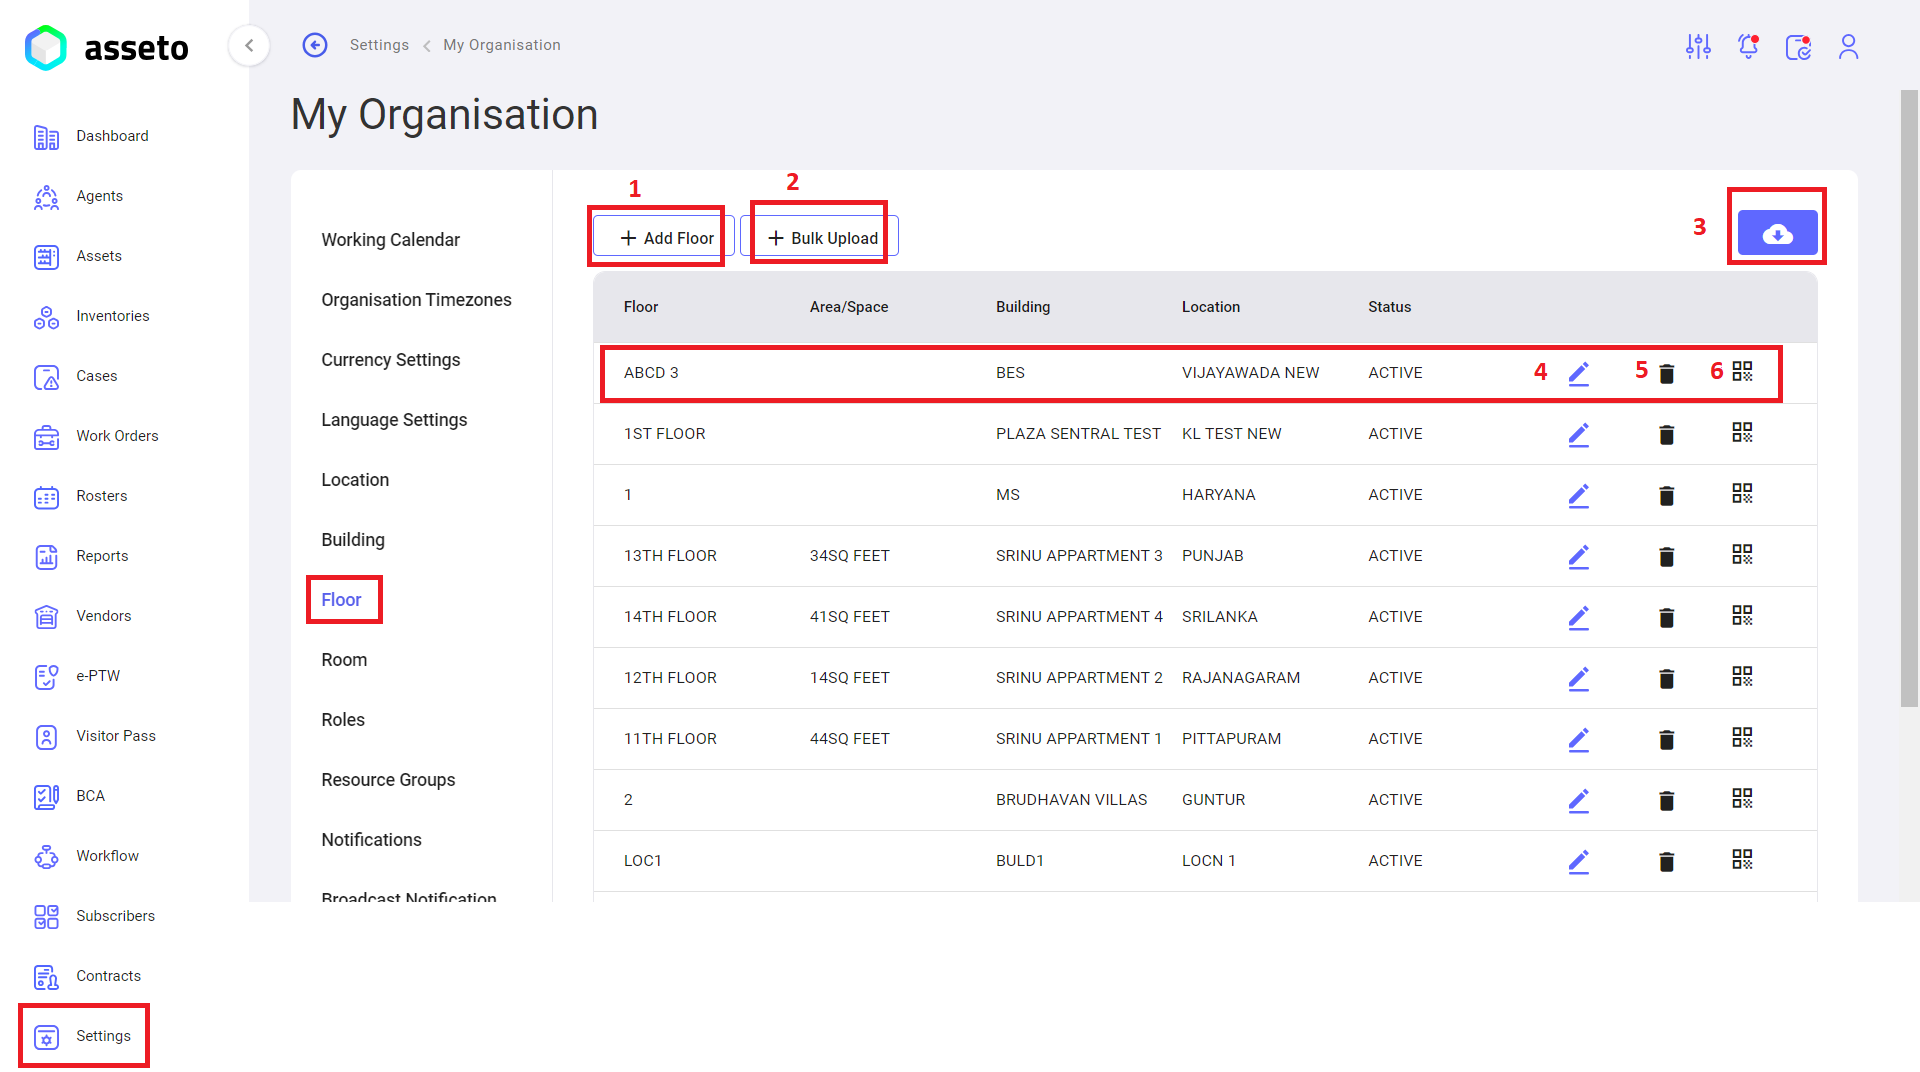
Settings -> My Organization -> Floor:
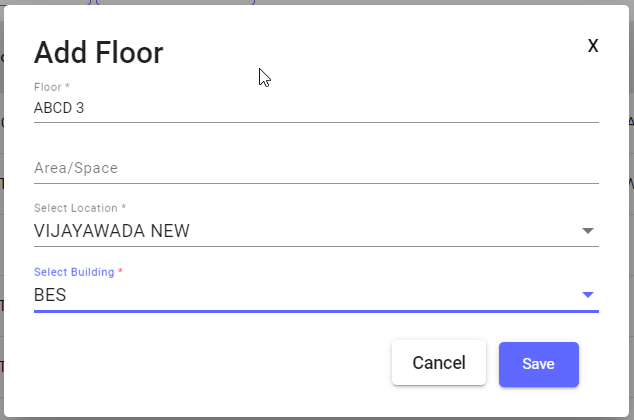
1. Add Floor: Click on add floor button to create individual floor name.
When click on “add floor” button following page will appear, fill the mandatory fields then only save button will be enabled. Click on the save button, your floor details will be saved and displayed in the table first row.
2. Bulk Upload Floor: Click on bulk upload button to create multiple floors at a time, download csv file and fill the data then upload.
3. Export button: To download QR list (floors), you can export as with image or without image.
4. Edit Floor: Here you edit already created floor names by clicking on edit icon available in each row of floor list.
5. Delete Floor: Here you delete already created floor names by clicking on delete icon available in each row of floor list.
6. QR: Click on QR icon and Scan QR to view that floor name with location.
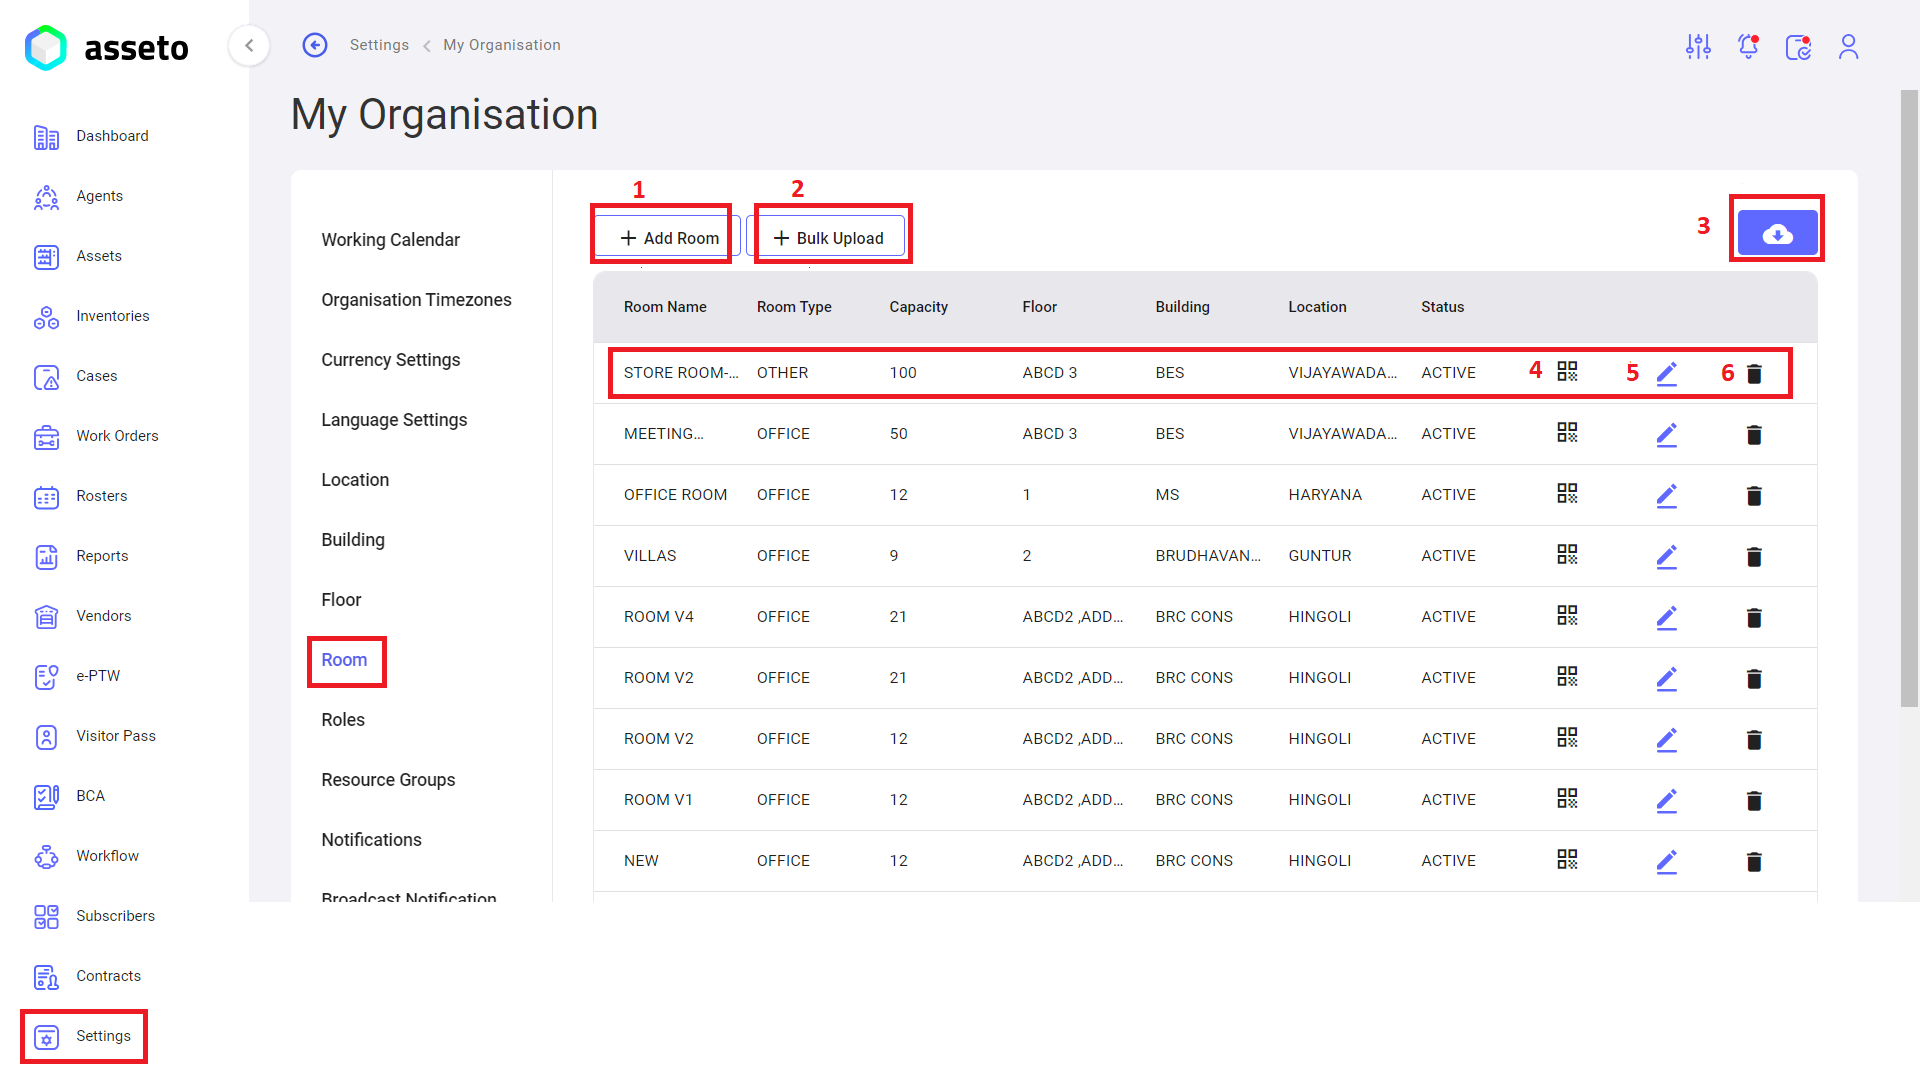
Settings -> My Organization -> Room:
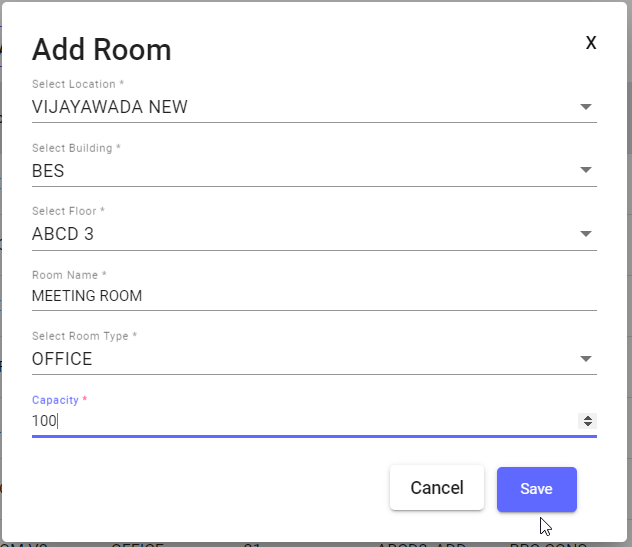
1. Add Room: Click on the add room button to create individual room name.
When click on “add room” button following page will appear, fill the mandatory fields then only save button will be enabled. Click on the save button your room details will be saved and displayed in the table first row.
2. Bulk Upload Room: Click on bulk upload button to create multiple rooms at a time, download csv file and fill the data then upload.
3. Export button: To download QR list (rooms), you can export as with image or without image.
4. QR: Scan QR to view that room with building and location.
5. Edit Room: Here you edit already created room names by clicking on edit icon available in each row of floor list.
6. Delete Room: Here you delete already created room names by clicking on delete icons available in each row of floor list.
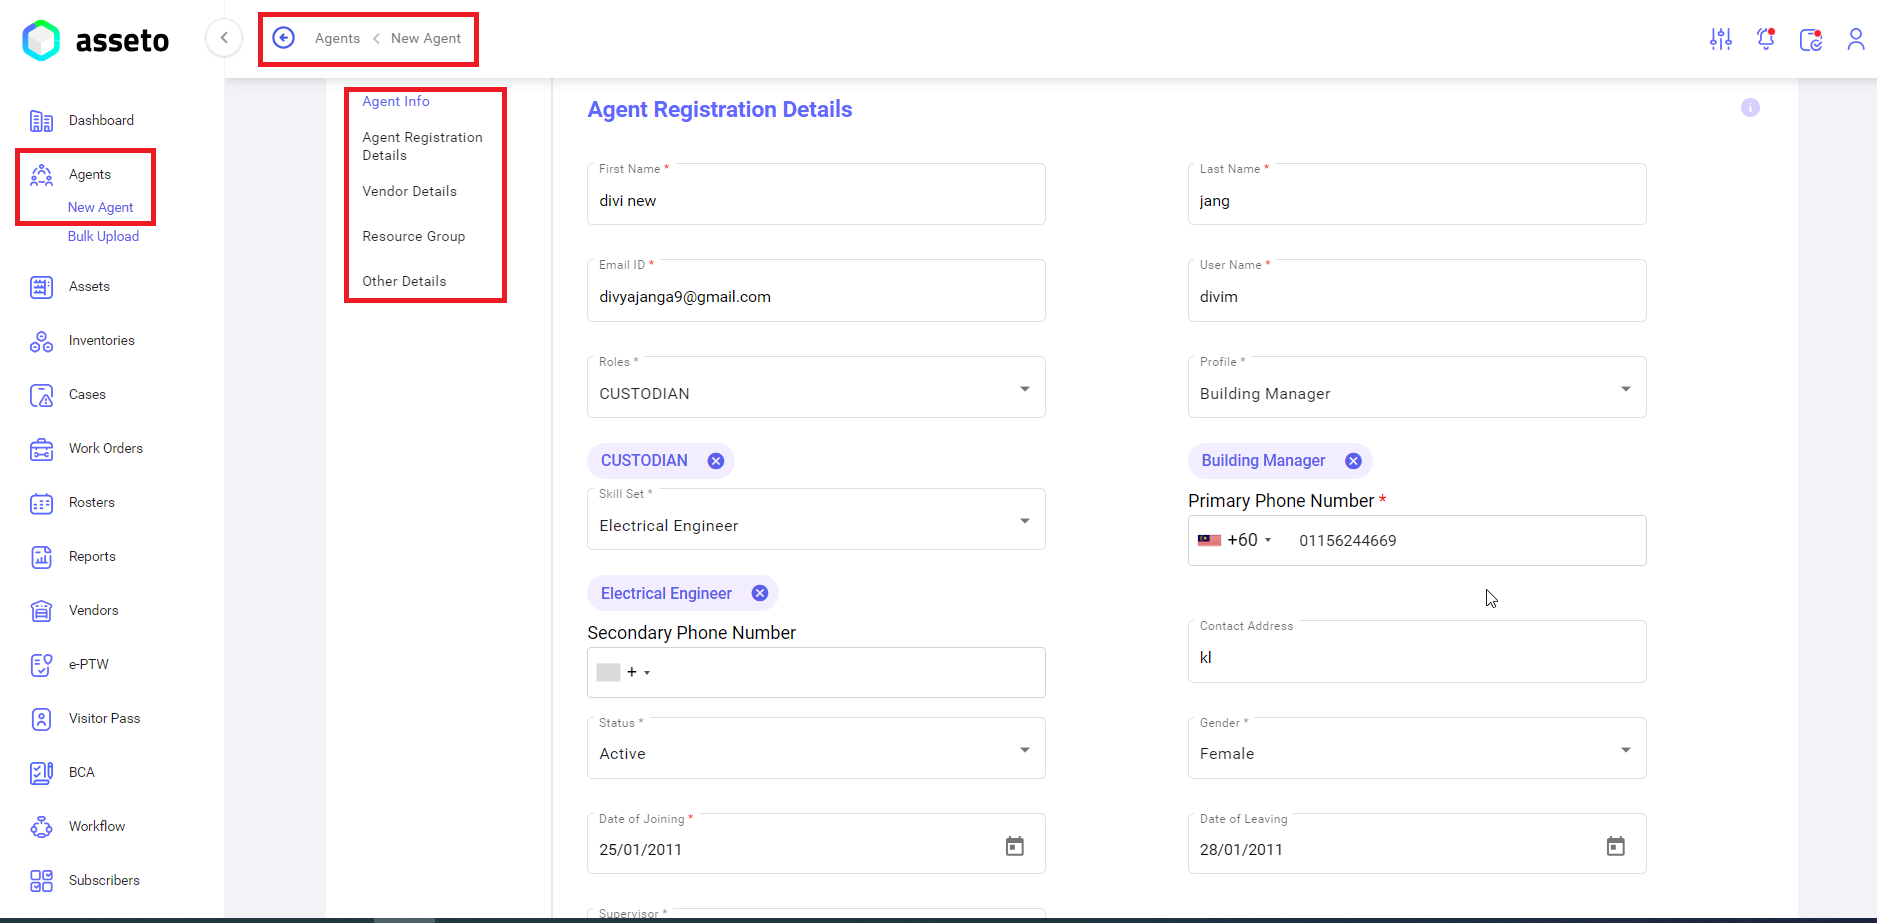
iii. Left Menu -> Agent -> New Agent:
To onboard agent with assessor role. For more details, please review Agents module user guide 2.2 Pre requisites to Onboard New Agent and 2.3 New Agent.
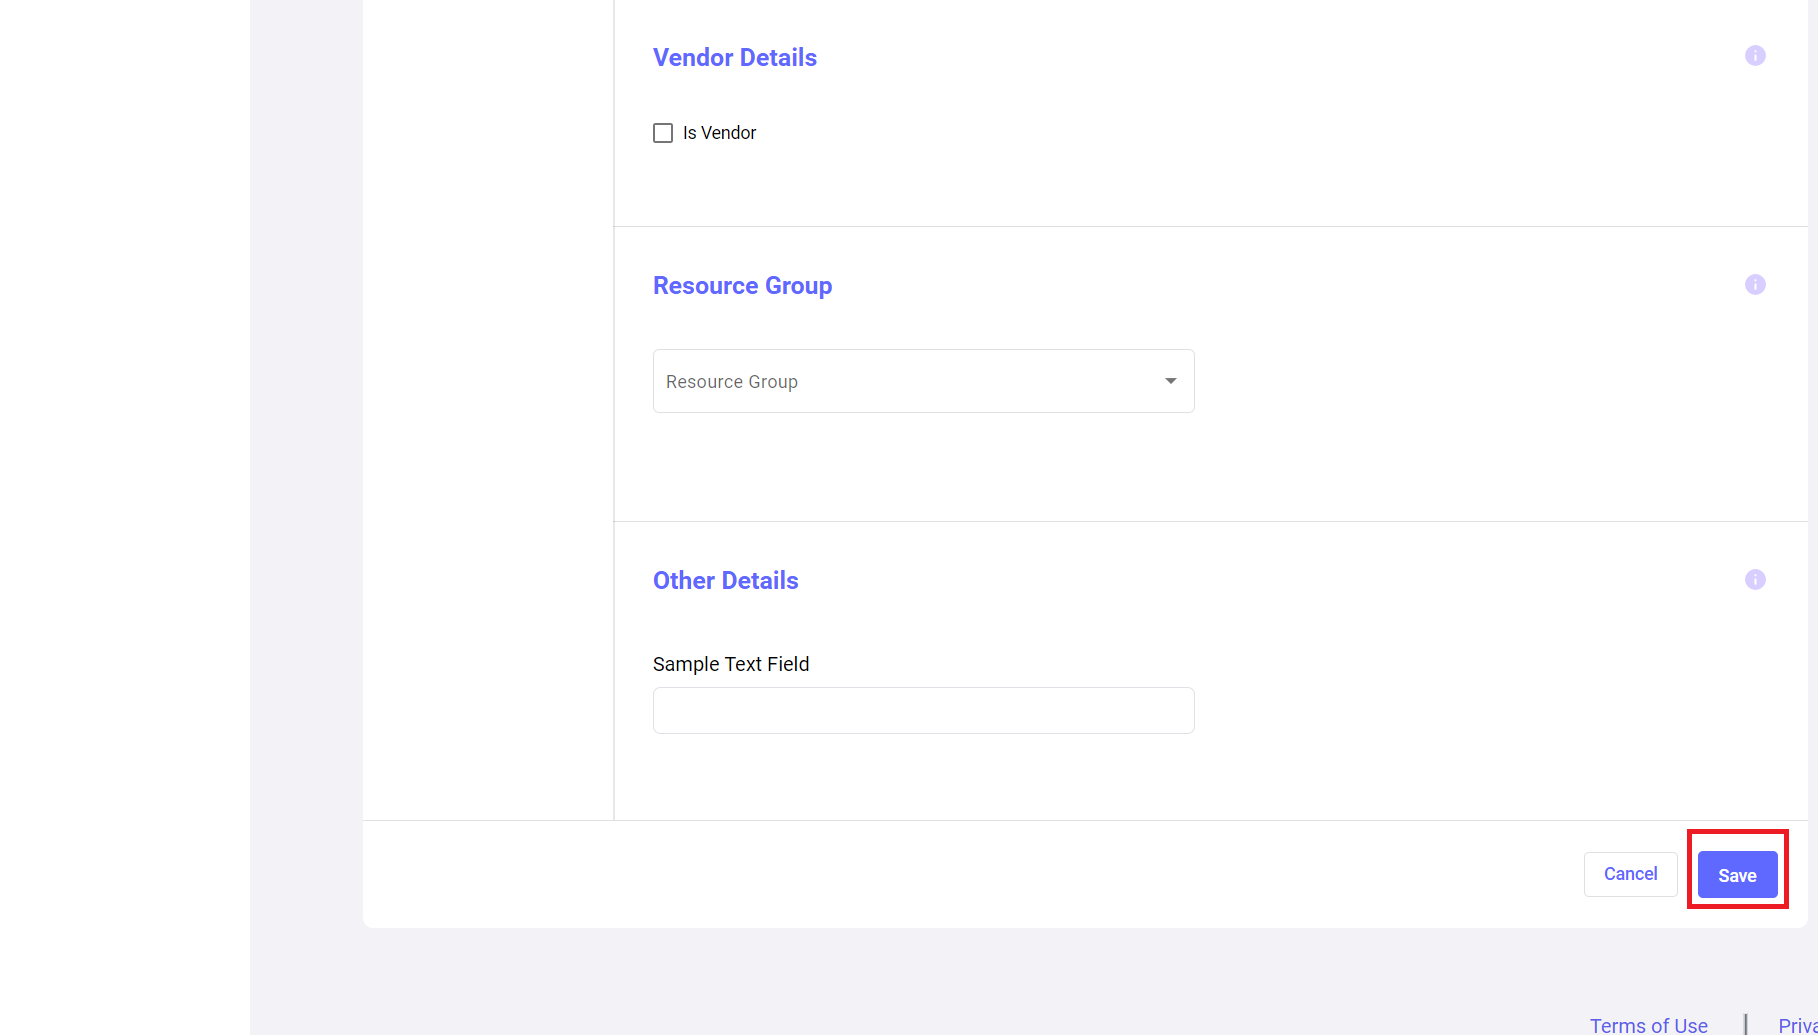
Fill the all-mandatory fields then only the save button will be enabled. Here vendor details and resource group fields are non-mandatory fields.
Note: Every agent should provide an individual email id, do not match with other agent’s email id.
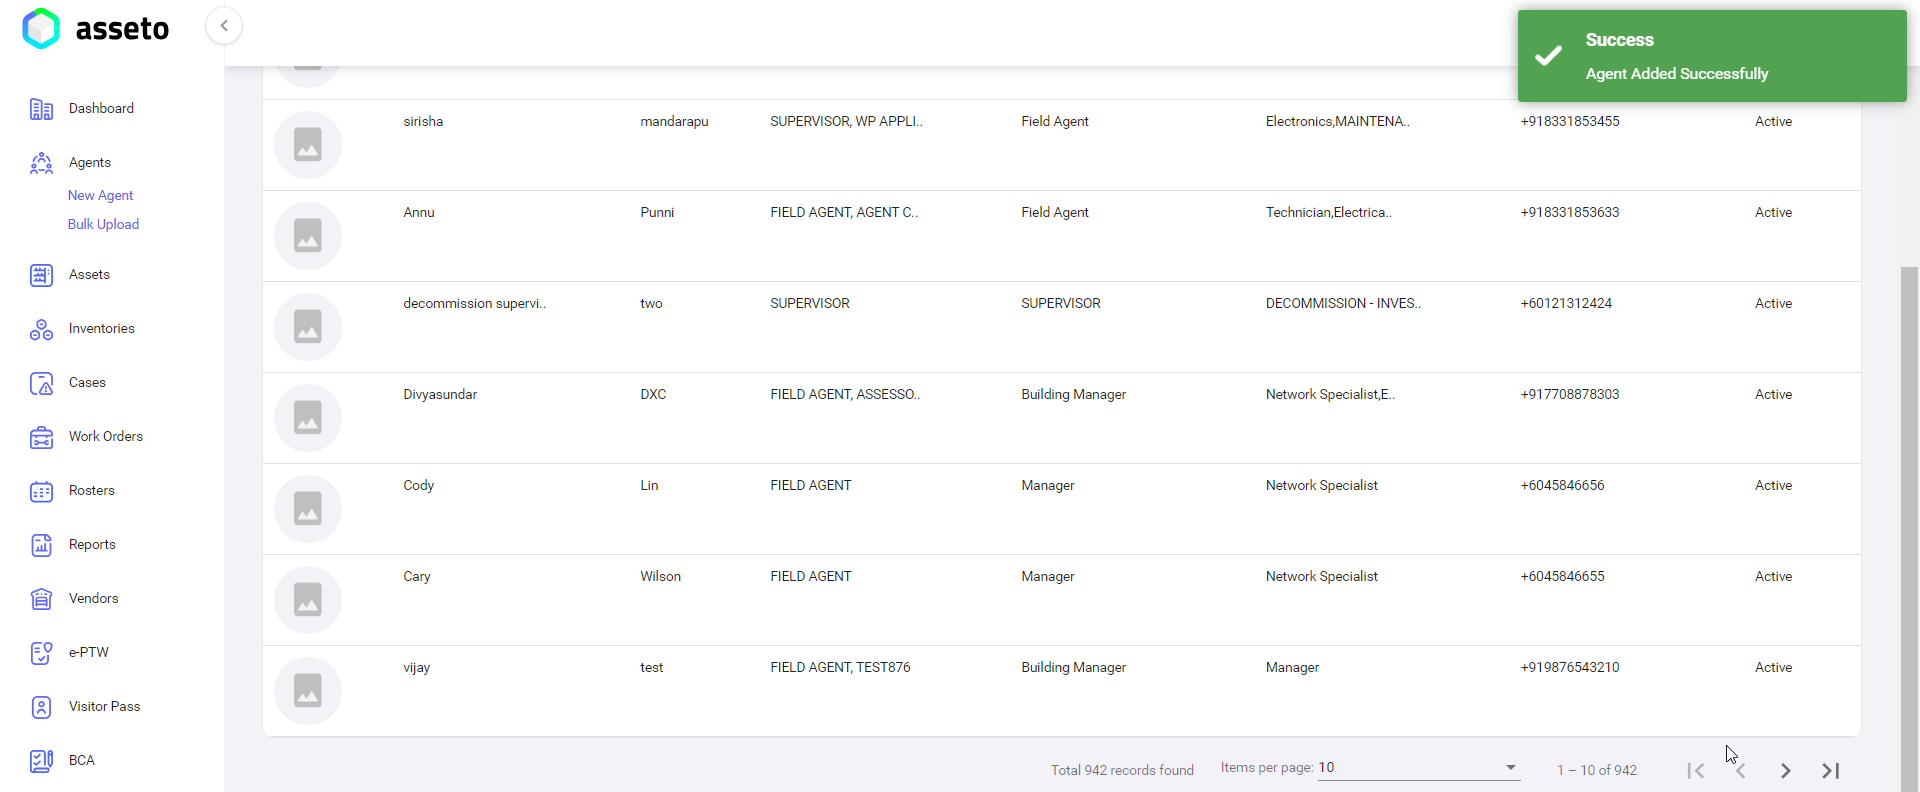
In the agents list we can see newly added agent on the top of the list.
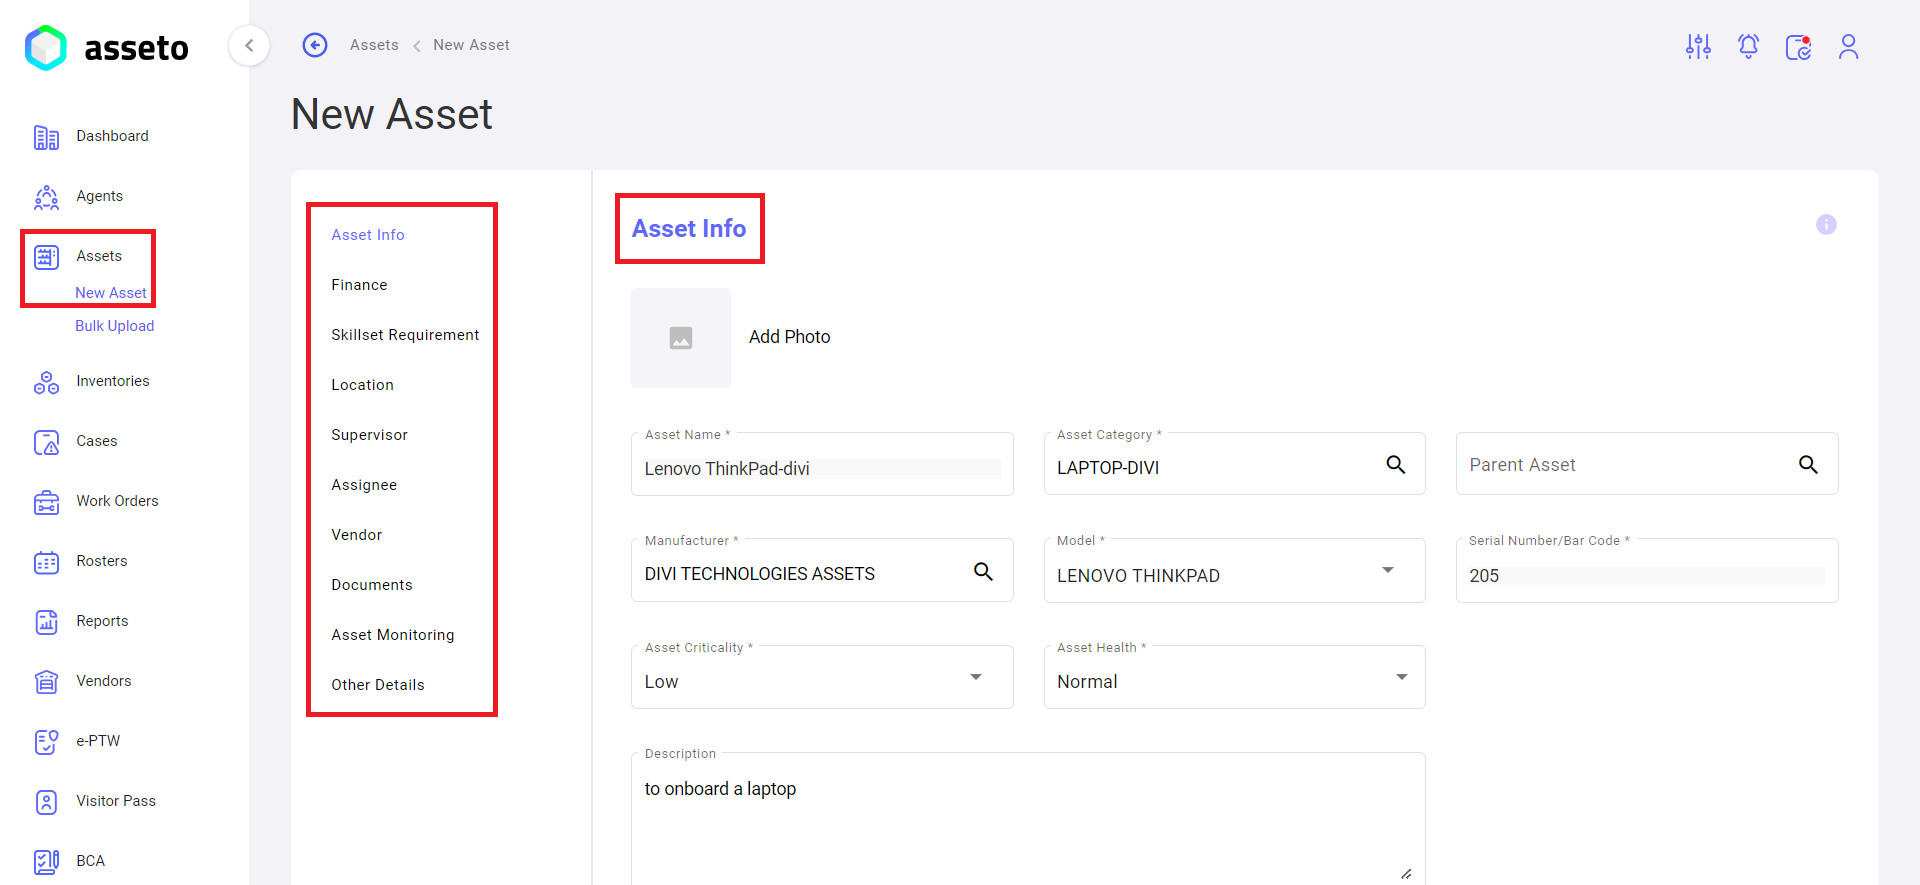
iv. Left Menu -> Assets -> New Asset
To onboard Assets. For more details, please review Assets module user guide 3.2 Pre requisites to Onboard New Assets and 3.3 New Assets.
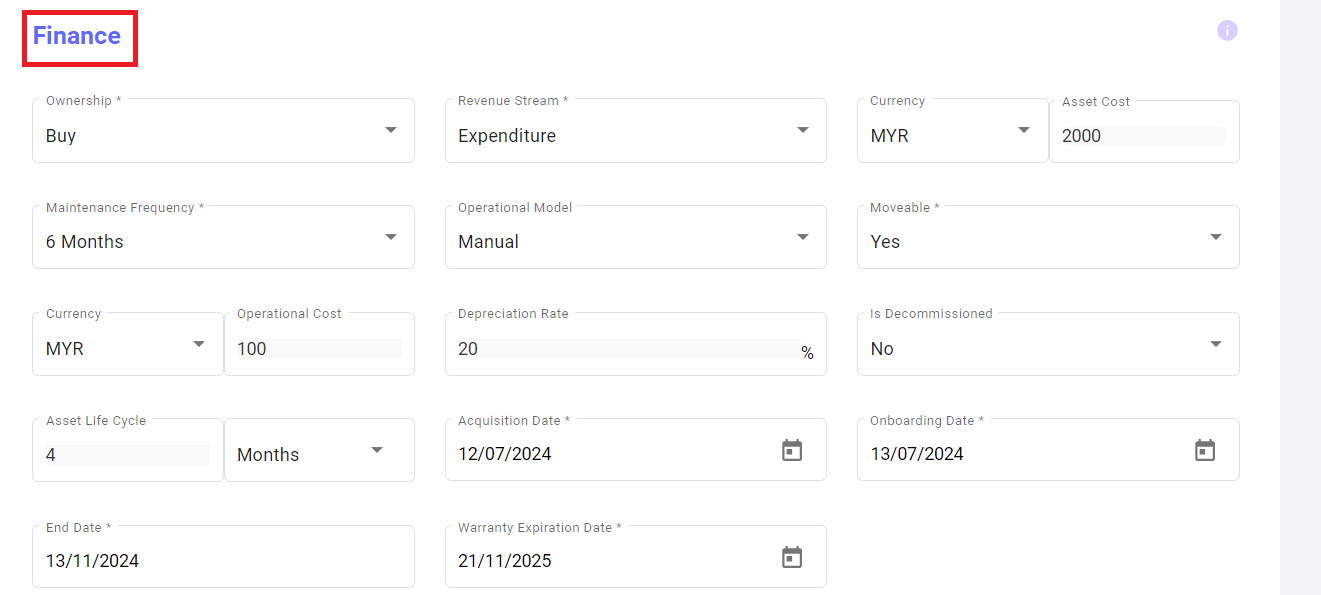
Next finance section
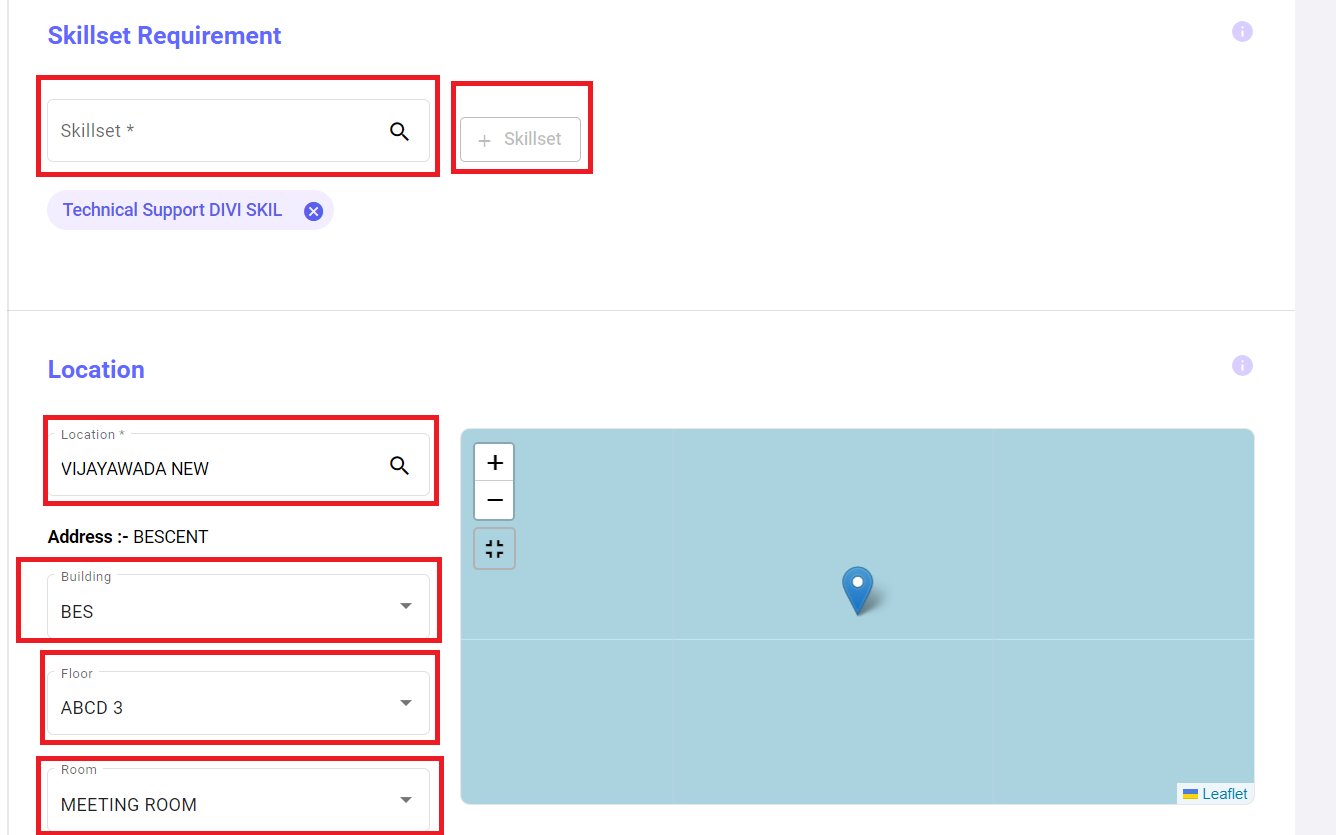
Next skillset requirement and location section
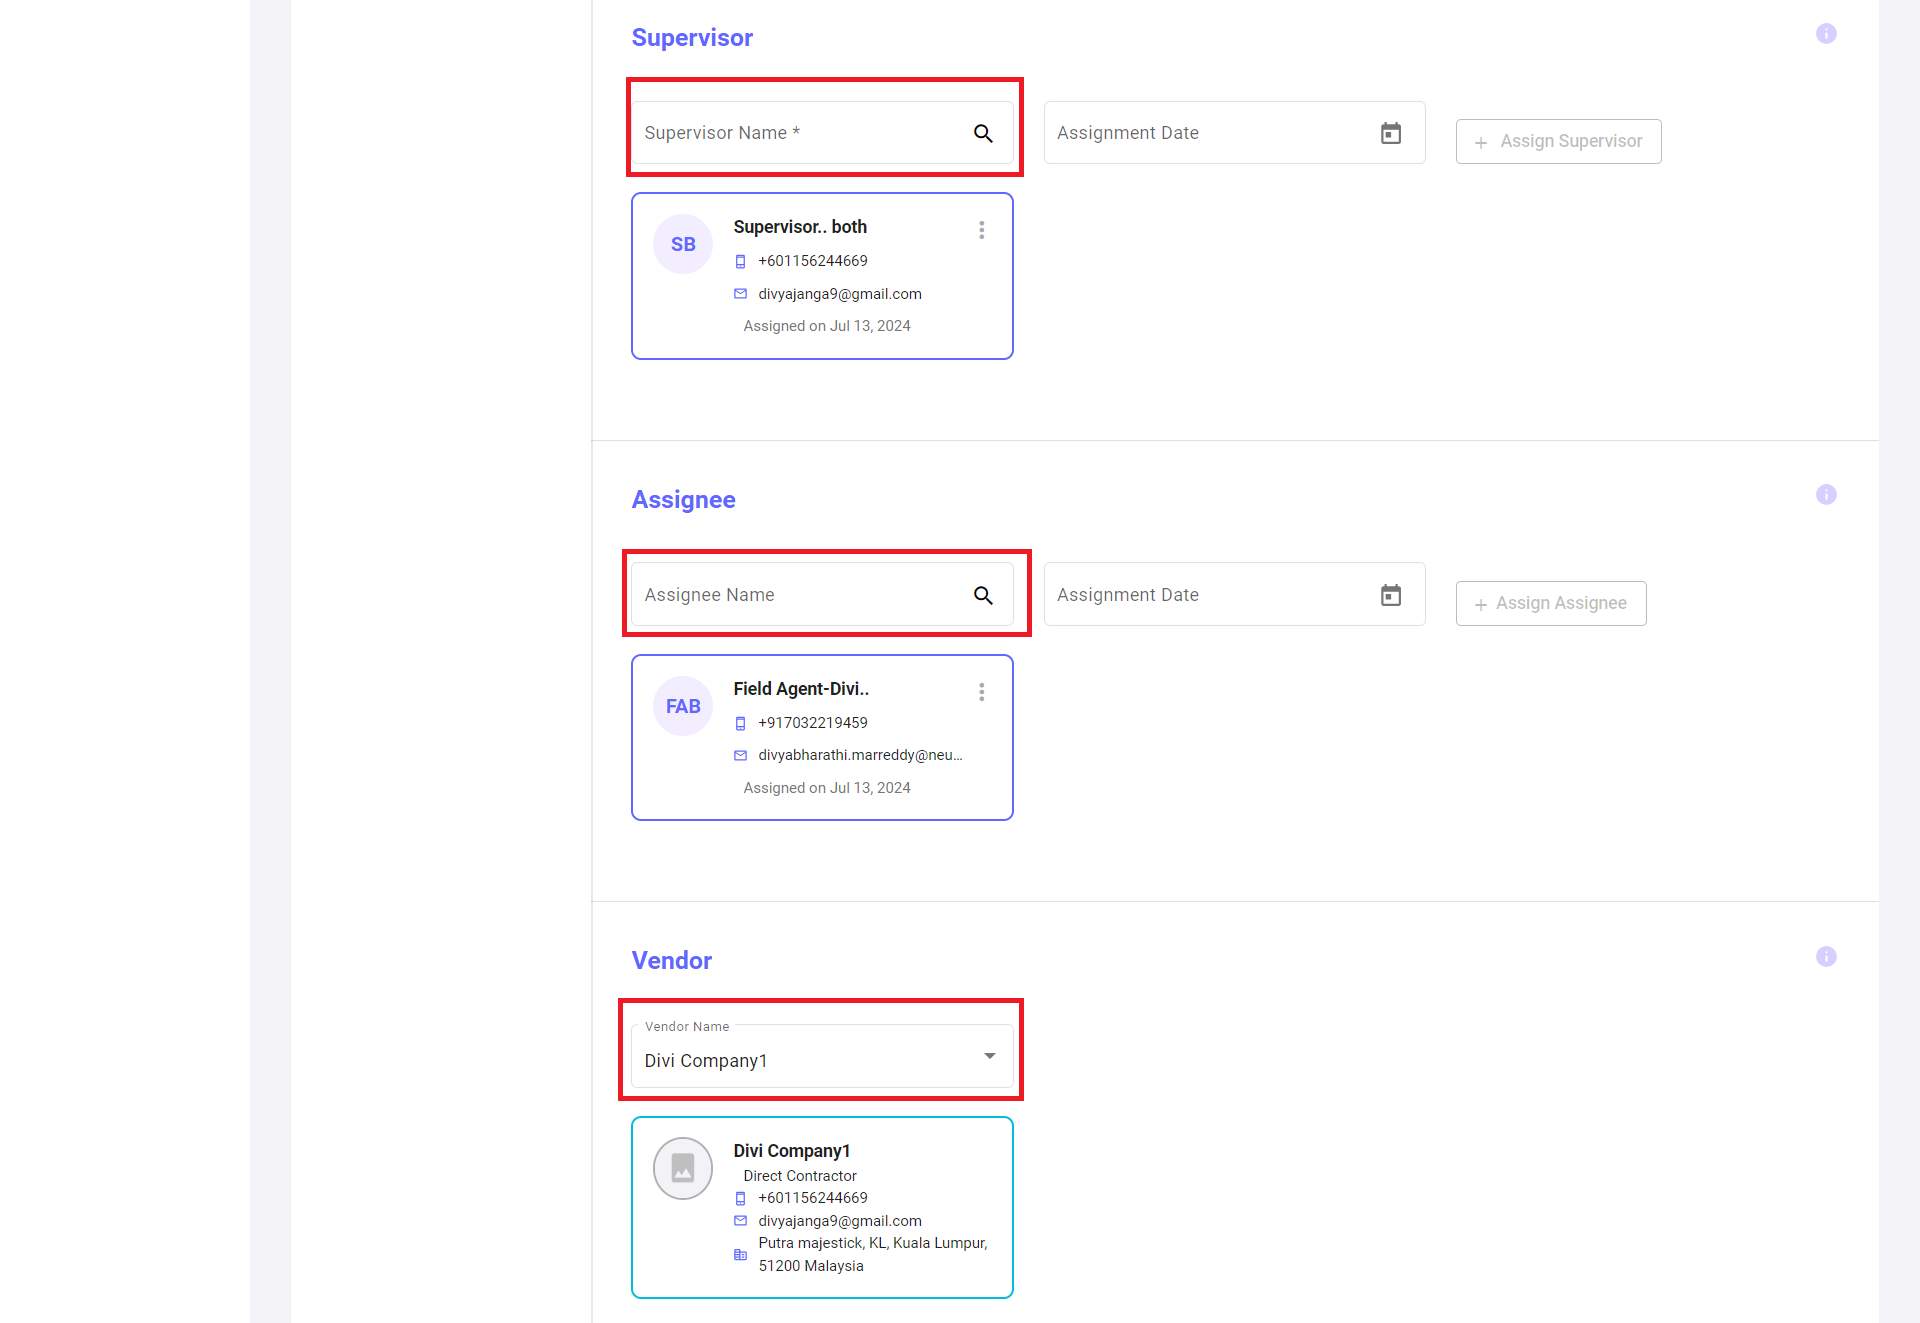
Next you can select supervisor, assignee and vendor from the list. Here assignee non-mandatory field.
Next click on the save button to onboard the new asset.
Assets will be saved and displayed in the first row of the asset list.



No Comments