4.4. Bulk Upload
Bulk upload has the following features.
- New Inventory Bulk Upload
- Stocktake Bulk Upload
- StockUpdate Bulk Upload
4.4.1. New Inventory Bulk Upload
By using this feature, the user can onboard multiple inventories in bulk.
Inventory Bulk upload having 3 sections, those are
- Preparation: To download Bulk upload template.
- Pre check: To check for any errors in the uploaded sheet.
- Processing: To see the progress on the bulk upload process.
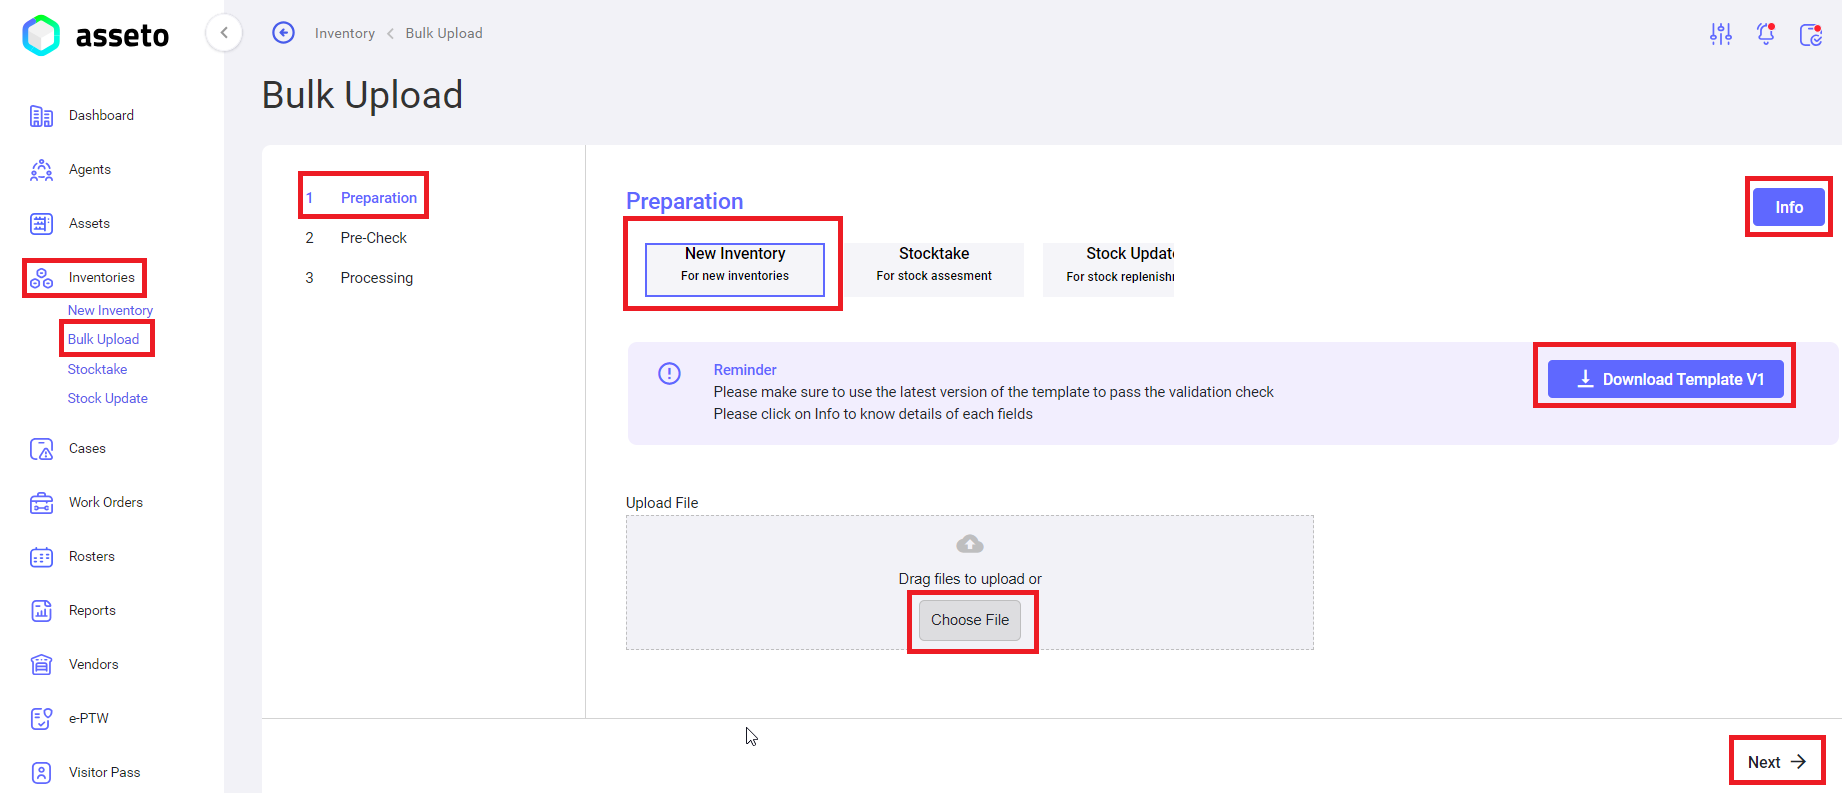
1. Preparation: click on download template button to download csv file will be available in your local pc downloads folder as shown by following screenshot.

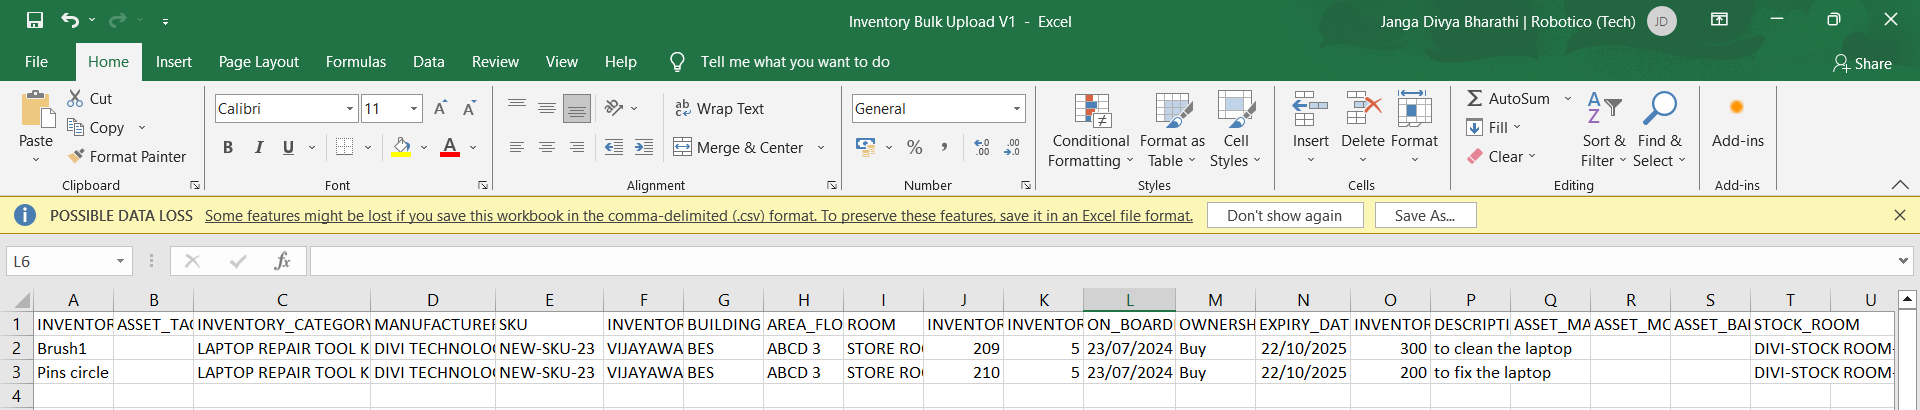
Fill the data on the downloaded csv file for all inventories to be onboarding using bulk upload.
Upload the file by clicking on choose file button on the bulk upload page.
After uploading the csv file ‘Next’ button will be enabled, you can click on next button the system will navigate to you validation check page.
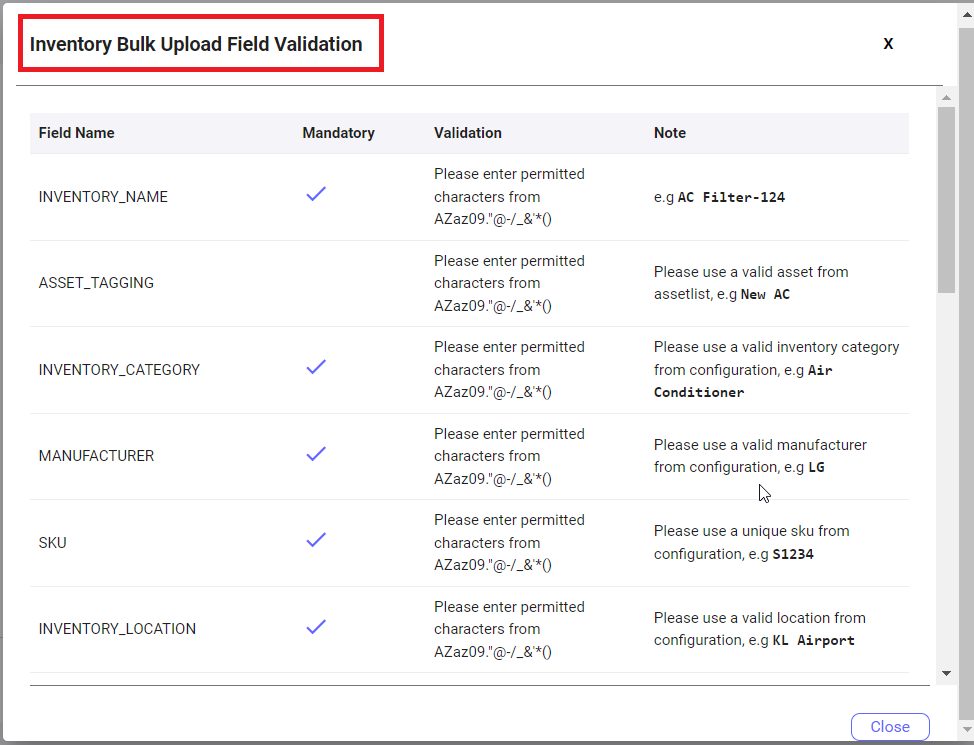
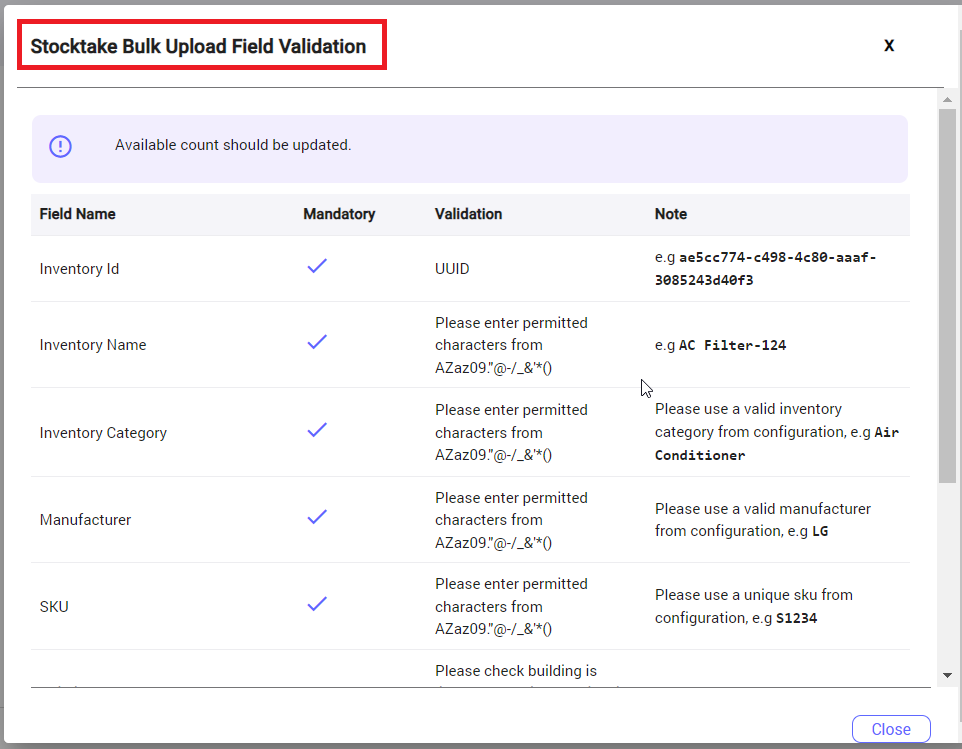
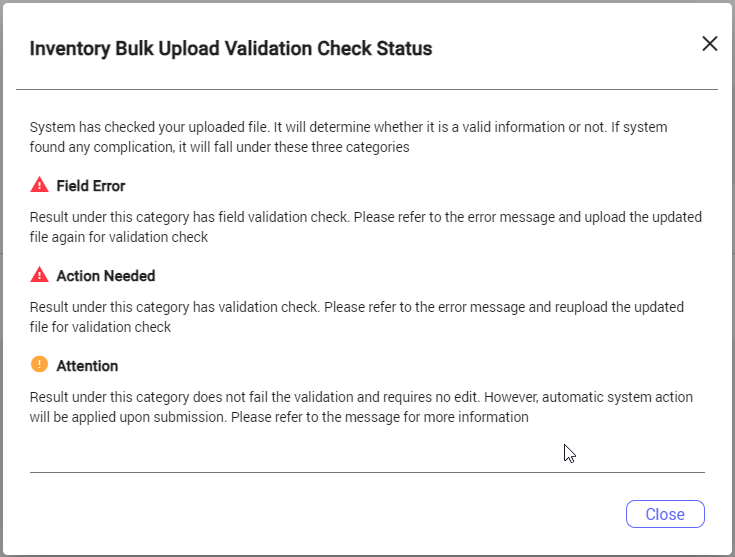
2. Precheck/validation check: If uploaded file having any errors will be display here, user will not be able to move to next stage unless those errors are corrected, submit button enabled (as shown by below screenshot) if no errors in your csv file.
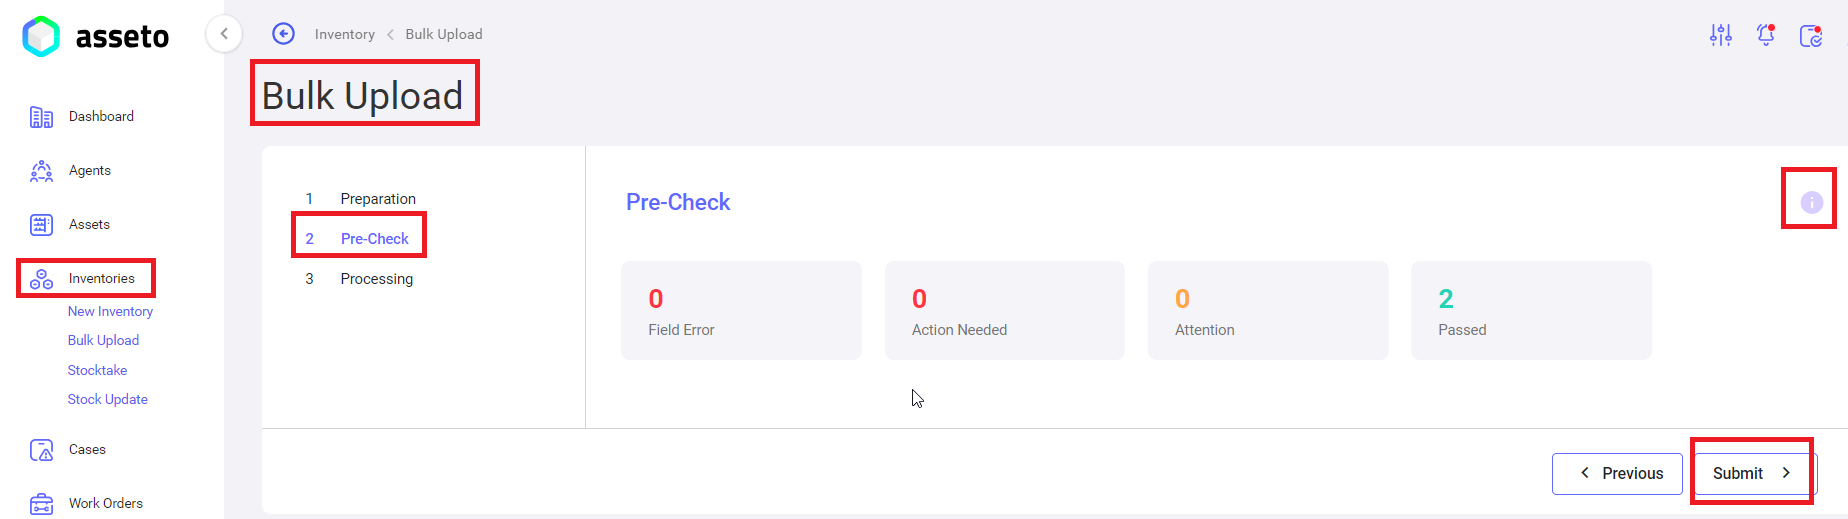
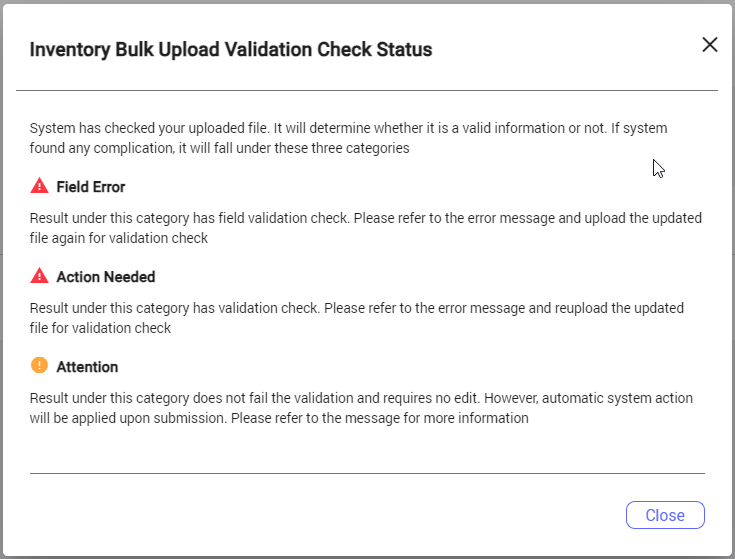
Note: Click on the tooltip to check the validation status on validation/pre-check page.
If there are no errors user can view passed count (i.e. number of inventories added) submit button enabled. Clicking on the submit button system will navigate to you next page.
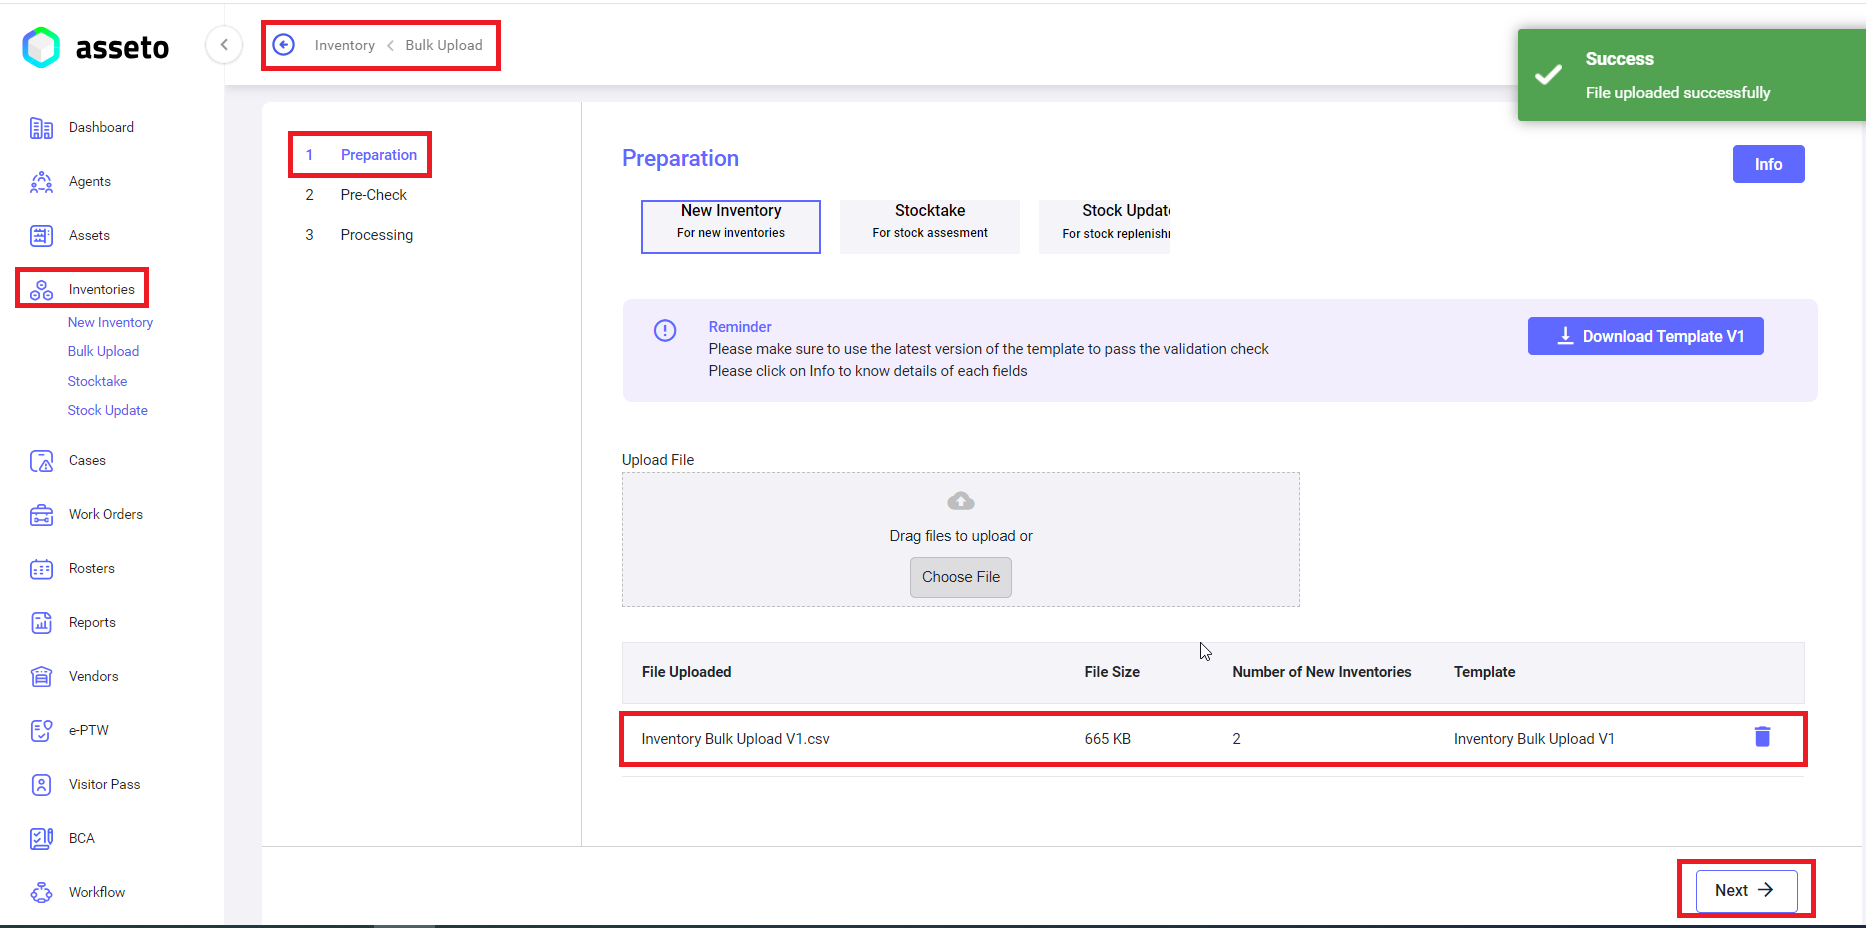
3. Processing: User can see the progress of bulk upload to the application. “Inventories added successfully” confirmation message will be displayed.
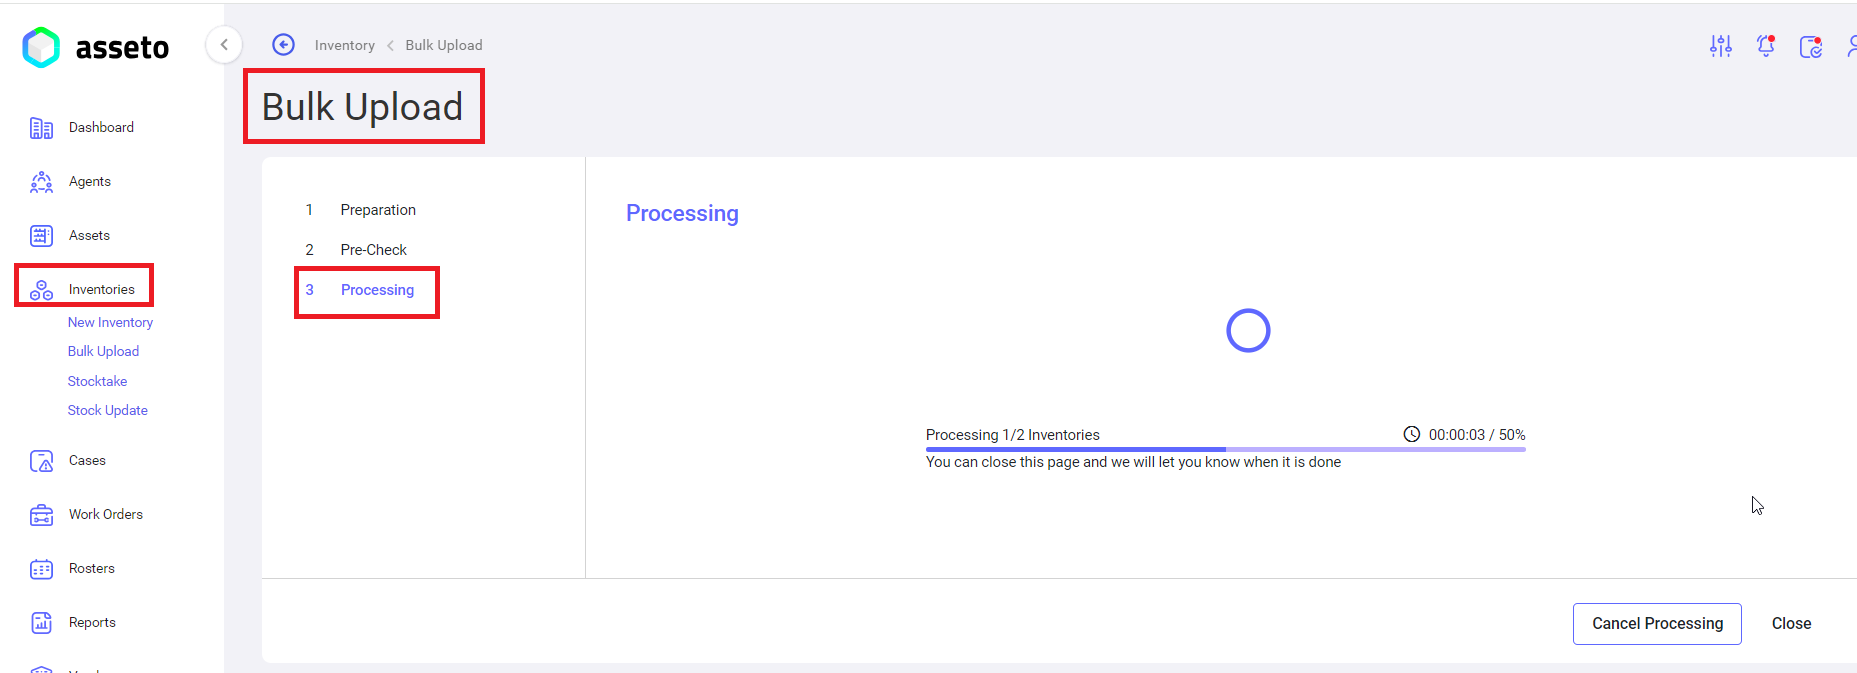
Click on close. added inventories through bulk upload will be displayed on the inventories list page.

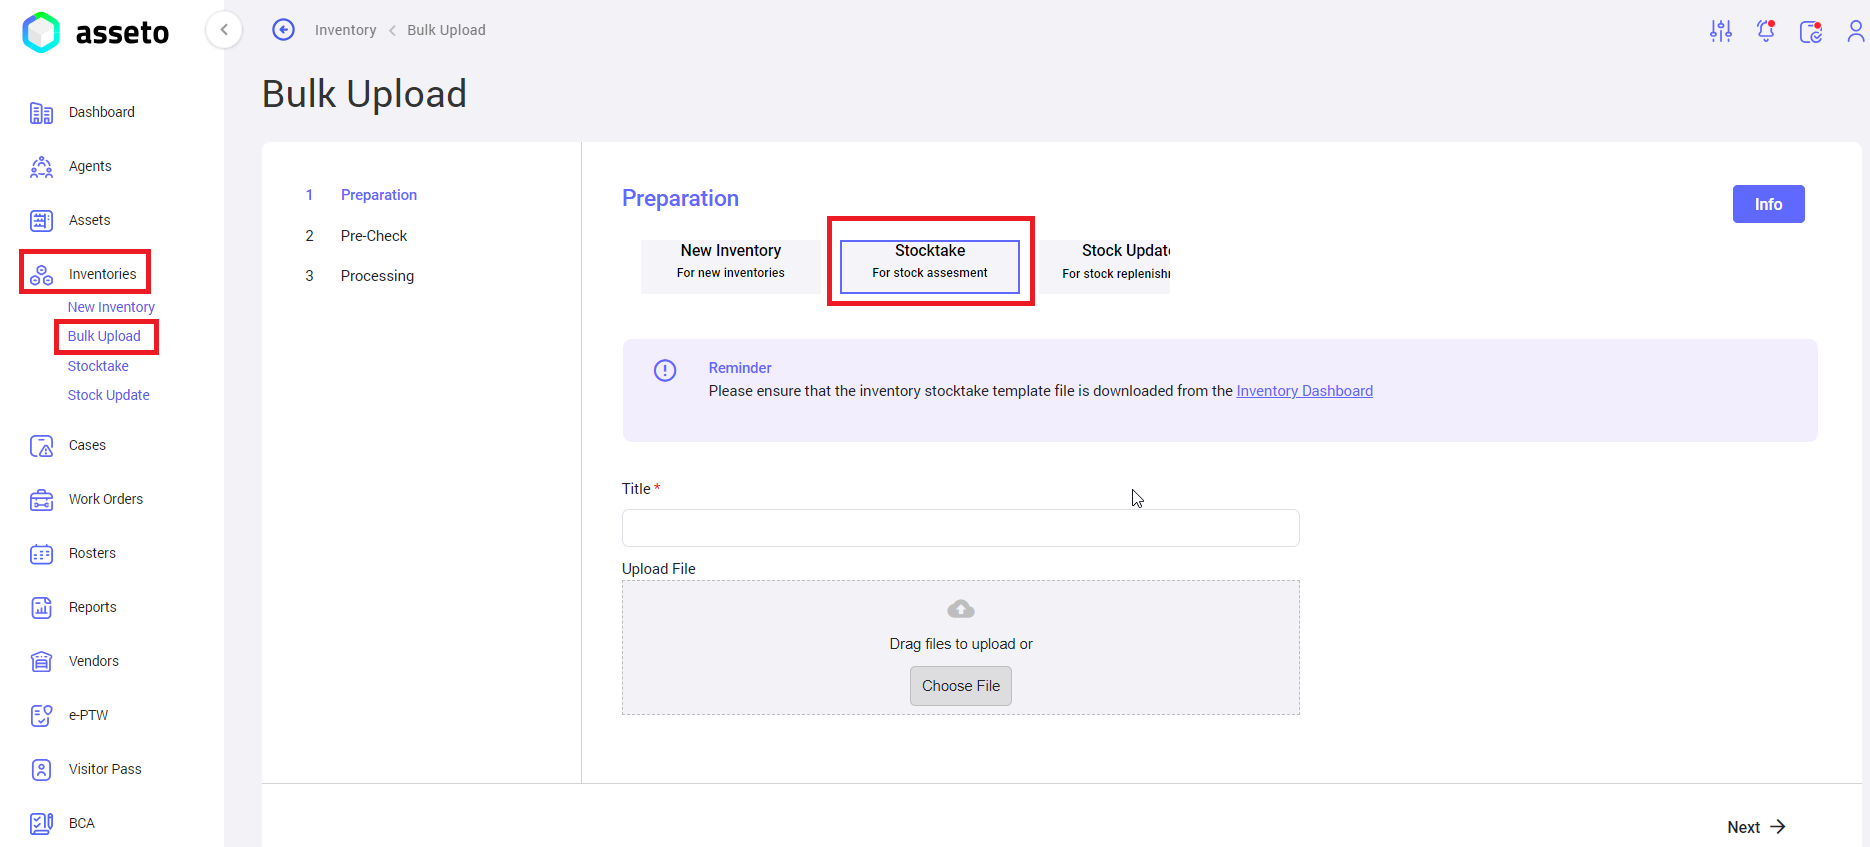
4.4.2. Stocktake Bulk Upload
By using this feature user (role type custodian and should have “Stock Room” access) can upload stocktake inventories in bulk (for stock assessment).
Login into Asseto with custodian credentials ->Left Menu -> Inventory -> Bulk Upload -> Stocktake.
Stocktake Bulk upload having 3 sections, those are
- Preparation: bulk upload template download.
- Pre check: to check for any errors in the uploaded sheet.
- Processing: to see the progress of the bulk upload process.
1. Preparation: Download inventory stocktake template from inventory dashboard.
Note: Agent having role type custodian and should have “Stock Room” access to download the csv file.
Click on the export button and click on “stocktake” option, here you can view available stock rooms under your custodian account.
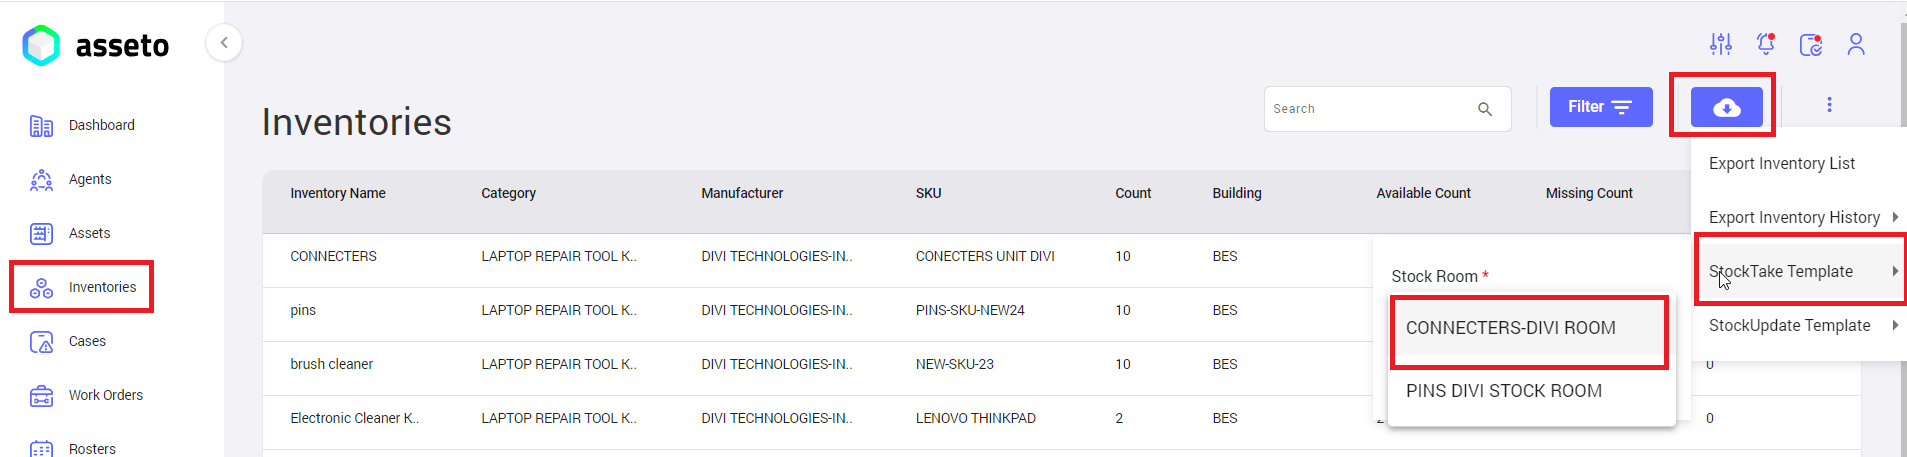
Select one room from the stock room list.
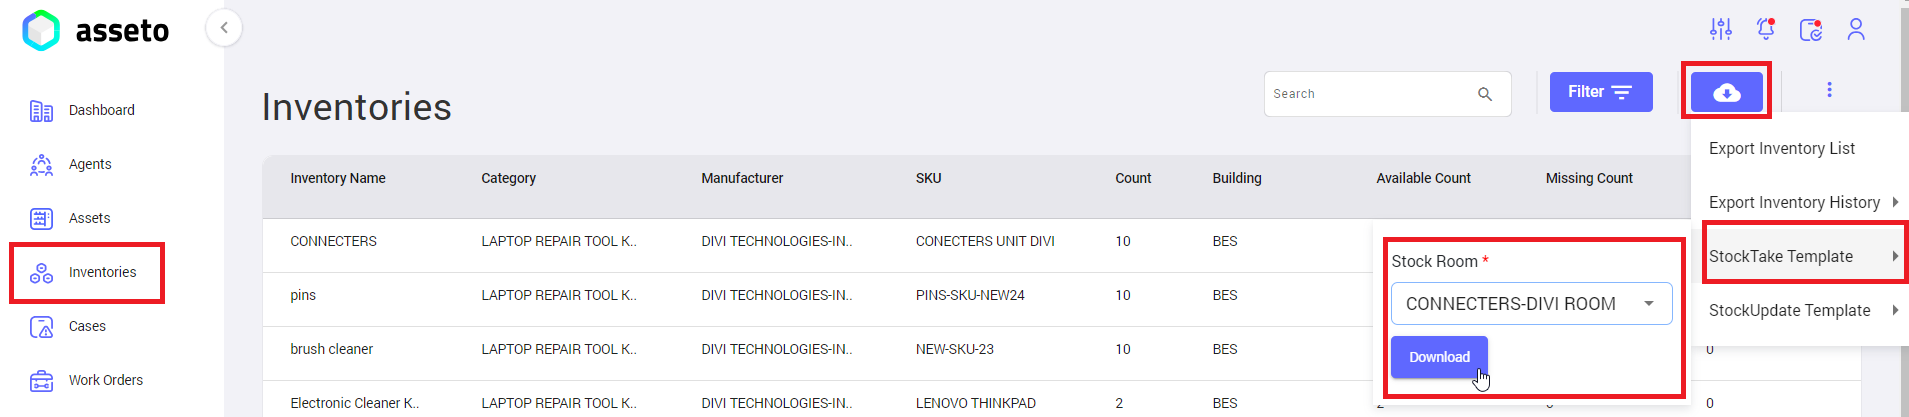
Click on the download button. Downloaded csv file will be available in your local pc downloads folder as shown by following screenshot.

Next: fill the fields in the sheet.
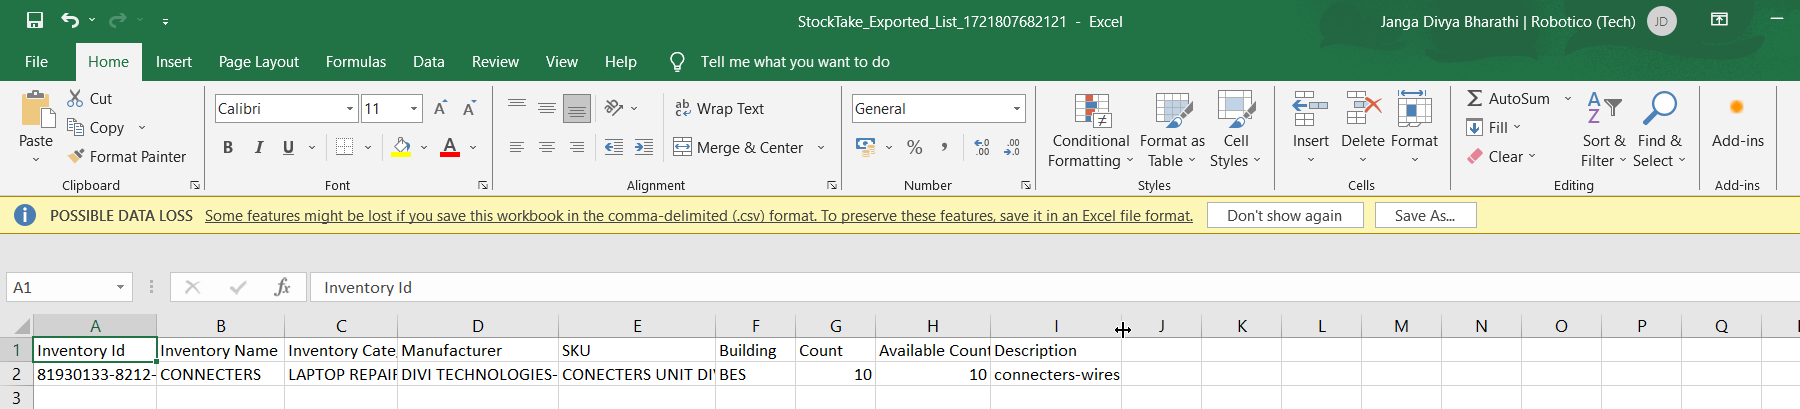
Next: Upload it.

After uploading the csv file ‘Next’ button will be enabled, you can click on next button the system will navigate to you validation check page.
2. Precheck/validation check: If uploaded file having any errors will be display here, user will not be able to move to next stage unless those errors are corrected, submit button enabled (as shown by below screenshot) if no errors in your csv file.
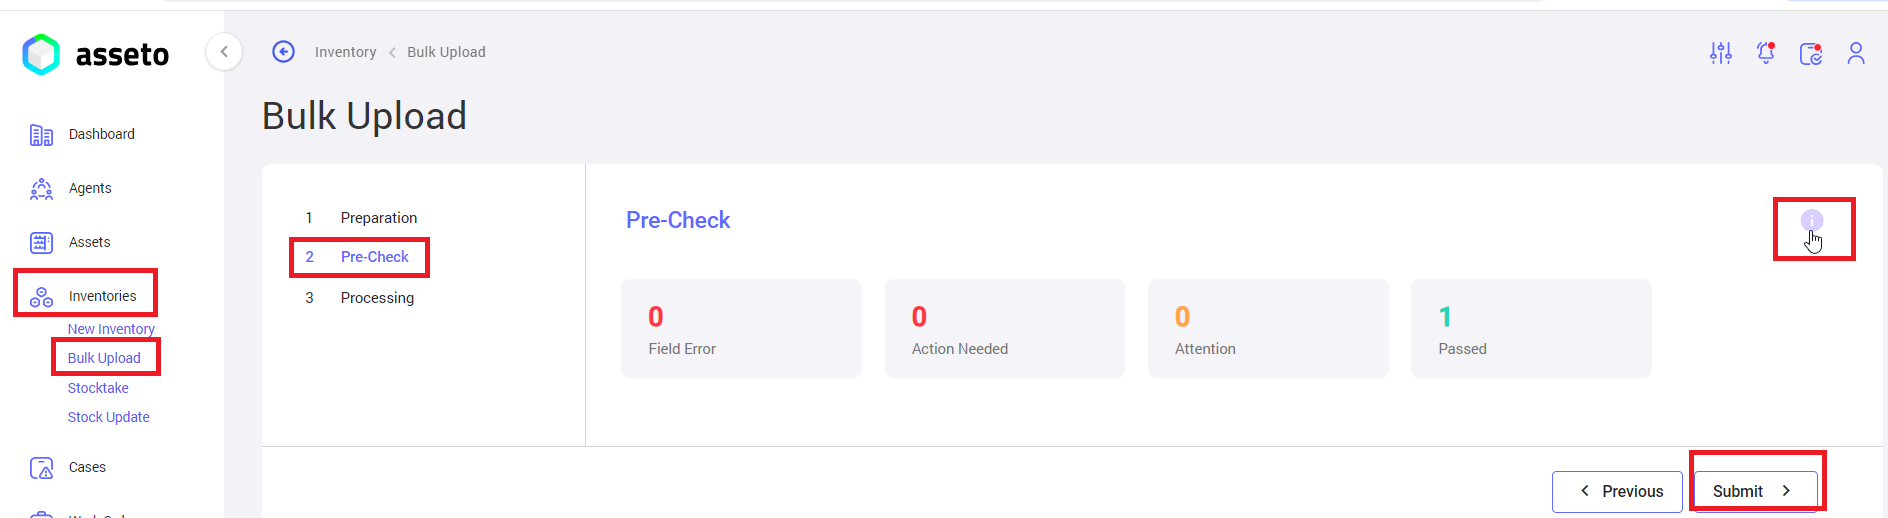
Note: Click on the tooltip to check the validation status on validation/pre-check page.
If there are no errors the user can view passed count (i.e. number of records in stocktake csv file) and submit button enabled. Clicking on the submit button system will navigate to you next page.
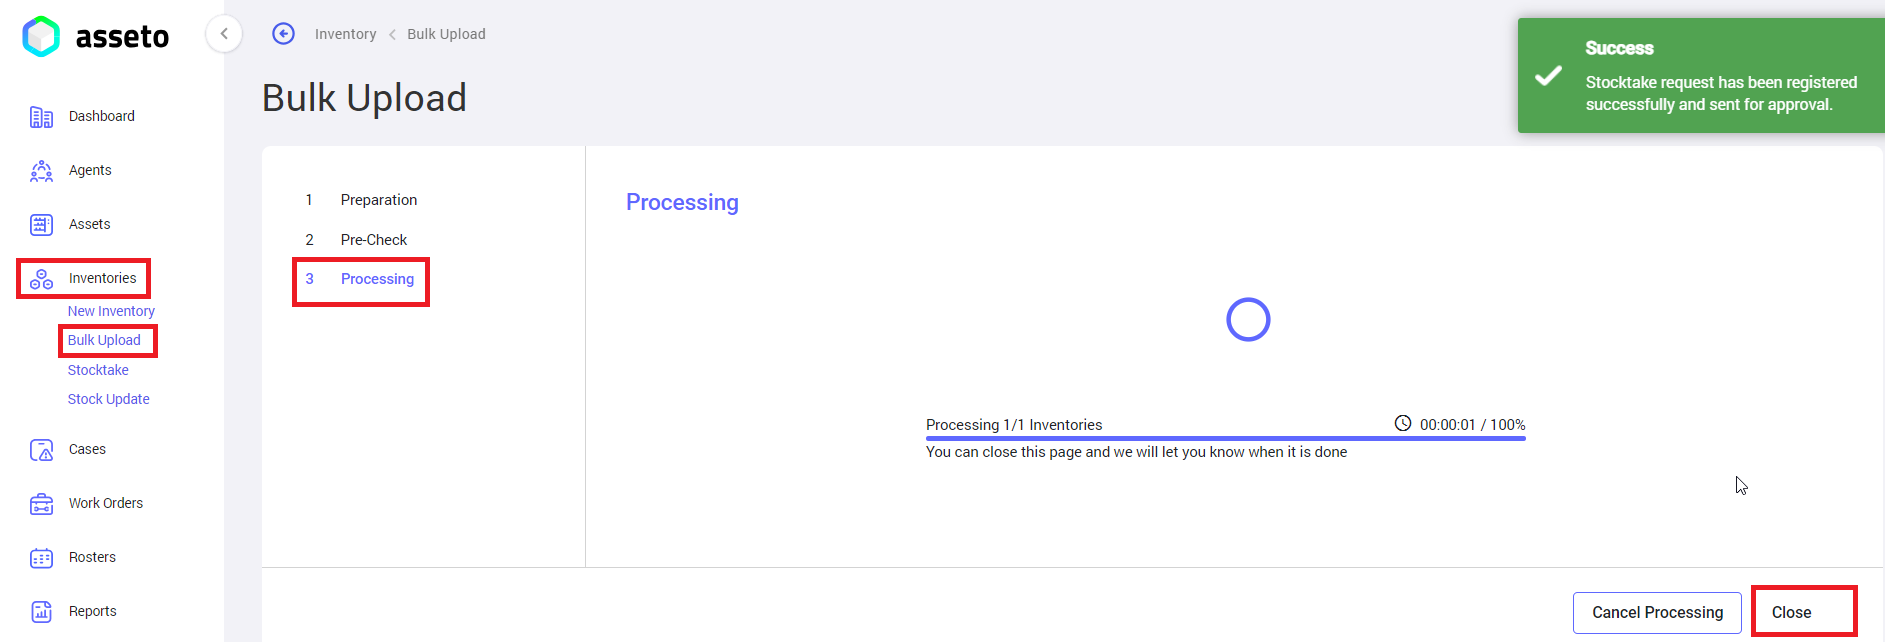
3. Processing: user can see the progress of bulk upload to the application. “stocktake request has been registered successfully and sent for approval” confirmation message will be displayed.
Next
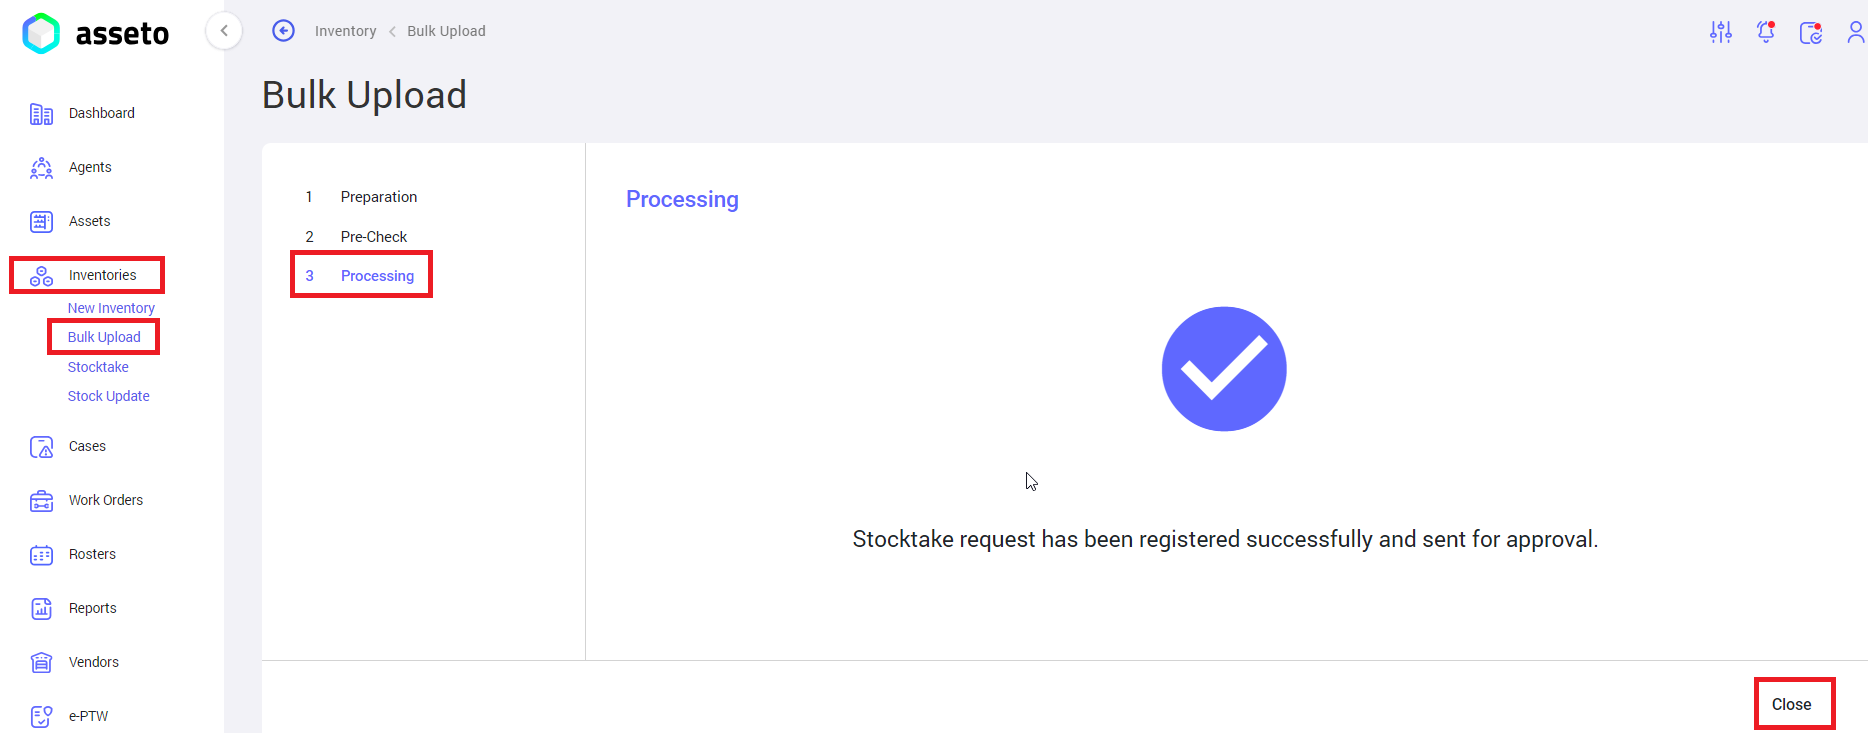
Click on close. added stocktake data file through bulk upload will be sent to coordinator for approval and system navigate to stocktake bulk upload page as shown by following screenshot.
Note: Agent having role type “Coordinator” can approve or reject the Stocktake file.
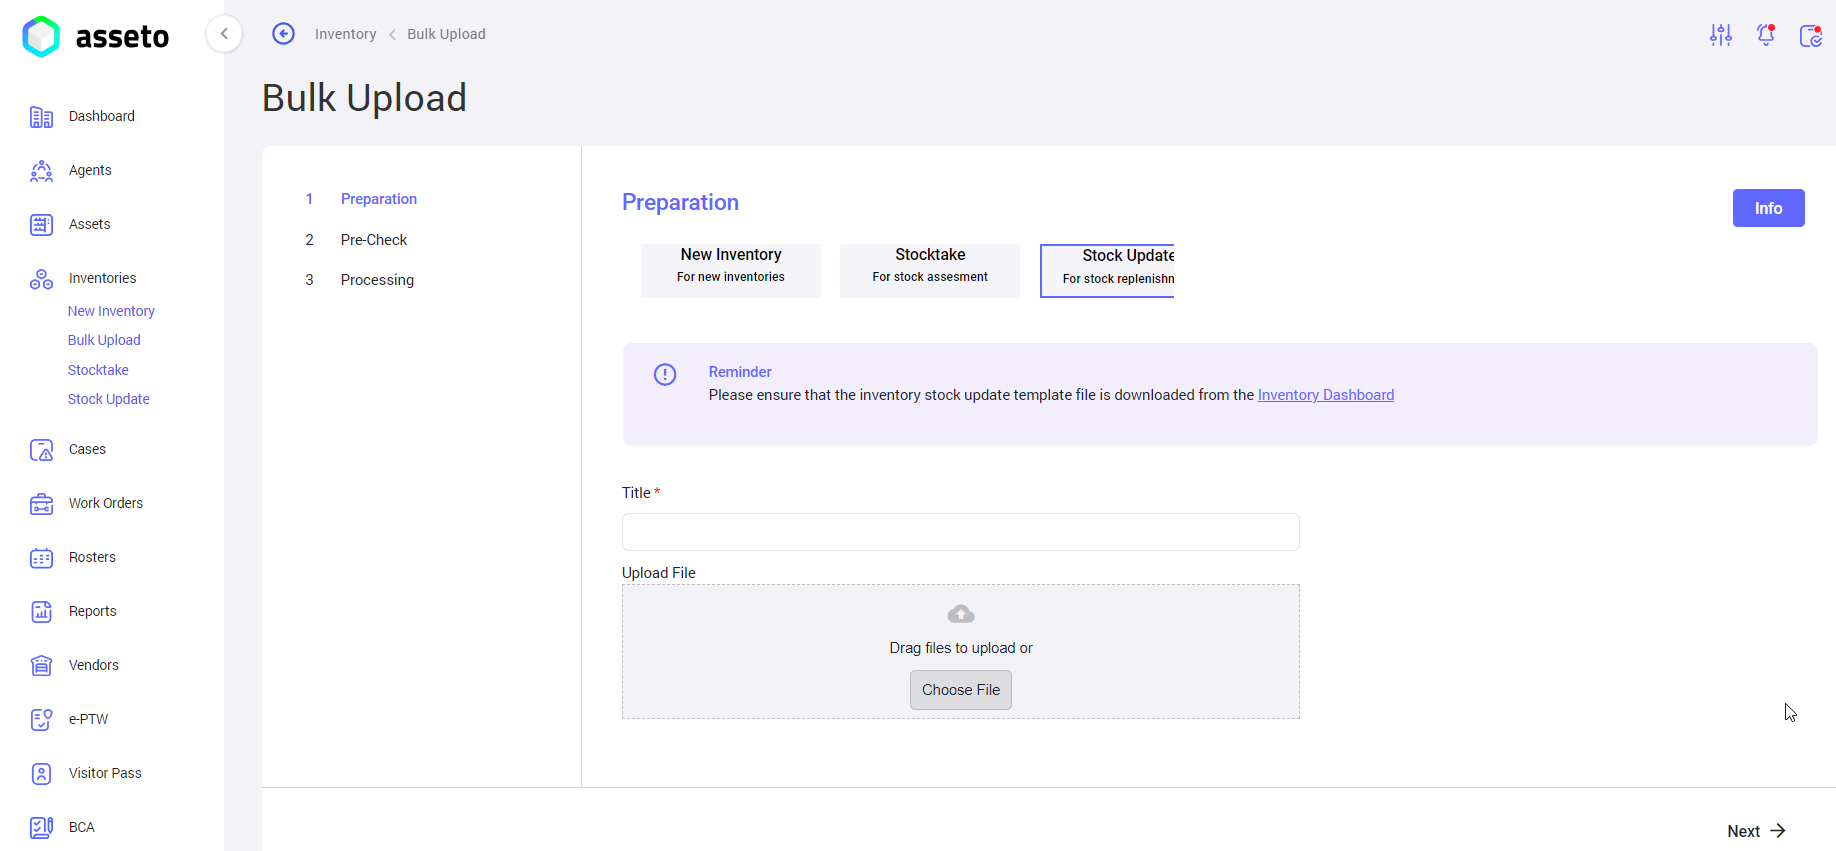
4.4.3. StockUpdate Bulk Upload
By using this feature user (role type custodian and should have “Stock Room” access) can upload stock update inventories in bulk (for stock replenishment).
Login into Asseto with custodian credentials -> Left Menu -> Inventory -> Bulk Upload -> Stock Update.
stock update Bulk upload having 3 sections, those are
- Preparation: bulk upload template download.
- Pre check: to check for any errors in the uploaded sheet.
- Processing: to see the progress of the bulk upload process.
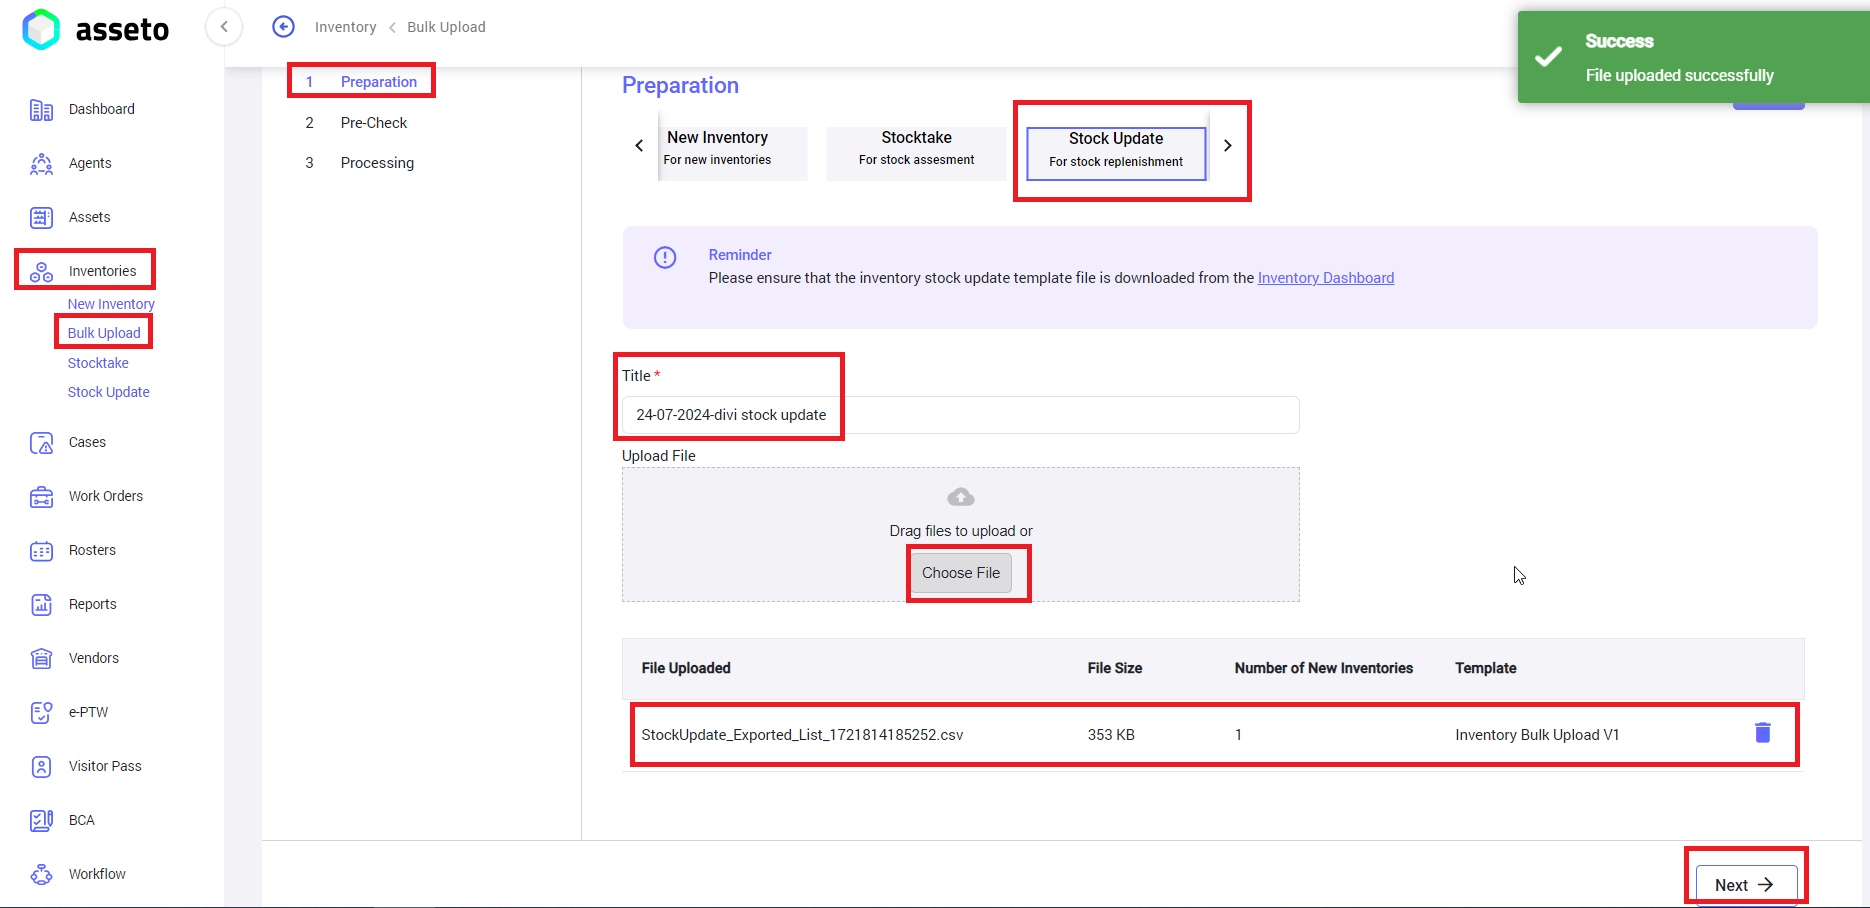
1. Preparation: Download inventory stock update template from inventory dashboard.
Note: Agent having role type custodian to download the csv file.
Click on the export button and click on “stock update” option, here you can view available stock rooms under your custodian account.
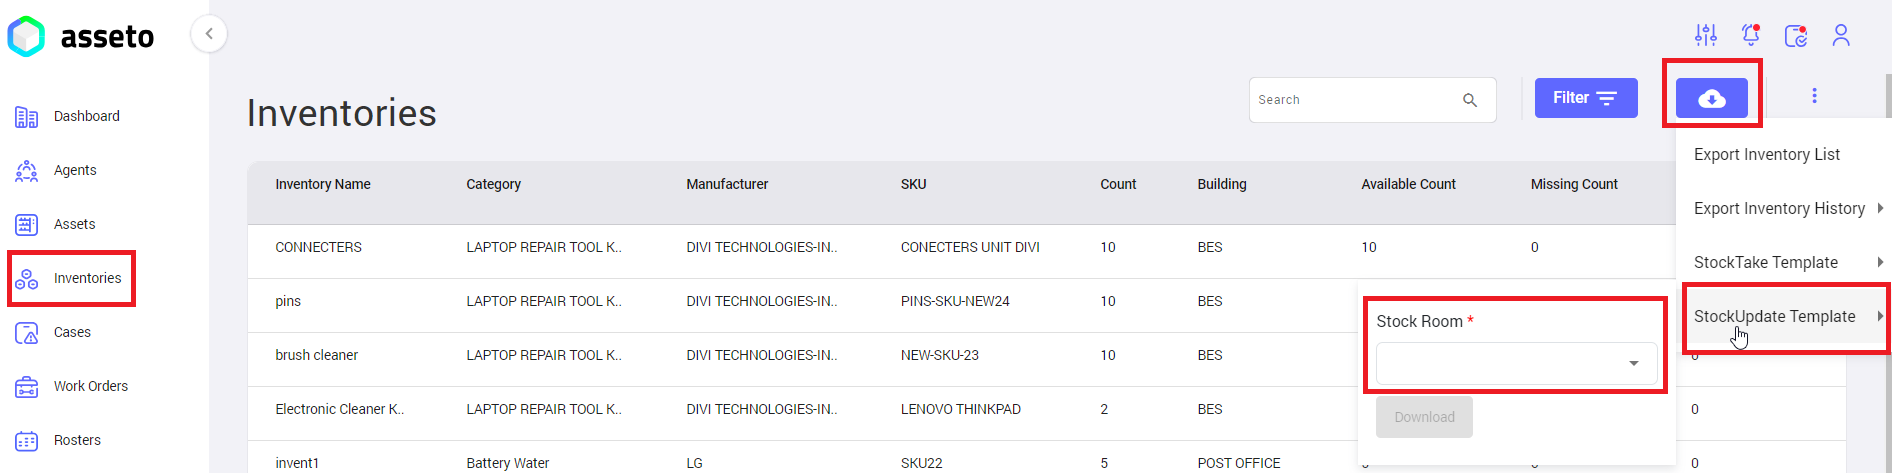
Next: Select stockupdate template.
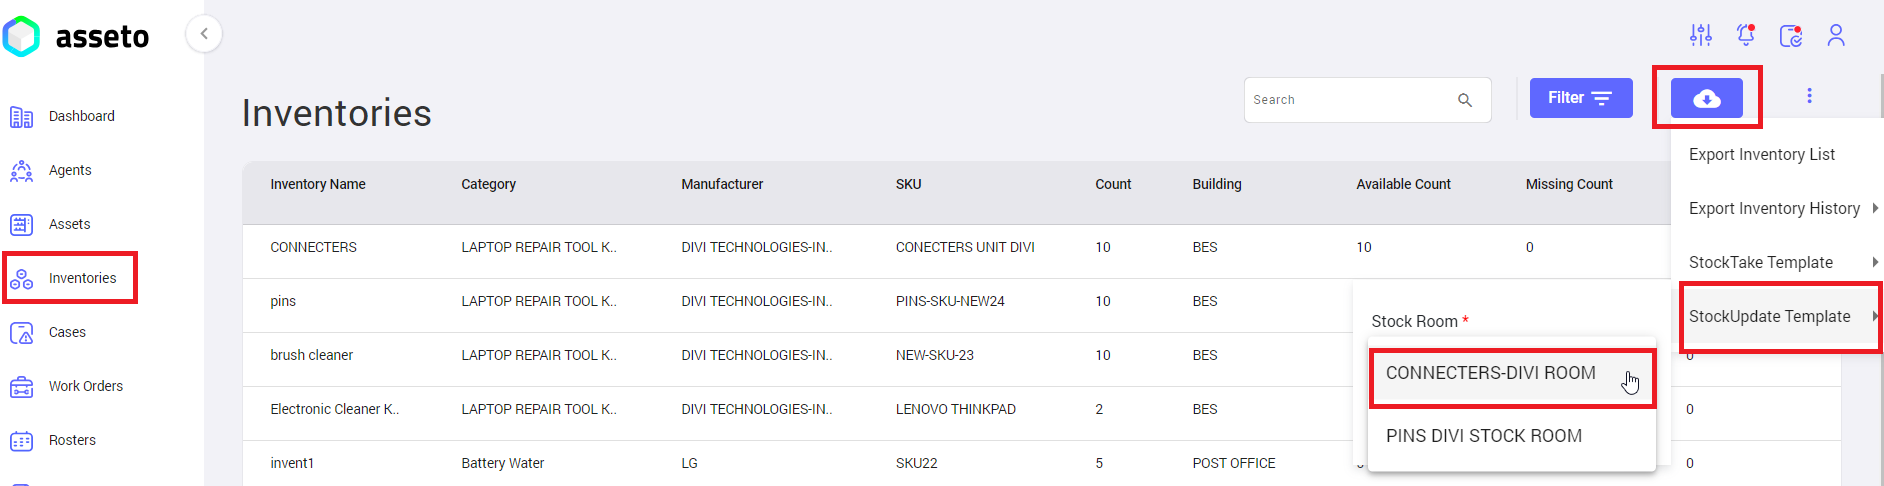
Next: Select one room from the stock room list.
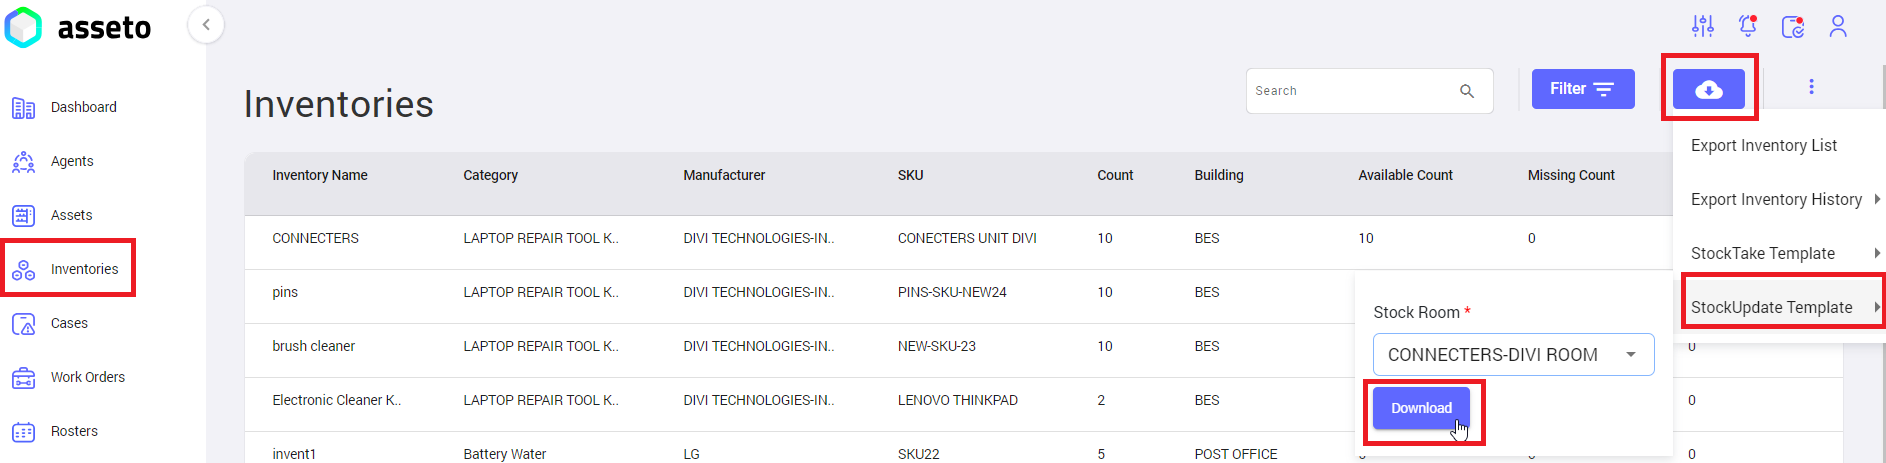
Click on the download button. Downloaded csv file will be available in your local pc downloads folder as shown by following screenshot.

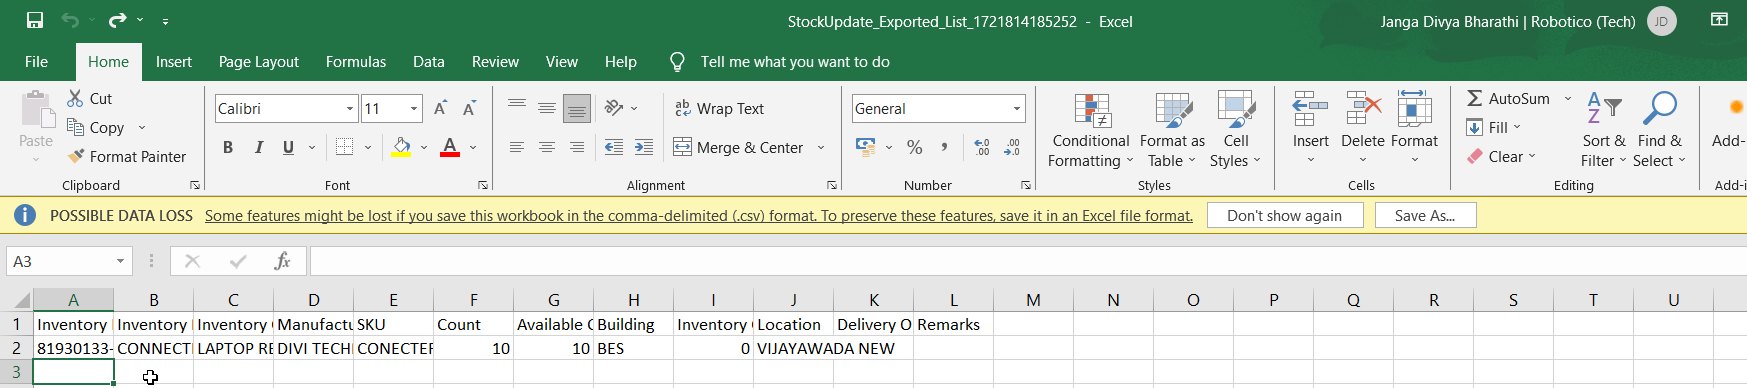
Fill the data on the downloaded csv file for stock count and upload the using “stock update” bulk upload.
Next: Upload this csv file by clicking on choose file button on inventory stock update bulk upload.
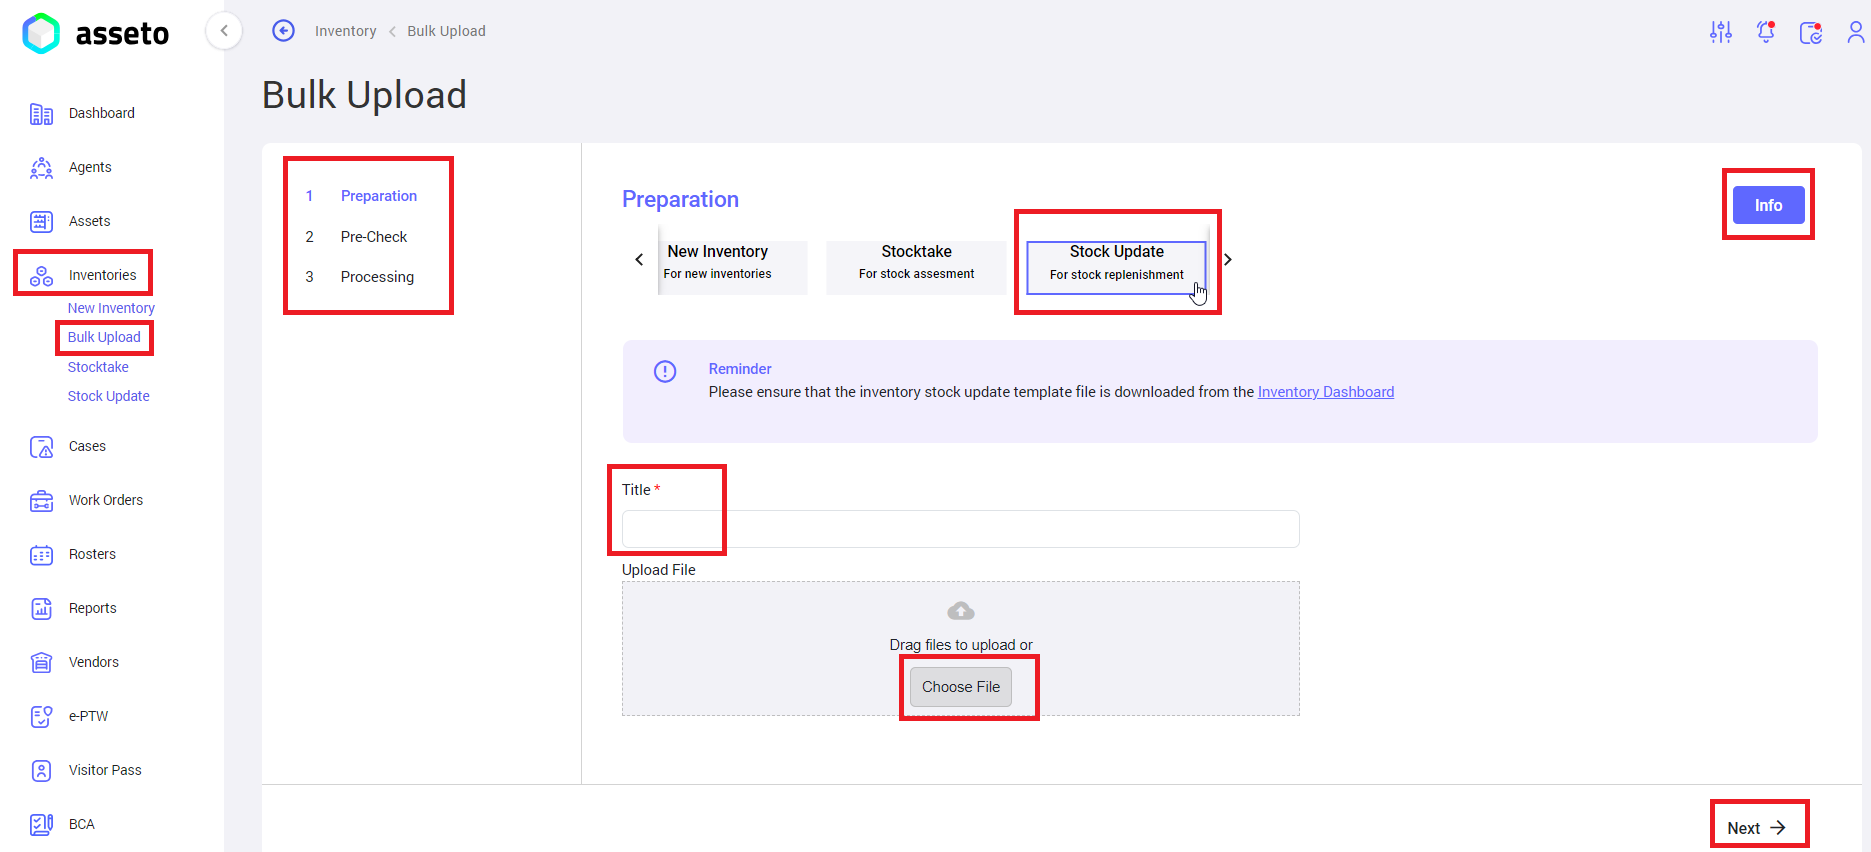
After uploading the csv file ‘Next’ button will be enabled, you can click on next button the system will navigate to you validation check page.
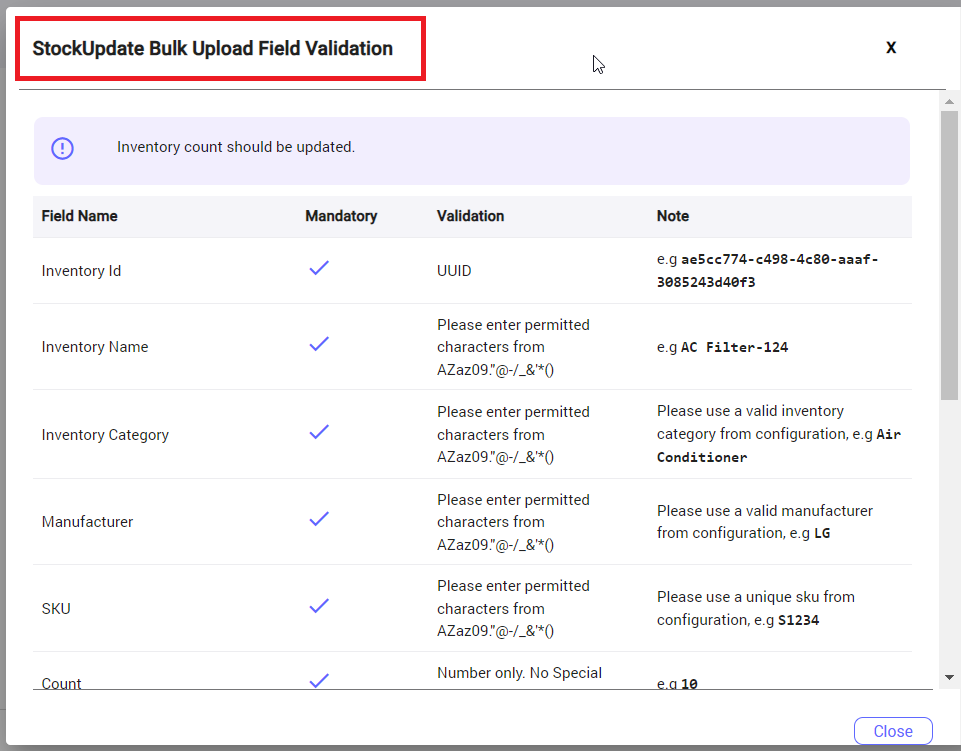
2. Precheck/validation check: If uploaded file having any errors will be display here, user will not be able to move to next stage unless those errors are corrected, submit button enabled (as shown by below screenshot) if no errors in your csv file.

Note: Click on the tooltip to check the validation status on validation/pre-check page.

If there are no errors user can view passed count (i.e. number of records in stock update csv file) and submit button enabled. Clicking on the submit button system will navigate to you next page.
3. Processing: User can see the progress of bulk upload to the application. “Stock update request has been registered successfully and sent for approval” confirmation message will be displayed.
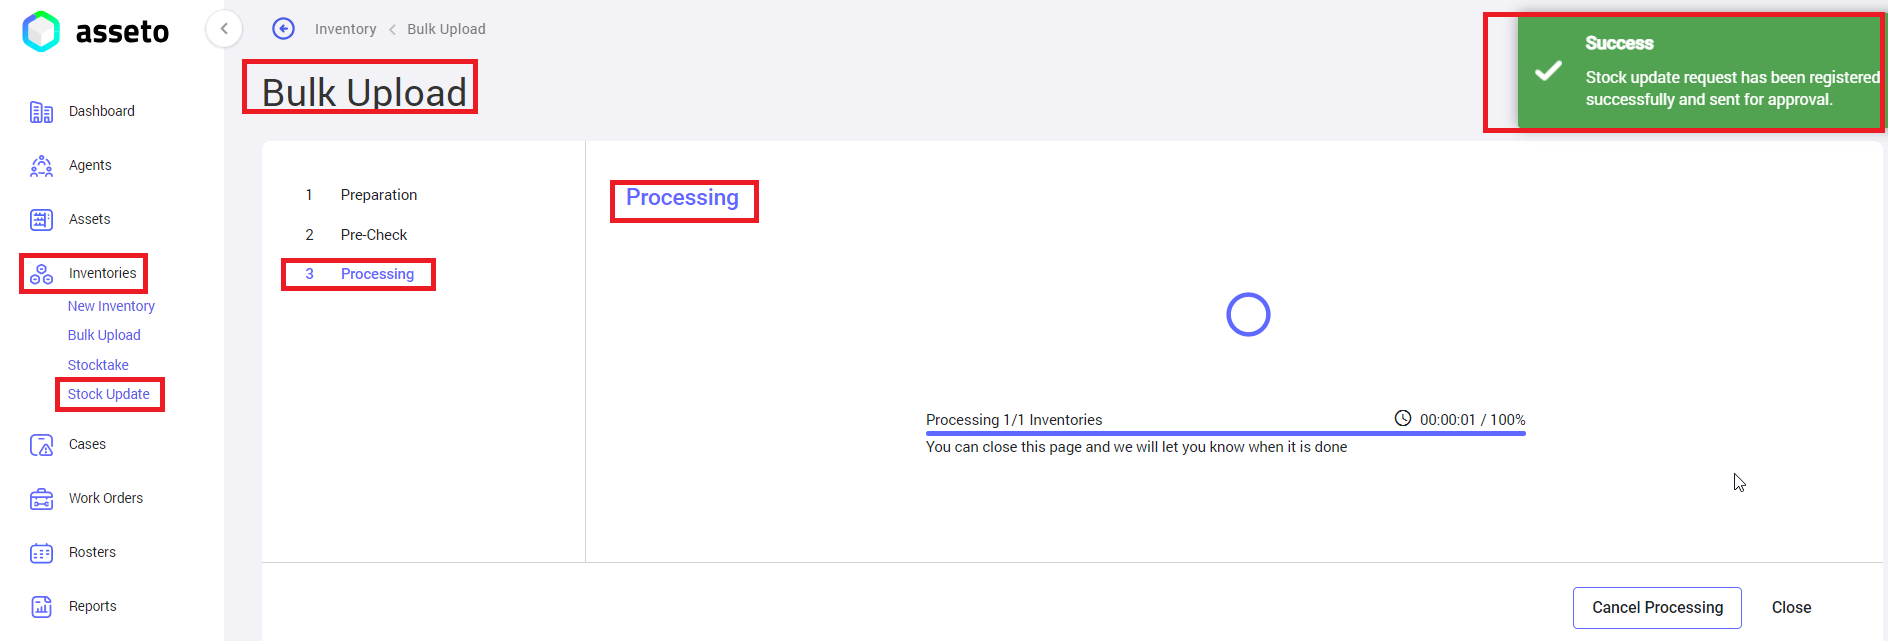
Next
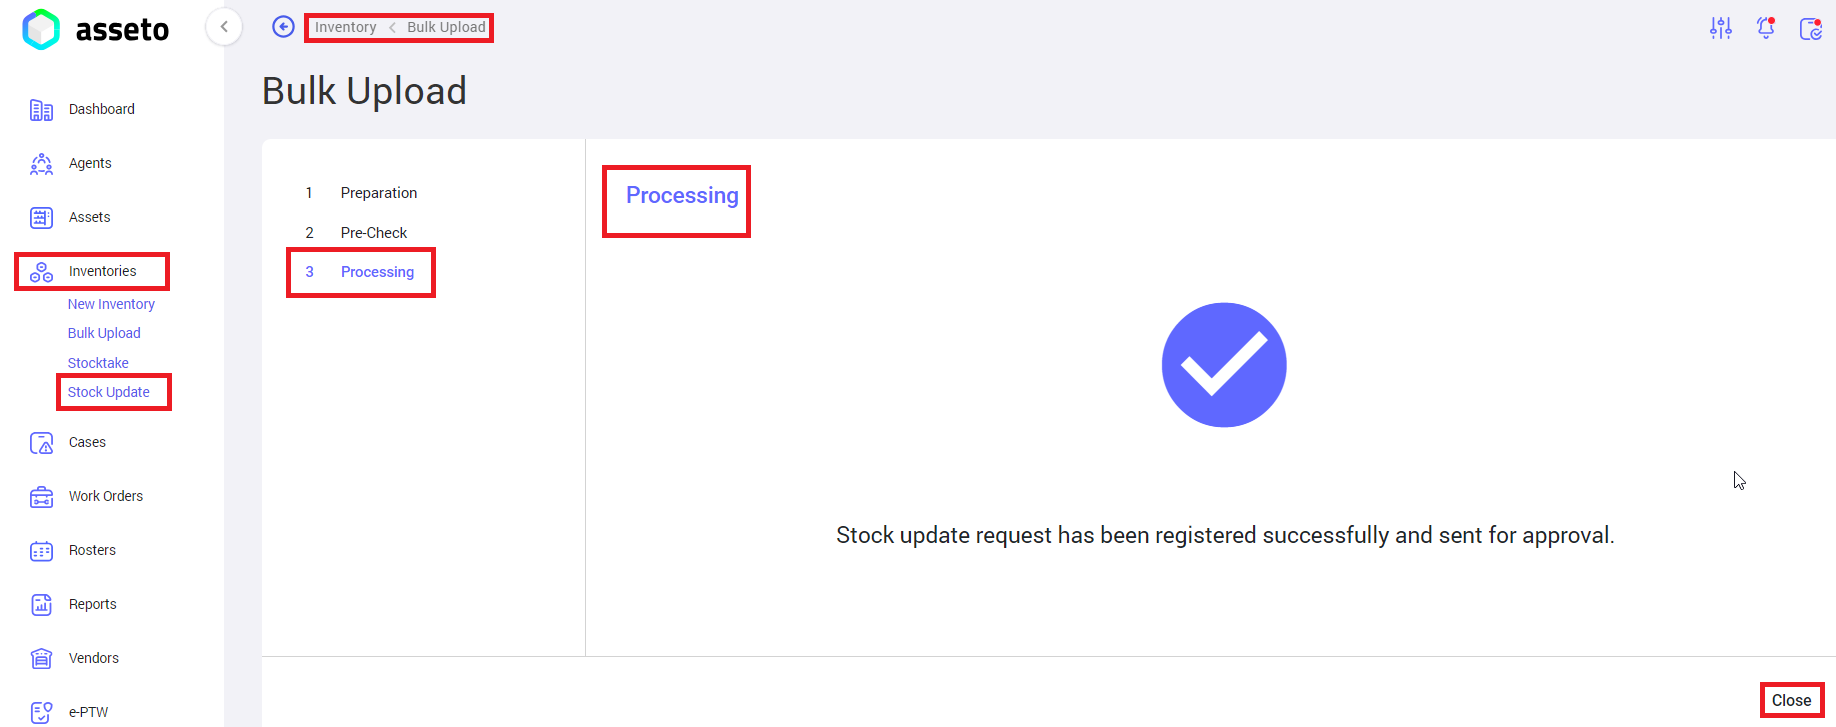
Click on close. added stock update data file through bulk upload will be sent to coordinator for approval and system navigate to stock update bulk upload page as shown by following screenshot.
Note: Agent having role type coordinator can approve or reject the stock update file.
No Comments