9.4. Vendor Detail View
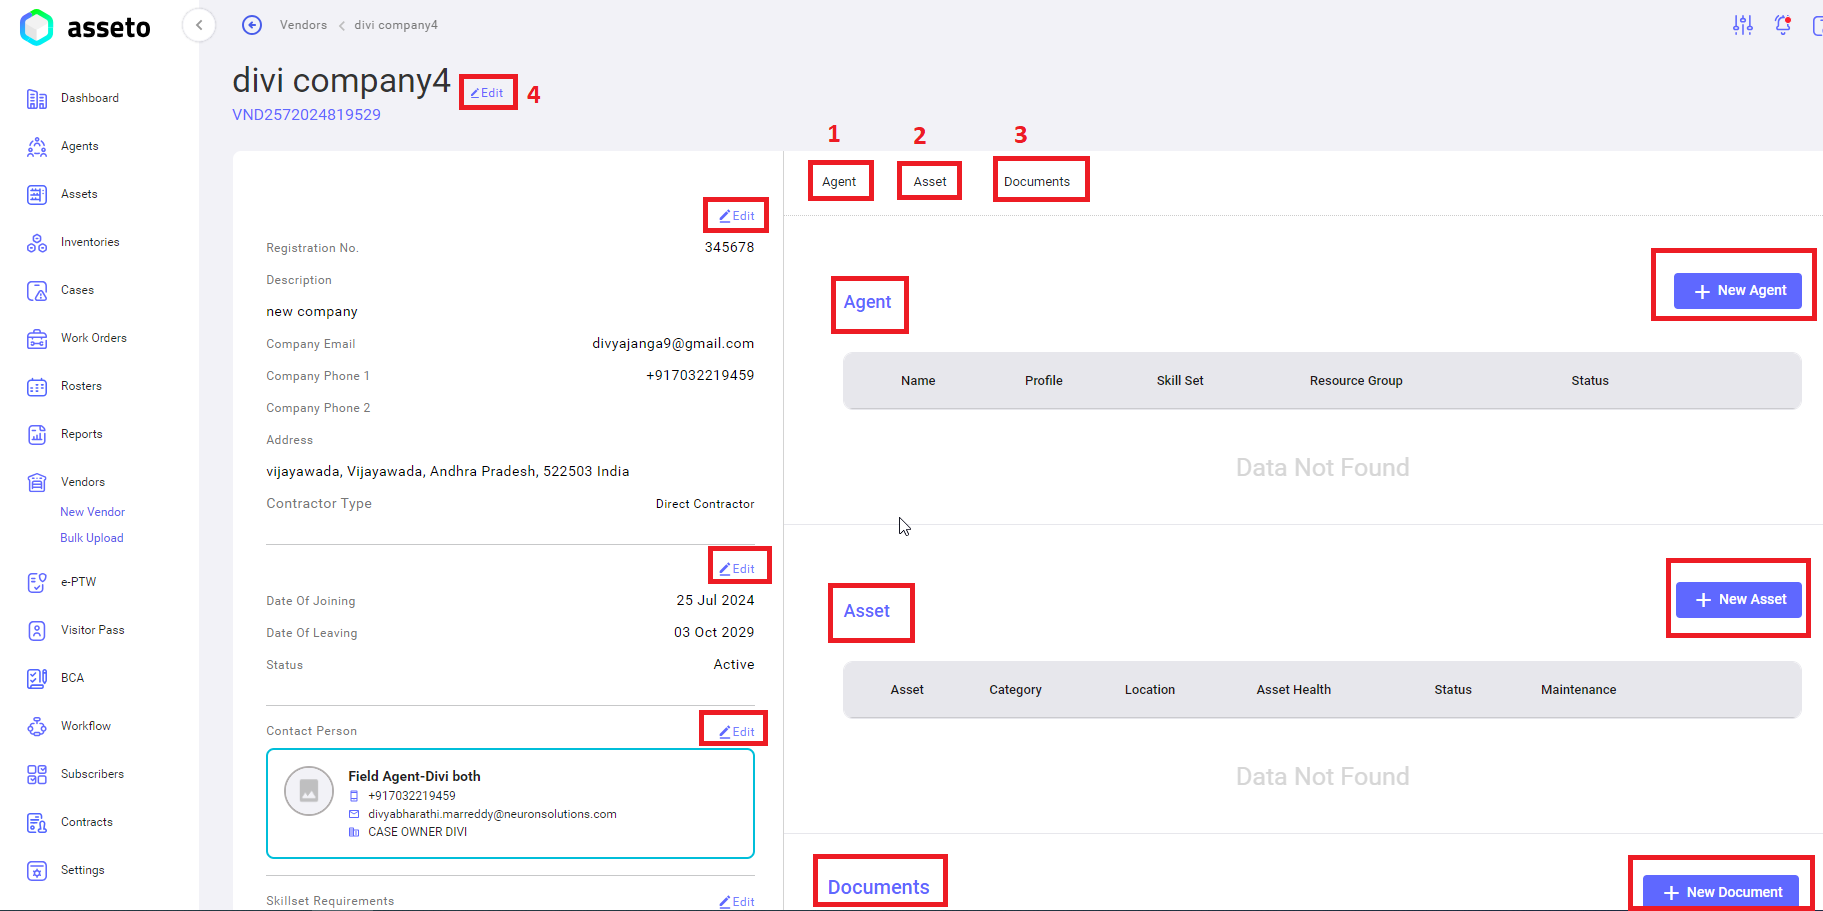
Here you can view the detailed information of the vendor (as shown by following screenshots). Clicking on the specific vendor on the vendor list will be navigated to the vendor detail’s view page.
On the vendor view page, users can add or remove agents and assets (linking vendor to assets and agents).
Vendors view page having following features
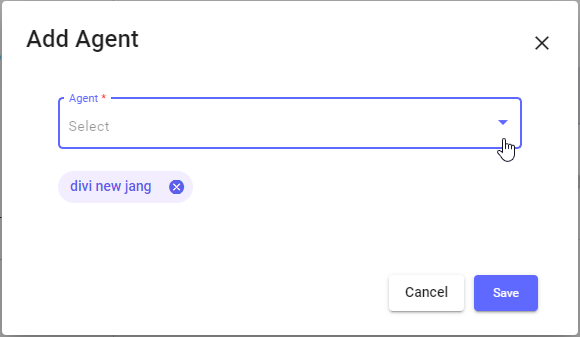
- Agent Section: Agents can be selected from a dropdown list of those already created in the agents module within the Asseto application. This functionality allows for the assignment of agents on a contract basis.
when you click on the agent tab the system will navigate to agent section. Here you can add an agent under this vendor. Here user can view already associated agents with this vendor.
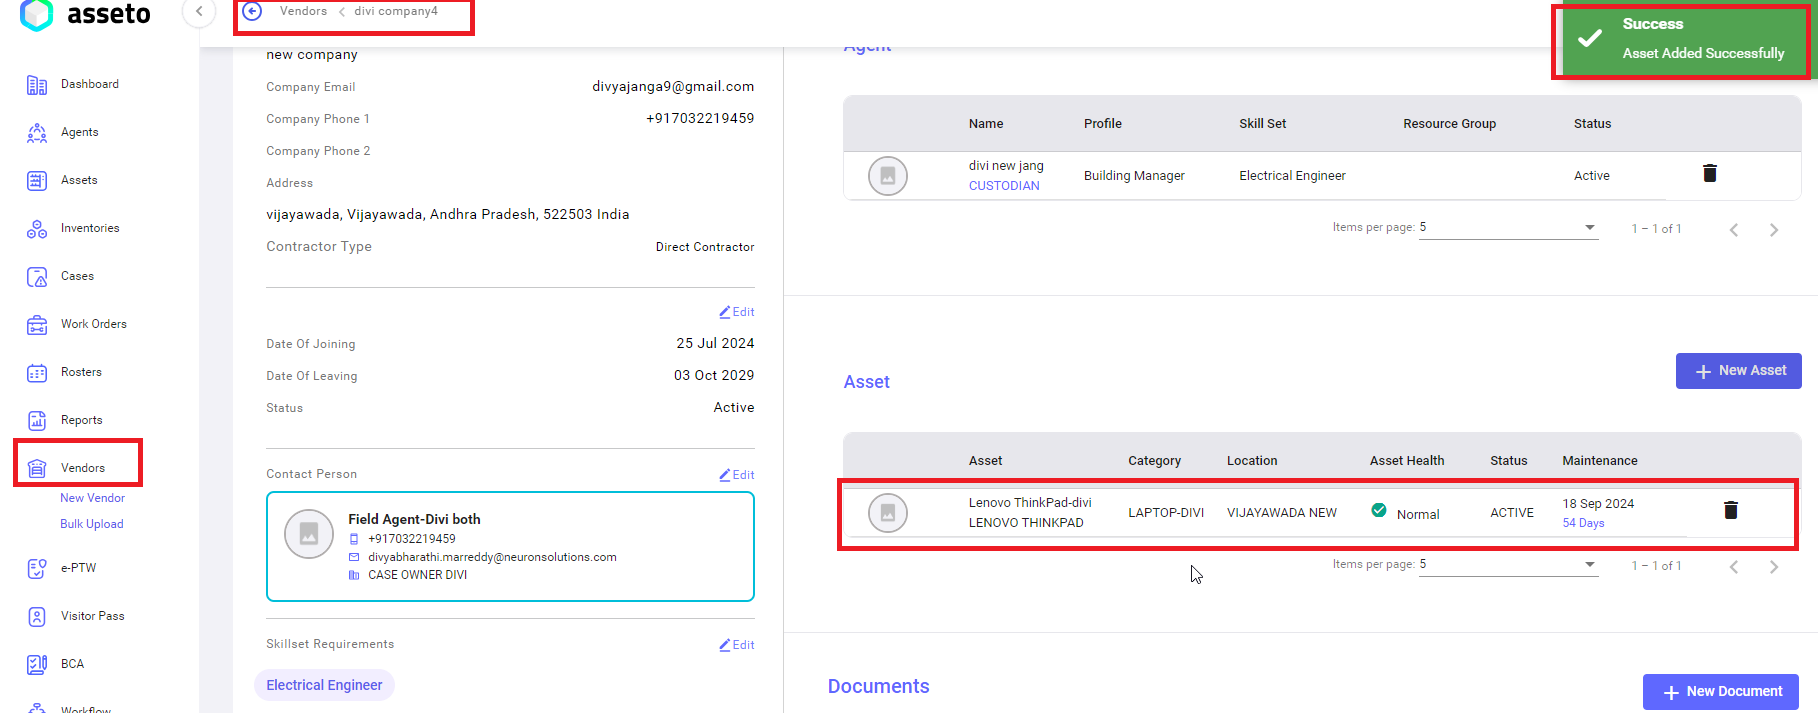
Select one agent from dropdown and click on save button, “agent added successfully” confirmation message will appear, and selected agent will be added in agent section as shown by the following screenshot.
Note: When an agent is tagged to a vendor, it indicates that the agent has been contracted to work for that vendor.
Delete: By clicking on the delete icon user can delete association between agent and vendor.
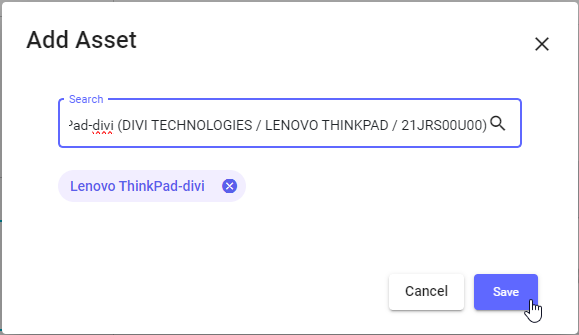
2. Asset Section: Assets can be selected from a dropdown list of those already created in the assets module within the Asseto application. This functionality allows the allocation of assets to the vendor.
When you click on the asset tab system will navigate to asset section. Here you can add assets under this vendor. Here user can view already associated assets with this vendor.
Select one asset from dropdown and click on save button, “asset added successfully” confirmation message will appear, and selected asset will be added in asset section.
Delete: By clicking on the delete icon user can delete association between asset and vendor.
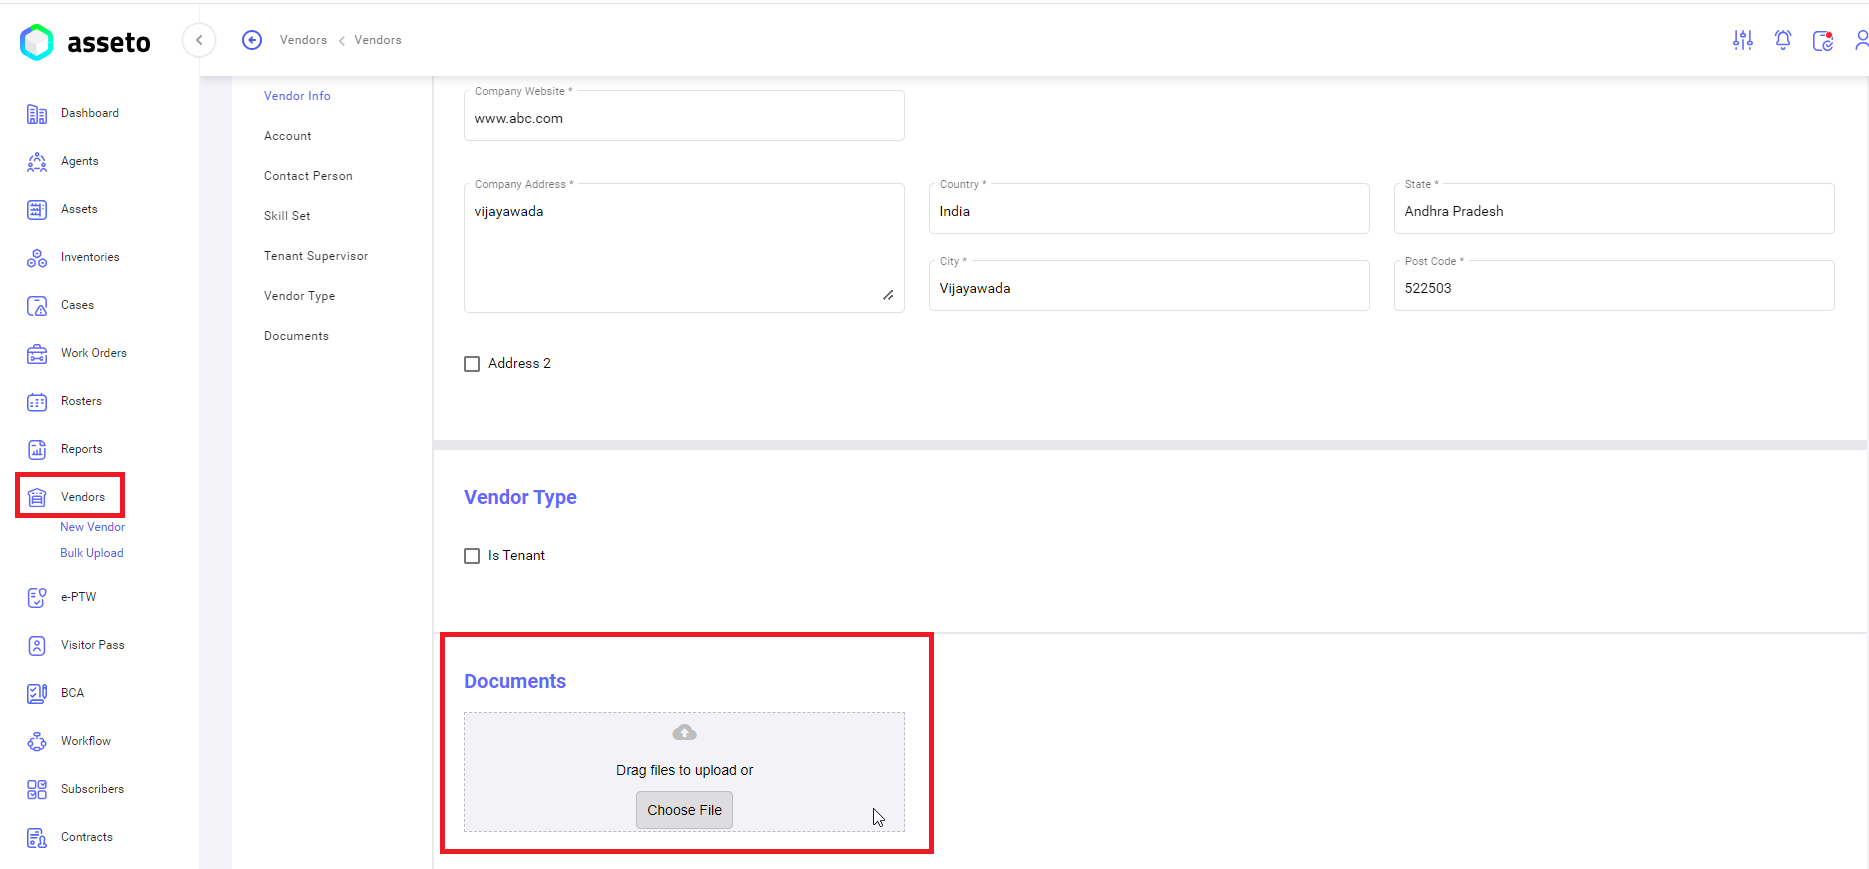
3. Documents Section: when you click on the documents tab the system will navigate to vendor edit page documents section. Here you can add documents under this vendor.
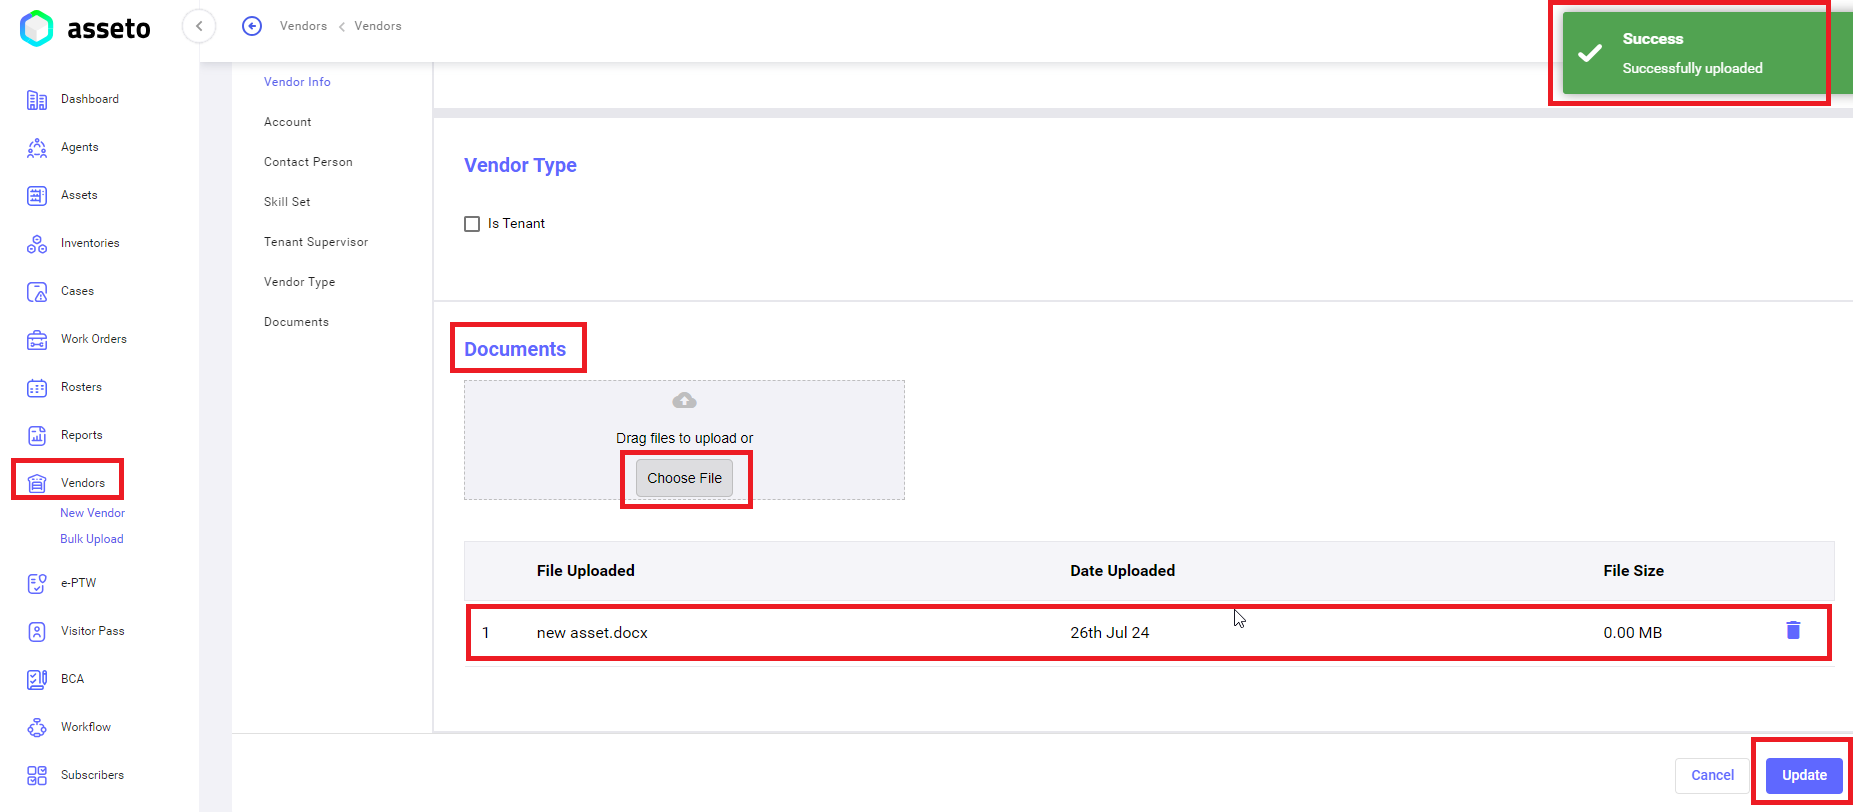
Click on ‘choose file’ button, select your document from local pc.
“Successfully uploaded” confirmation message will appear. Click on the update button, screen navigate to vendor detail view page.
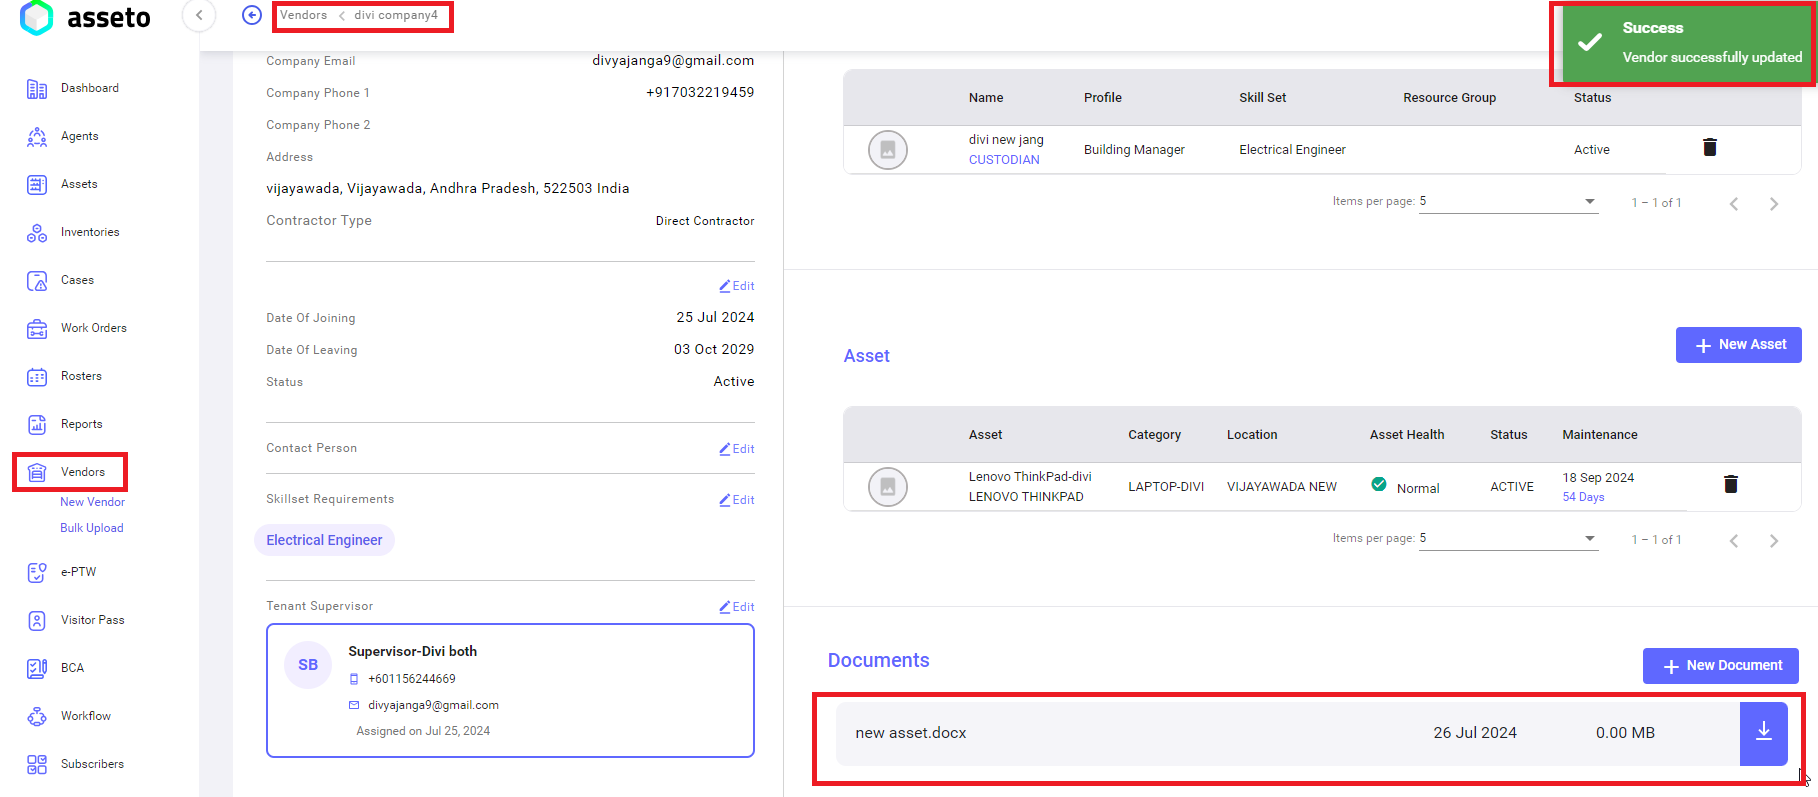
“Vendor successfully updated” confirmation message will appear.
In the documents section, the user can view recently added documents and already existing documents with this vendor.
To delete the document, click on “new document” then you navigate to vendor edit page there you can see already existing document with delete icon.


No Comments