2. My Organisation
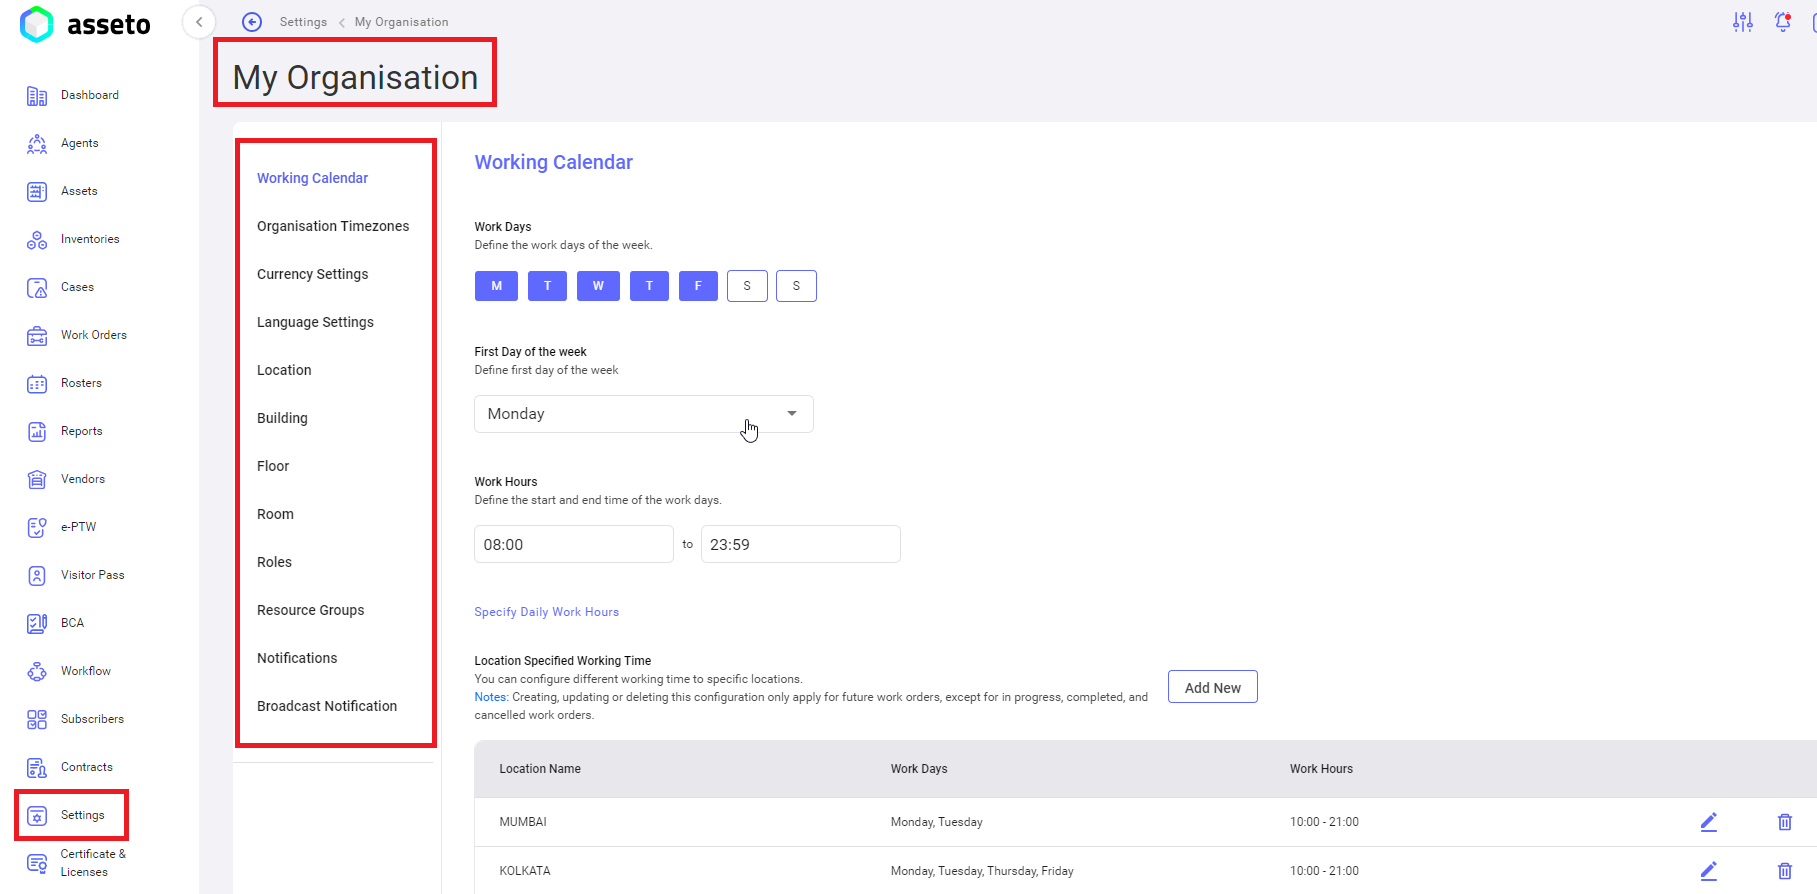
User can configure Working calendar, Organisation time zones, currency settings, Language settings, location, building, Floor, Room, Roles, Resource groups, Notifications and Broadcast Notification. Options are available as menu on left side, working calendar is highlighted by default.
Settings -> My Organisation:
i. Settings -> My Organisation -> working calendar:
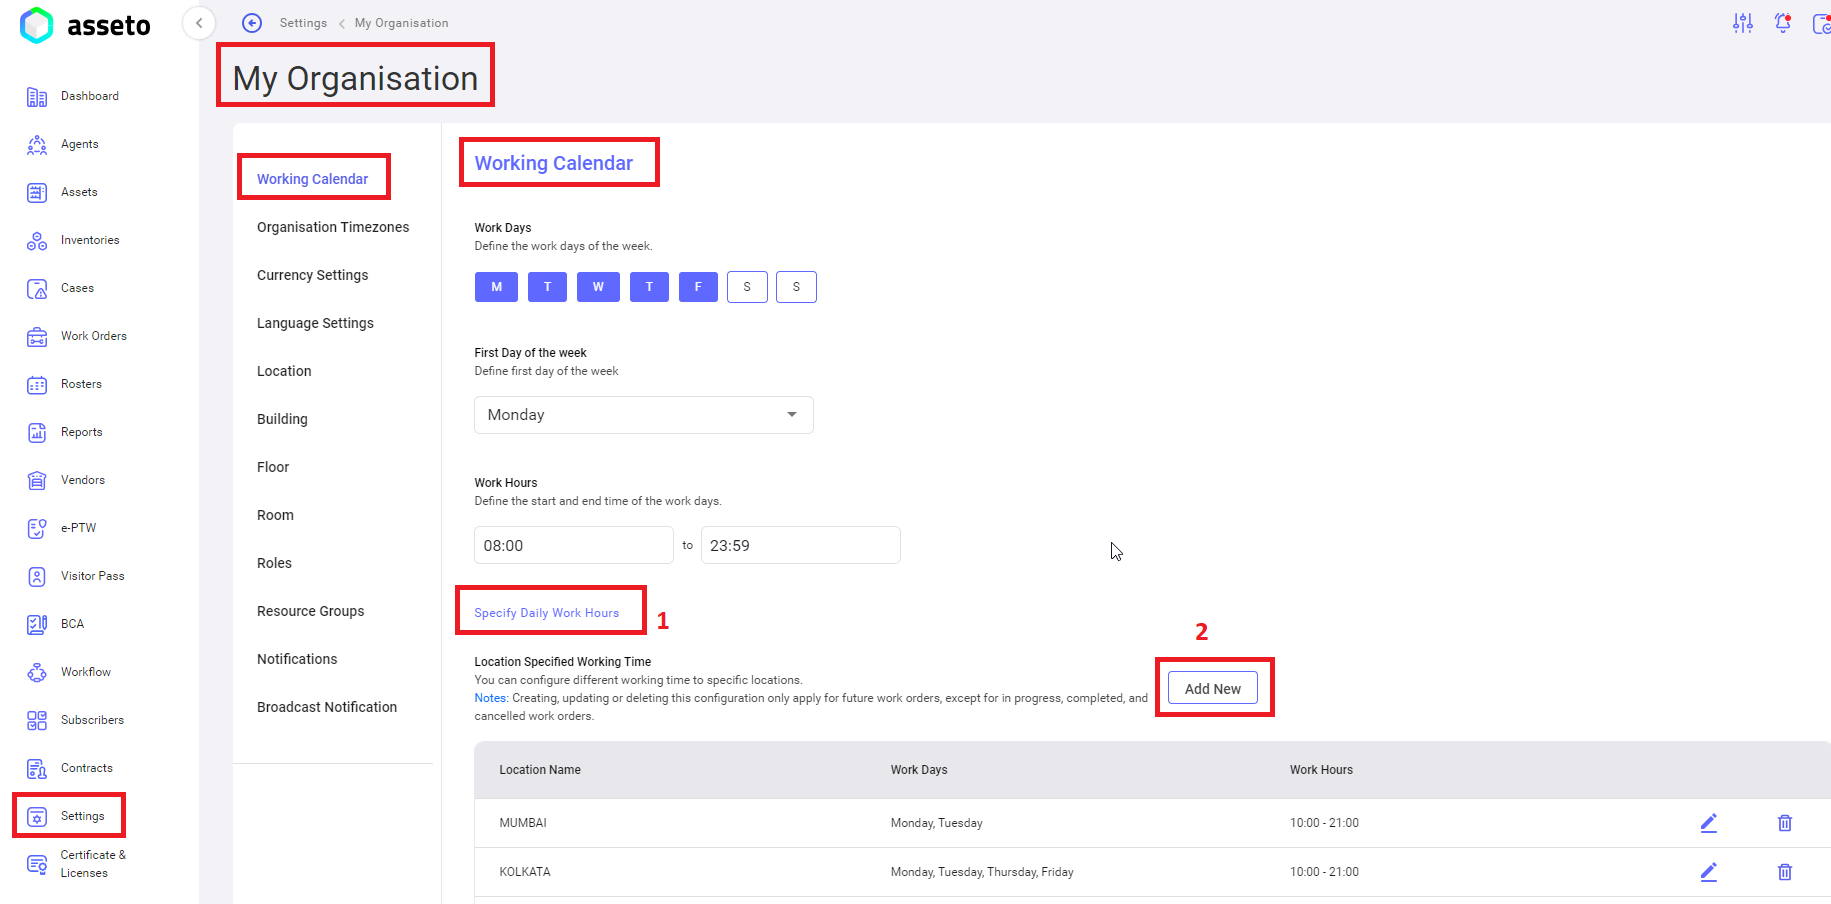
This feature is useful to customize your organization working days and working hours.
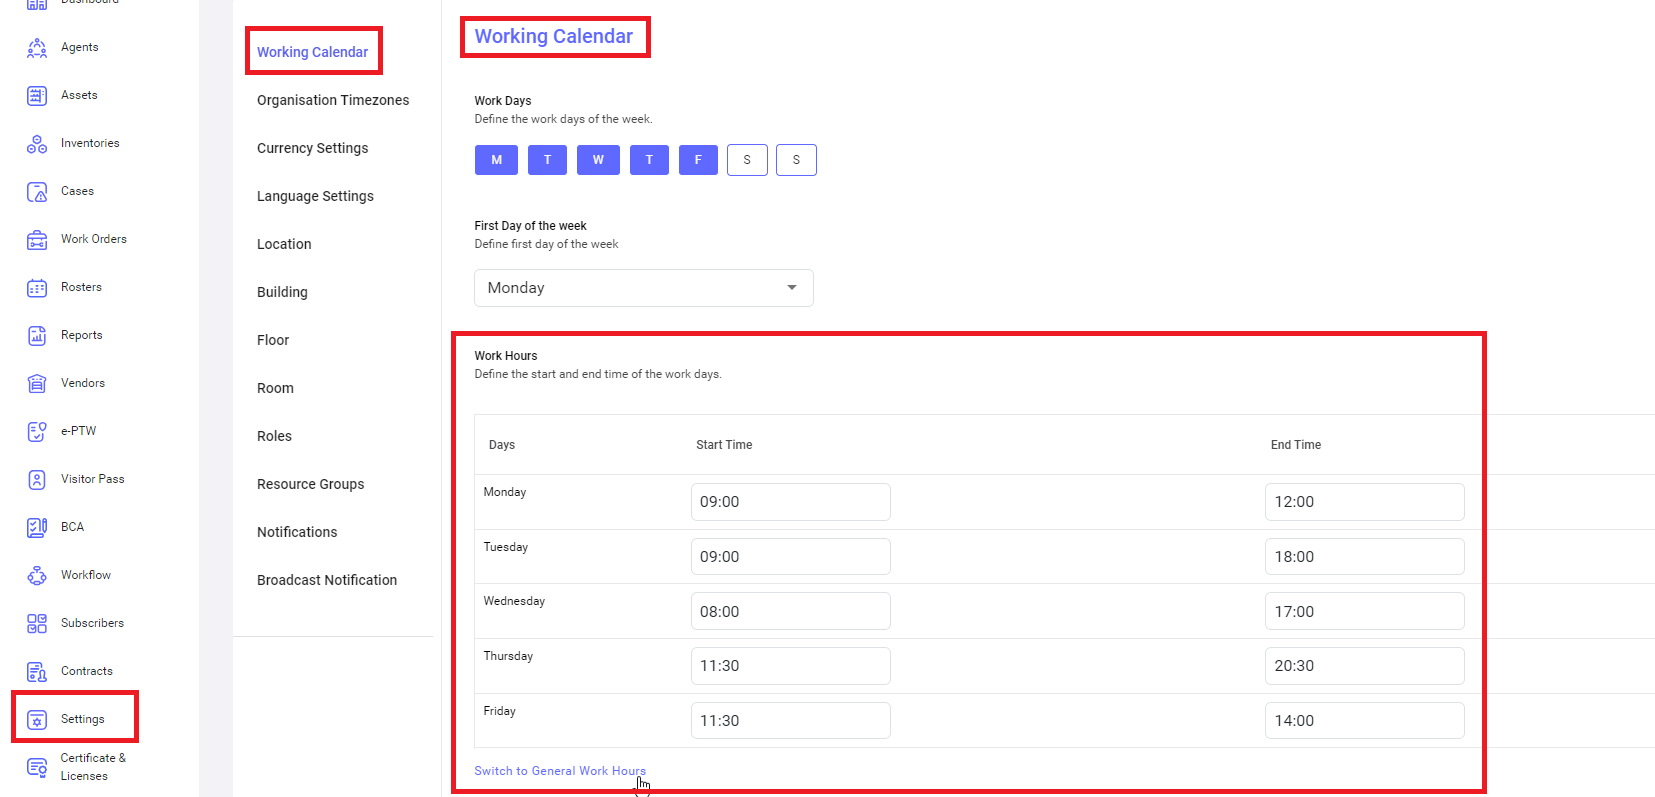
- Specify Daily Work Hours: when you click on this link following table will be display to customize your organisation start time and end time in day-day.
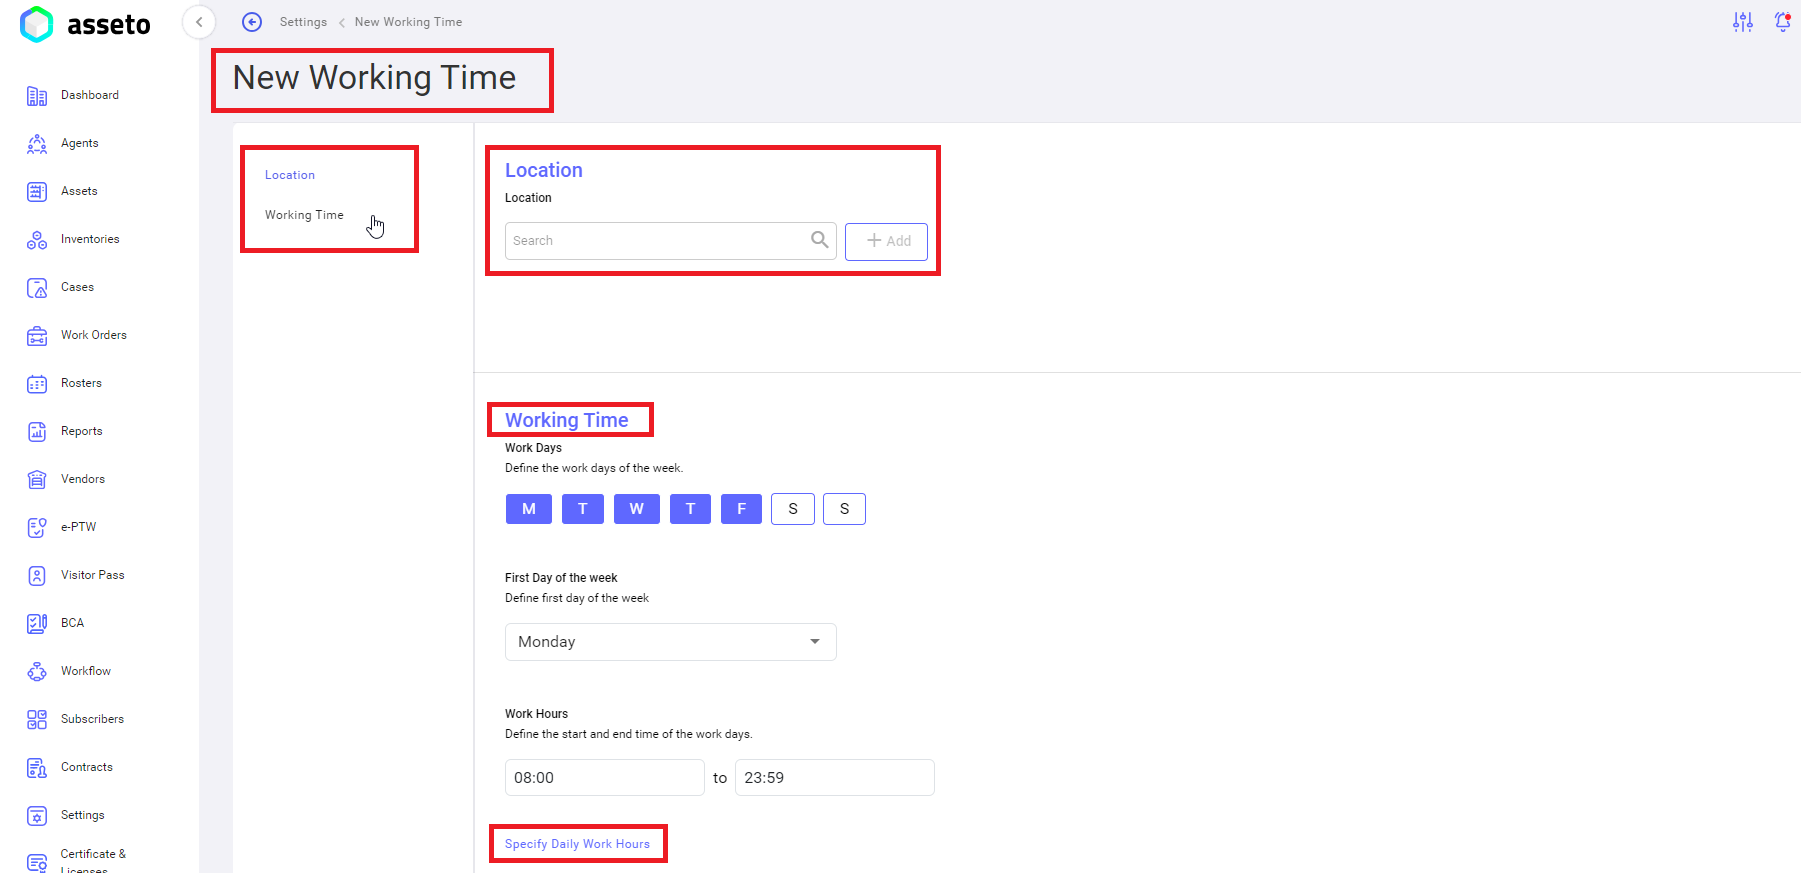
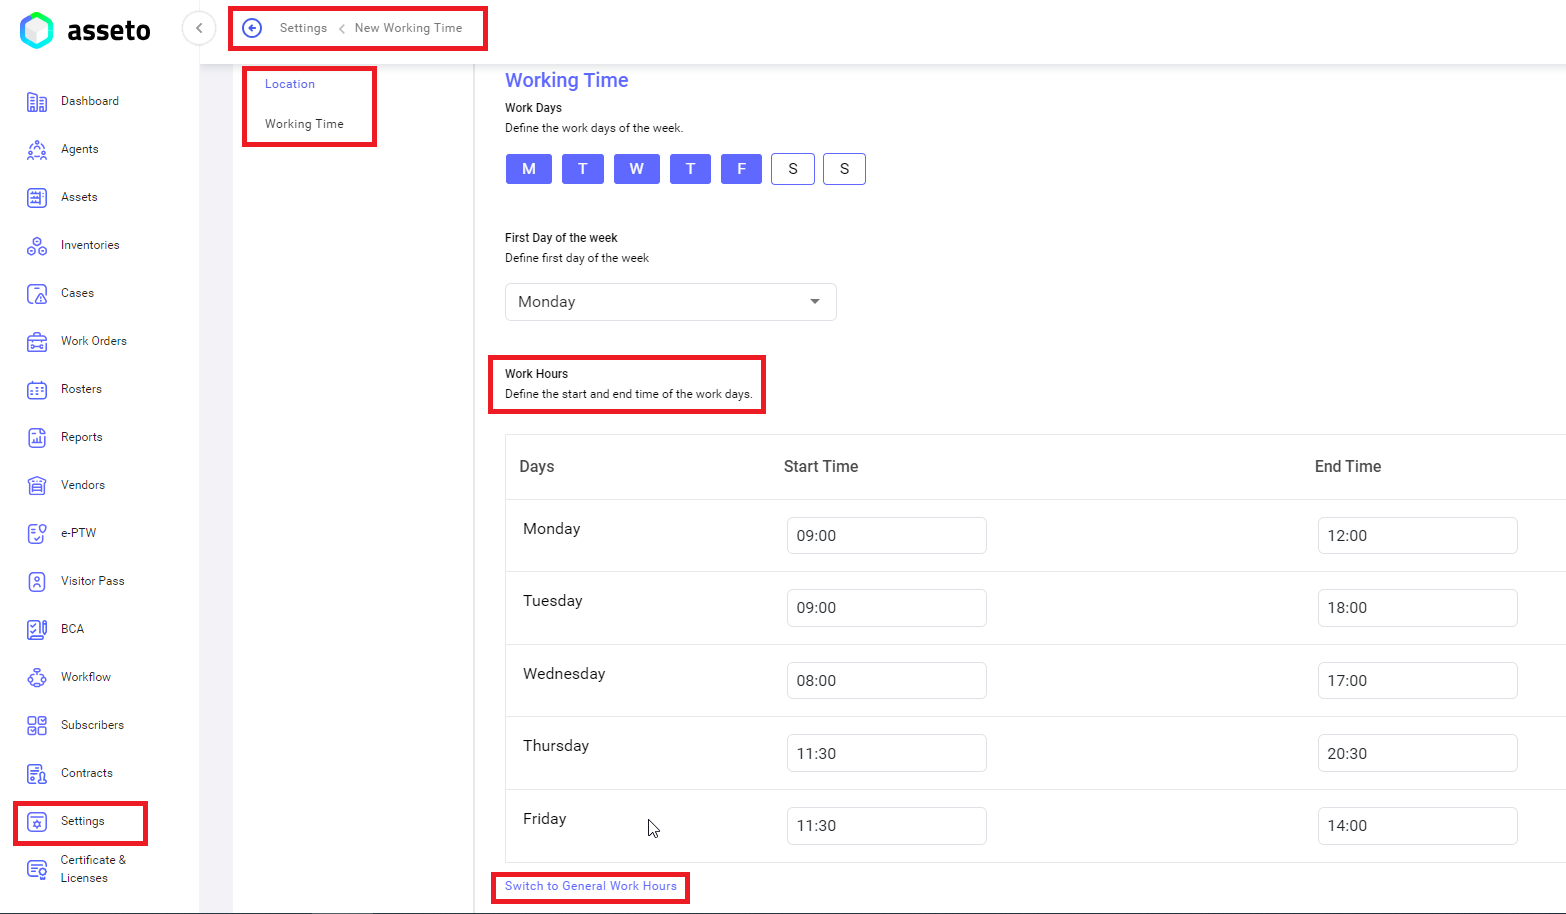
2. Add New: when you click on “Add New” button following table will be navigate to “New Working Time” page to customize working days and hours based on location.
Add locations and specify working days. When user want to customize working hours click on “specify work hours” button to select working hours for your selected location organization.
Added working days and working hours based on location shown by below table.
Edit/Delete: User can edit and delete the location based working time by clicking on edit and delete icons.
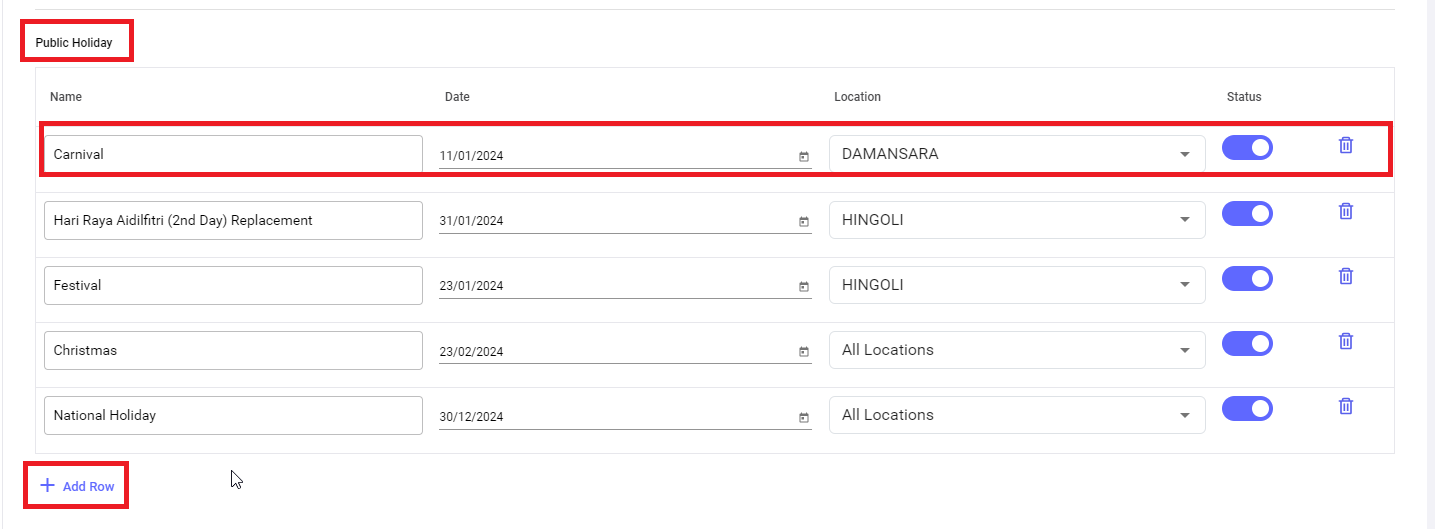
Public Holiday: To configure holidays to your organization.
Click on “Add Row” button new row will be display to fill the fields, by default status is enabled user can disable or delete when there is no need of particular row (holiday).
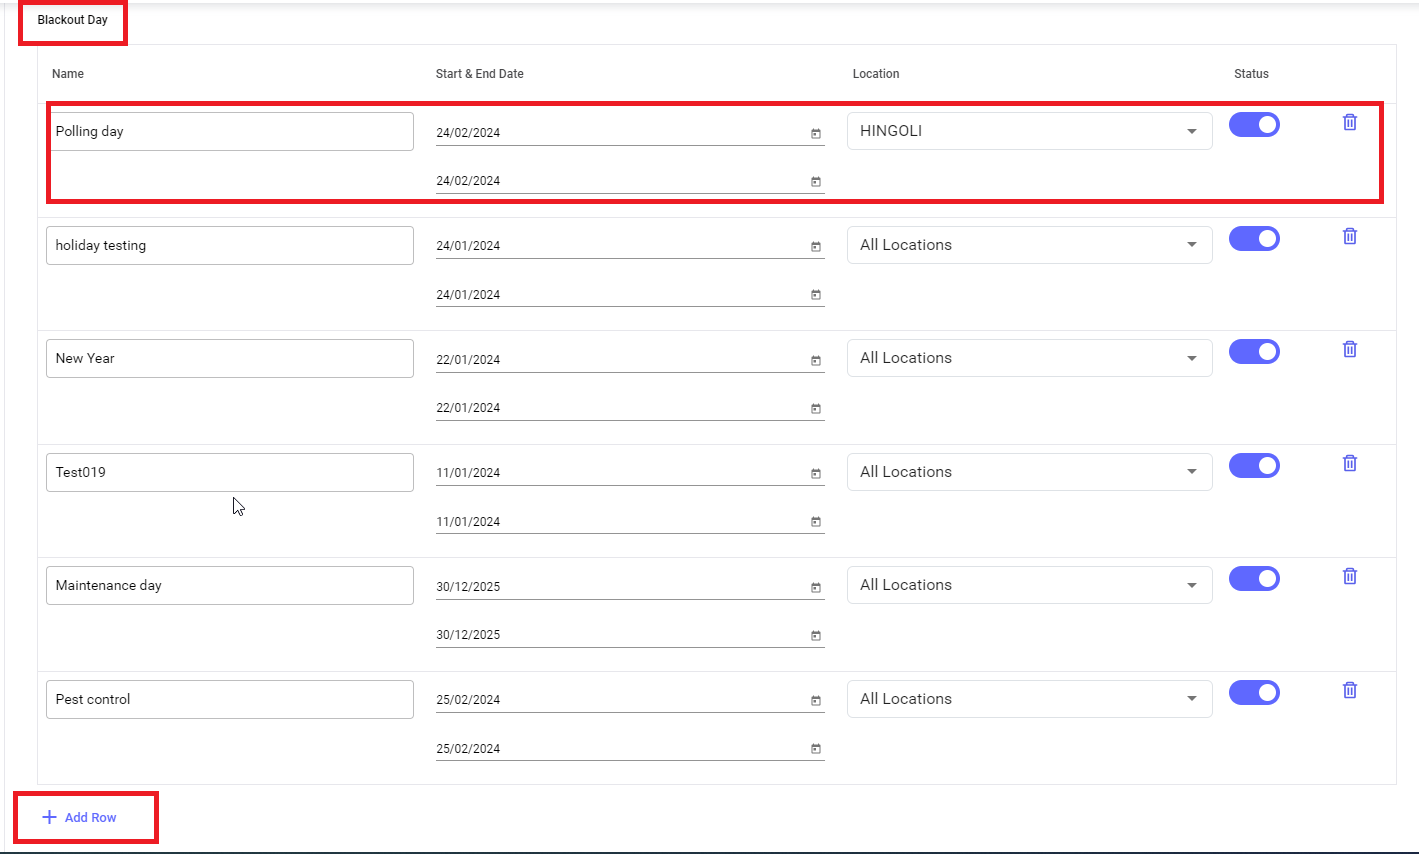
Blackout Day: To configure blackout days to your organization.
Click on “Add Row” button new row will be display to fill the fields, by default status is enabled user can disable or delete when there is no need of particular row (Blackout Day).
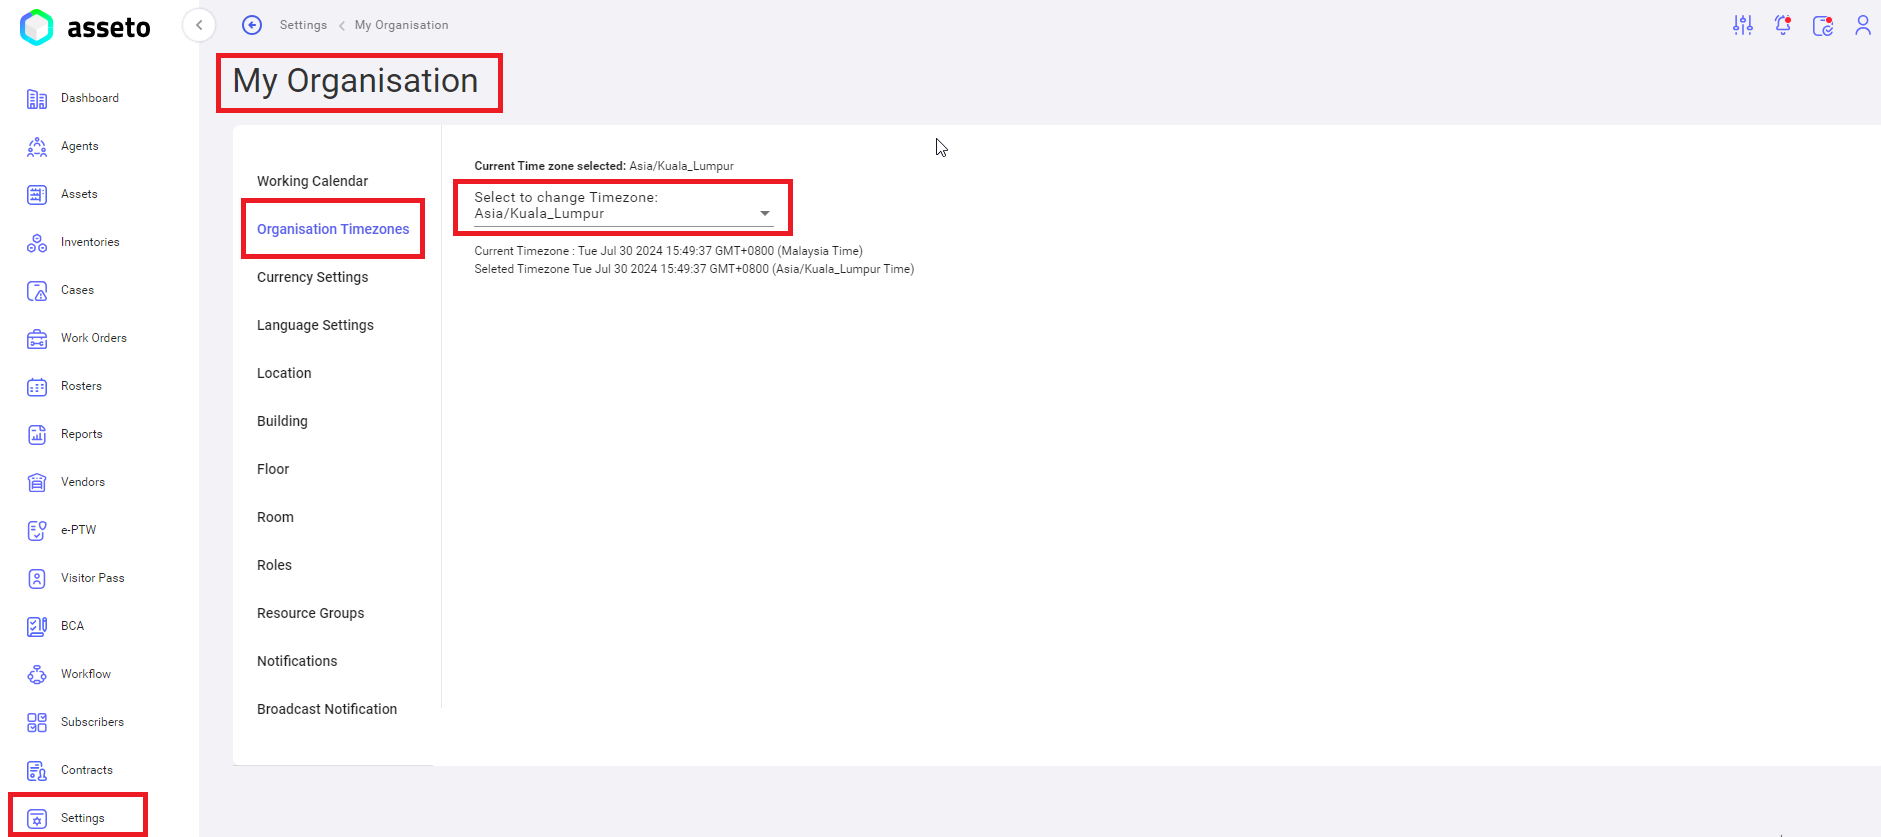
ii. Settings -> My Organisation -> Organisation Time Zones:
To configure your organization time zone country wise.
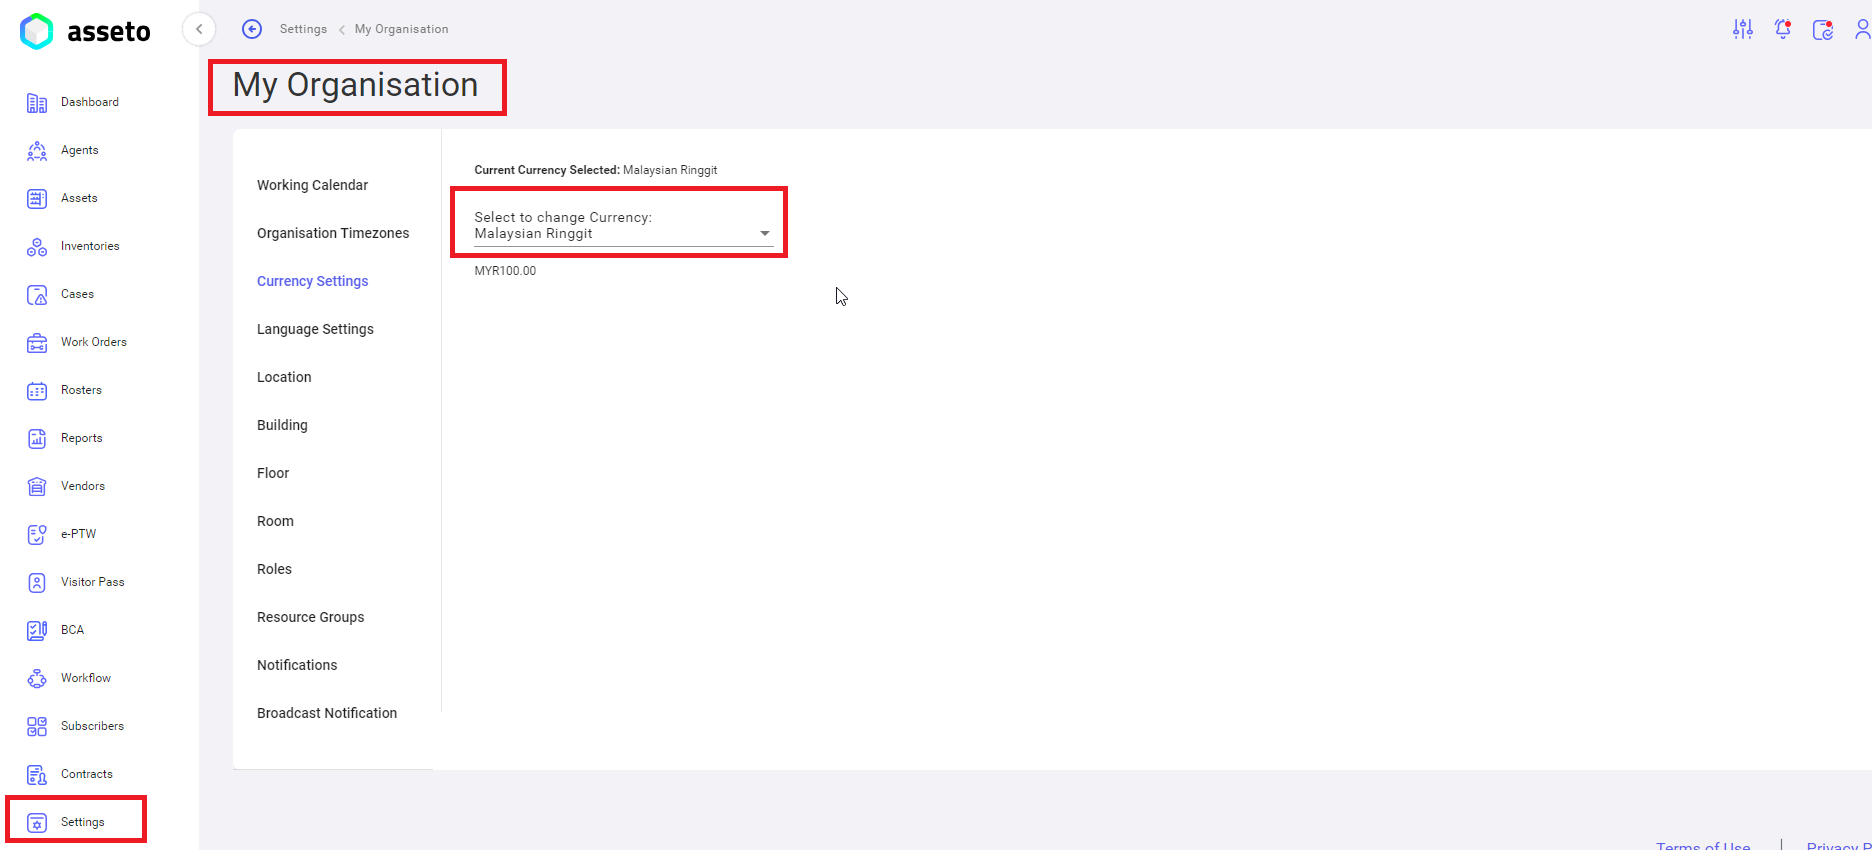
iii. Settings -> My Organisation -> Currency Settings:
To configure your organization currency type country wise like, INR, MYR, SGD…etc.
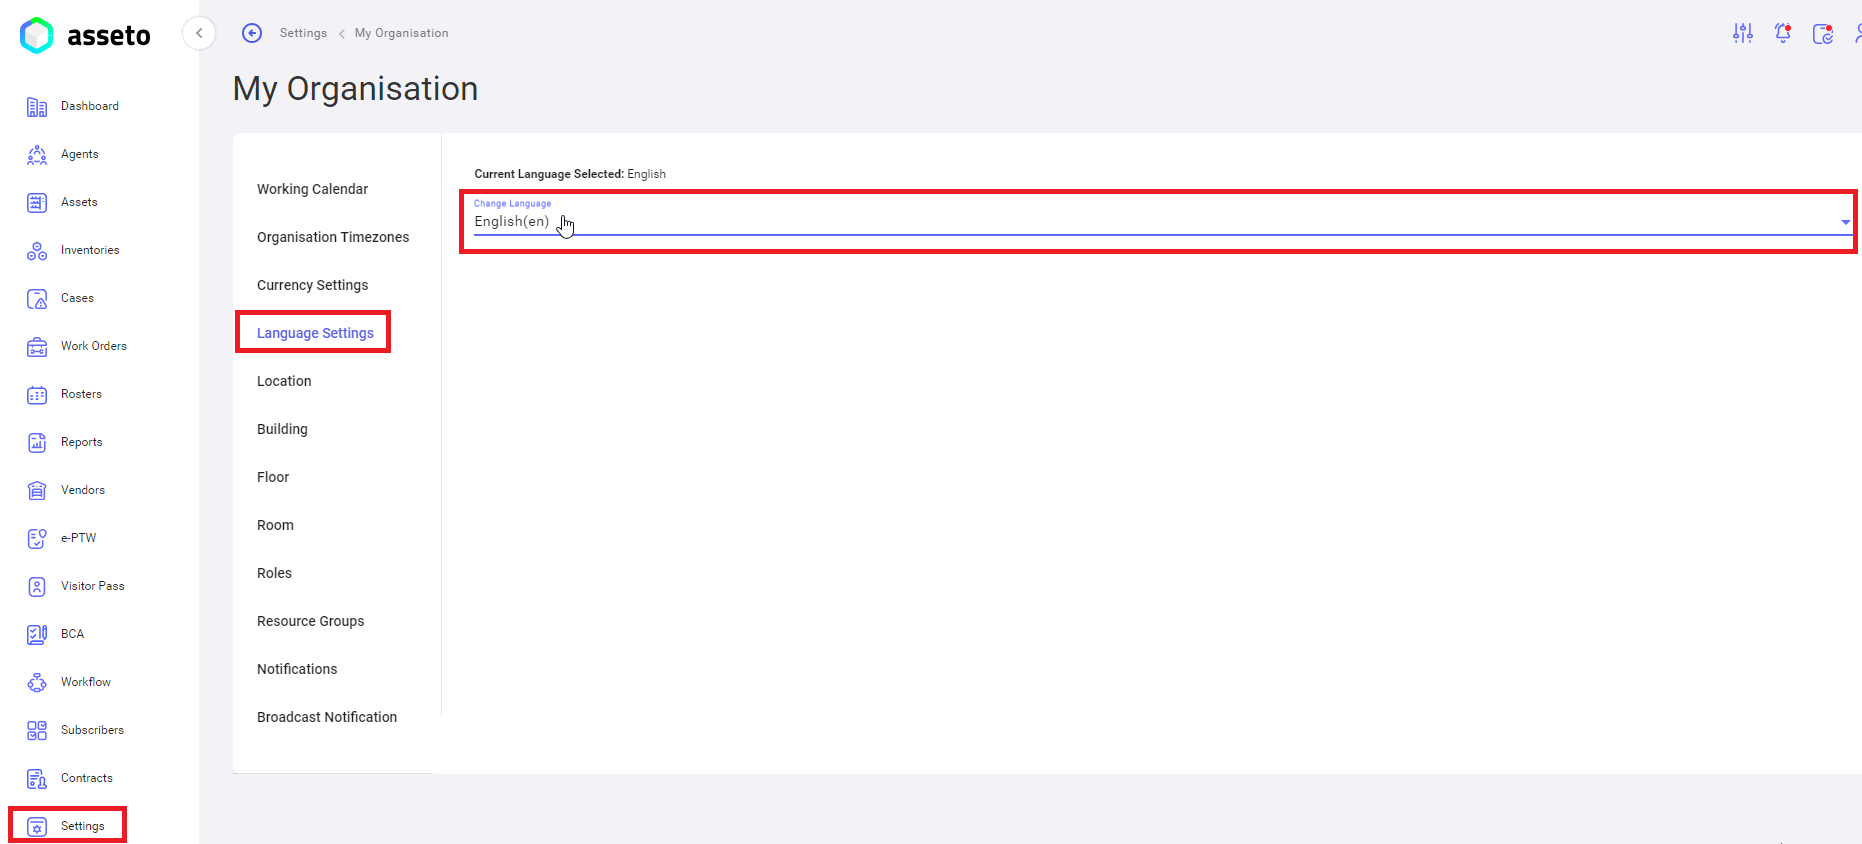
iv. Settings -> My Organisation -> Language Settings:
To configure your language type.
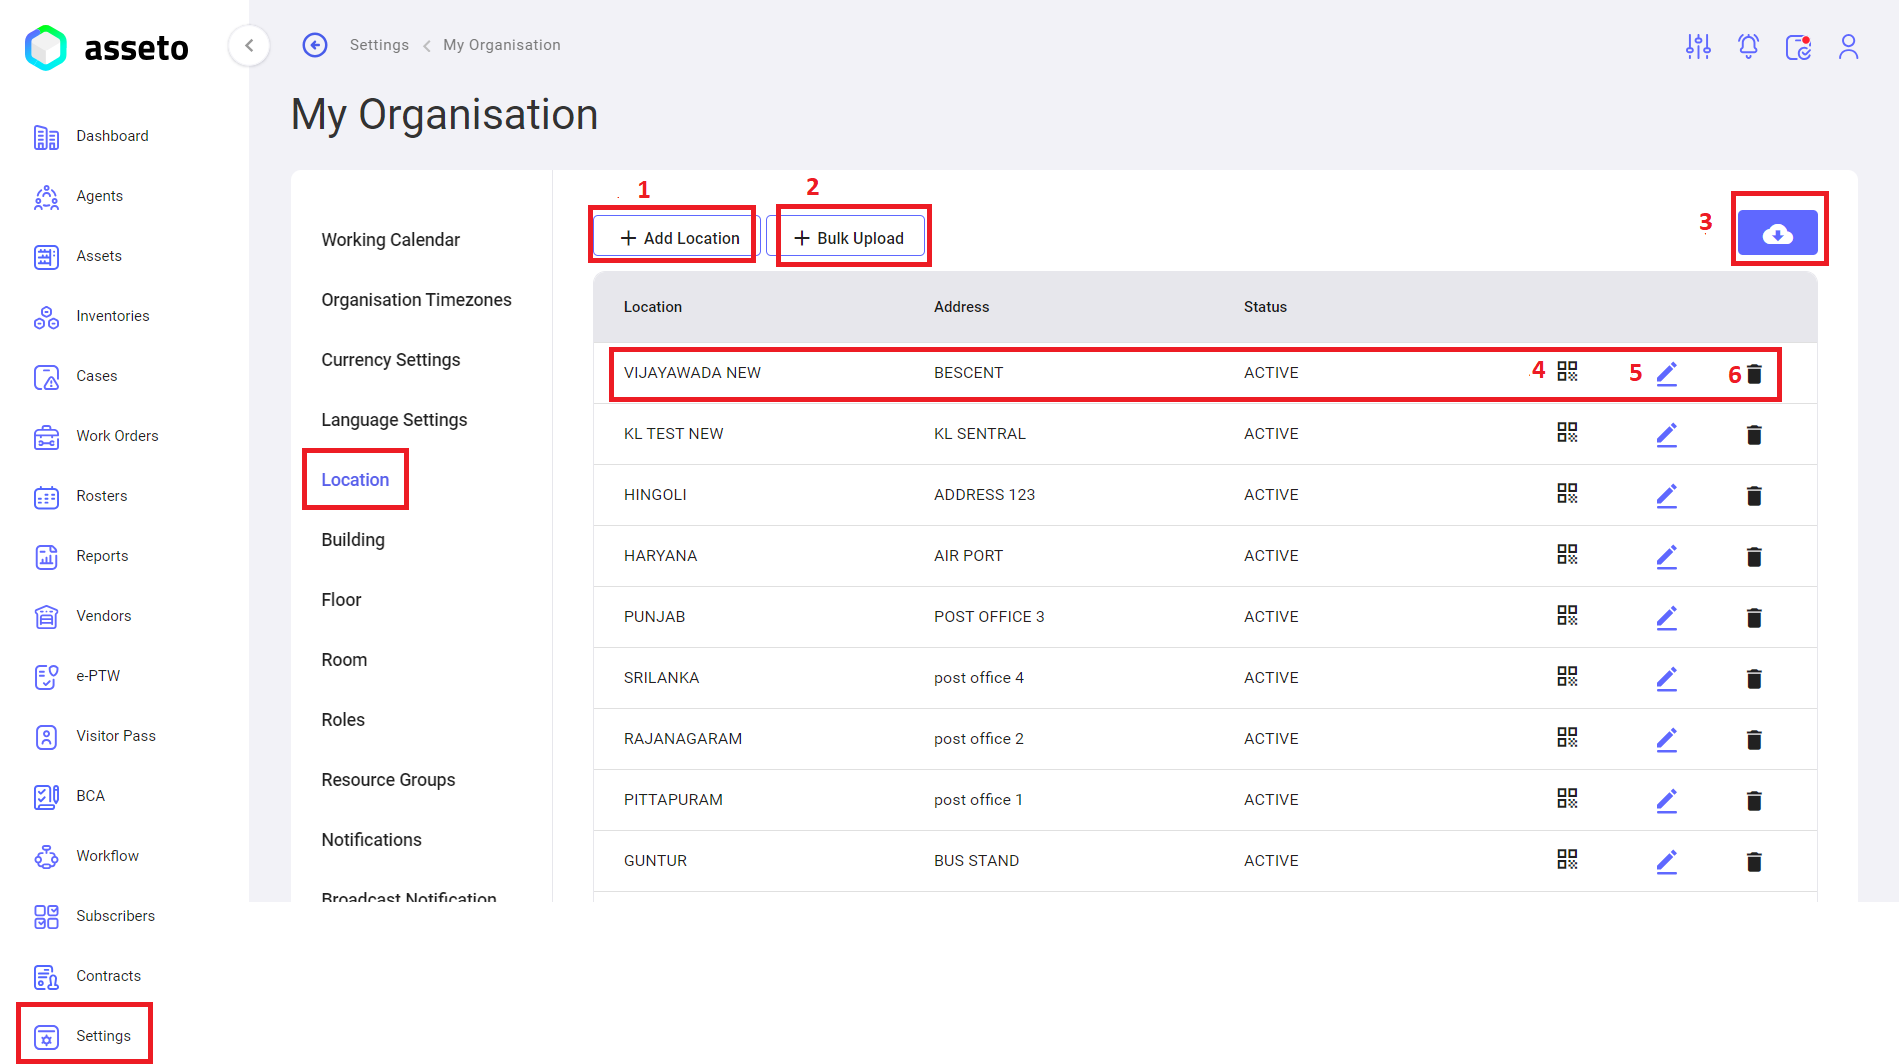
v. Settings -> My Organisation -> Location:
By using this feature user can add the location.
1. Add Location: click on add location button to create individual location.
When click on “add location” button following page will appear, fill the mandatory fields then only save button will be enabled. Click on save button your location details will be saved and displayed in the table first row.
2. Bulk Upload Location: click on bulk upload button to create multiple locations at a time, download csv file and fill the data then upload.
3. Export button: to download QR list (locations), you can export as with image or without image.
4. QR: click on QR icon and Scan QR to view that location
5. Edit Location: Here you edit already created locations by clicking on edit icon available in each row of Location list.
6. Delete Location: Here you delete already created locations by clicking on delete icon available in each row of Location list.
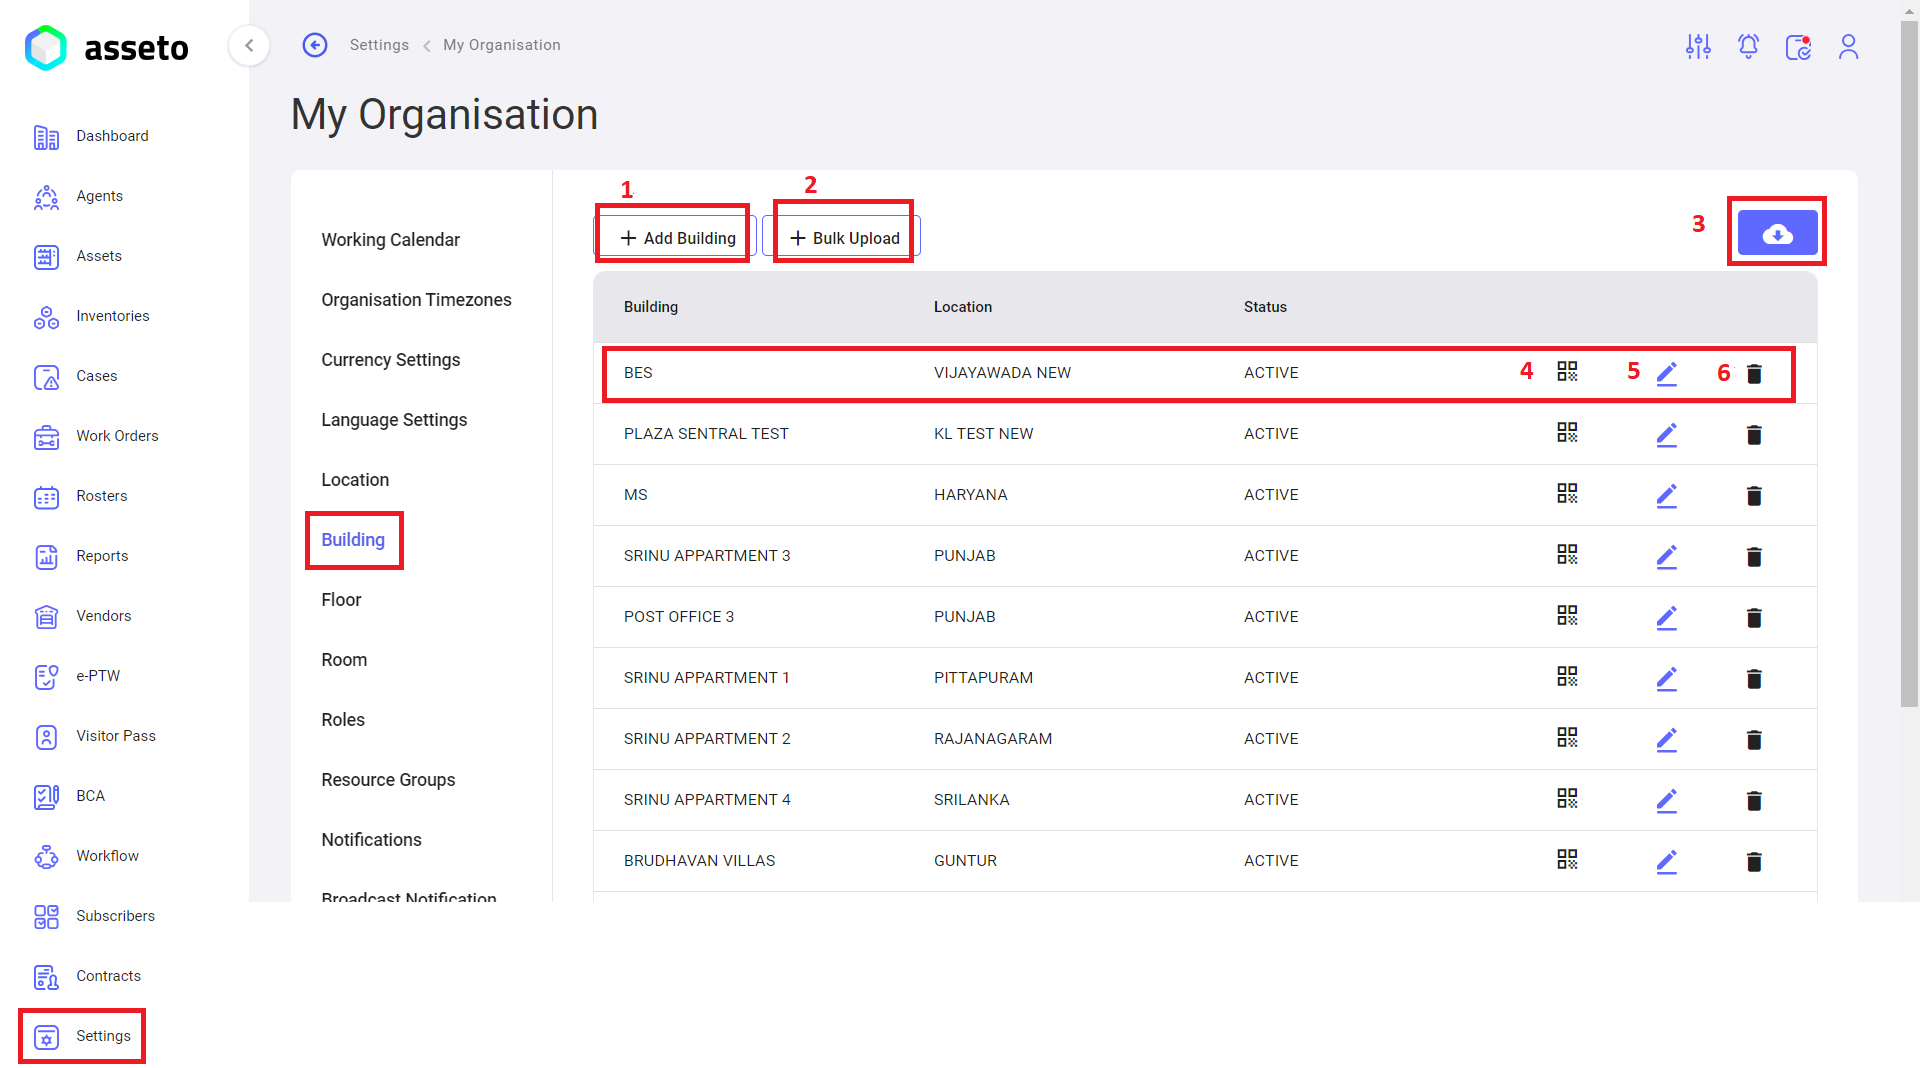
vi. Settings -> My Organisation -> Building:
By using this feature user can add the building.
1. Add Building: click on add building button to create individual building name.
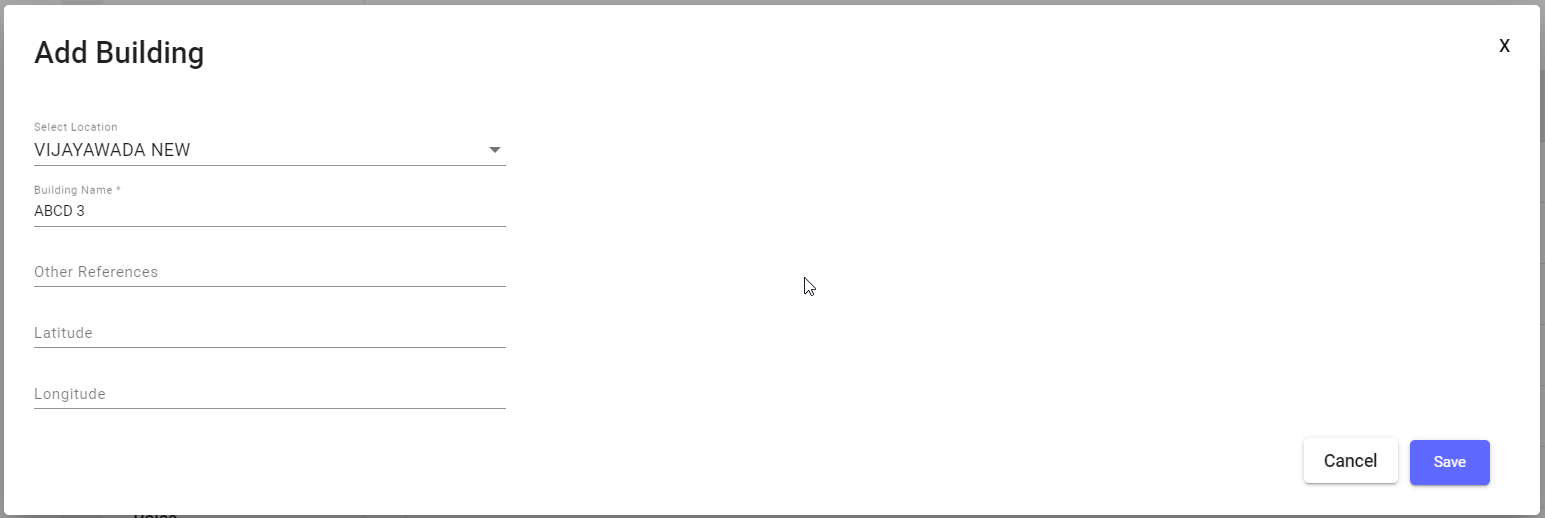
When click on “add building” button following page will appear, fill the mandatory fields then only save button will be enabled. Click on save button your building details will be saved and displayed in the table first row.
2. Bulk upload Building: click on bulk upload button to create multiple buildings at a time, download csv file and fill the data then upload.
3. Export button: to download QR list (buildings), you can export as with image or without image.
4. QR: click on QR icon and Scan QR to view that building name with location.
5. Edit Building: Here you can edit already created building names by clicking on edit icon available in each row of building list.
6. Delete Building: Here you can delete already created building names by clicking on delete icon available in each row of building list.
vii. Settings -> My Organisation -> Floor:
By using this feature user can add the floor.
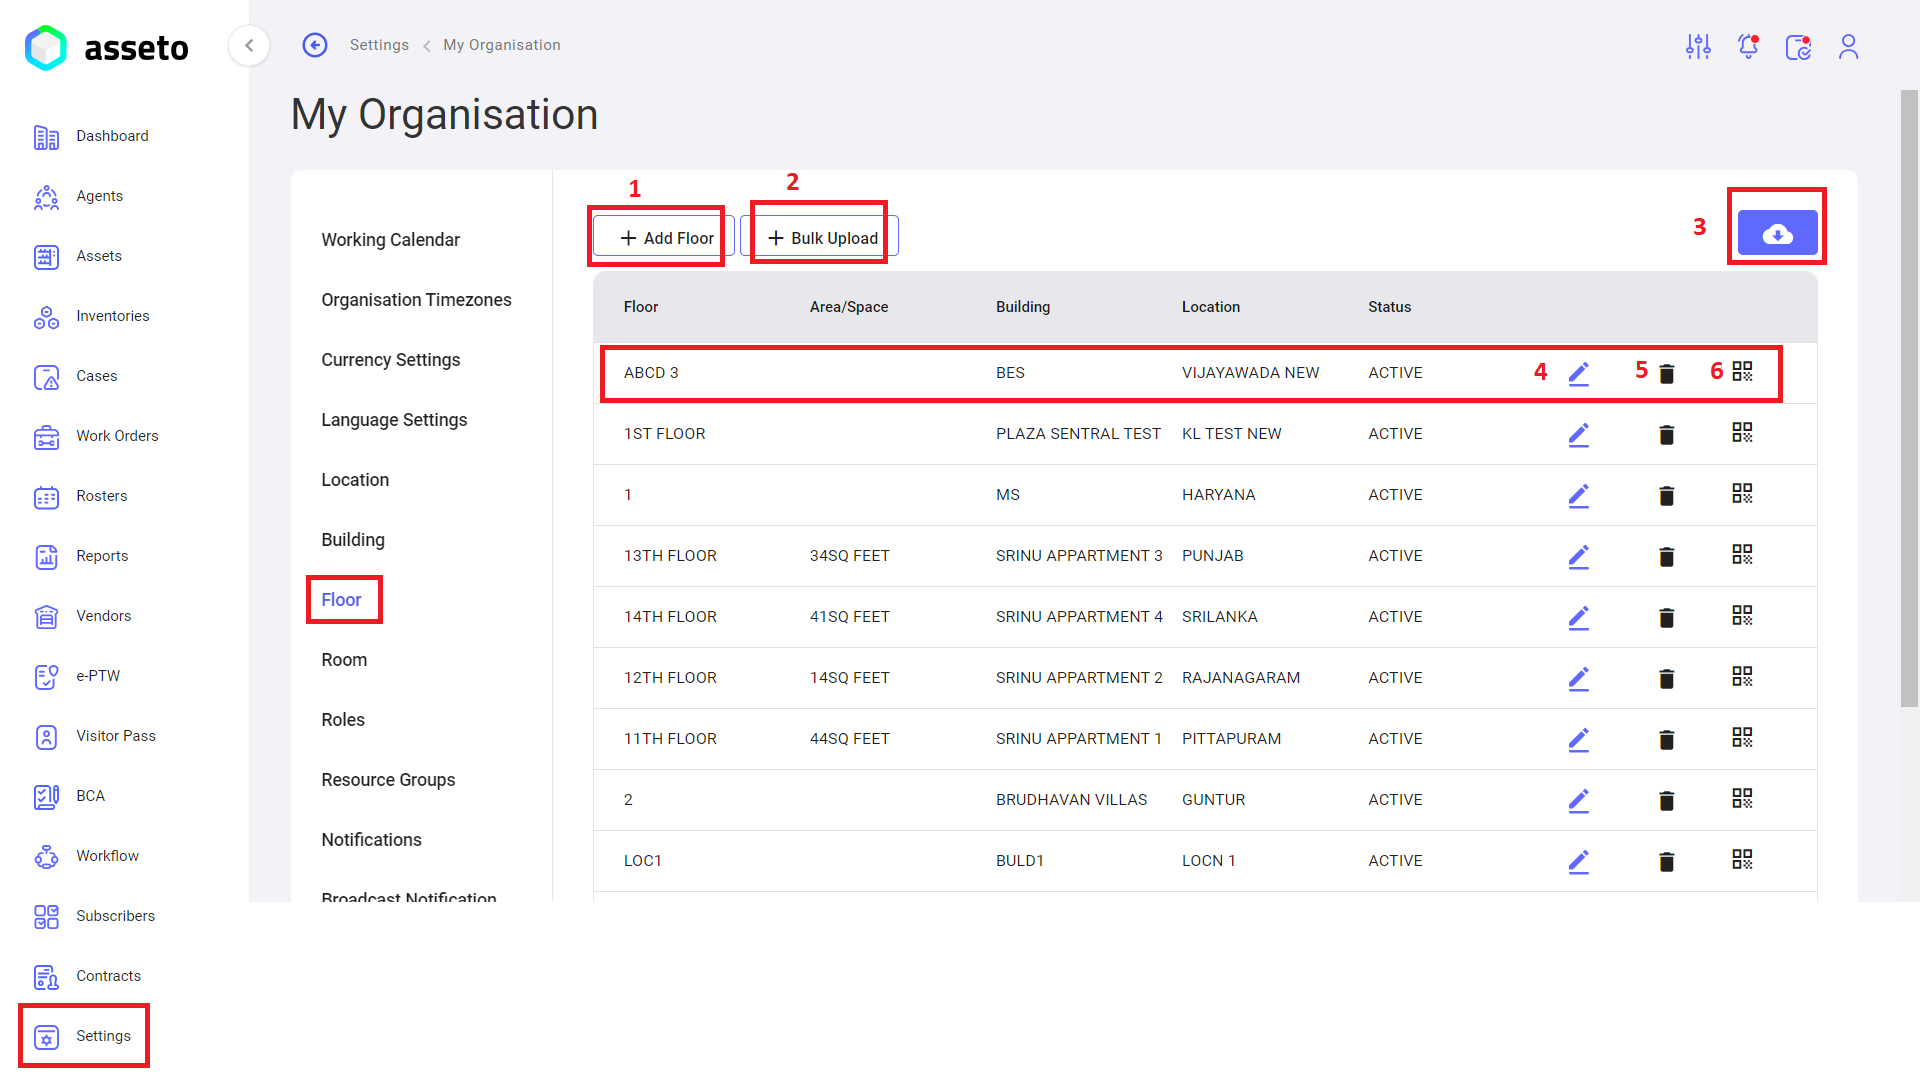
1. Add Floor: Click on add floor button to create individual floor name.
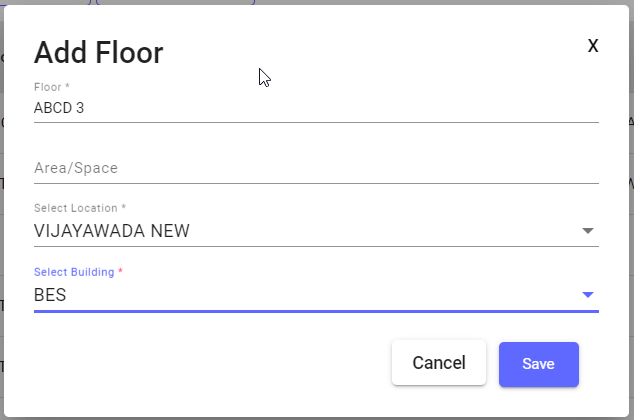
When click on “add floor” button following page will appear, fill the mandatory fields then only save button will be enabled. Click on save button your floor details will be saved and displayed in the table first row.
2. Bulk Upload Floor: Click on bulk upload button to create multiple floors at a time, download csv file and fill the data then upload.
3. Export button: to download QR list (floors), you can export as with image or without image.
4. Edit Floor: Here you edit already created floor names by clicking on edit icon available in each row of floor list.
5. Delete Floor: Here you delete already created floor names by clicking on delete icon available in each row of floor list.
6. QR: click on QR icon and Scan QR to view that floor name with location.
viii. Settings -> My Organisation -> Room:
By using this feature user can add the room.
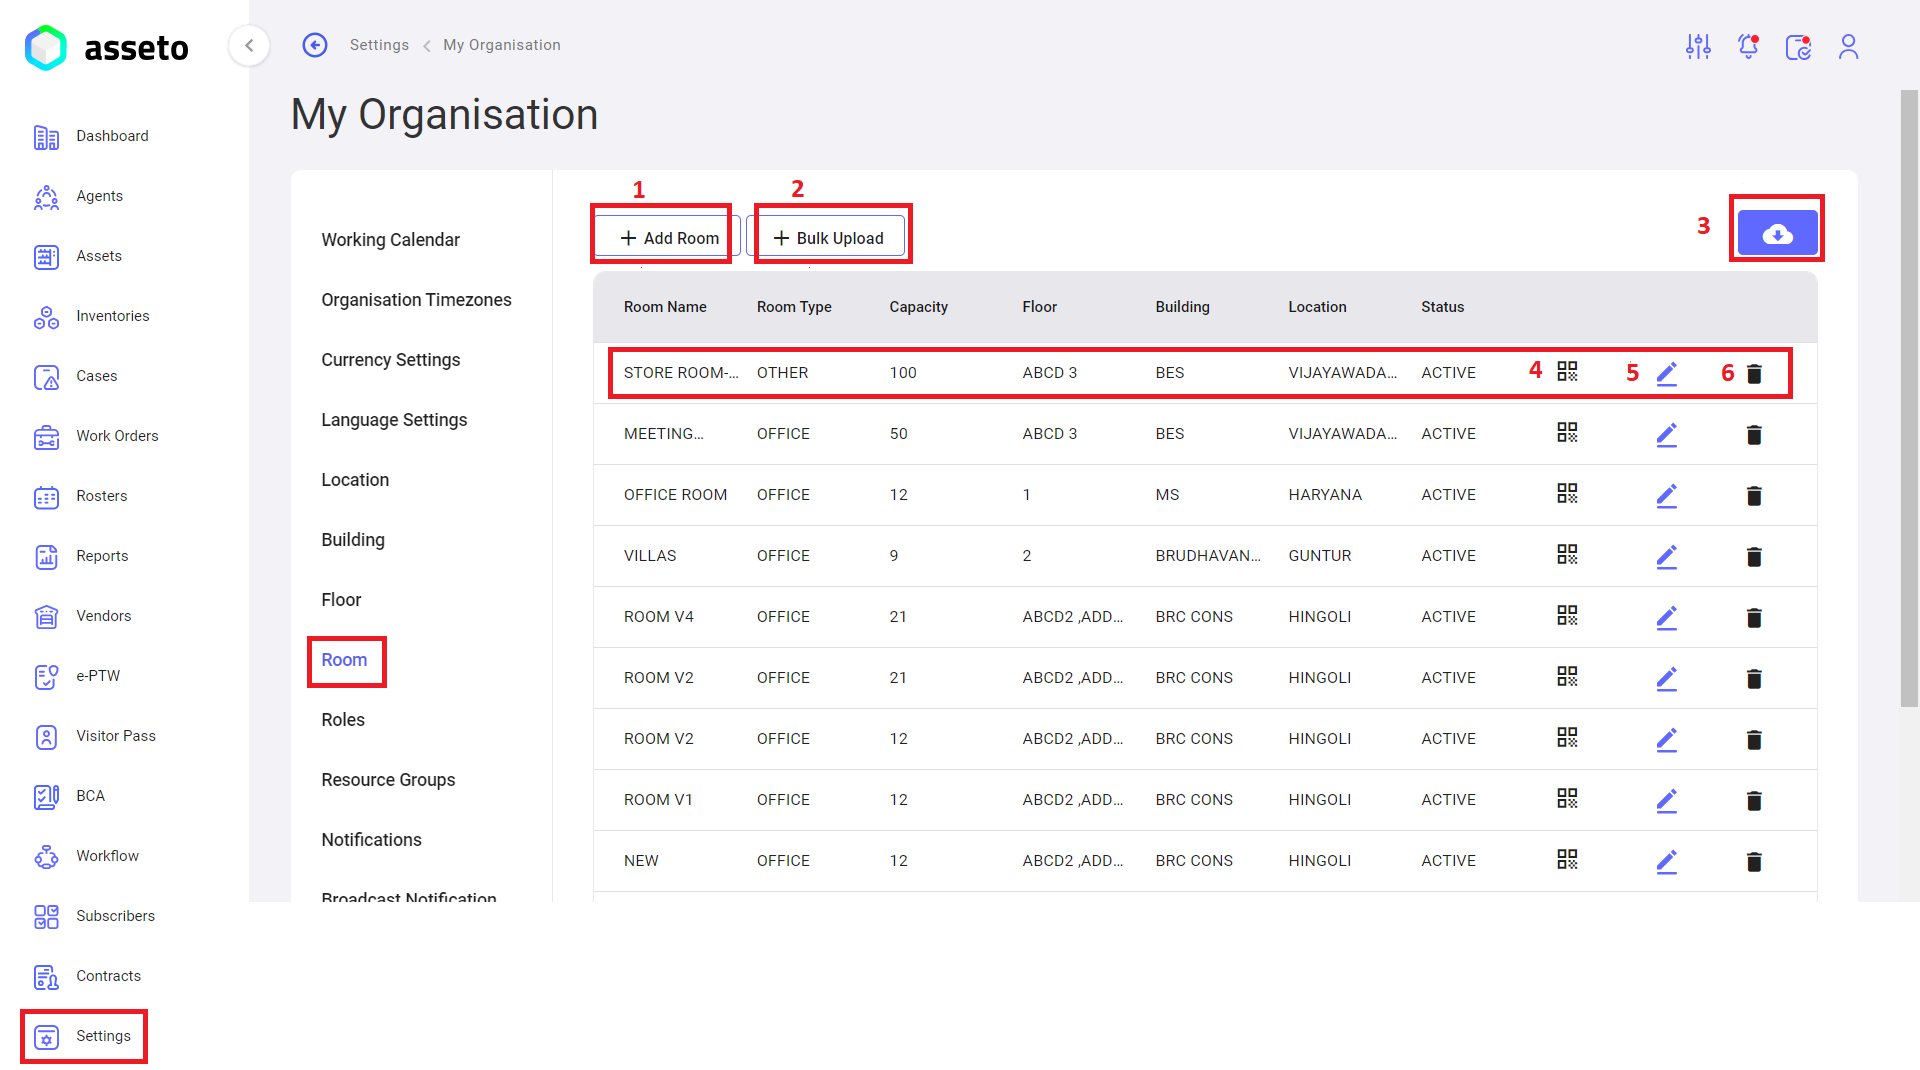
1. Add Room: click on add room button to create individual room name.
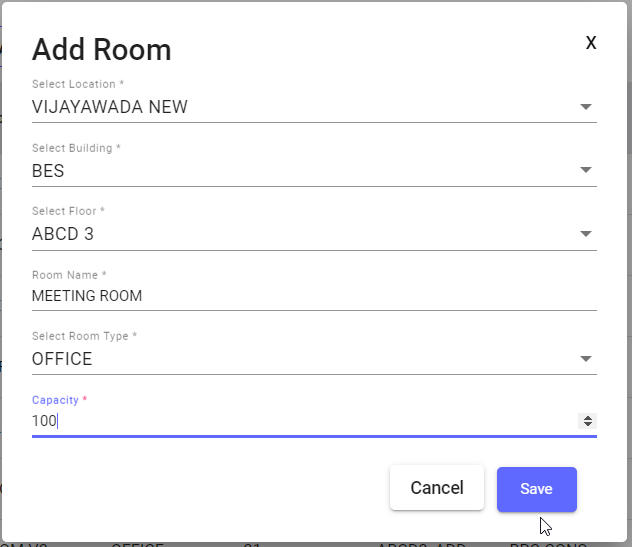
When click on “add room” button following page will appear, fill the mandatory fields then only save button will be enabled. Click on save button your room details will be saved and displayed in the table first row.
2. Bulk Upload Room: click on bulk upload button to create multiple rooms at a time, download csv file and fill the data then upload.
3. Export button: to download QR list (rooms), you can export as with image or without image.
4. QR: Scan QR to view that room with building and location.
5. Edit Room: Here you edit already created room names by clicking on edit icon available in each row of floor list.
6. Delete Room: Here you delete already created room names by clicking on delete icons available in each row of floor list.
ix. Settings -> My Organisation -> Roles:
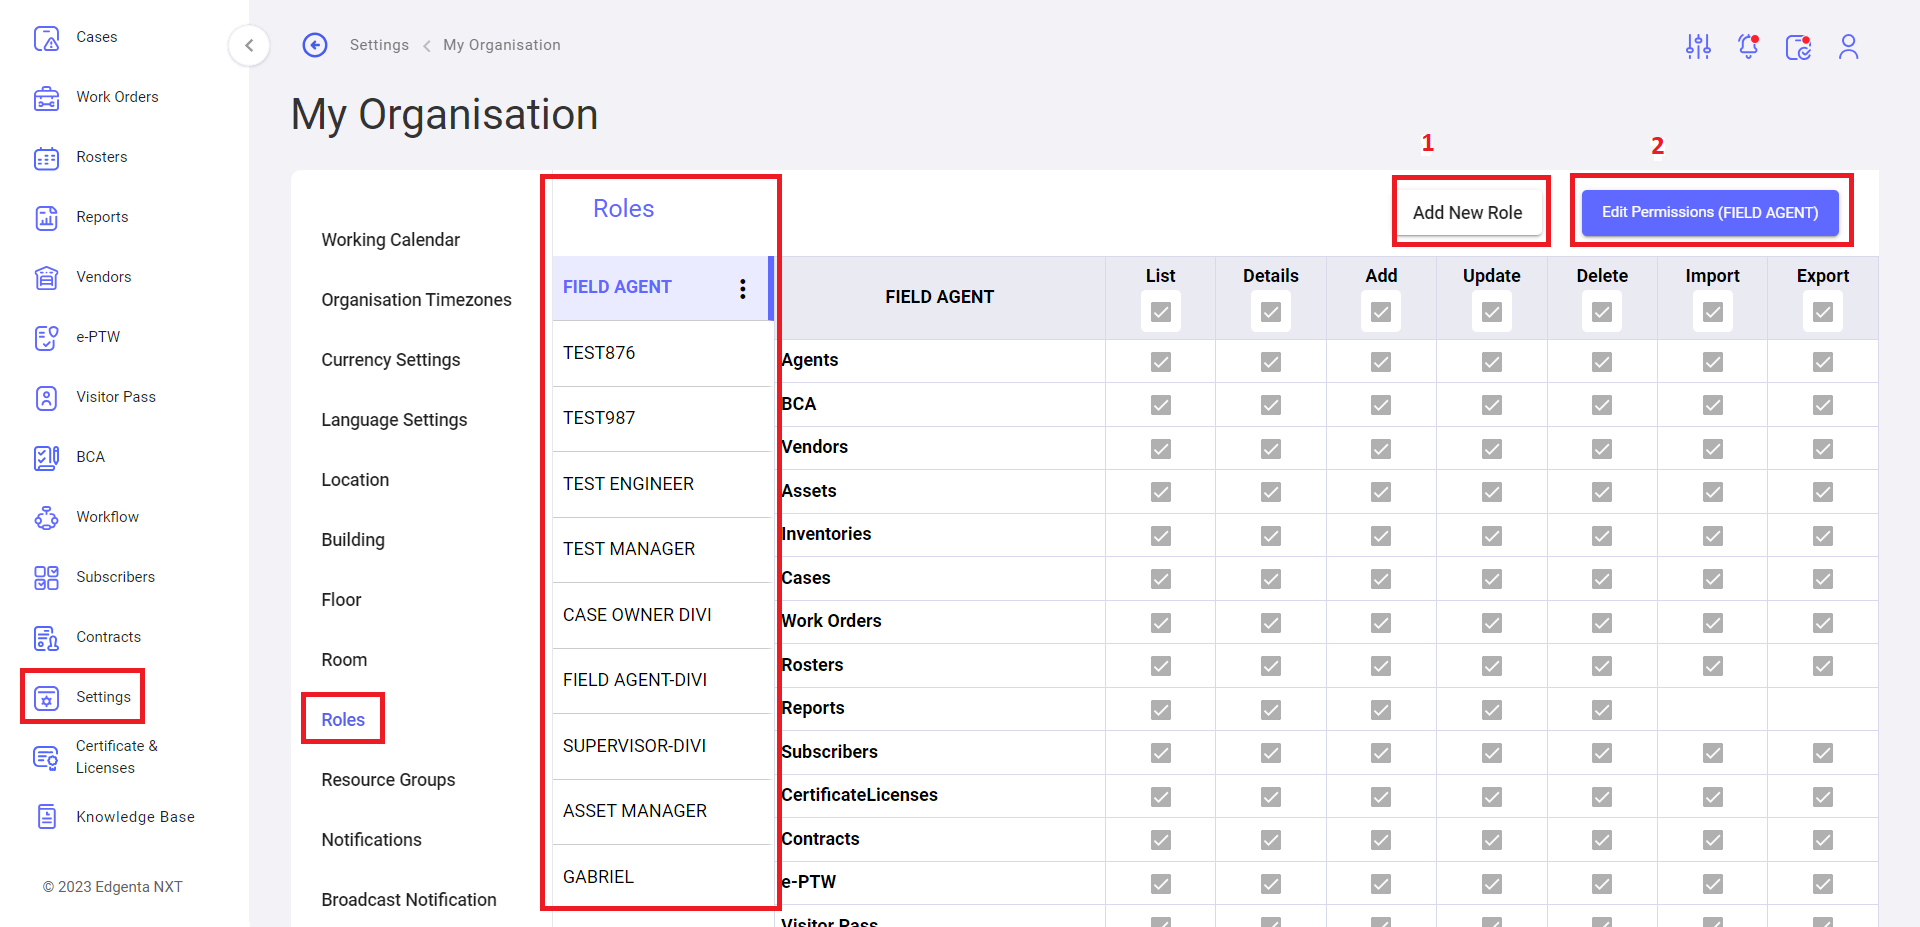
Here you can create a new role for users onboarding, which we can we use in various modules like, agents, assets creation.
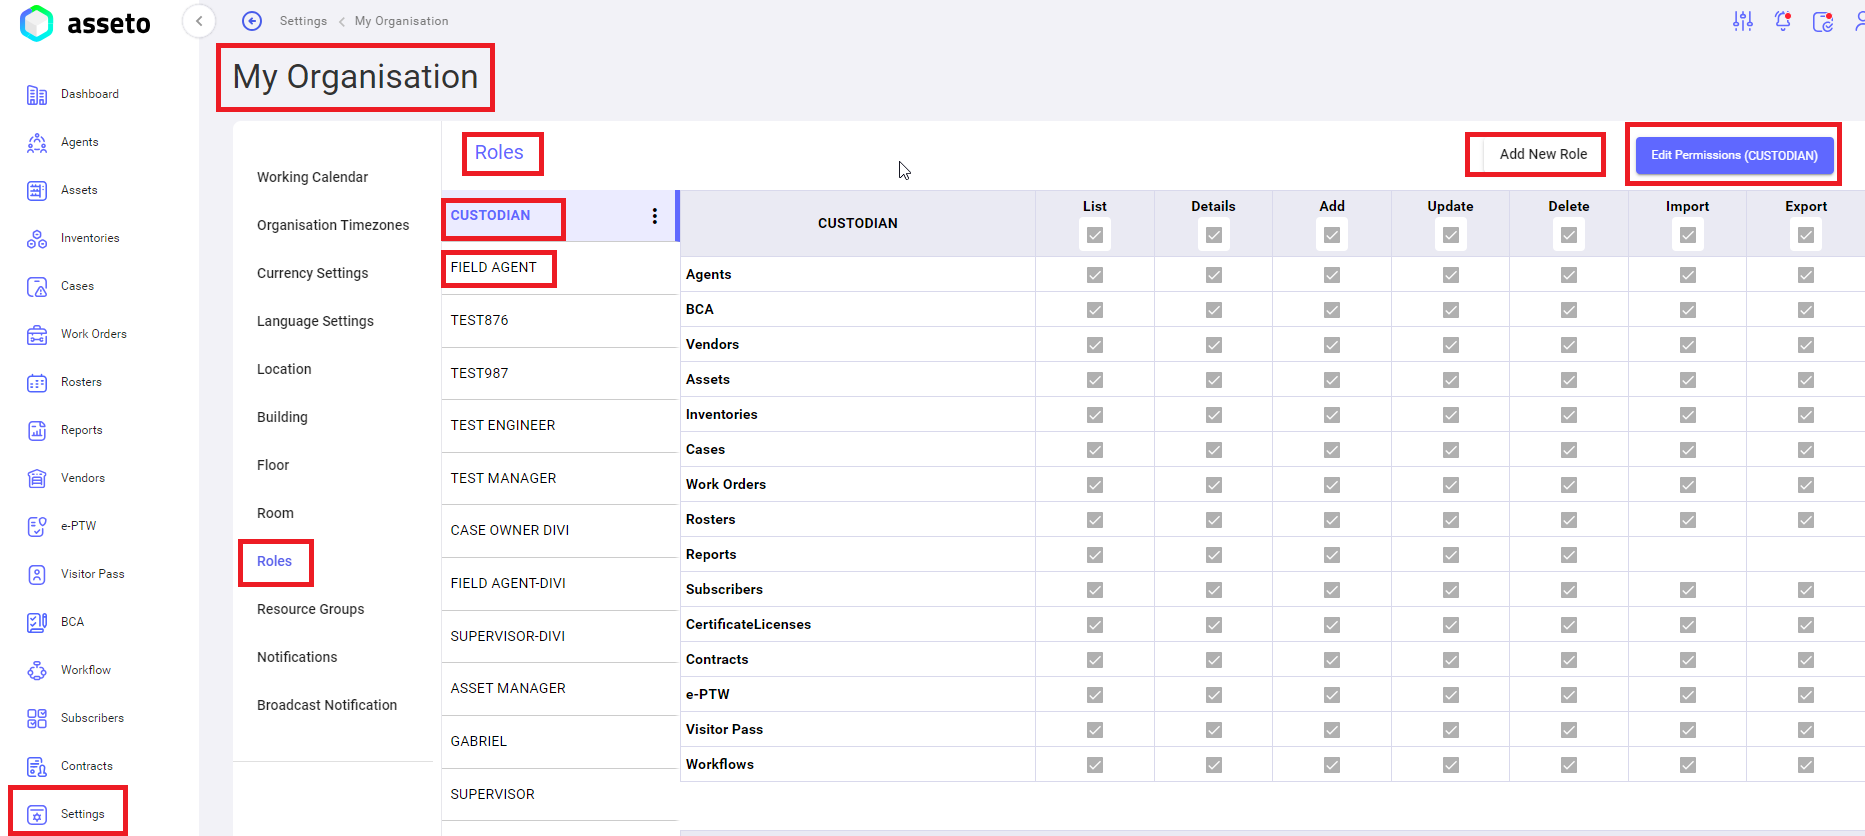
- Add Role: Click on add “new role” button provide role name and add role type (mandatory fields) as shown by below screenshot then click on submit button to save the role details.
2. Permissions: You can give permissions to role, click on edit permissions button select check boxes to give permissions for selected role which is created earlier as shown by below screenshot.
x. Settings -> My Organisation -> Resource Groups:
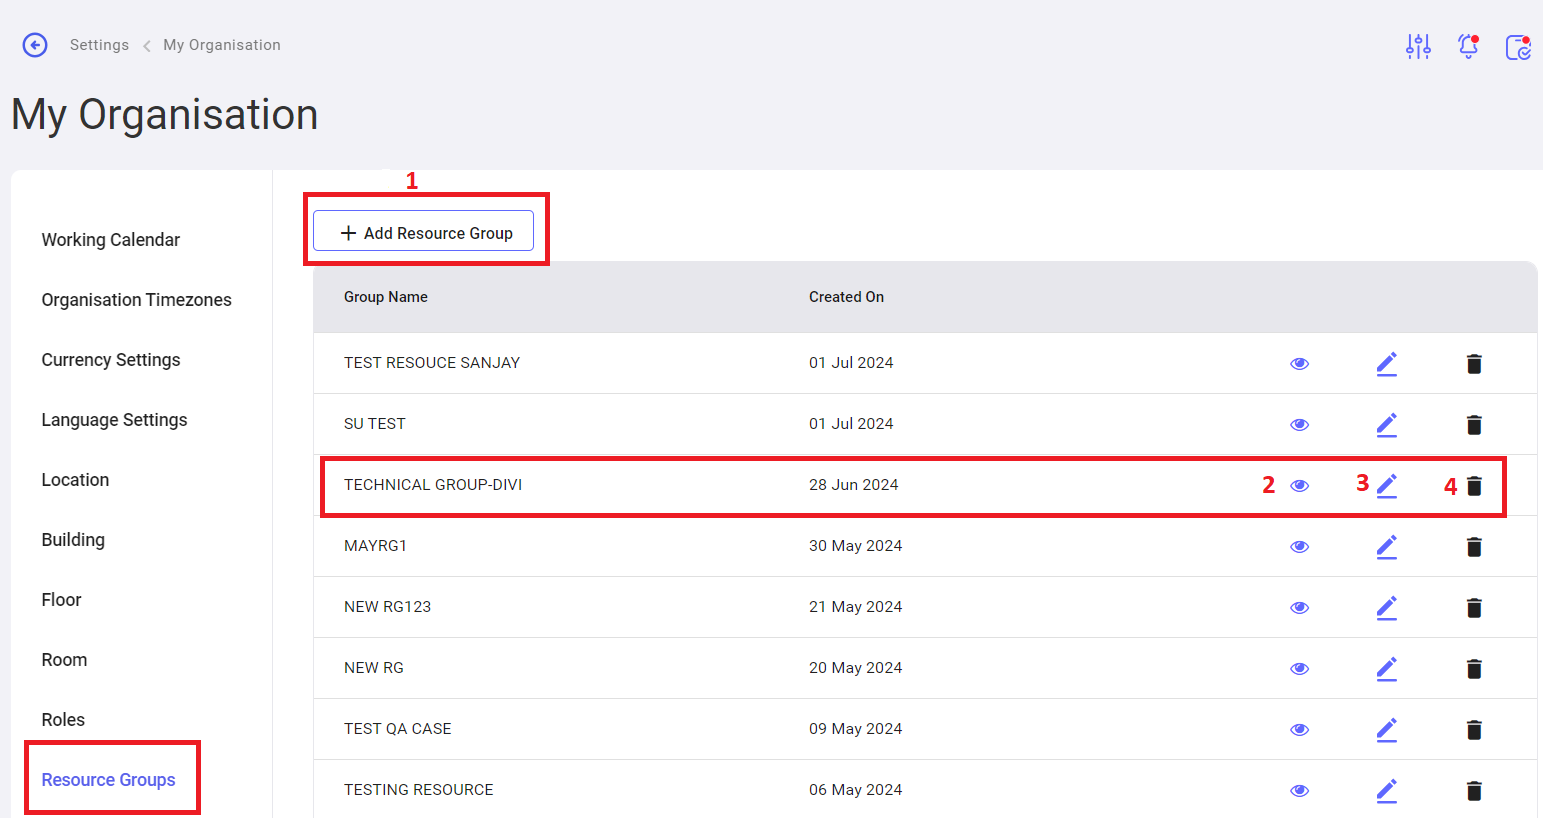
You can create new resource group by clicking on add resource group button, which we can we use in various modules like, agents, assets creation.
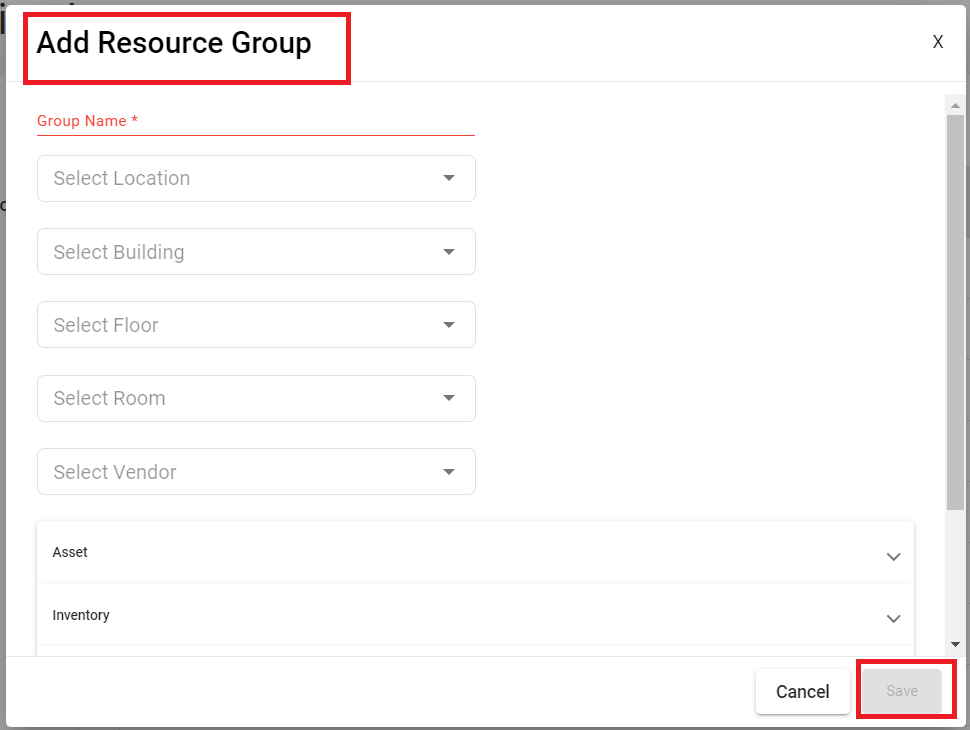
1. Add Resource Group: When you click on “add resource group” button following page will be displayed, fill the all-mandatory fields then only save button will be enabled, click on save button to save the resource group.
2. View Resource Group: Here you can view the selected resource group which is created earlier.
3. Edit Resource Group: Here you can edit the selected resource group which is created earlier.
4. Delete Resource Group: Here you can delete the selected resource group which is created earlier.
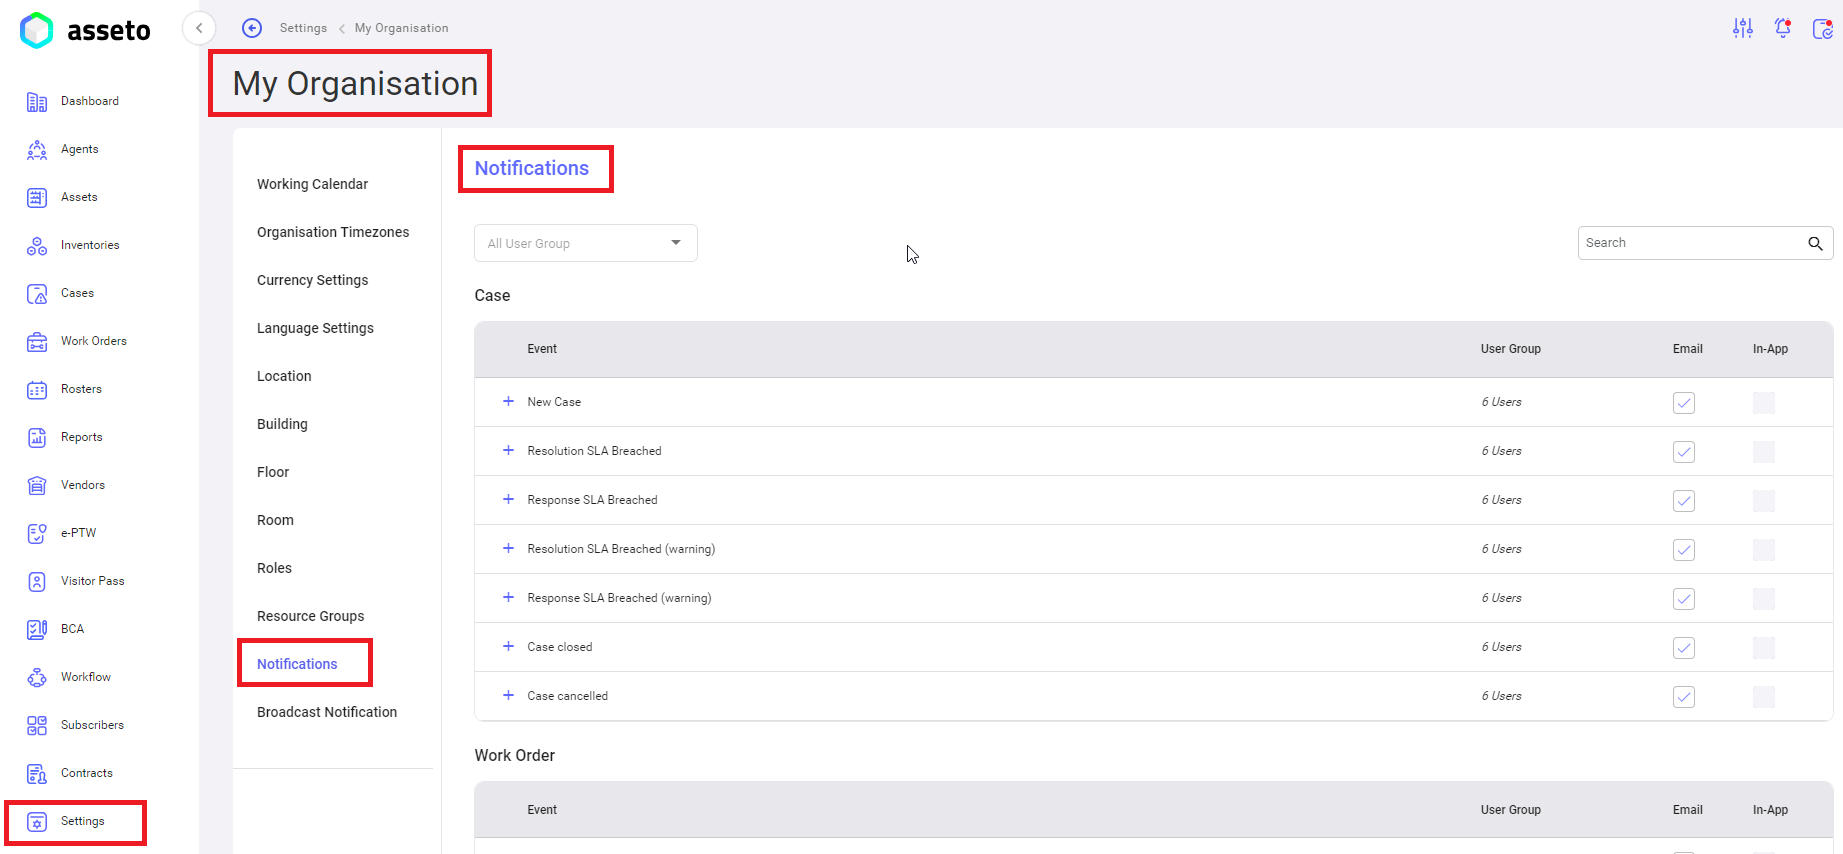
xi. Settings -> My Organisation -> Notifications:
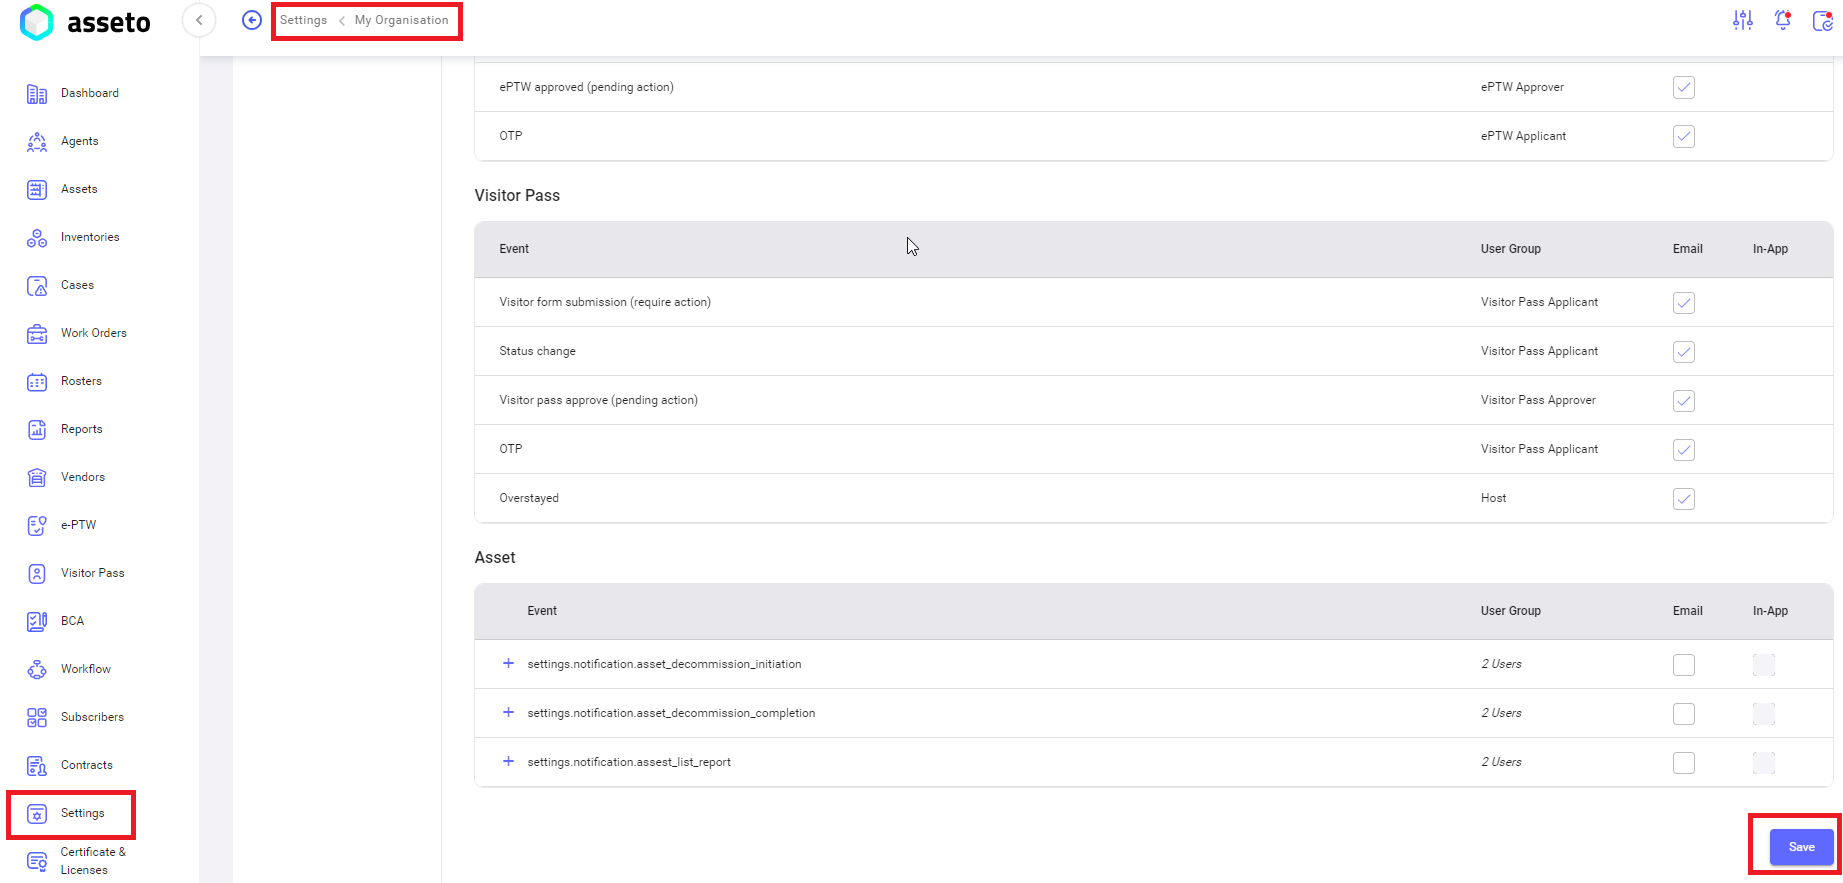
User can customize notifications to send the user groups from this application.
Select your choice and click on save button.
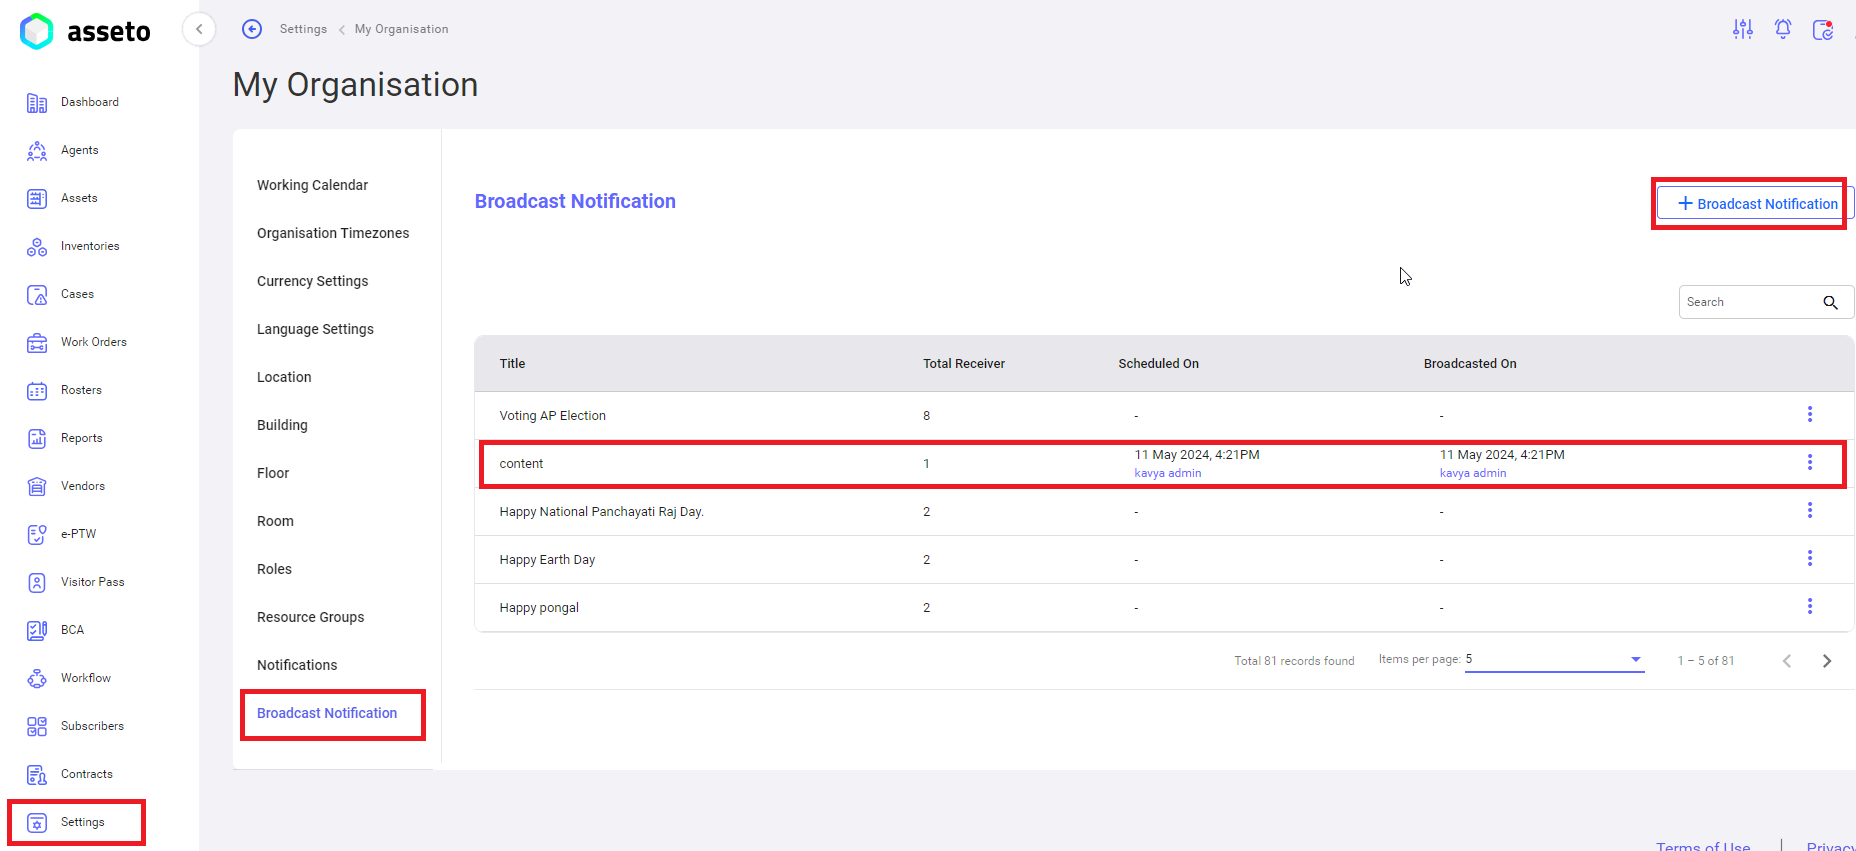
xii. Settings -> My Organisation ->Broadcast Notification:
By using this feature user can add the broadcast notifications.



No Comments