7. Agents
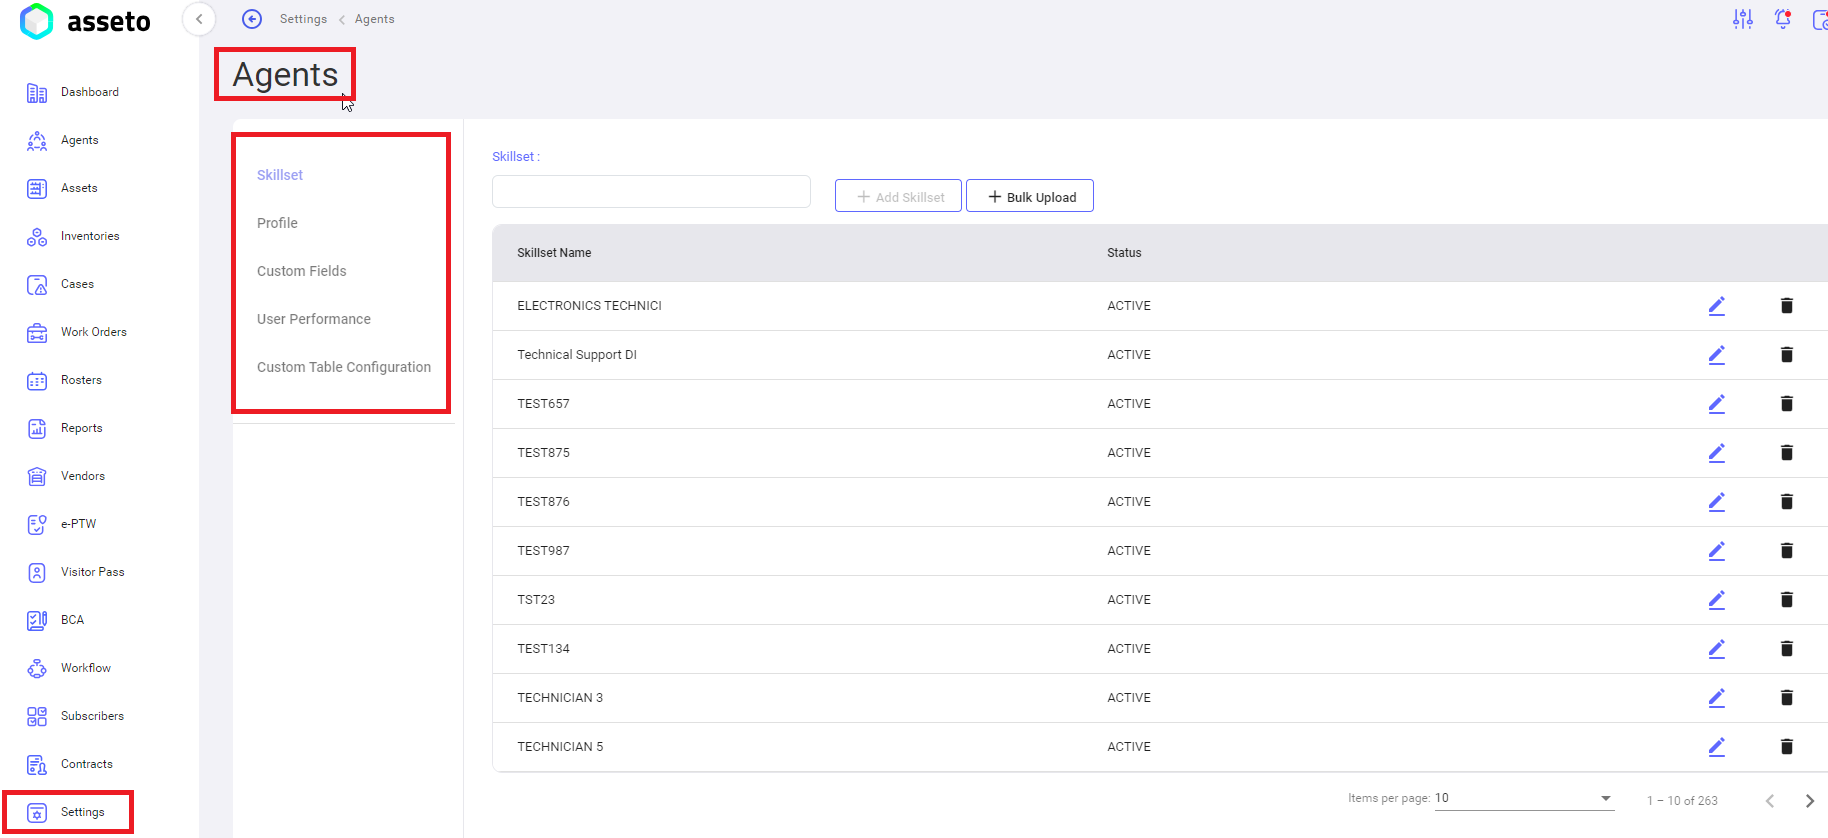
Settings -> Agents:
User can configure skillset, profile, custom fields, user performance and custom table configuration. Options are available as menu on left side, skillset is highlighted by default.
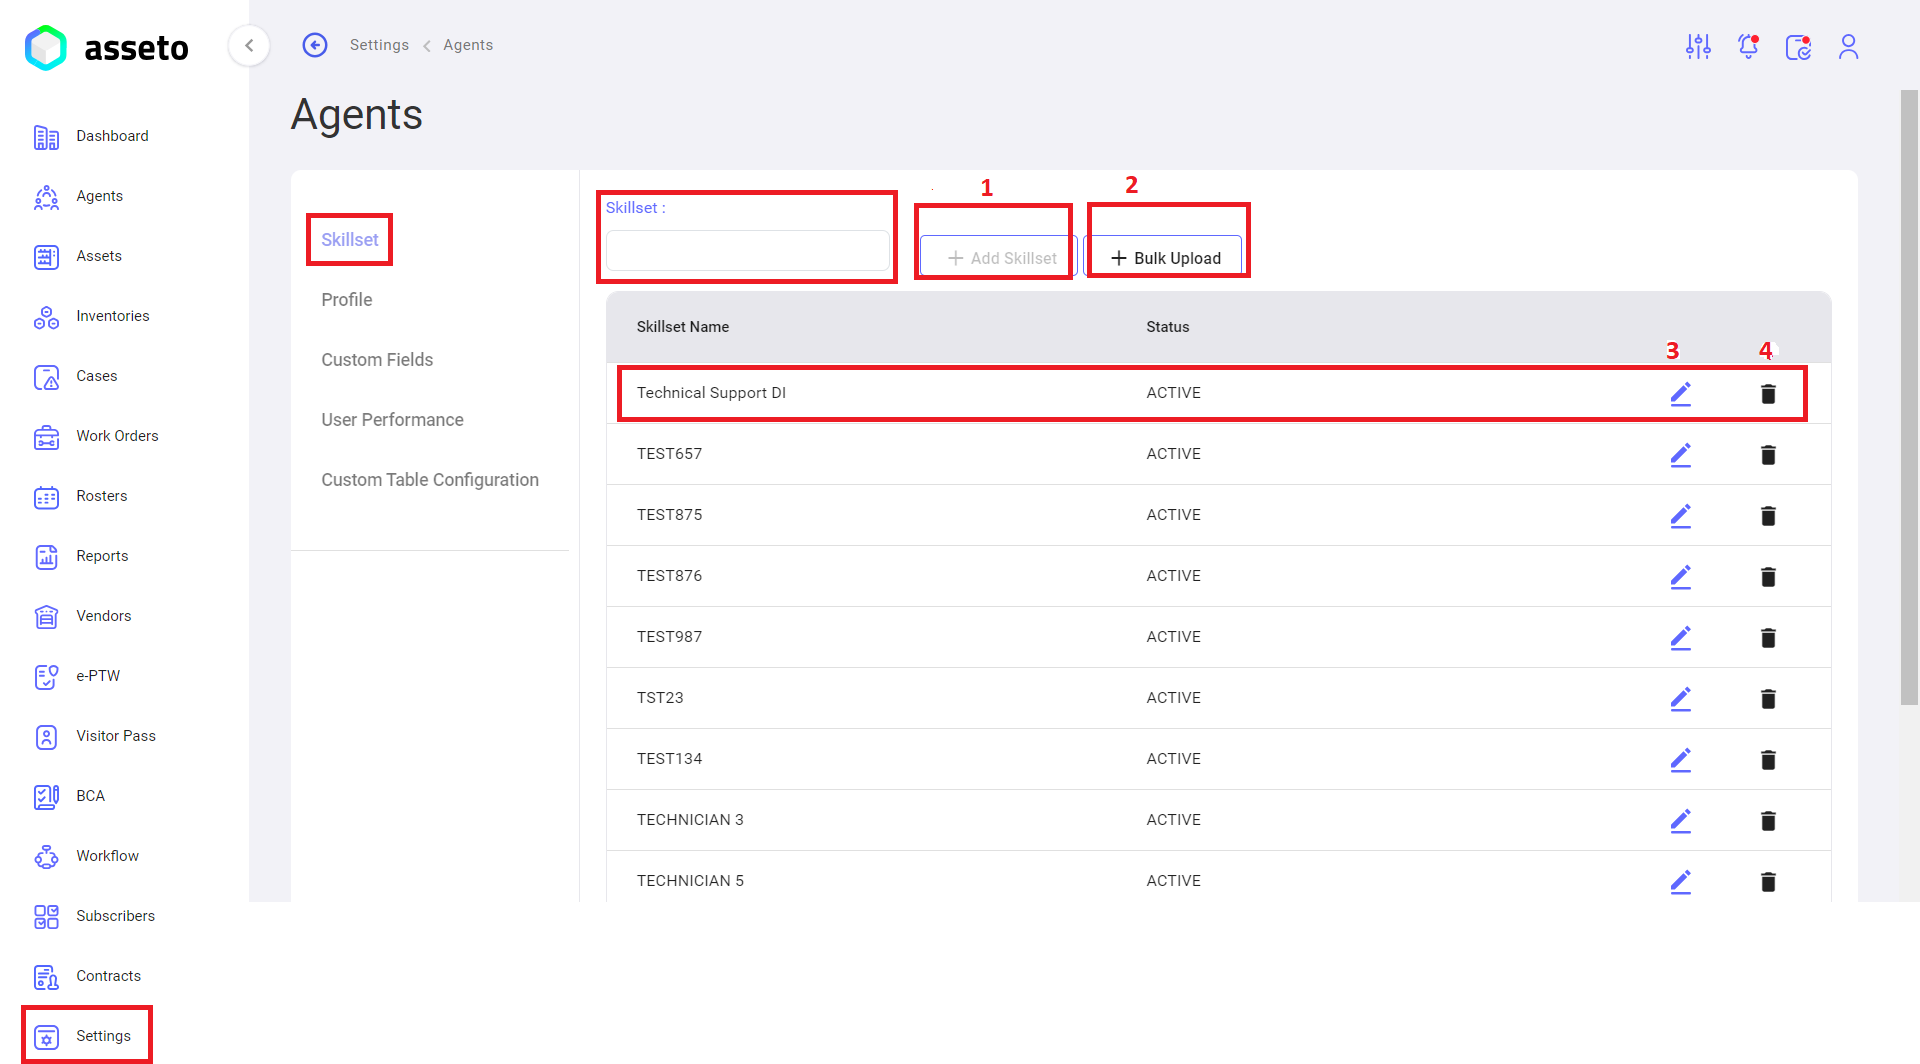
i. Settings -> Agents -> skillset
1. Add skillset: Here you can add new skillset to use in various modules like, agents and assets. To create skillset, you can type in skillset text box then click on “add skillset” button.
2. Skillset Bulk Upload: To create multiple skillsets at a time, click on bulk upload button, download csv file and fill the data then upload the file to save multiple skillsets.
3. Edit Skillset: You can edit the skillset which is added earlier by clicking on edit icons available every row of skillset list.
4. Delete Skillset: You can delete the already added skillset by clicking on delete icons available every row of skillset list.
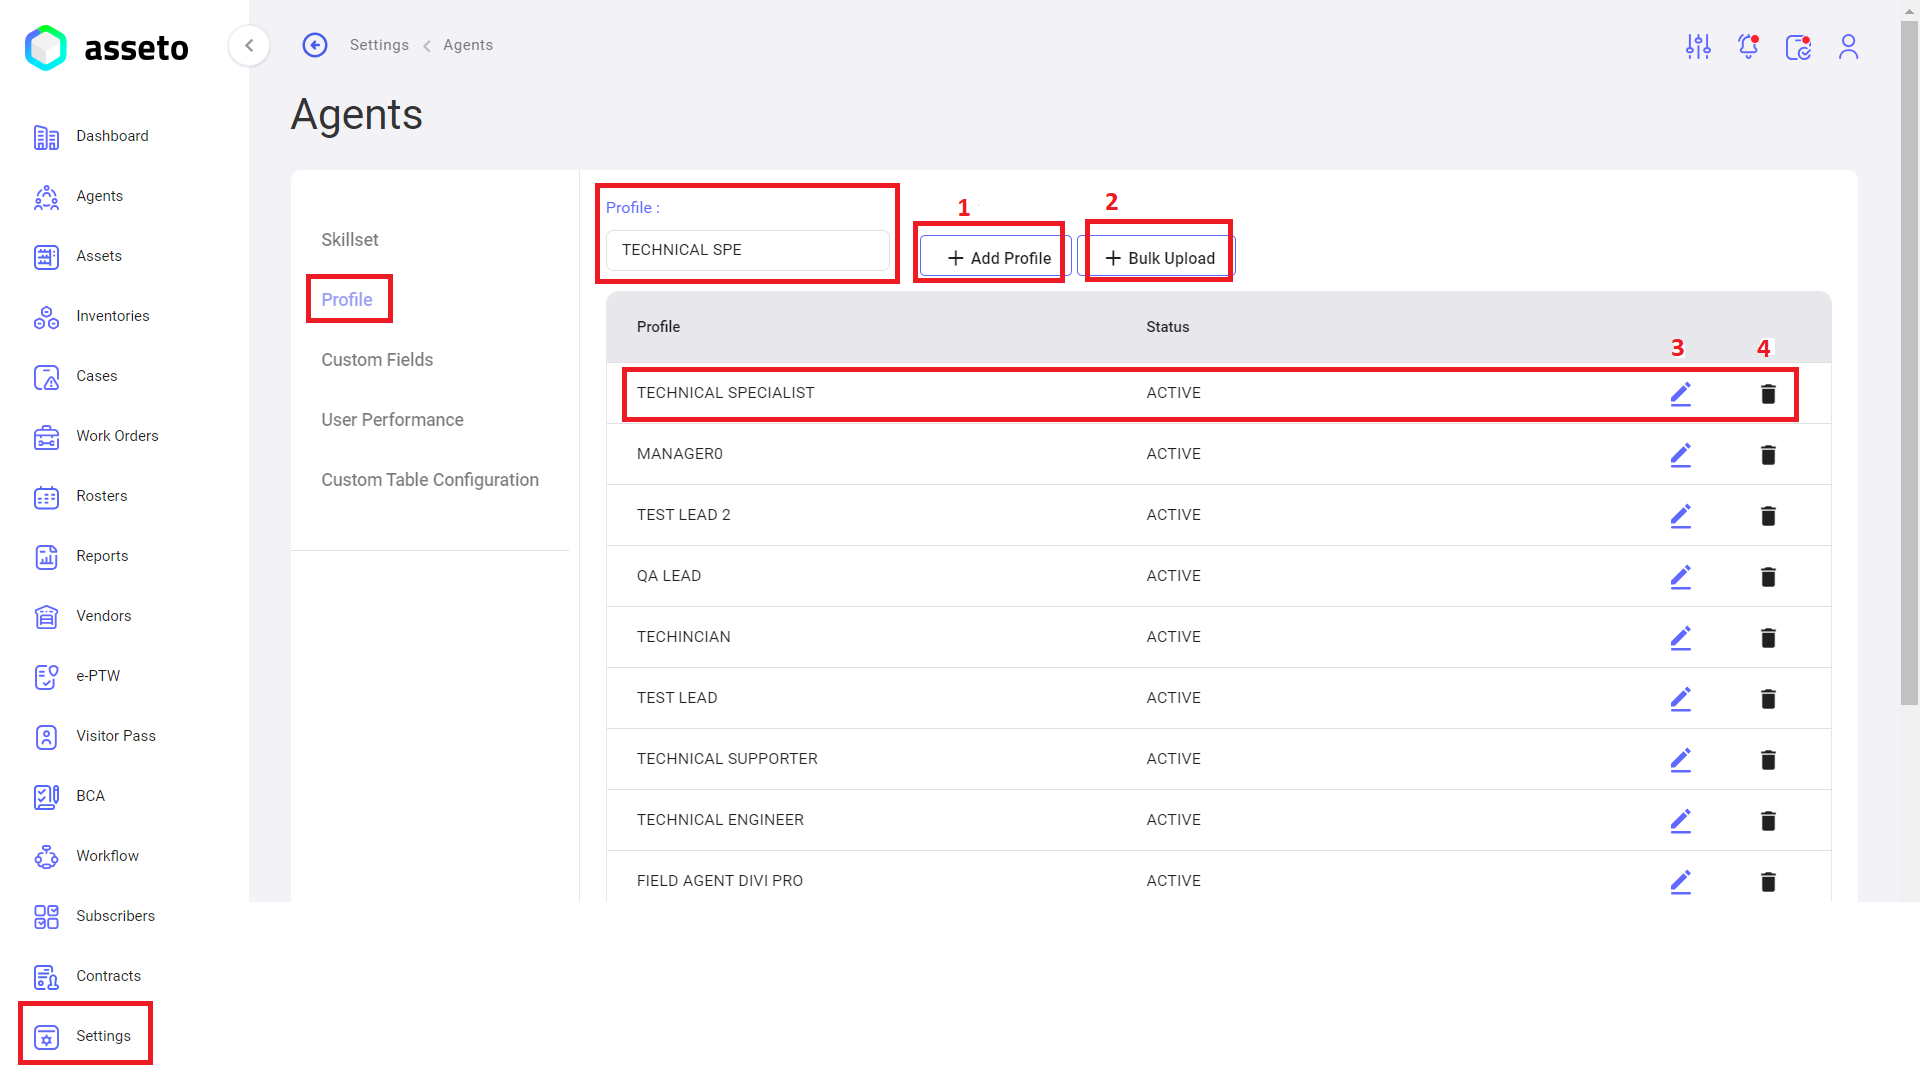
ii. Settings -> Agents -> Profile
1. Add profile: To create profile, you can type in text box then click on “add profile” button.
2. Profiles Bulk Upload: To create multiple profiles at a time, click on bulk upload button, download csv file and fill the data then upload the file to save multiple profiles.
3. Edit profile: You can edit the profile which is added earlier by clicking on edit icon available every row of profile list.
4. Delete profile: You can edit the already added profile by clicking on delete icons available every row of profile list.
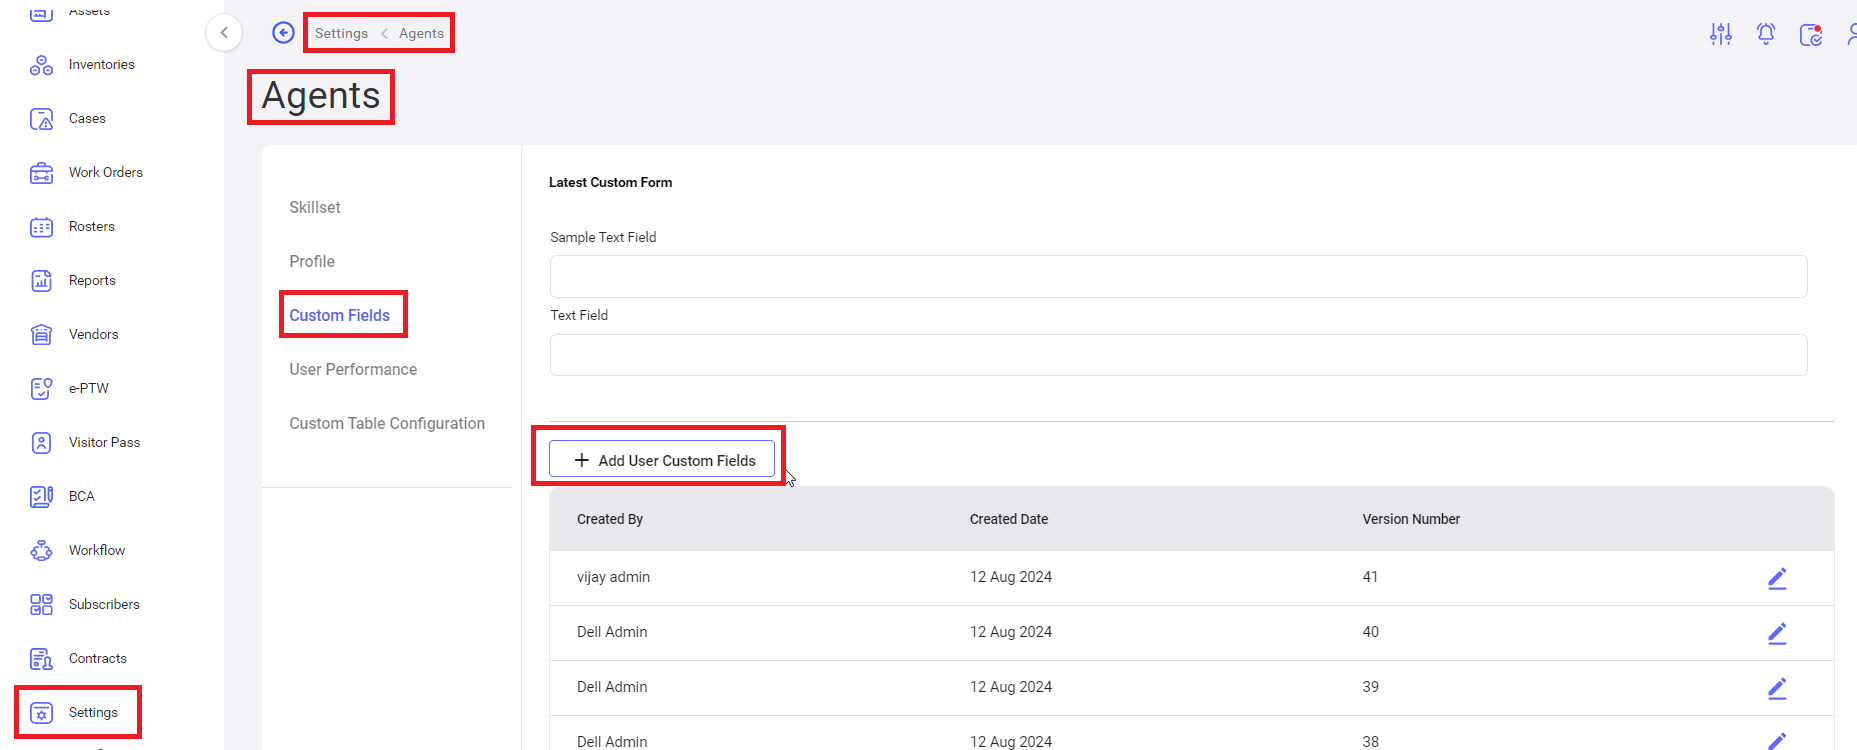
iii. Settings -> Agents -> Custom Fields
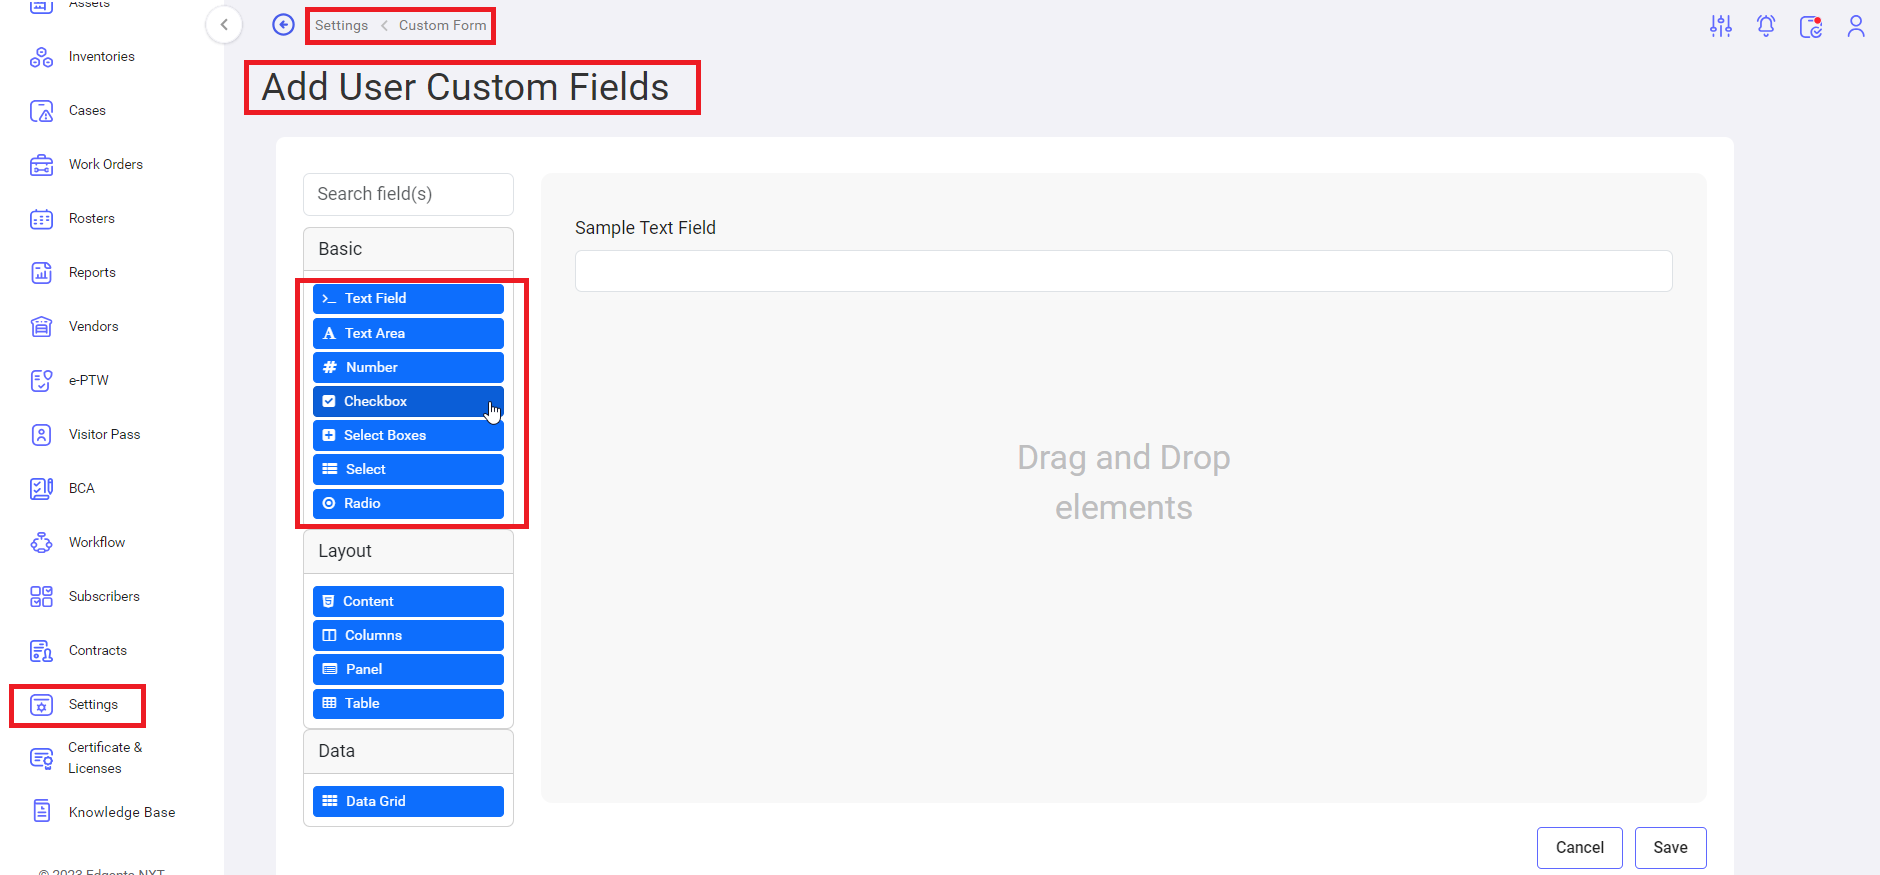
Add Asset Custom Fields: to add custom fields, click on “Add User Custom Fields” page will open as shown by following screenshot.
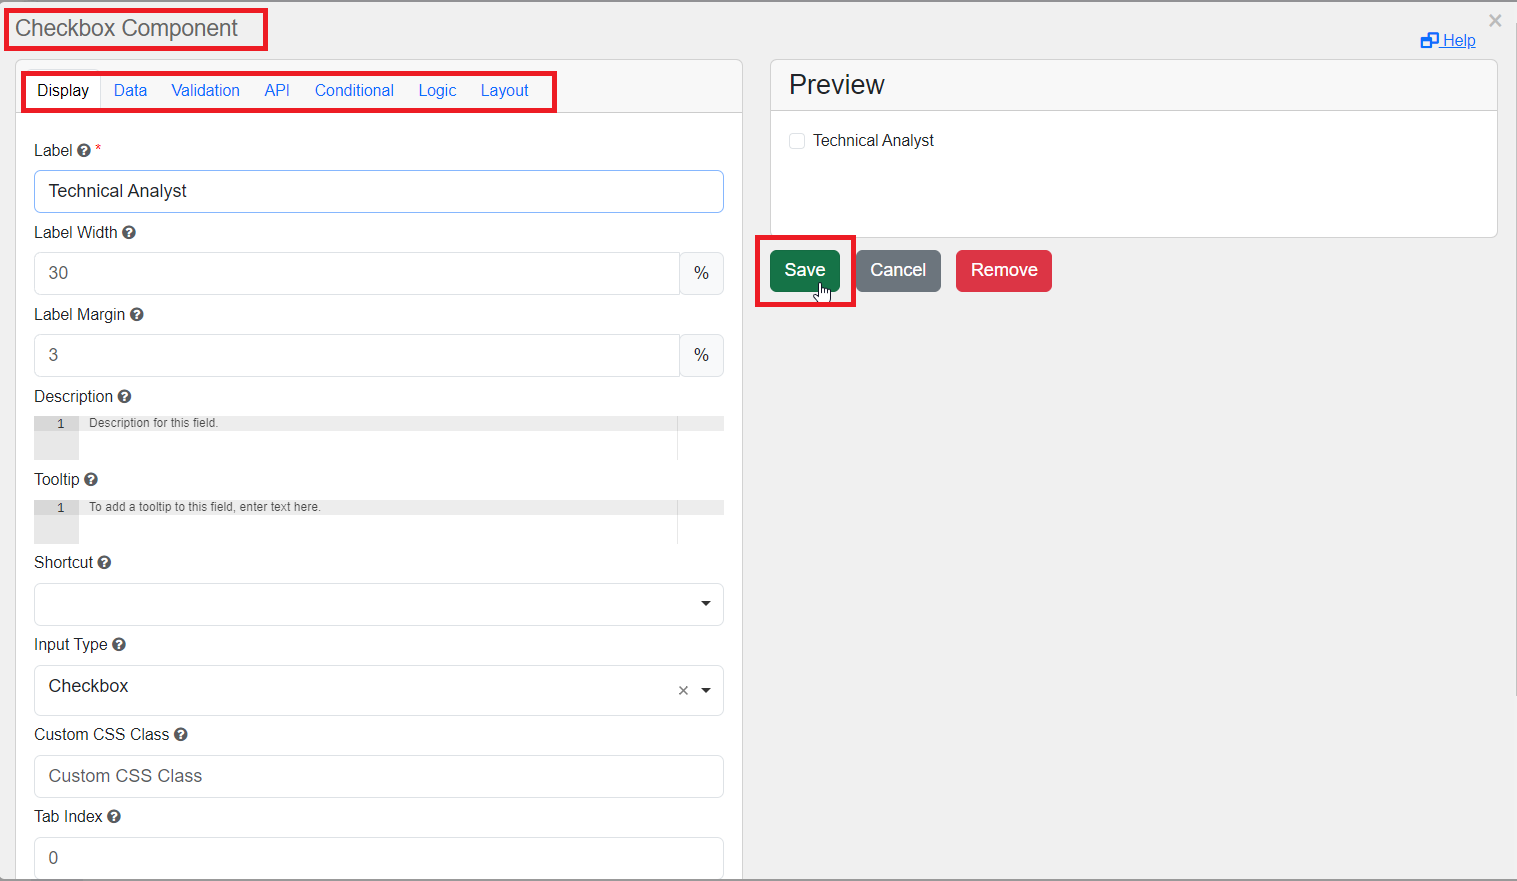
Step1: drag and drop the one of the elements from the list, following page (highted with ‘Display’ section) will open to select label name.
Step2: click on ‘Data’ section, to set the data into selected label and click on save button.
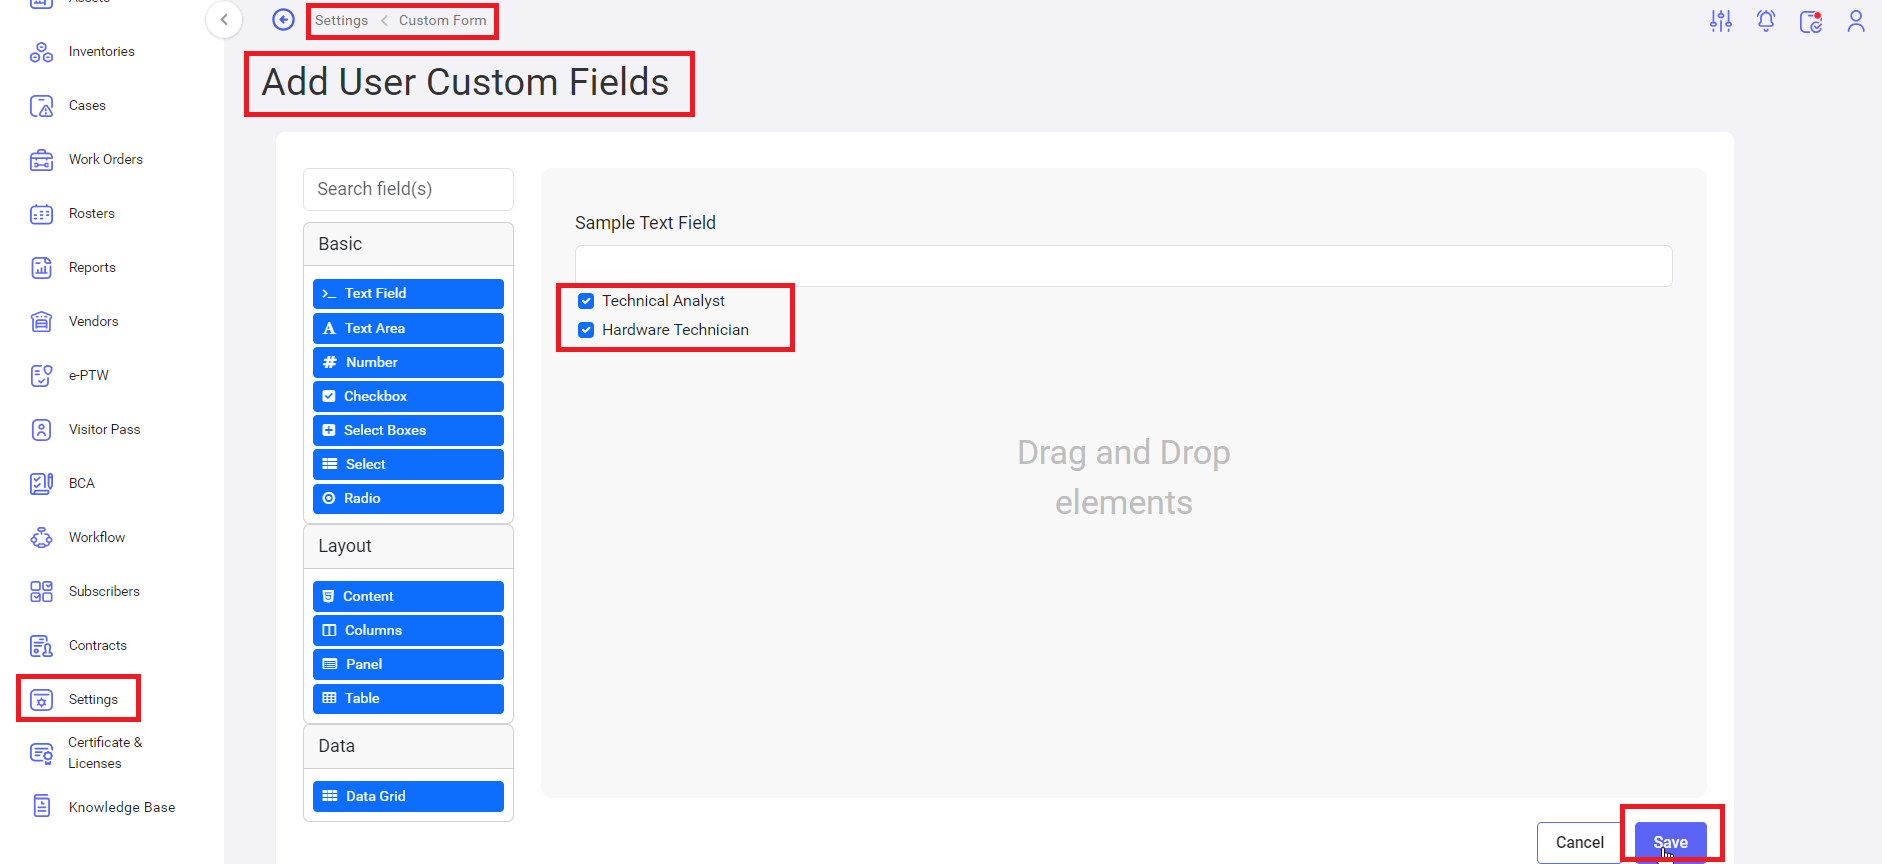
Step3: Again, system will navigate to “Add User Custom Fields” page, click on “save” button.
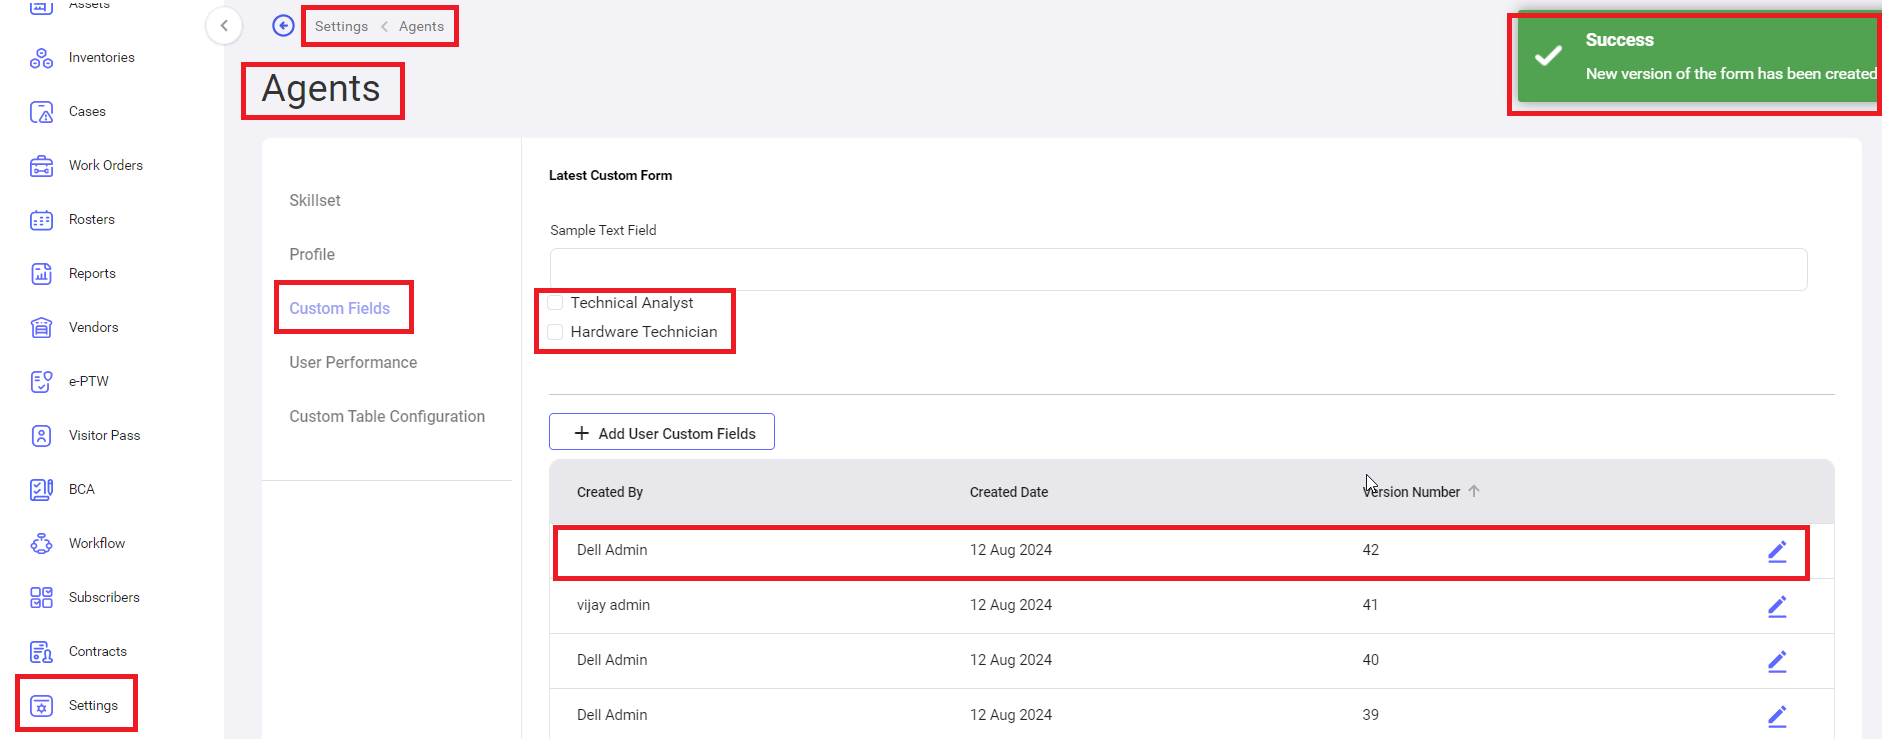
Confirmation message “New Version of the form has been created” will be display and system navigate to custom fields dashboard.
Newly added custom fields will display top of the table as shown by the following screenshot.
Edit Custom fields: Custom fields are display in the list, click on edit icon to edit/update the custom field.
iv. Settings -> Agents -> User Performance
Check/uncheck the check boxes-based user requirement and click on “save” button.
Confirmation message “User Performance Parameters Updated Successfully” will be display.
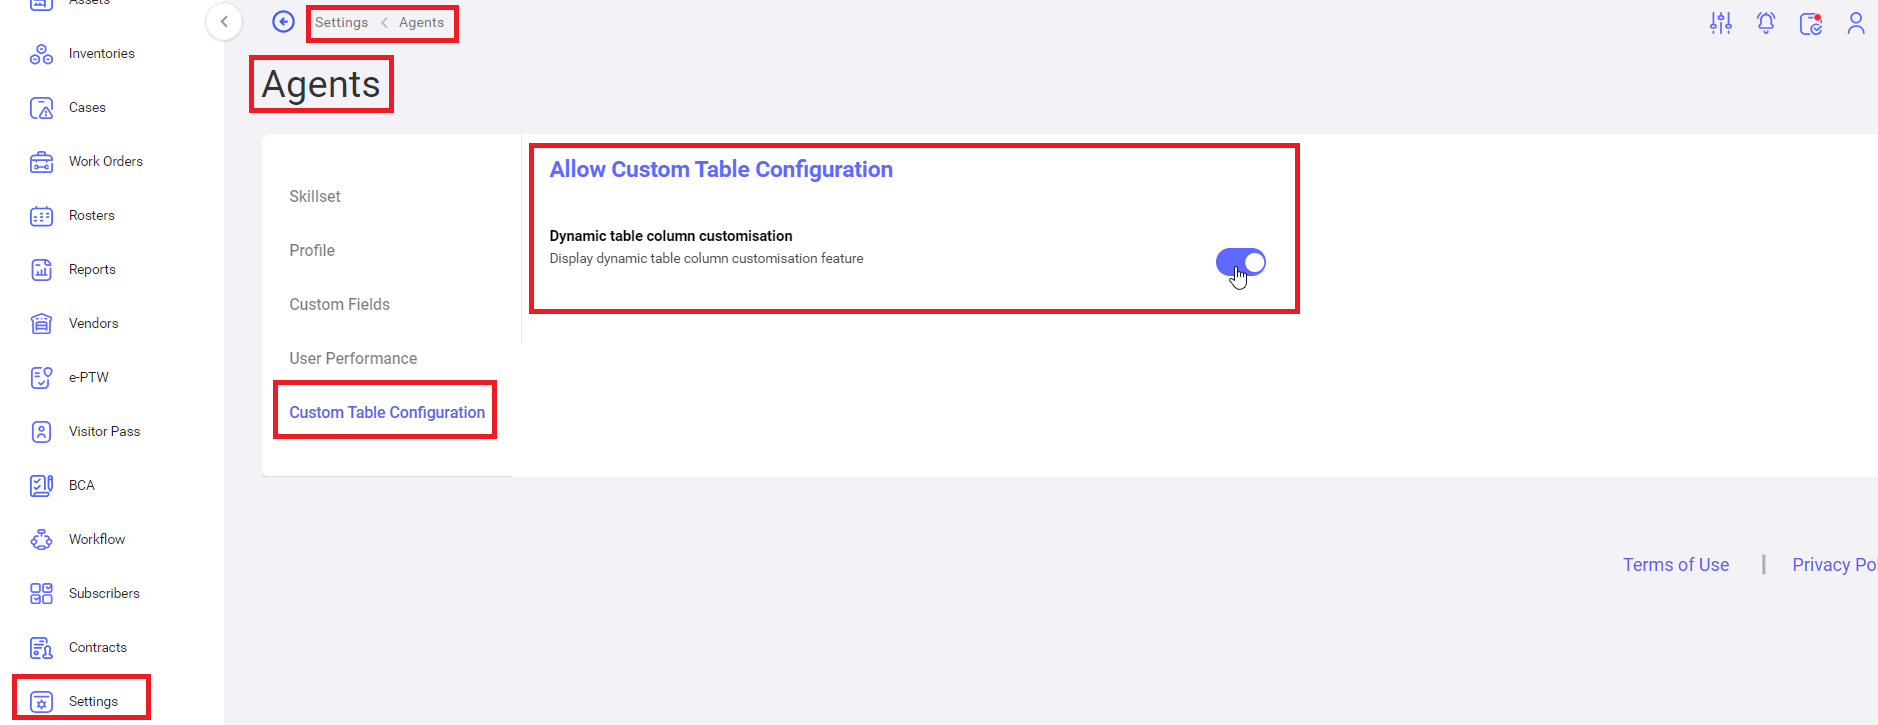
i. Settings -> Agents -> Custom Table Configuration
Here user can enable/disable the “Display dynamic table column configuration feature”.


No Comments