3. Pre-Requisite
Pre-Requisite for Case Creation:
Before creating Case below configurations should be done on Case settings. The configuration includes:
-
Case type configuration.
-
Case sub type configuration.
-
SLA configuration.
-
Agent configuration.
-
Case Owner Auto-Assignment Configuration.
-
Case Association Configuration.
Case type configuration.
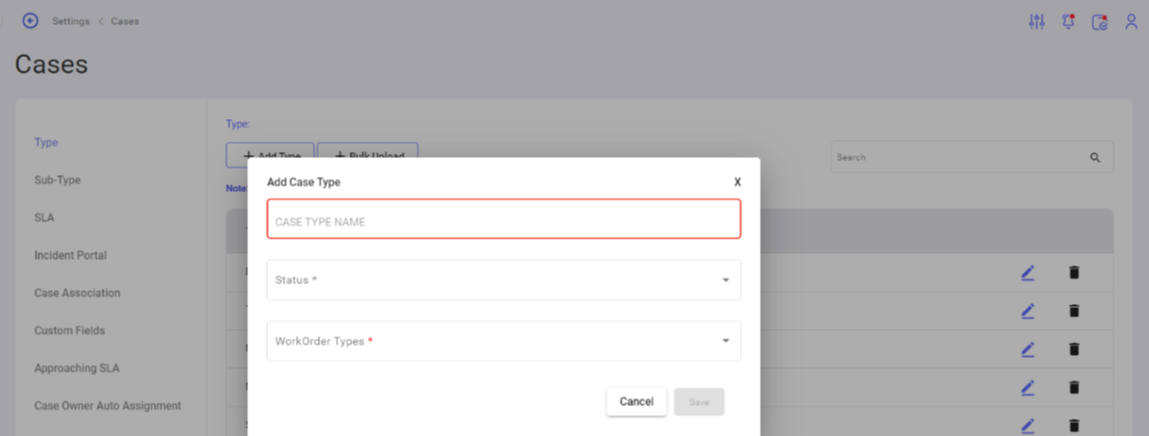
Case type can be configured by navigating to Settings >> Cases >> Type. It is mandatory to configure Work order type to configure Case type. Below are the parameters involved in Case type configuration.

- Add type / Bulk upload: These are the options used to configure case type. Case type can be configured individually or in bulk.
- List view: Case types configured can be viewed in a dynamic table with related information like status, edit and delete features.
- Status: To show the specific Case sub-type status whether active or inactive.
- Edit: To edit specific case type.
- Delete: To Delete specific case type.
- Search: To search specific Case type.
Add Case type page view:
Case sub-type configuration.
Case sub-type can be configured by navigating to Settings >> Cases >> Sub-Type. It is mandatory to configure Case type to configure Case sub-type. Below are the parameters involved in Case sub-type configuration.
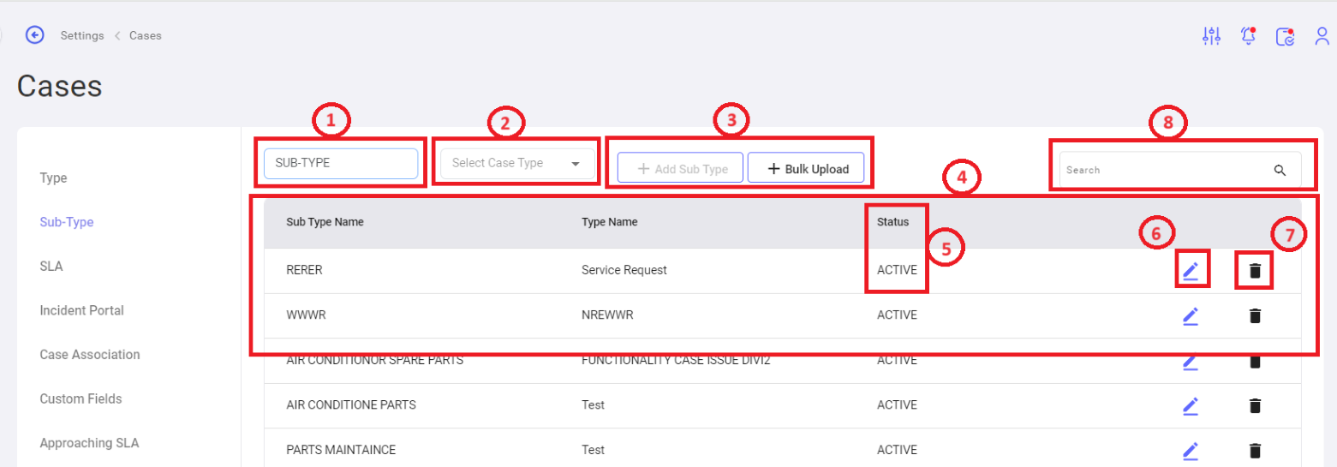
- Sub-Type: To key in manual input the Case sub-type name.
- Select Case Type: To select the case type & associate with case sub-type. It's a mandatory option to be selected while creating Case sub-type.
- Add Sub Type & Bulk Upload: These are the 2 options to configure Case sub-type in settings. Add sub-type option to create individual Case sub-type gets active only on selecting the Case type to associate with Case sub-type.
- List view: Case sub-types configured can be viewed in a dynamic table with related information like status, edit and delete feature.
- Status: To show whether the specific Case sub-type status whether active or inactive.
- Edit: To edit specific case sub-type.
- Delete: To Delete specific case sub-type.
- Search: To search specific Case sub-type.
SLA configuration.
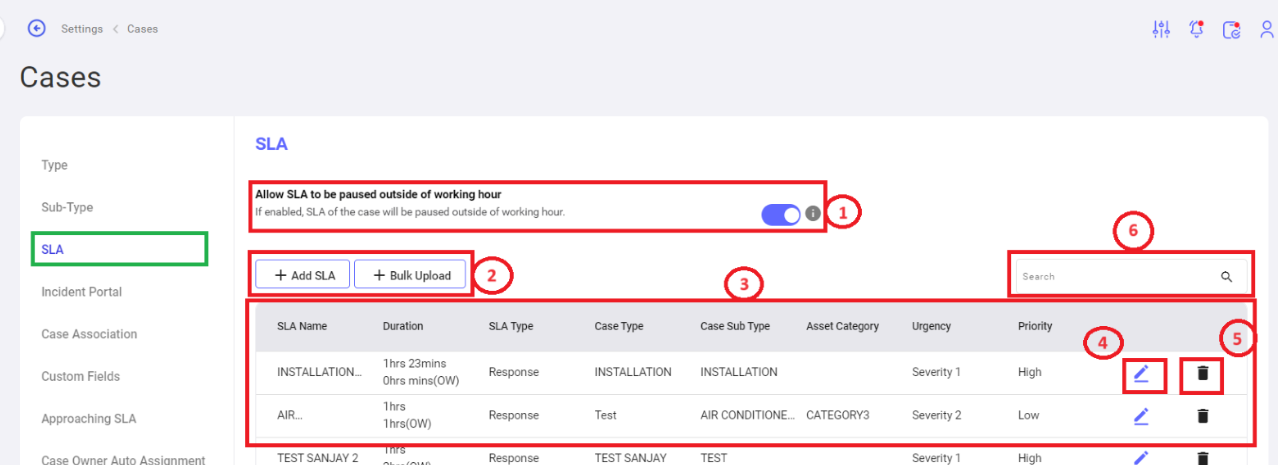
- Allow SLA to be paused outside of working hour: If User enables this feature, SLA of the case will be paused outside of working hour.
- Add SLA & Bulk Upload: These are the 2 options to configure Response and Resolution SLA in Case settings.
- List view: To show the SLA configured in a dynamic table with related information like duration, SLA type, case type, case sub-type, asset category, urgency, priority edit and delete feature.
- Edit: To edit specific SLA.
- Delete: To Delete specific SLA.
- Search: To search specific SLA.
Add SLA page view:


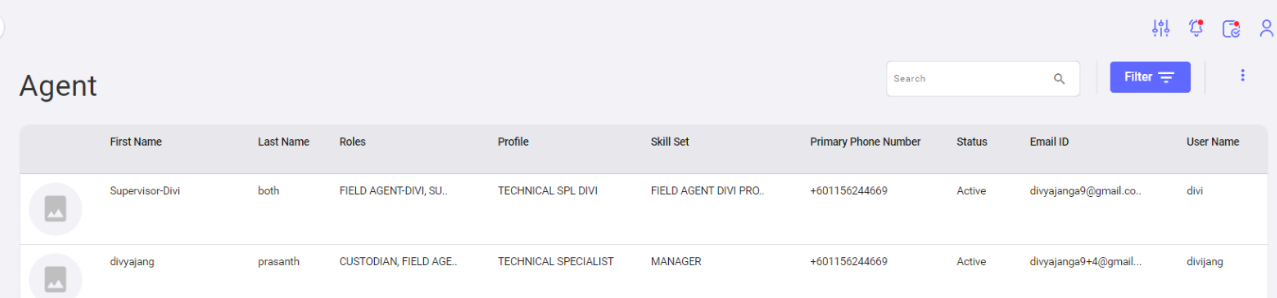
Agent configuration.
Make sure that the Agent details are available in the Agent dashboard. If the Agent name does not exist, add using Add new agent from Agent module.
Case Owner Auto – Assignment Configuration.
Define Case Owner auto assignment rule using this configuration. This will impact on the Case creation page. The parameters involved in defining the auto assignment rule are, rule name, threshold, case type, case sub-type, skill sets etc.
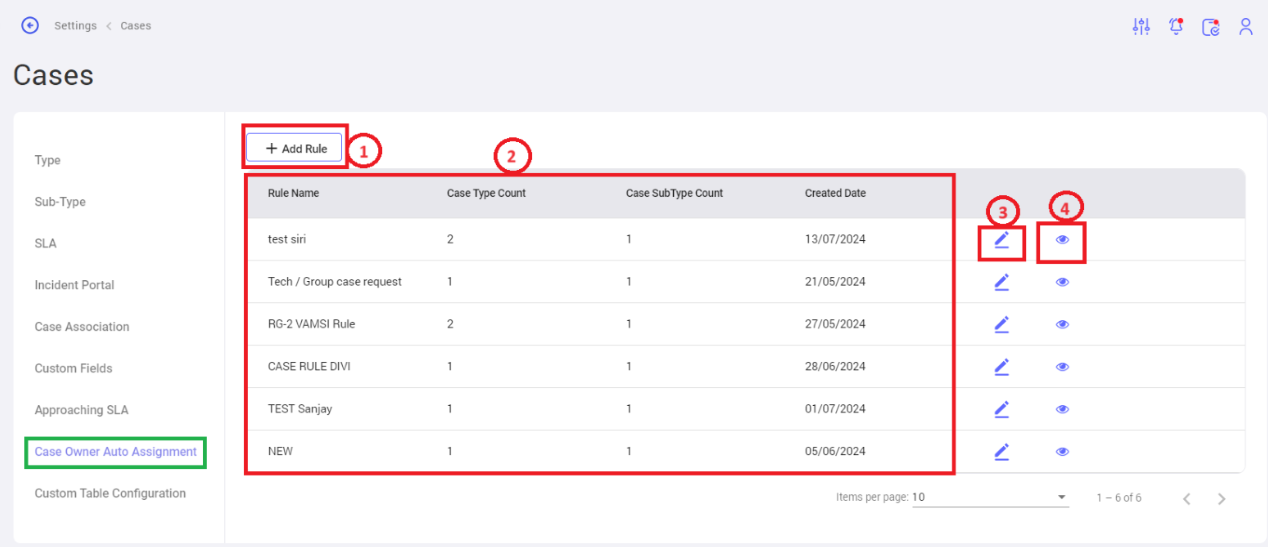
- Add Rule: To define Case owner auto assignment rule.
- List view: To view all the rules configured.
- Edit: To edit the auto-assignment rule.
- View: To view the auto-assignment rule.
Case Association Configuration:
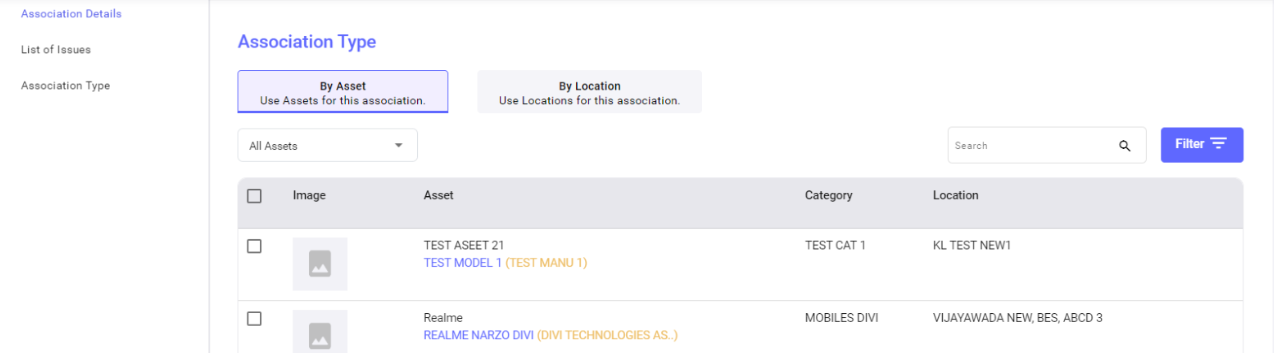
Case Association configuration can be completed by navigating to Case Association from Case settings. Case Association will be based on Assets / Location. Based on the issue type the User selects, case type, case sub-type, priority, urgency, response SLA, resolution SLA will get auto populated on Case creation page.
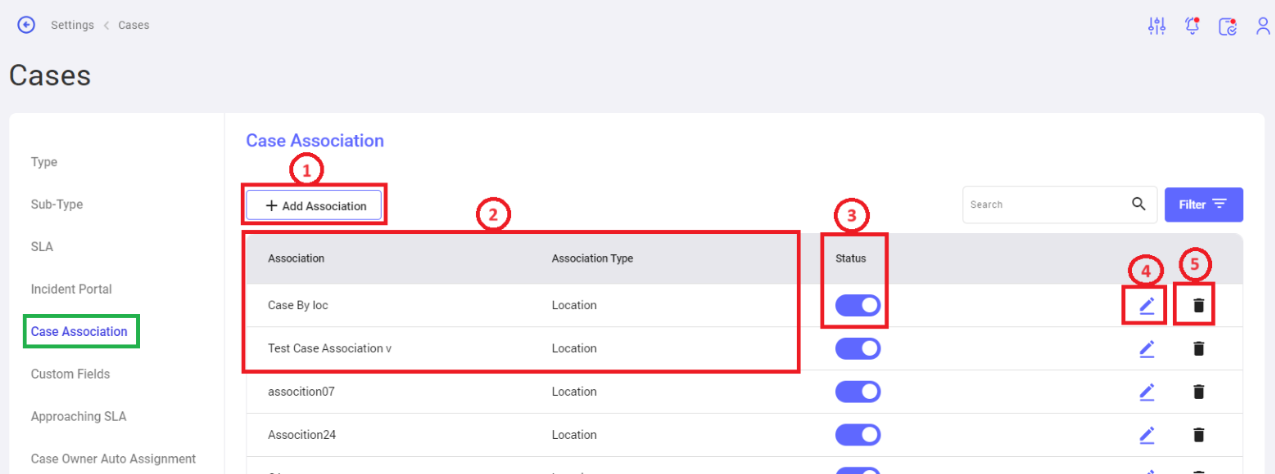
- Add Association: To create Case Association.
- List view: List of Associations can be viewed in a dynamic table.
- Status: Toggle icon in status column indicates whether the association is active or inactive.
- Edit icon: To edit the Association.
- Delete icon: To delete the association.
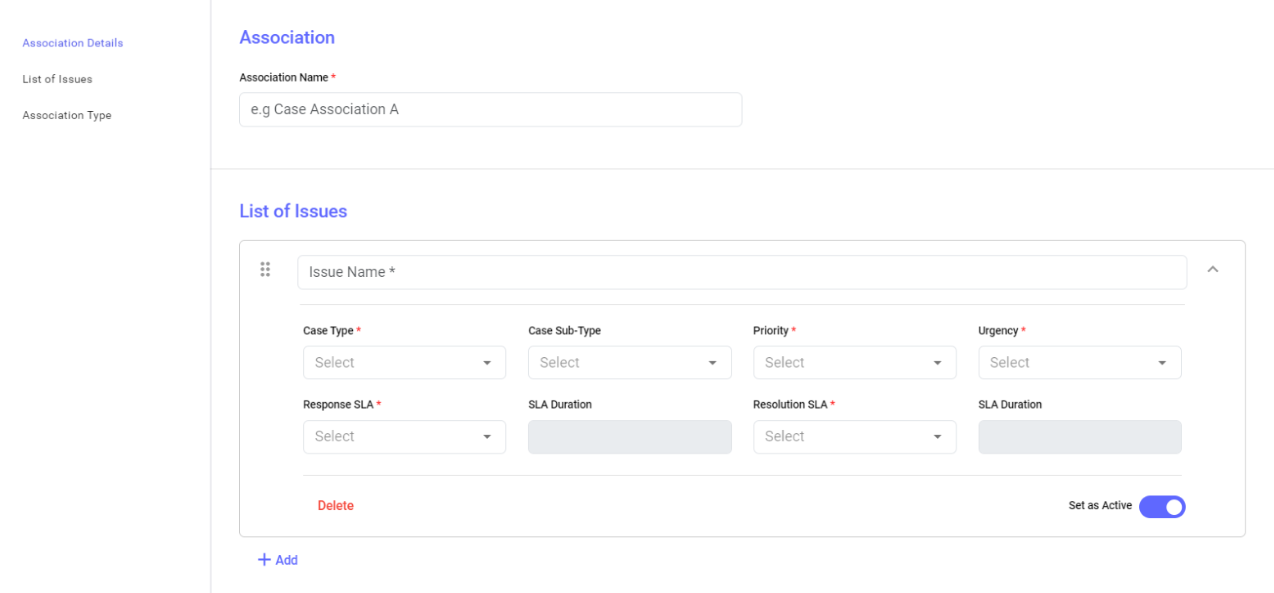
Case Association creation page view:
No Comments