4.2. Pre-requisite for Inventory Creation
Before onboarding inventories, the user must configure the necessary settings such as Inventory Category, Manufacturer, SKU, Stock Room, Location, and Currency within the Settings module.
Settings -> Inventories -> Inventory category:
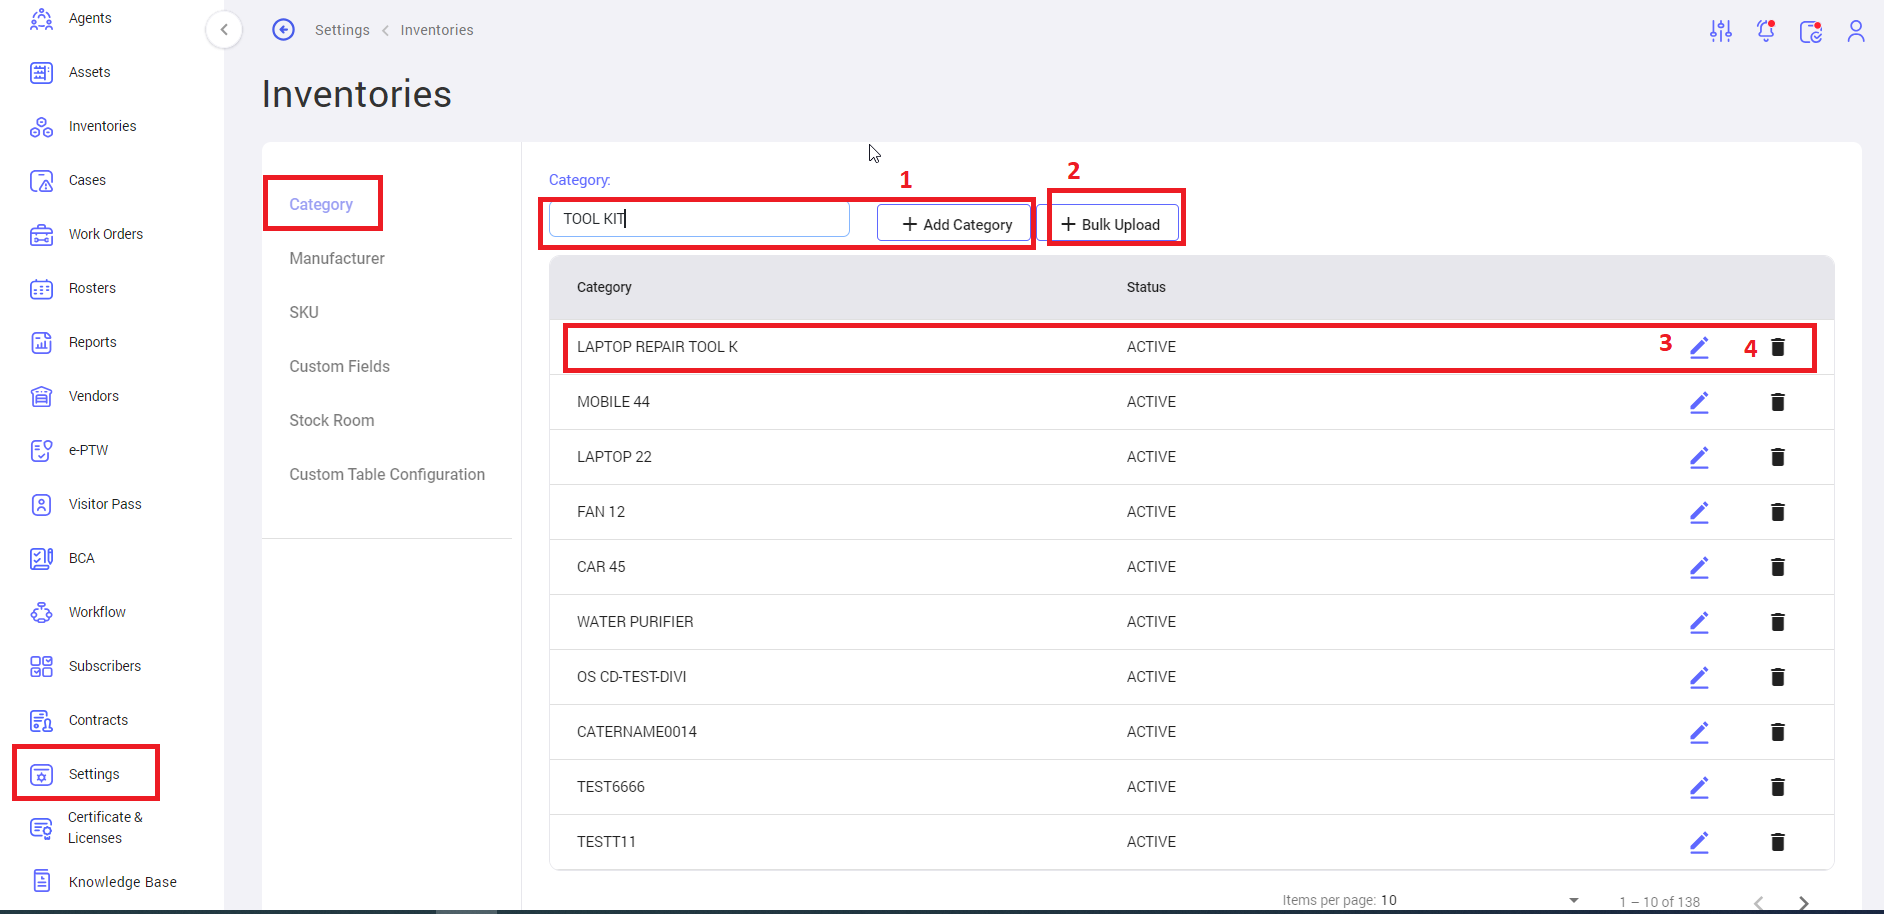
- Add Category: The user can type the category name in the text box and click on the "Add Category" button to add an individual category.
- Bulk Upload: The user can click on the bulk upload button to create multiple categories at a time. Download the CSV file, fill in the data, and upload it.
- Edit Category: The user can edit already created categories by clicking on the edit icon available in each row of the categories list.
- Delete Category: The user can delete already created categories by clicking on the delete icon available in each row of the categories list.
Settings -> Inventories -> Manufacturer
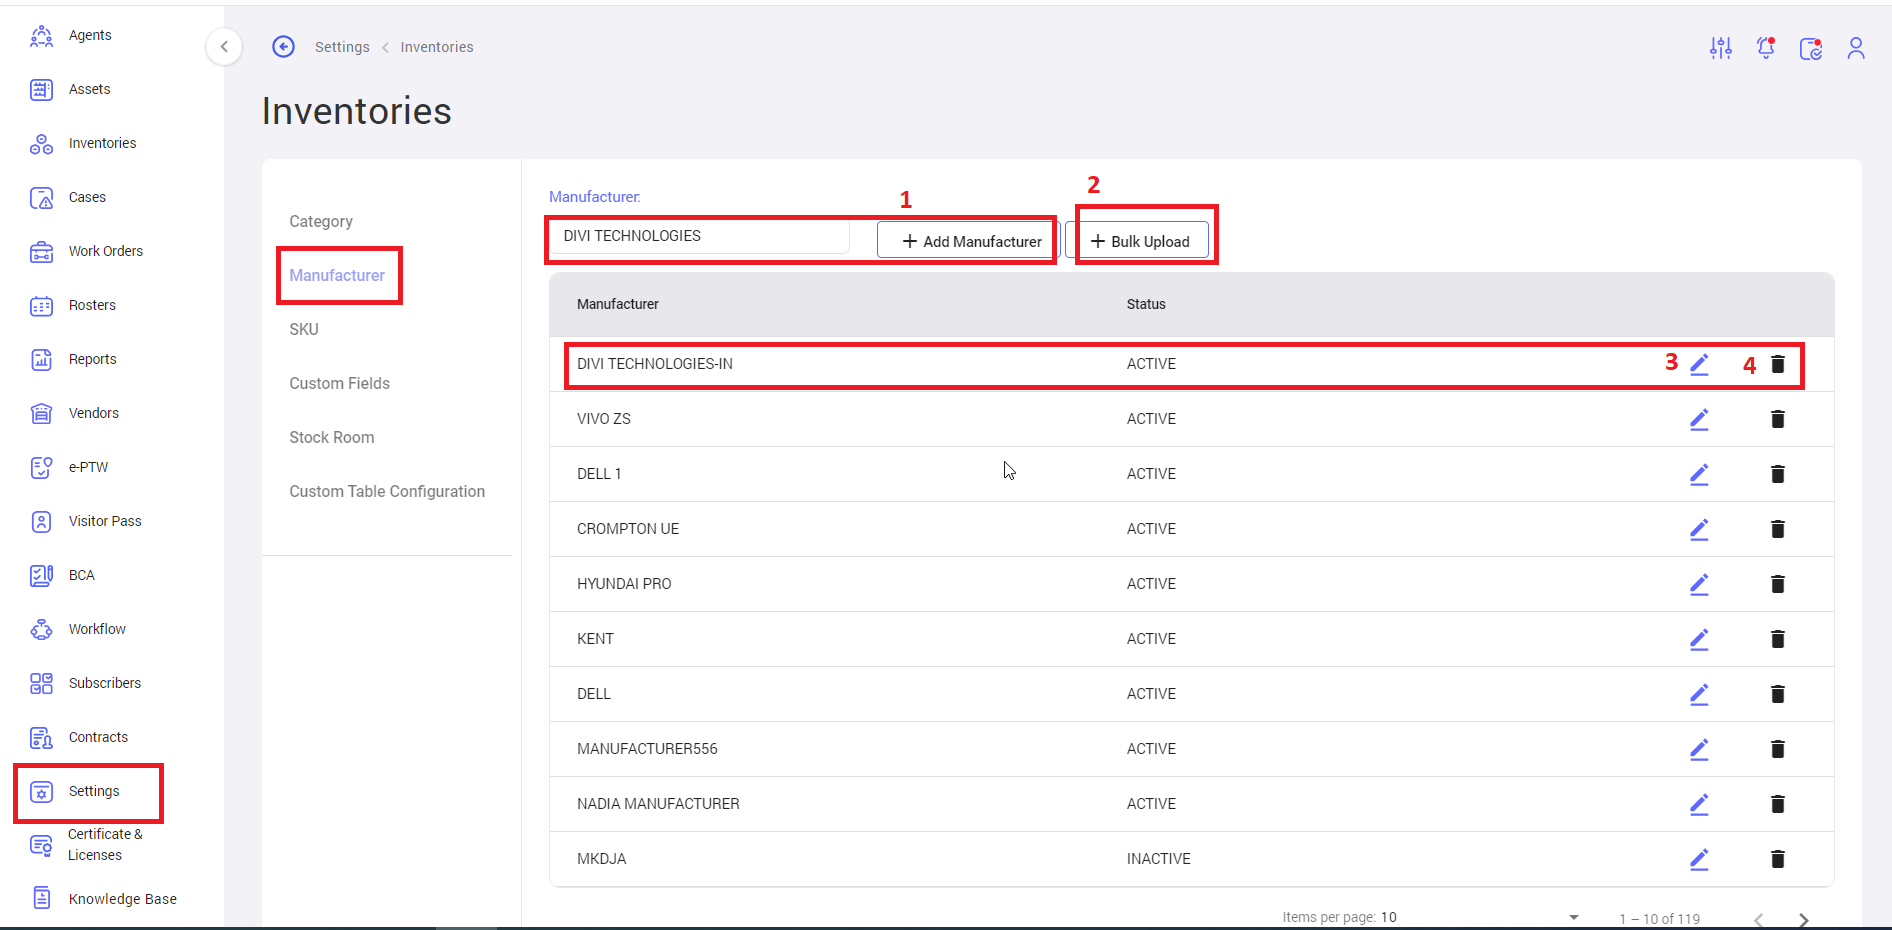
- Add Manufacturer: The user can type the manufacturer name in the text box and click on the "Add Manufacturer" button to add an individual manufacturer.
- Bulk Upload: The user can click on the bulk upload button to create multiple manufacturers at once. Download the CSV file, fill in the data, and upload it.
- Edit Manufacturer: The user can edit already created manufacturers by clicking on the edit icon available in each row of the manufacturer list.
- Delete Manufacturer: The user can delete already created manufacturers by clicking on the delete icon available in each row of the manufacturer list.
Settings -> Inventories -> SKU
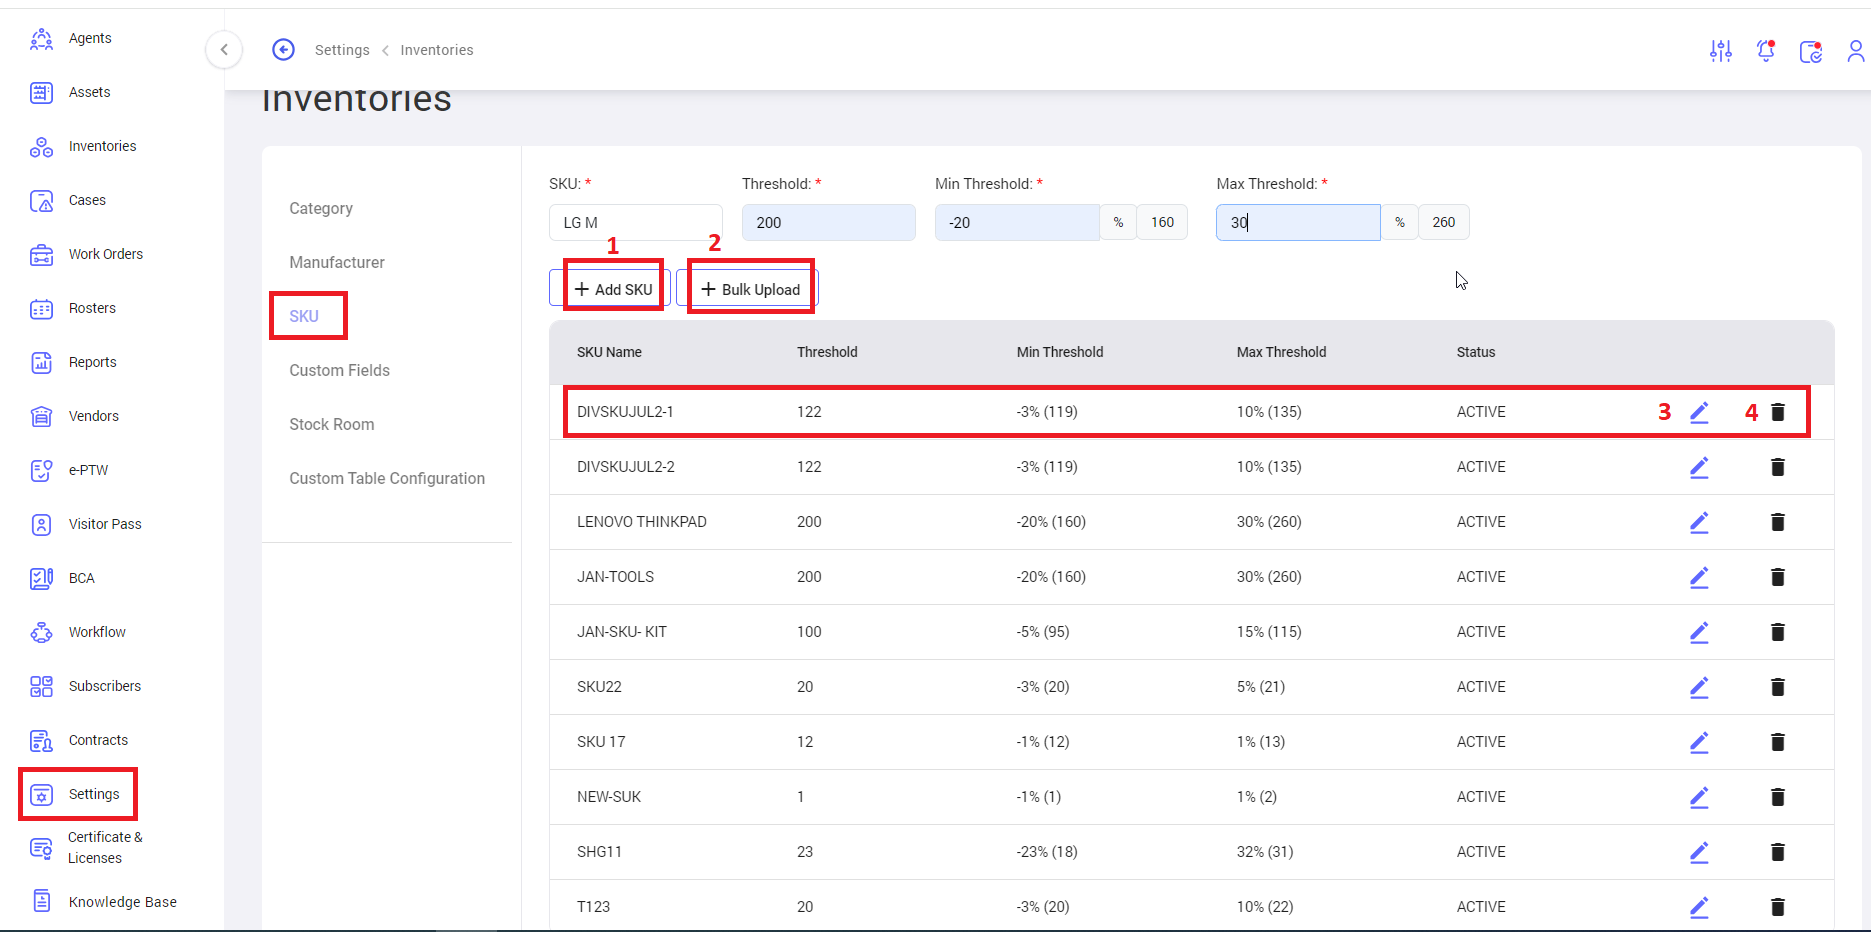
- Add SKU: The user can type the SKU name, Threshold, Min Threshold, and Max Threshold in the respective text boxes and click on the "Add SKU" button to add an individual SKU. (Note: Every inventory has individual SKU, for every inventory type we have to create separate SKU in settings.)
- Bulk Upload: The user can click on the bulk upload button to create multiple SKUs at once. Download the CSV file, fill in the data, and upload it.
- Edit SKU: The user can edit or update already created SKUs by clicking on the edit icon available in each row of the SKU list.
- Delete SKU: The user can delete already created SKUs by clicking on the delete icon available in each row of the SKU list.
Settings -> Inventories -> Stock Room
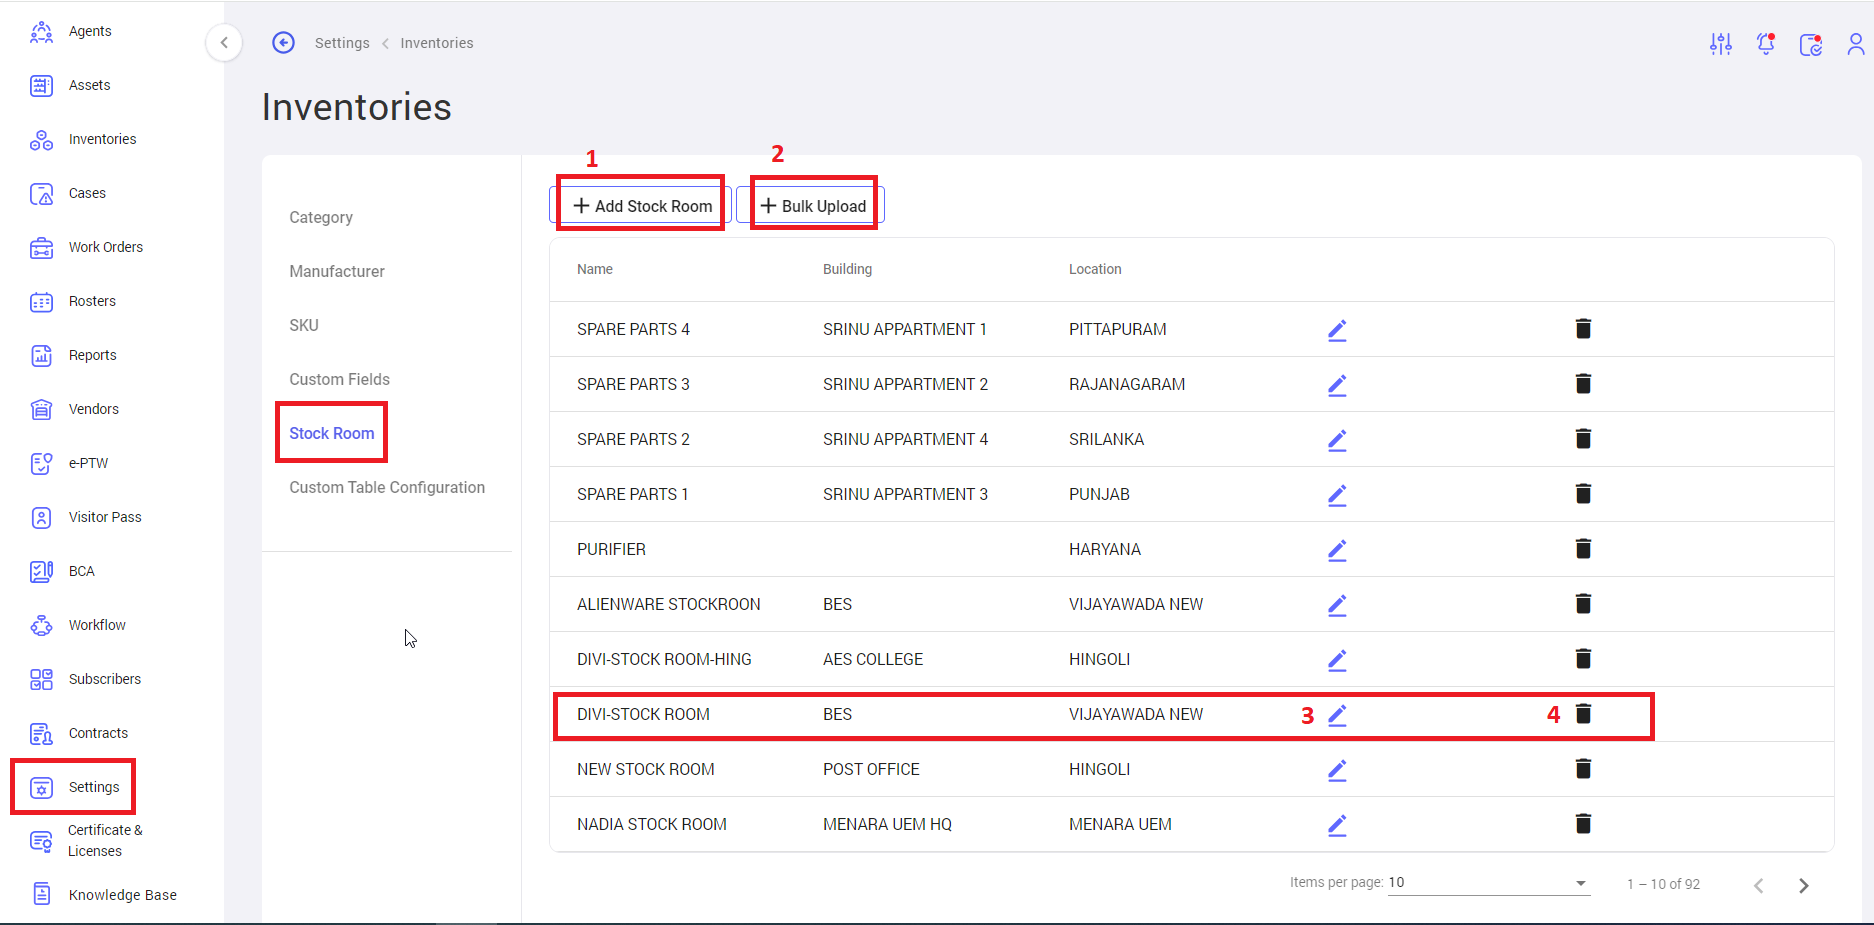
1.
will be created. 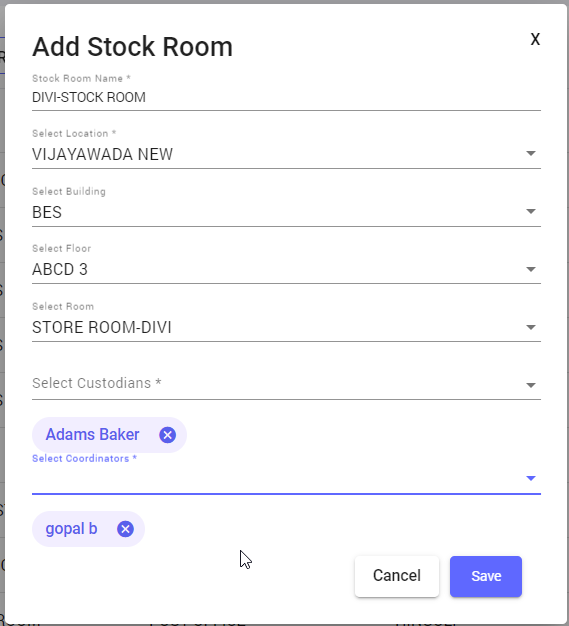
Note: Every inventory has an individual Stockstock Room,room, and for everyeach inventory typetype, wea separate stock room must be create separate Stock Roomcreated in the settings.
2.
3.upload it.
4.
Note: you cannot edit/update details inthe stock room iflist. it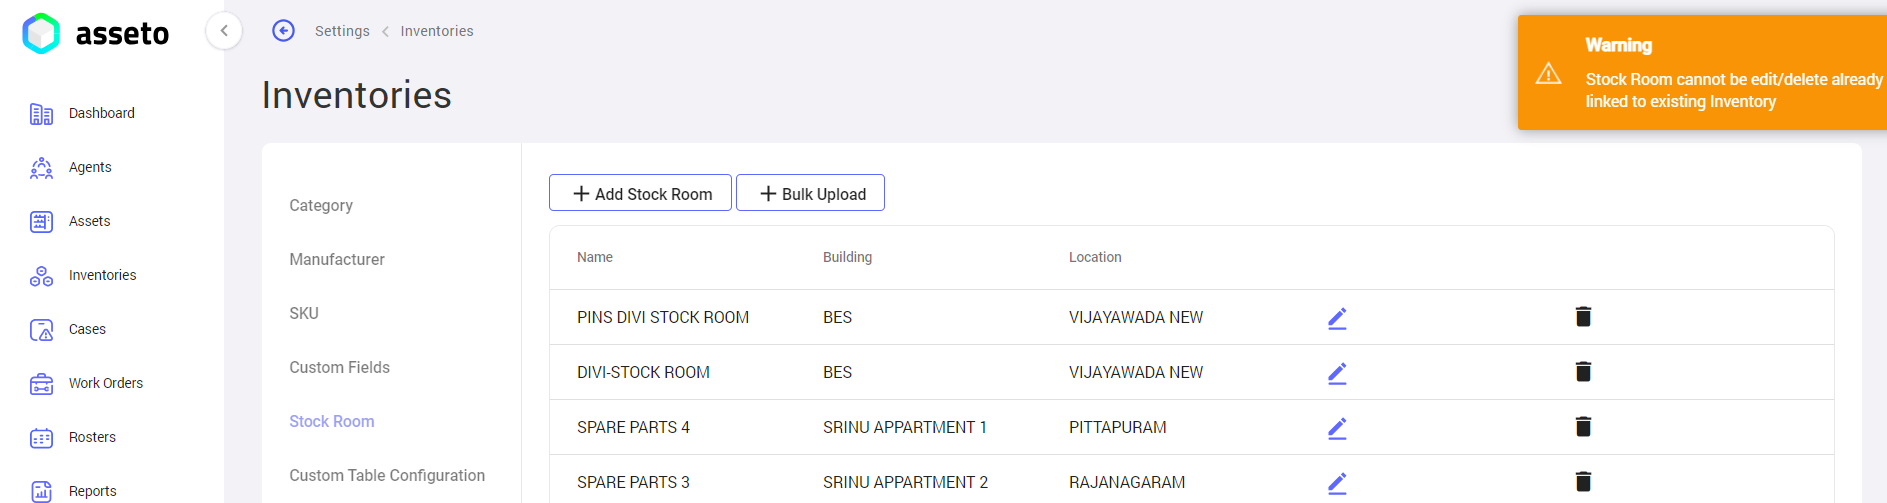 Note: If a stock room is linked to an existing inventory, the user cannot edit or update the details, and the system will display a warning
 messagemessage.
Settings -> My Organization -> Location
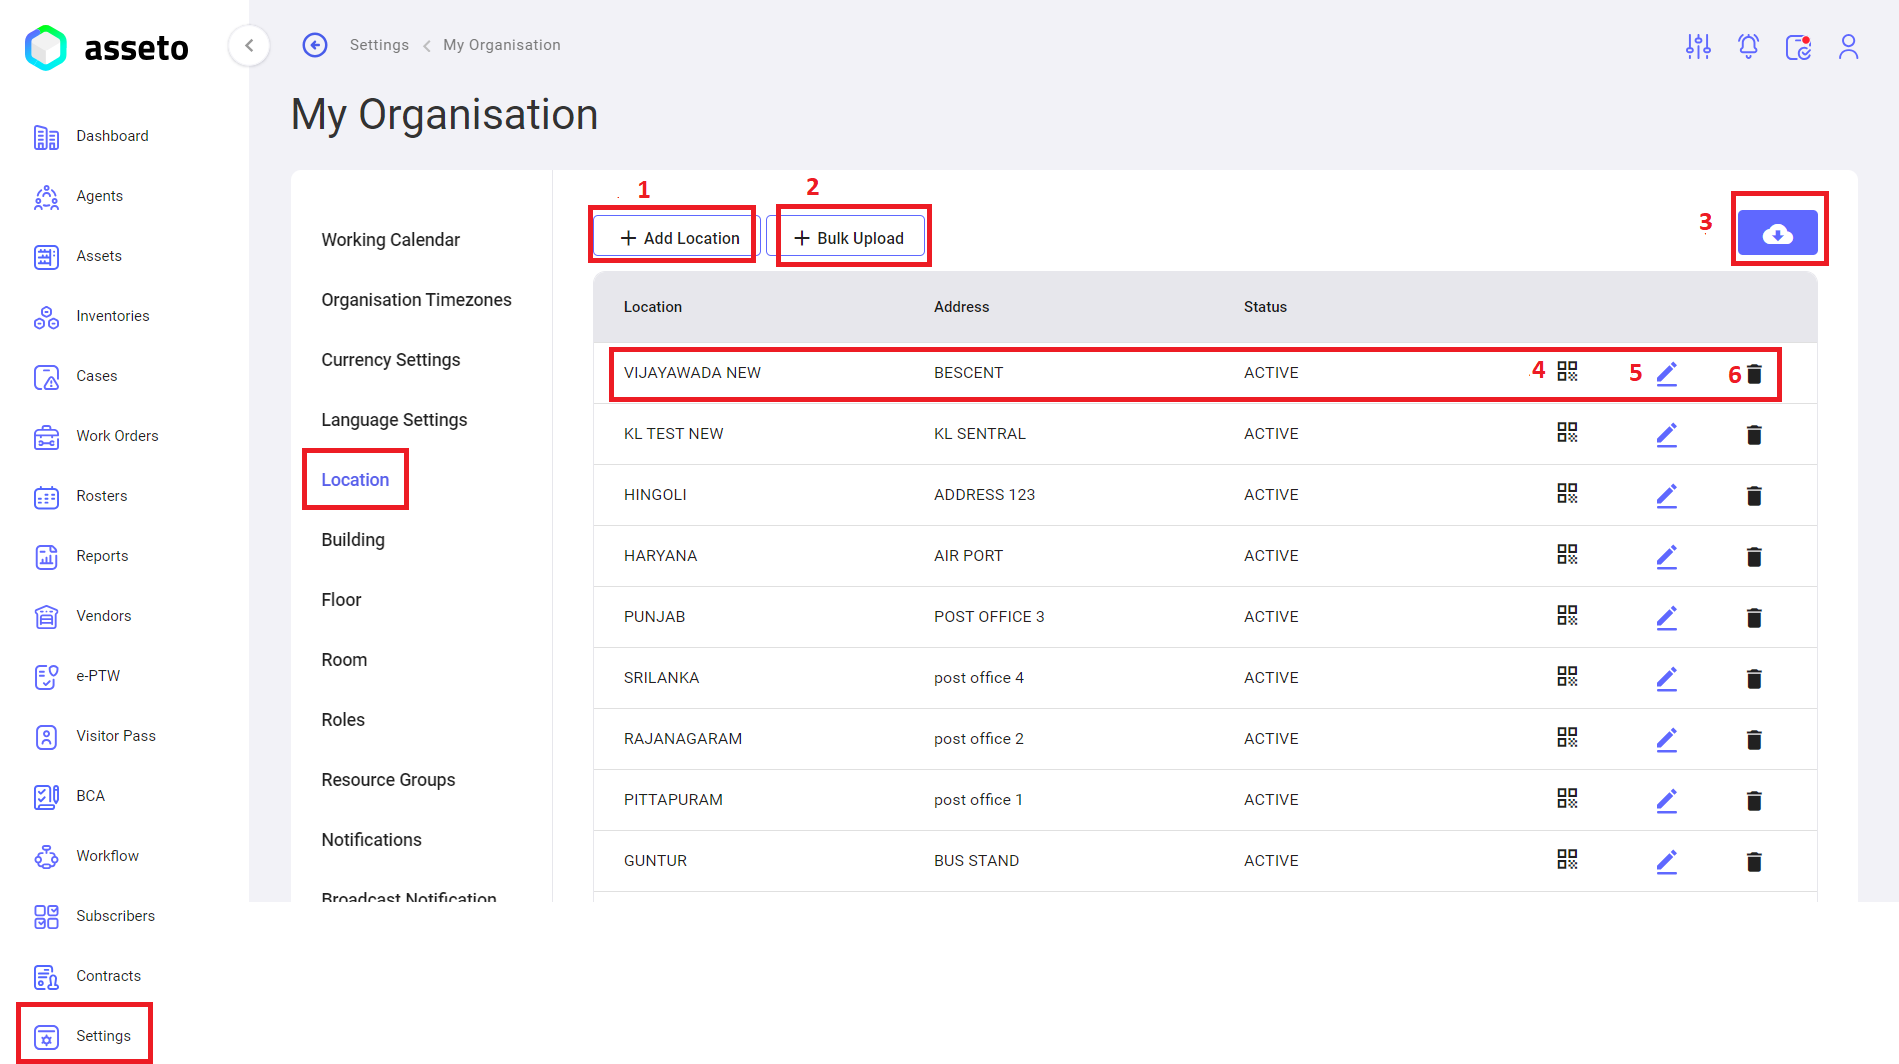
1.
add"Add locationLocation" button to create an individual location.
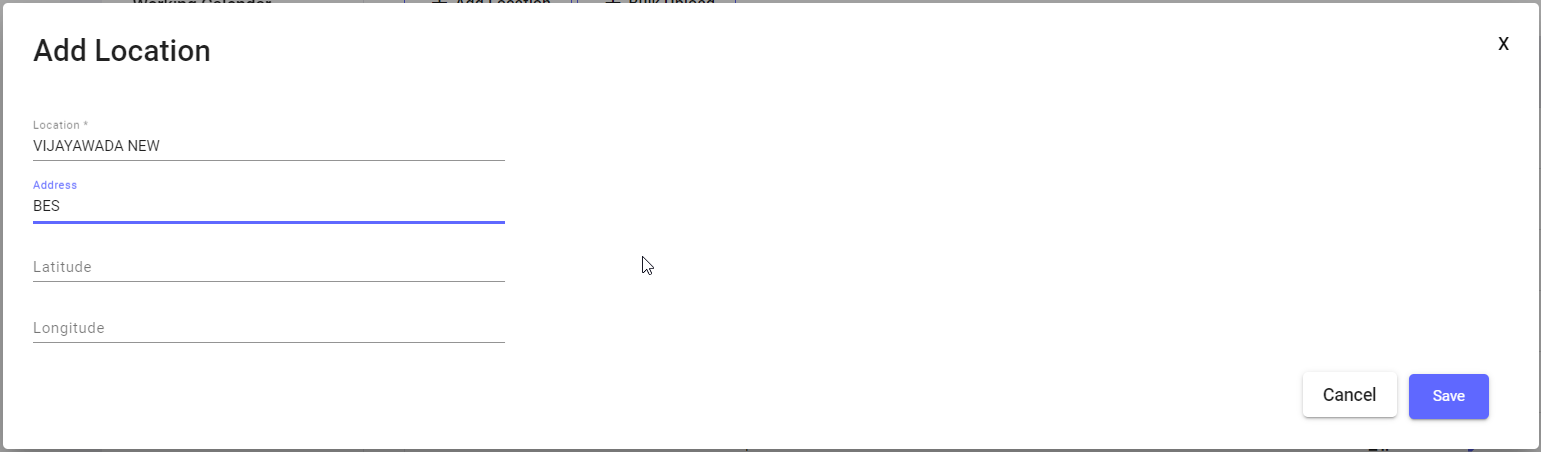 When
When click on “add location”the button followingis clicked, a page will appear,appear where the user must fill in the mandatory fields. Once all required fields thenare onlycompleted, the save button will be enabled. ClickUpon onclicking the save button, yourthe location details will be saved and displayed in the table first row.

2.table.
Location:Location: ClickThe user can click on the bulk upload button to create multiple locations atsimultaneously. aDownload time,the downloadCSV csvfile, filefill in the necessary data, and fillupload theit.
data then upload.
3. button:Button: To download the QR list (locations), youthe user can export asthe data either with image or without image.
4.QR:The Clickuser can click on the QR icon and Scanscan the QR code to view thatthe location
5.location.
Location:Location: HereThe youuser can edit already created locations by clicking on the edit icon available in each row of Locationthe location list.
6. Location:Location: HereThe youuser can delete already created locations by clicking on the delete icon available in each row of Locationthe location list.
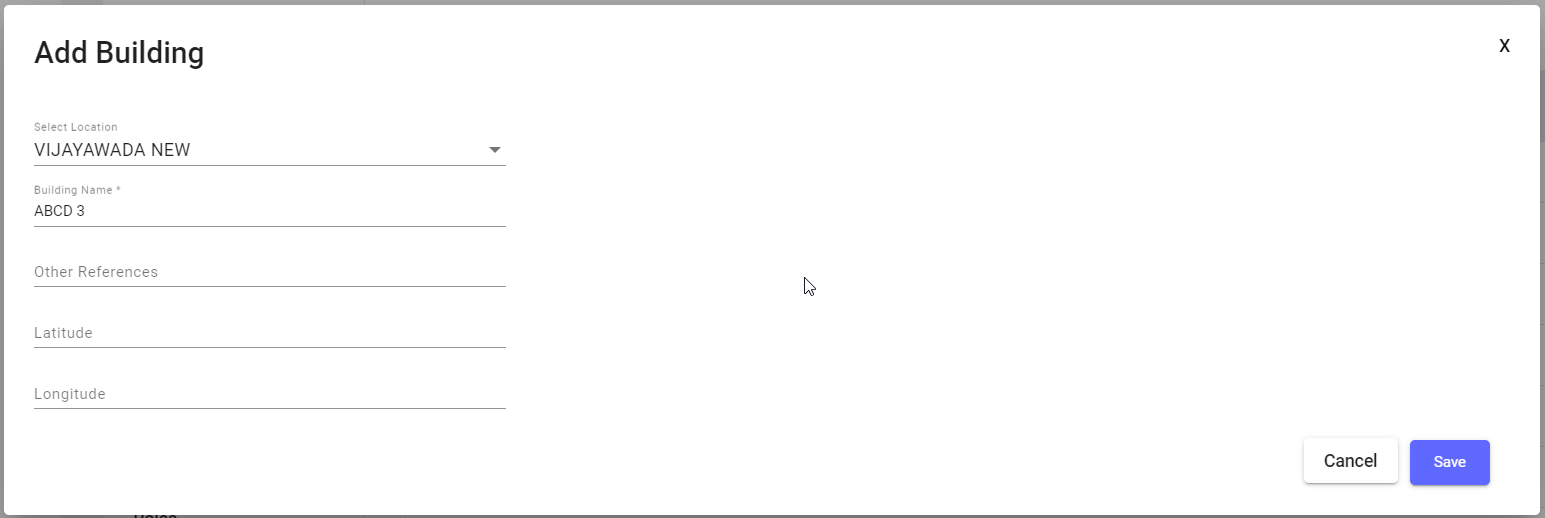
Settings -> My Organization -> Building:
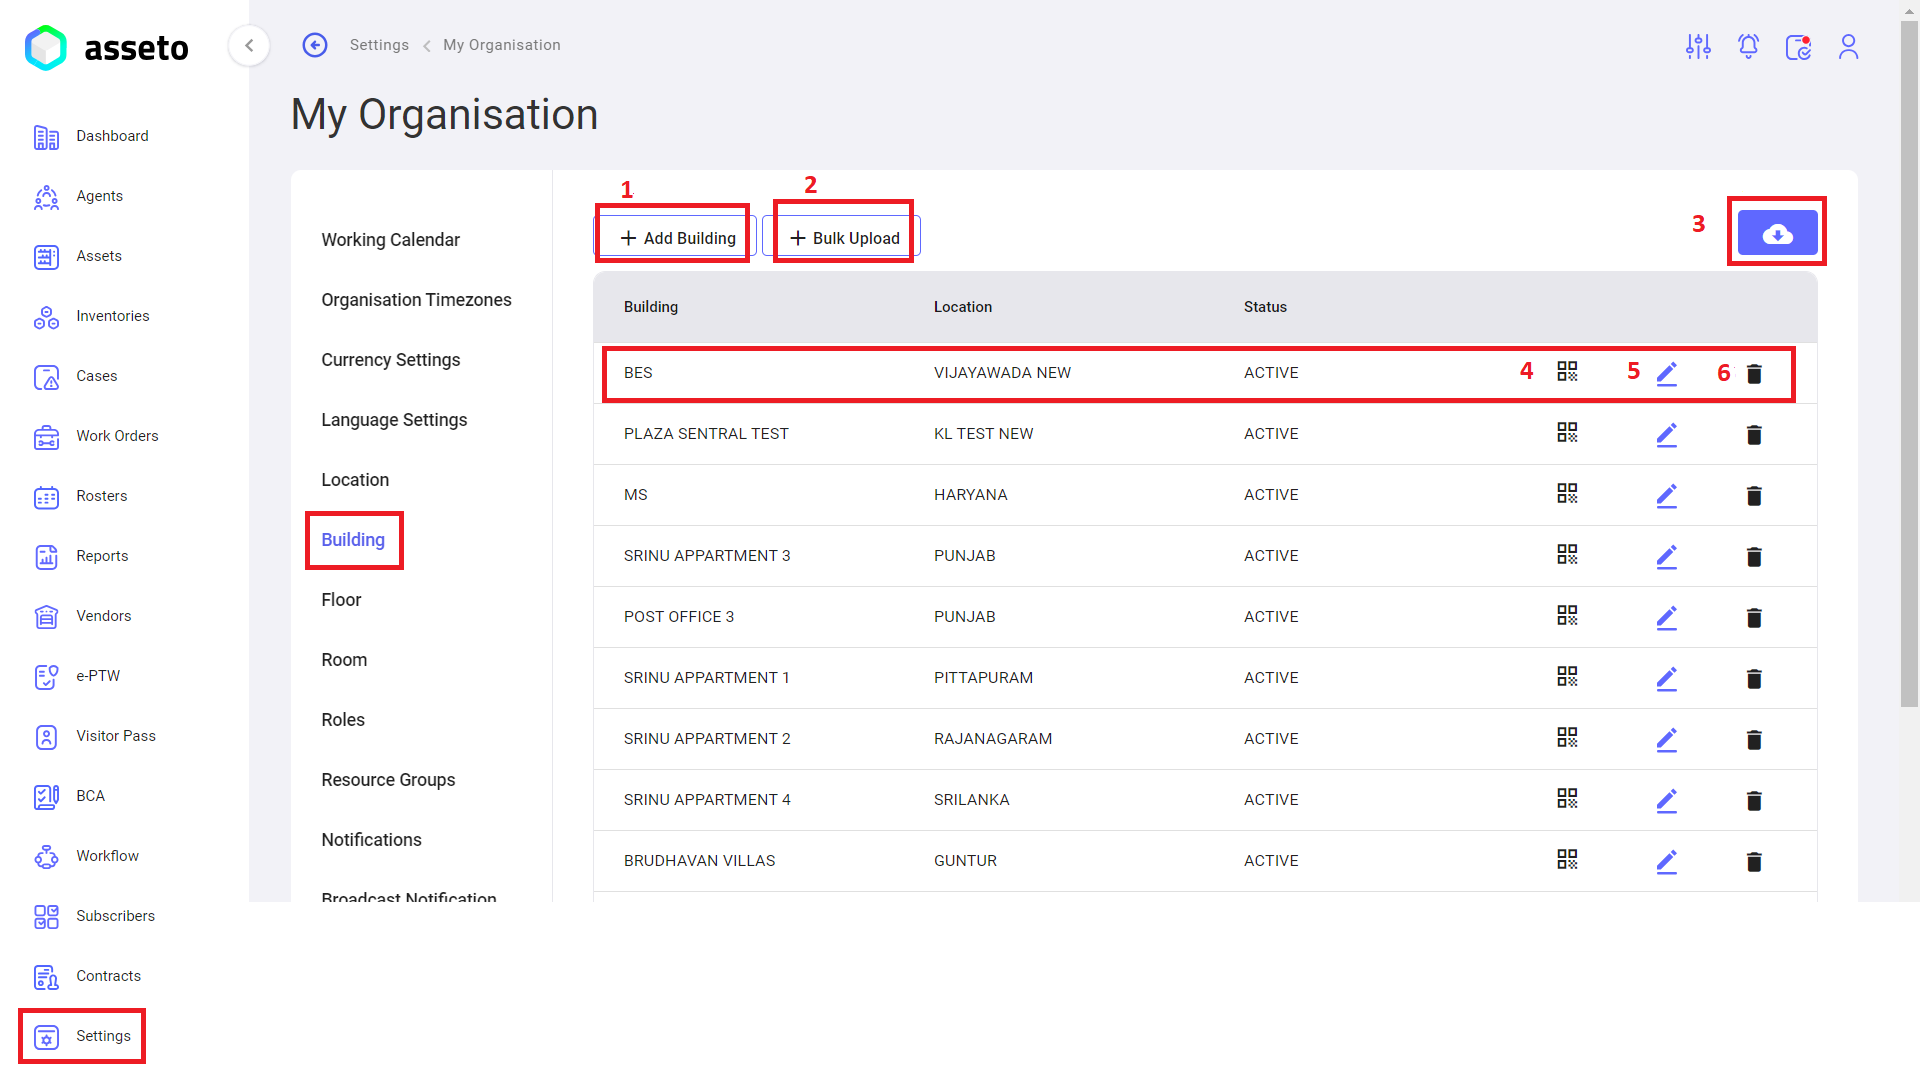
1.
- Add Building:
clickClick on theadd"AddbuildingBuilding" button to create an individual building name.
row When clicking on the “
addAddbuilding”Building”buttonbutton, the following page willappear,appear.fillFill in the mandatoryfieldsfields; only thenonlywill the save buttonwillbe enabled. Click on the savebuttonbutton, and your building details will be saved and displayed in thetablefirstrow.
of
the2.table. - Bulk
uploadUpload Building: Click on the bulk upload button to create multiple buildings ataonce.time,DownloaddownloadthecsvCSVfilefile, fill in the data, andfill the datathenupload.upload it.
- Export button: To download a QR list (buildings), you can export
asit withimageor without an image. - QR: Click on the QR icon and
Scanscan the QR code to viewthatthe building name along with the location. - Edit Building:
Here you editEdit already created building names by clicking on the edit icon available in each row of the building list. - Delete
Building:Building:Here you deleteDelete already created building names by clicking on the delete icon available in each row of the building list.
3.
4.
5.
6.
Settings -> My Organization -> Floor:
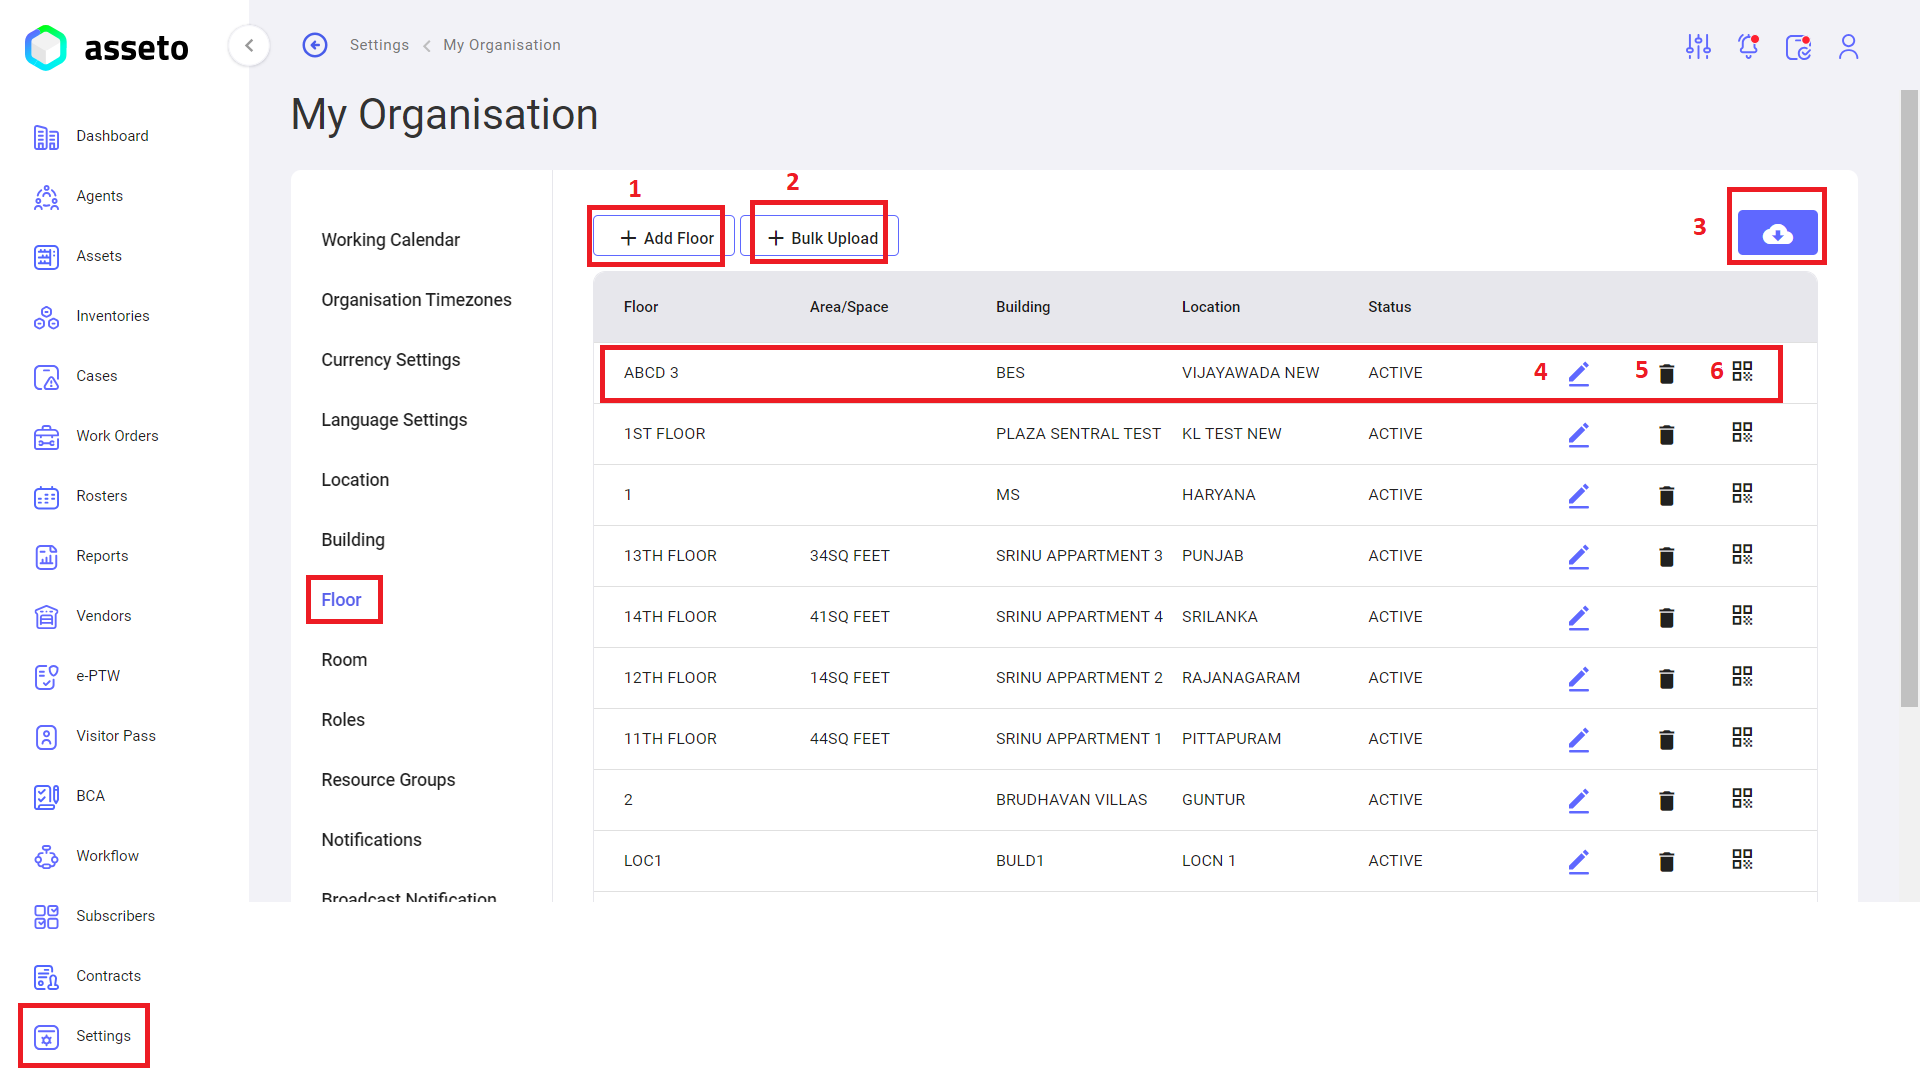
Floor:Floor: Click on theadd"AddfloorFloor" button to create an individual floor name. When
When clicktheon"Add“add floor”Floor" button is clicked, the following page will appear.appear,Fillfillin all mandatory fields, and once complete, themandatory fields then only save"Save" button will be enabled. Click on "Save" to store thesave button, yourfloordetailsdetails, which will then besaved anddisplayed in thetablefirstrow.row
of
the table.Floor:Floor: Click onbulktheupload"Bulk Upload" button to create multiple floors ataonce.time,Download the CSV file, fill in the required data, and upload it.- Export: Use the "Export" button to download
csv file and fillthedata then upload. Export button: To downloadQR list(floors),ofyoufloors,canwith the option to exportaswithimageor withoutimage.images.Floor:Floor:HereToyoumodifyeditanalreadyexistingcreatedfloor,floor names by clickingclick oneditthe "Edit" icon available in each row of the floor list.- Delete
Floor
5. :Floor: HereTo youremove deletea alreadyfloor, created floor names by clickingclick on deletethe "Delete" icon available in each row of the floor list.
6. QR:Scanscan the QR code, allowing the user to view thatthe floor name along with its location.
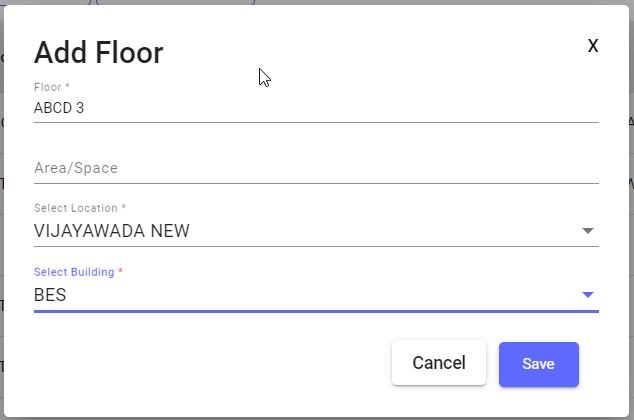
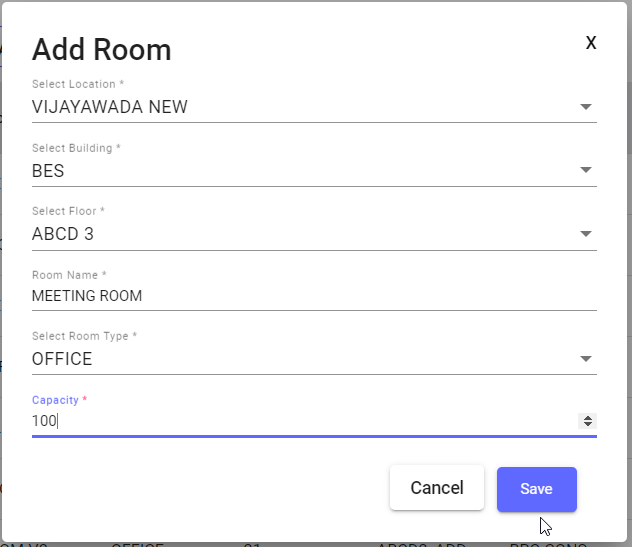
Settings -> My Organization -> Room:
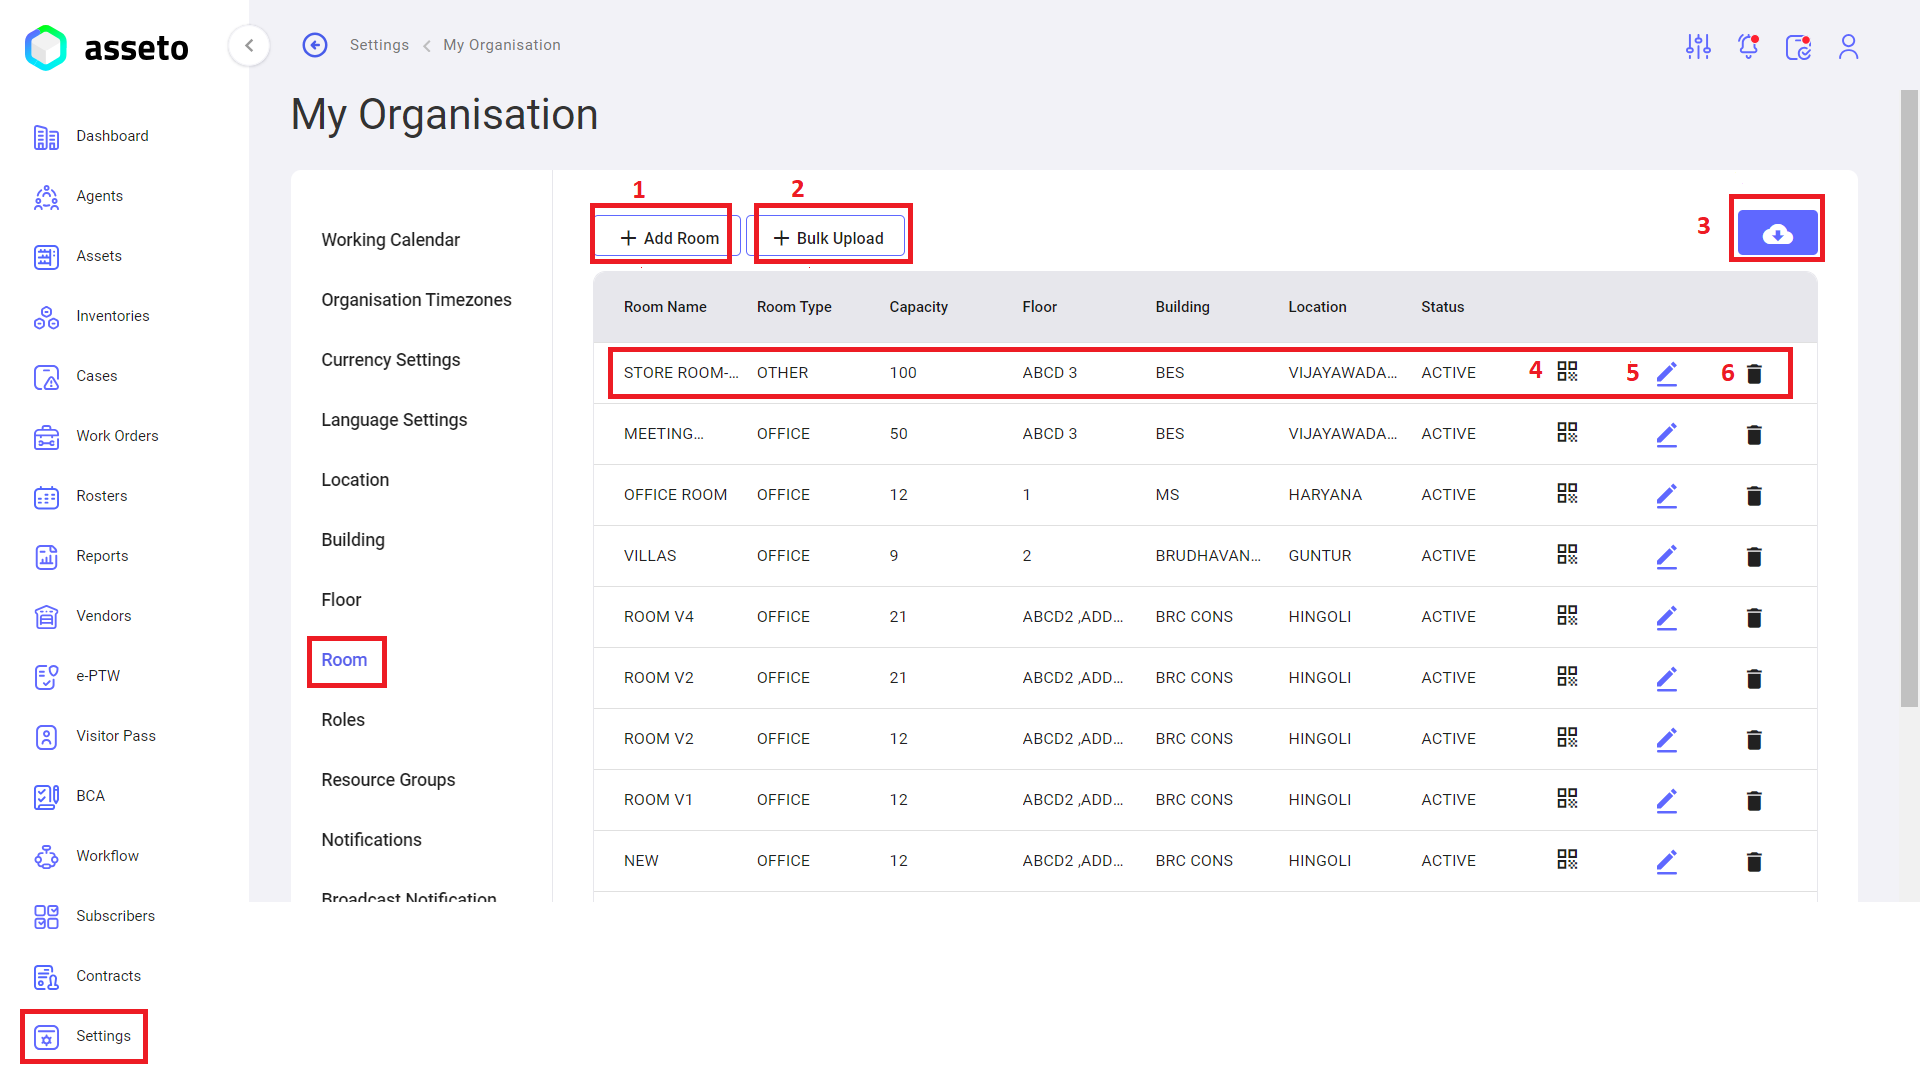
Add Room:
clickClick on theadd"AddroomRoom" button to create an individual room name. When
When clicktheon"Add“add room”Room" buttonfollowingis clicked, a new page willappear,appear.fillFill in all mandatory fields, and themandatory fields then only save"Save" button will be enabled. Clickon"Save" to store thesave button yourroomdetailsdetails, which will then besaved anddisplayed in thetablefirstrow.row of the table.bulktheupload"Bulk Upload" button to create multiple roomsatsimultaneously.aDownloadtime,the CSV file, fill in the necessary data, and upload it.Export: Use the "Export" button to download
csv file and fillthedata then upload.Export button: To downloadQR list(rooms),ofyourooms,canwith the option to exportaswithimageor withoutimage.images.
QR: Scan the QR code to view
thatthe roomwithdetails, including building and location.Edit Room:
HereToyoumodifyeditanalreadyexistingcreatedroom,room names by clickingclick oneditthe "Edit" iconavailablein each row offloorthe room list.Delete Room:
HereToyouremovedeleteaalreadyroom,created room names by clickingclick ondeletetheicons"Delete"availableicon in each row offloorthe room list.
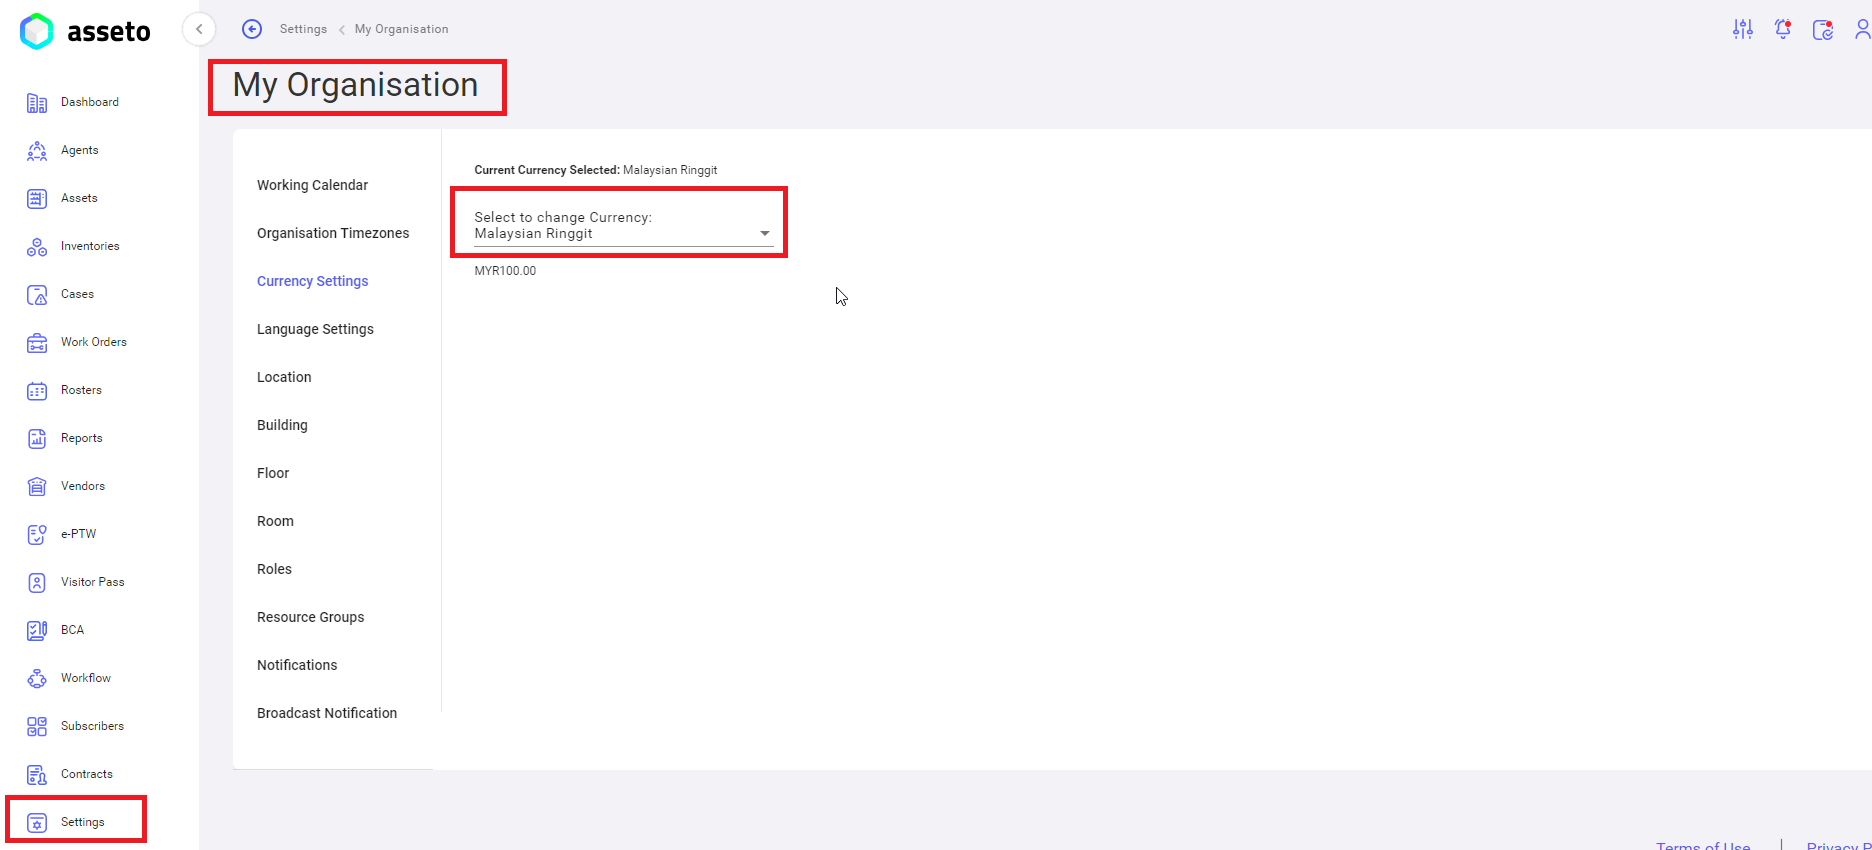
Settings -> My Organization -> Currency settings:
Select your currency type from the dropdown as shown by the screenshot below .