3.1. Assets Dashboard
Assets Dashboard:
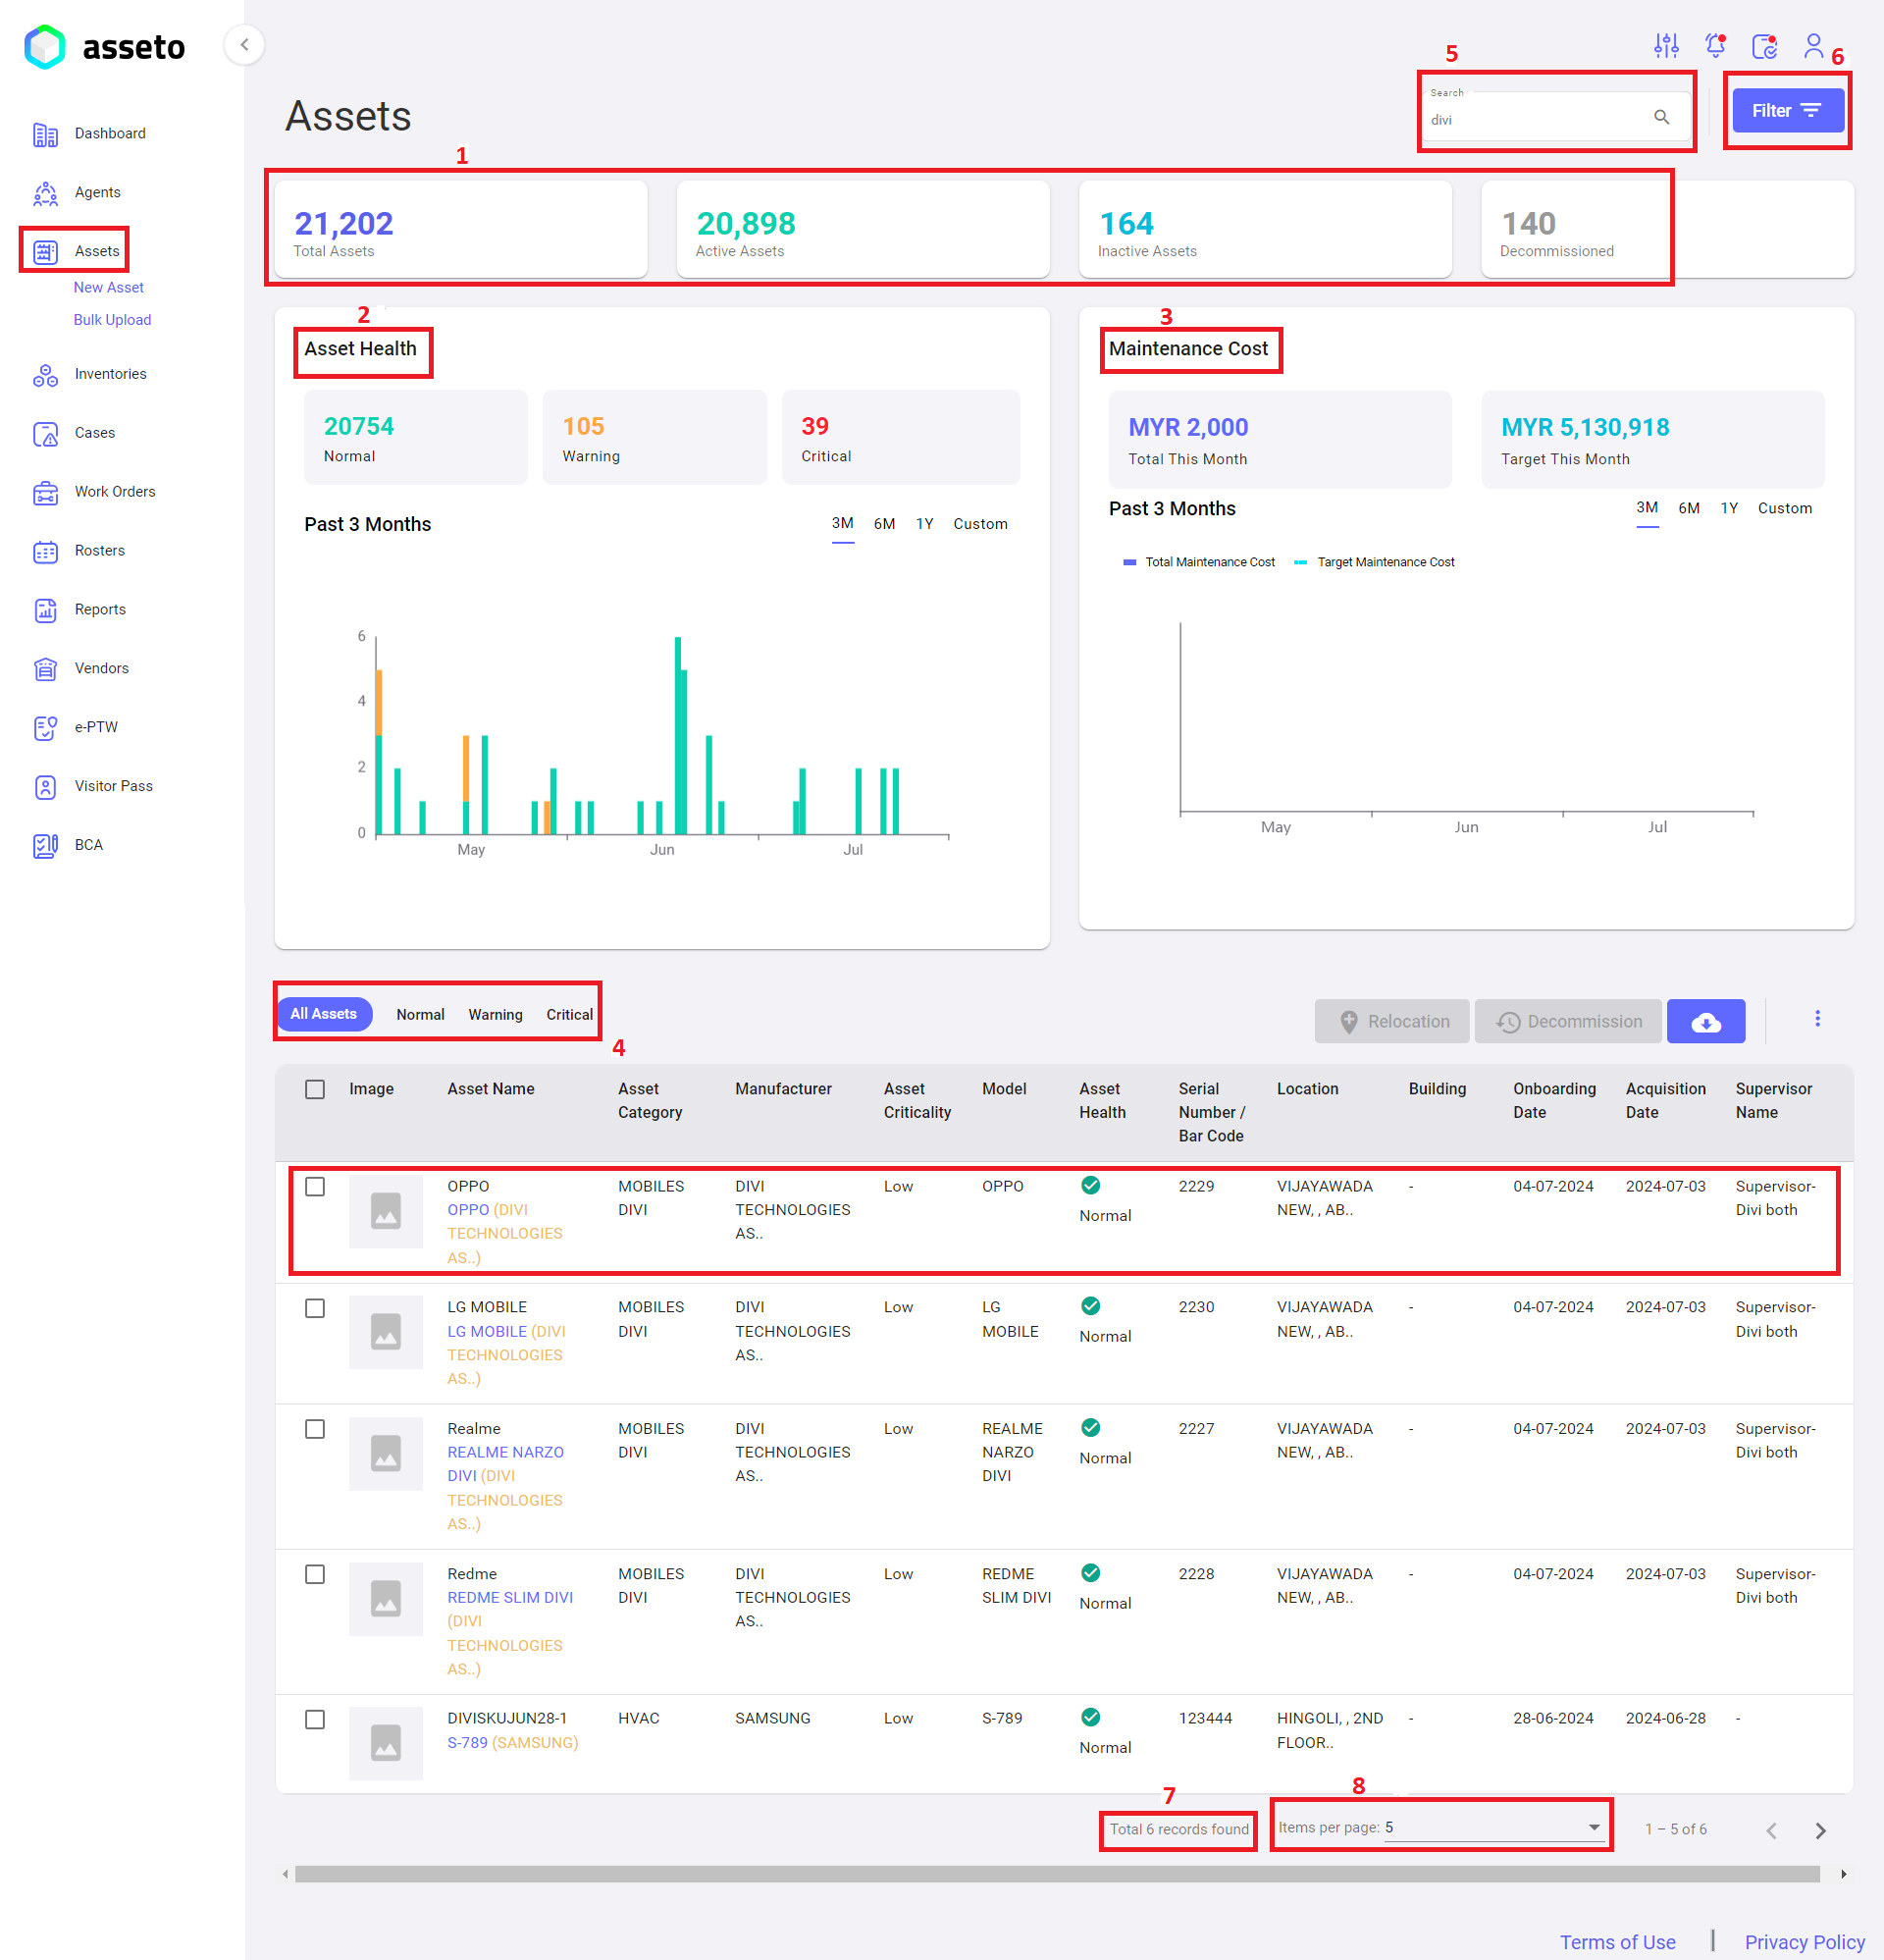
The Assets dashboard page is shown in the following screenshot.
The Assets Dashboard page displays the following information and charts:
- Asset Summary: Shows the total number of assets in the system, including the count of active, inactive, and decommissioned assets to date.
- Asset Health: Displays the number of active assets categorized by health status (Normal, Warning, Critical) and shown in a bar chart for different time periods (e.g., 3 months, 6 months, 1 year).
- Maintenance Cost: Shows maintenance cost data with "Total This Month" and "Target This Month" values. A chart visualizes the total and target maintenance costs.
- Assets List: Users can view the complete list of onboarded assets on the dashboard.
- Search Bar: Allows users to search for specific assets by asset name.
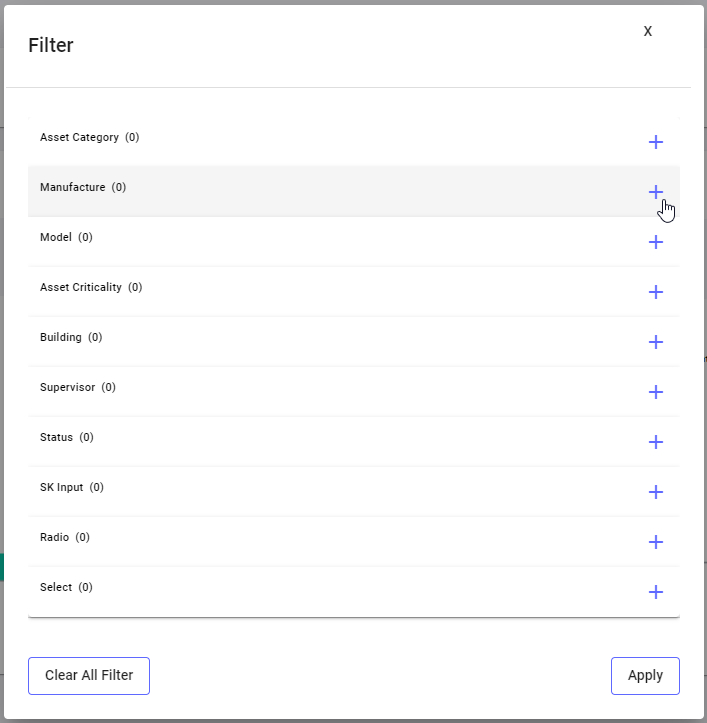
- Filter: Filters assets by various criteria such as asset category, manufacturer, model, etc. Clicking the filter icon will display a screen where the user can select filters, click the "Add" button, and then click "Apply." Filtered results will be displayed on the assets dashboard.

- Total Records: The total number of assets in the system is displayed at the bottom of the assets table.
- Pagination: The pagination view is located beside the total number of records, allowing the user to select the number of records to display per page (5, 10, 25, 50, 100) to view the desired list.
Assets List Page:
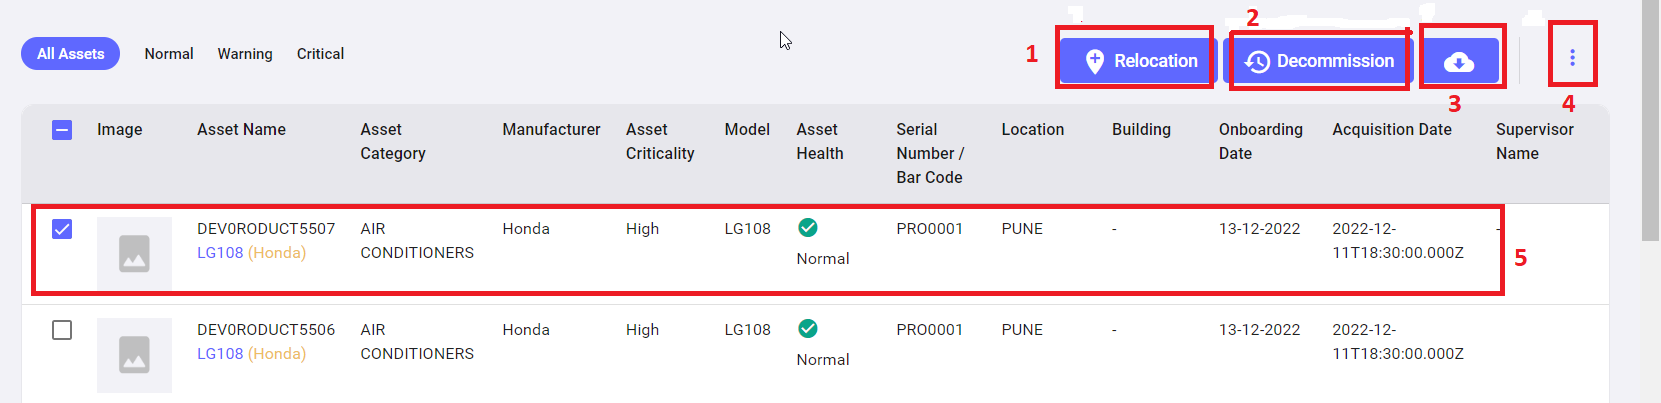
The asset list page has the following features.
Asset Relocation: if you click on the Relocation button the system will navigate to a new work order page with subject relocation request and some auto filled data of selected asset. Here you can fill remaining fields and click on save to apply for asset relocation.
Asset Decommission: if you click on the decommission button the system will navigate to a new work order page with subject decommission request and some auto filled data of selected asset. Here you can fill remaining fields and click on save to apply for asset Decommission.
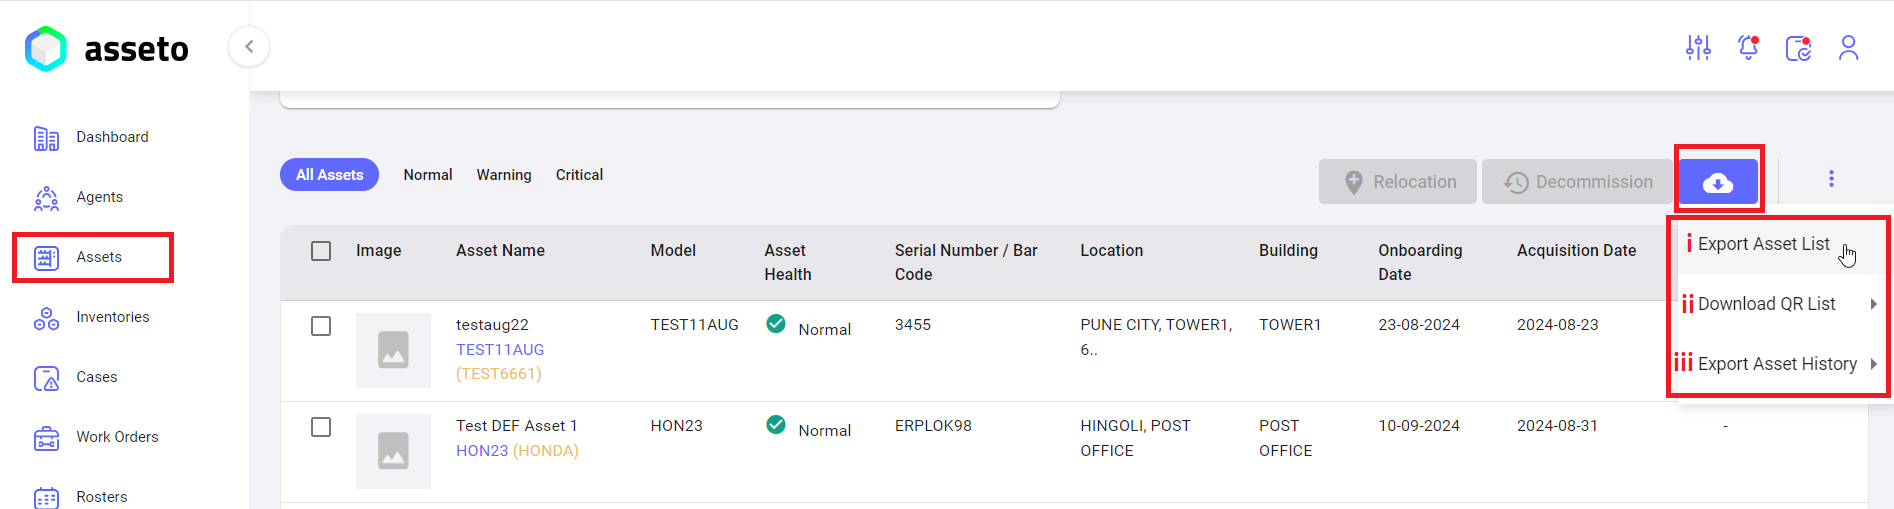
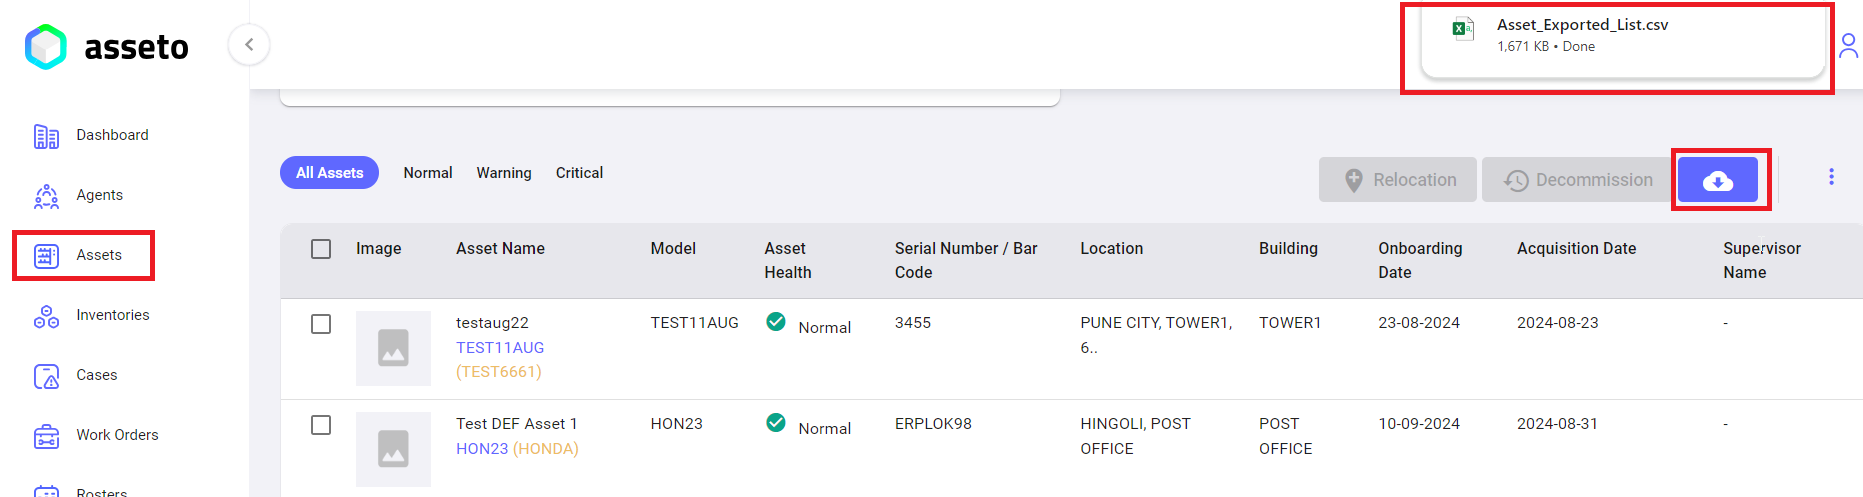
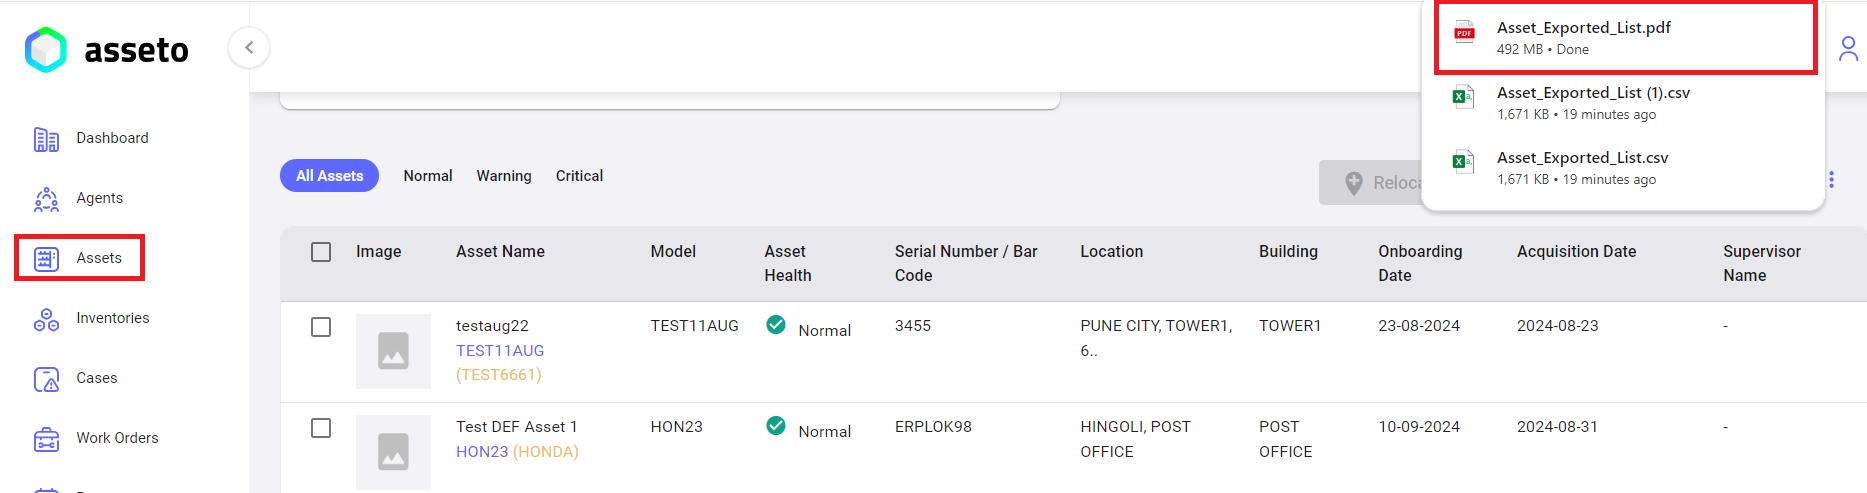
I. Export Asset List: To export the list of available assets from the system, please follow the appropriate procedures.
When you click on “Export Asset List” option, all assets list csv file downloaded into your local system.
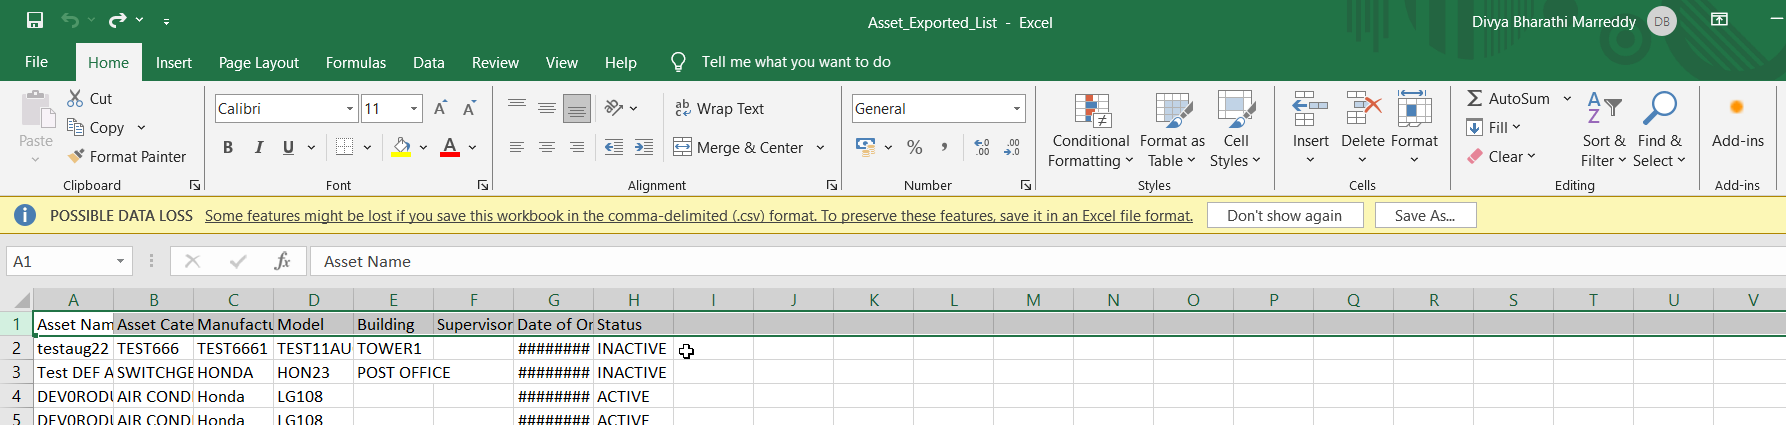
Asset exported file as shown by following screenshot.
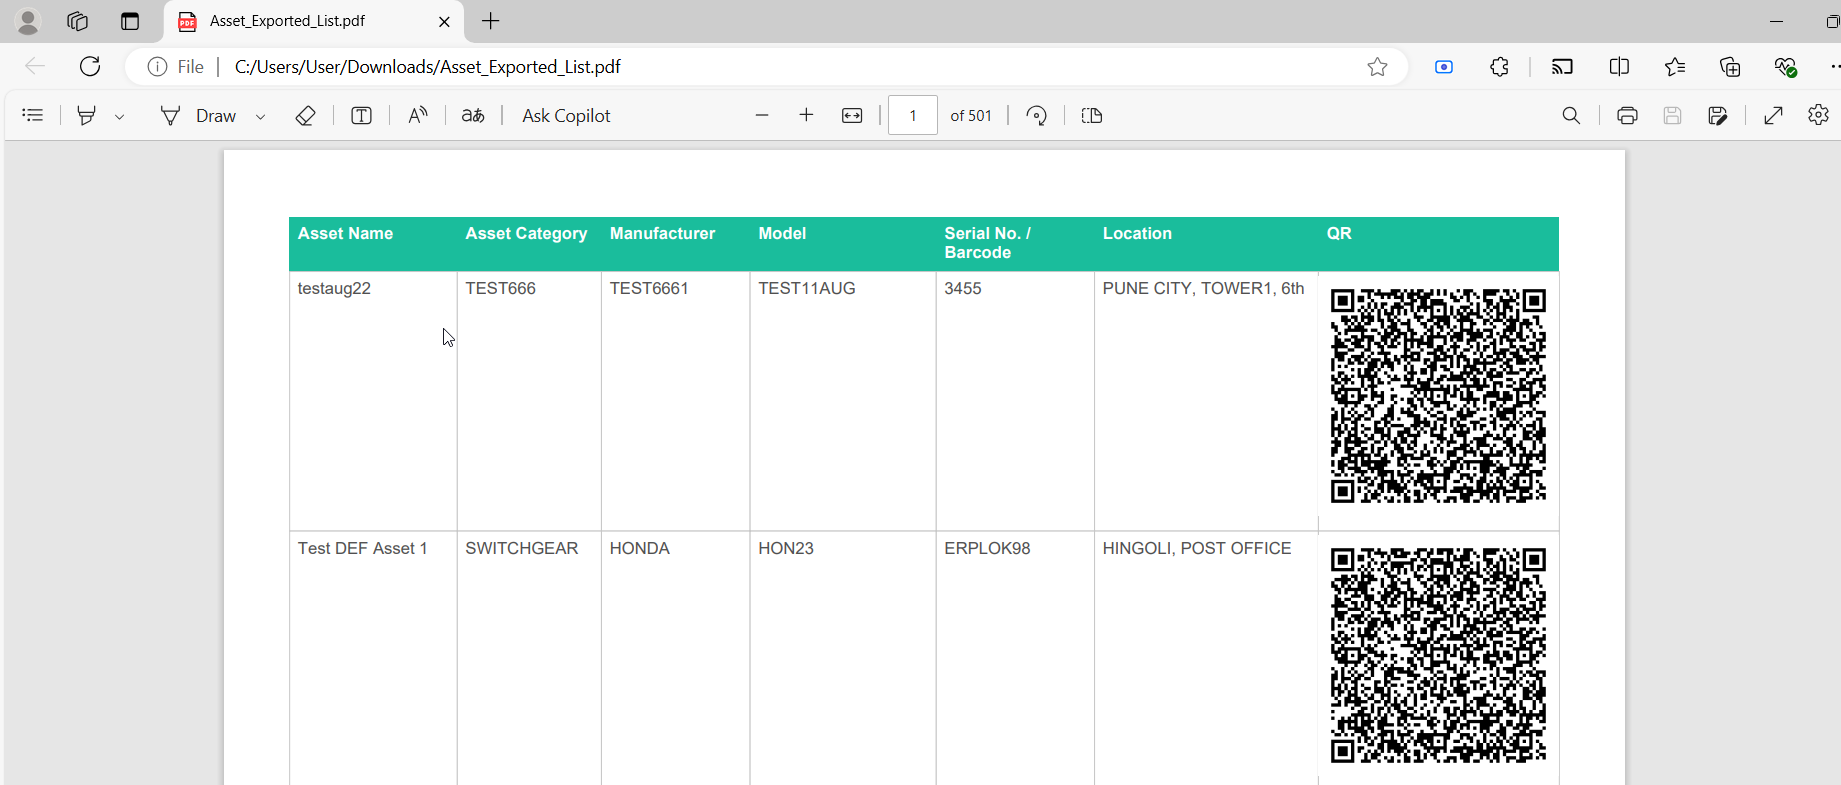
II. Download QR List: To download the assets list with QR.
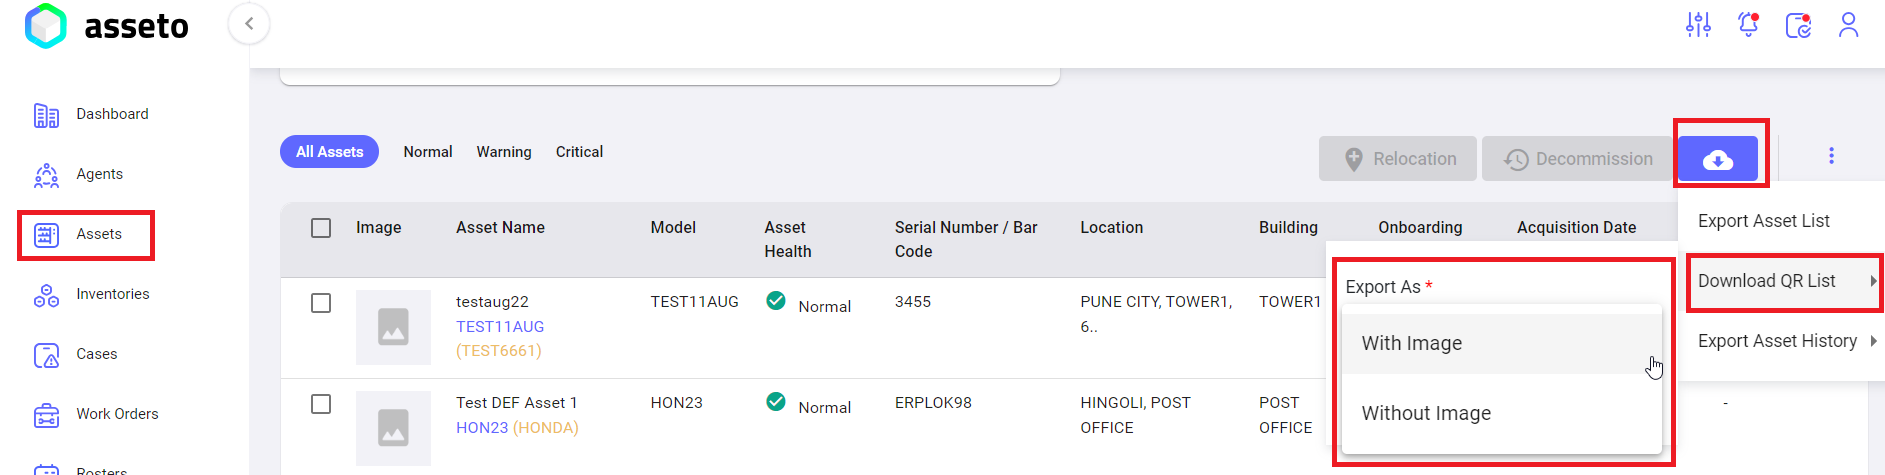
When you select the “Download QR List” option, you will see the “Export As” feature, which offers two choices: ‘With Image’ and ‘Without Image.’ Please select one of these options to download the assets list with QR codes.
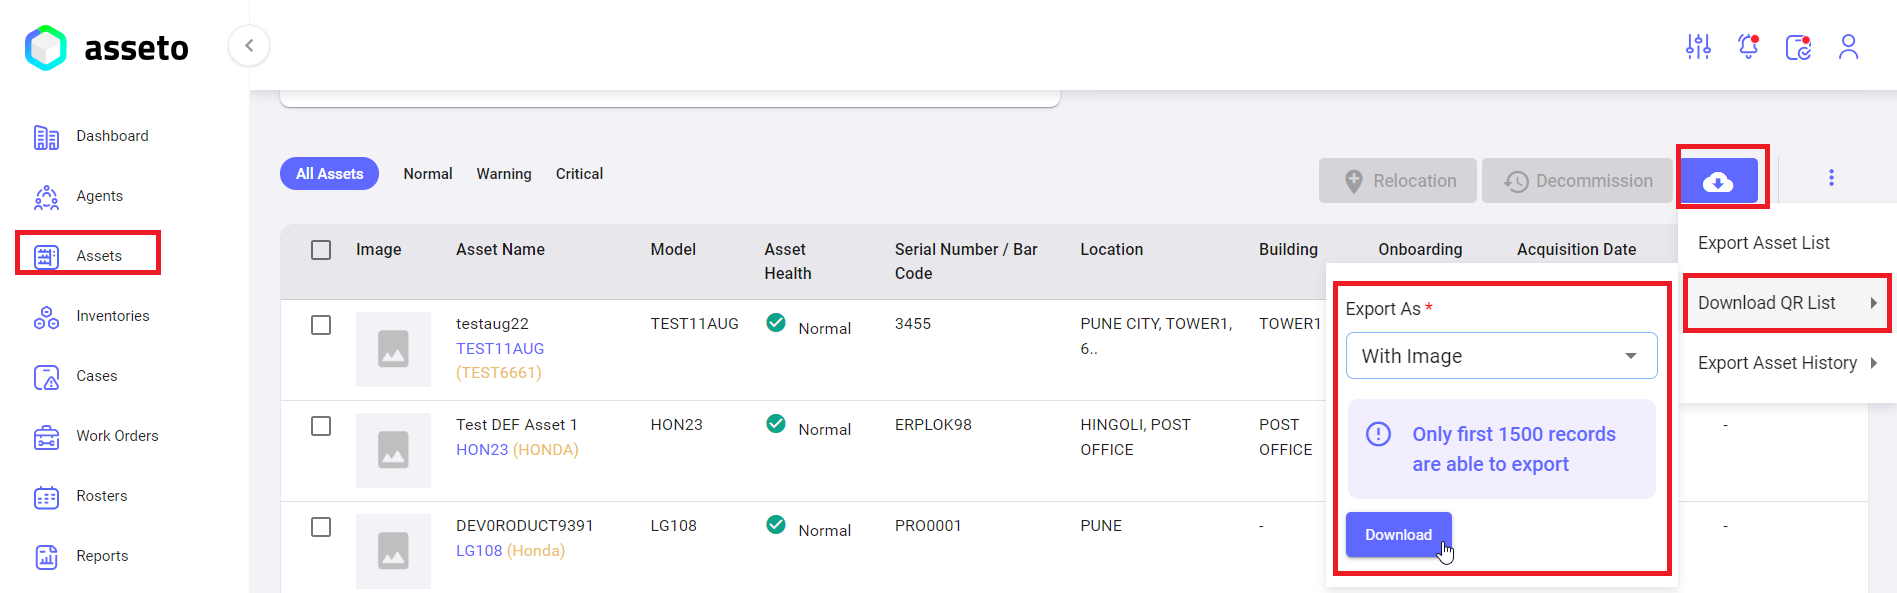
When you click on “Download” button, all assets list with QR pdf file downloaded into your local system.
Asset exported pdf file with QR as shown by following screenshot.
III. Export Asset History: To download the assets history within selected date range.
When you select the “Export Asset History” option, you will see the “calendar” feature, which offers to select start date and end date from the calendar. Please select dates to download the assets list.
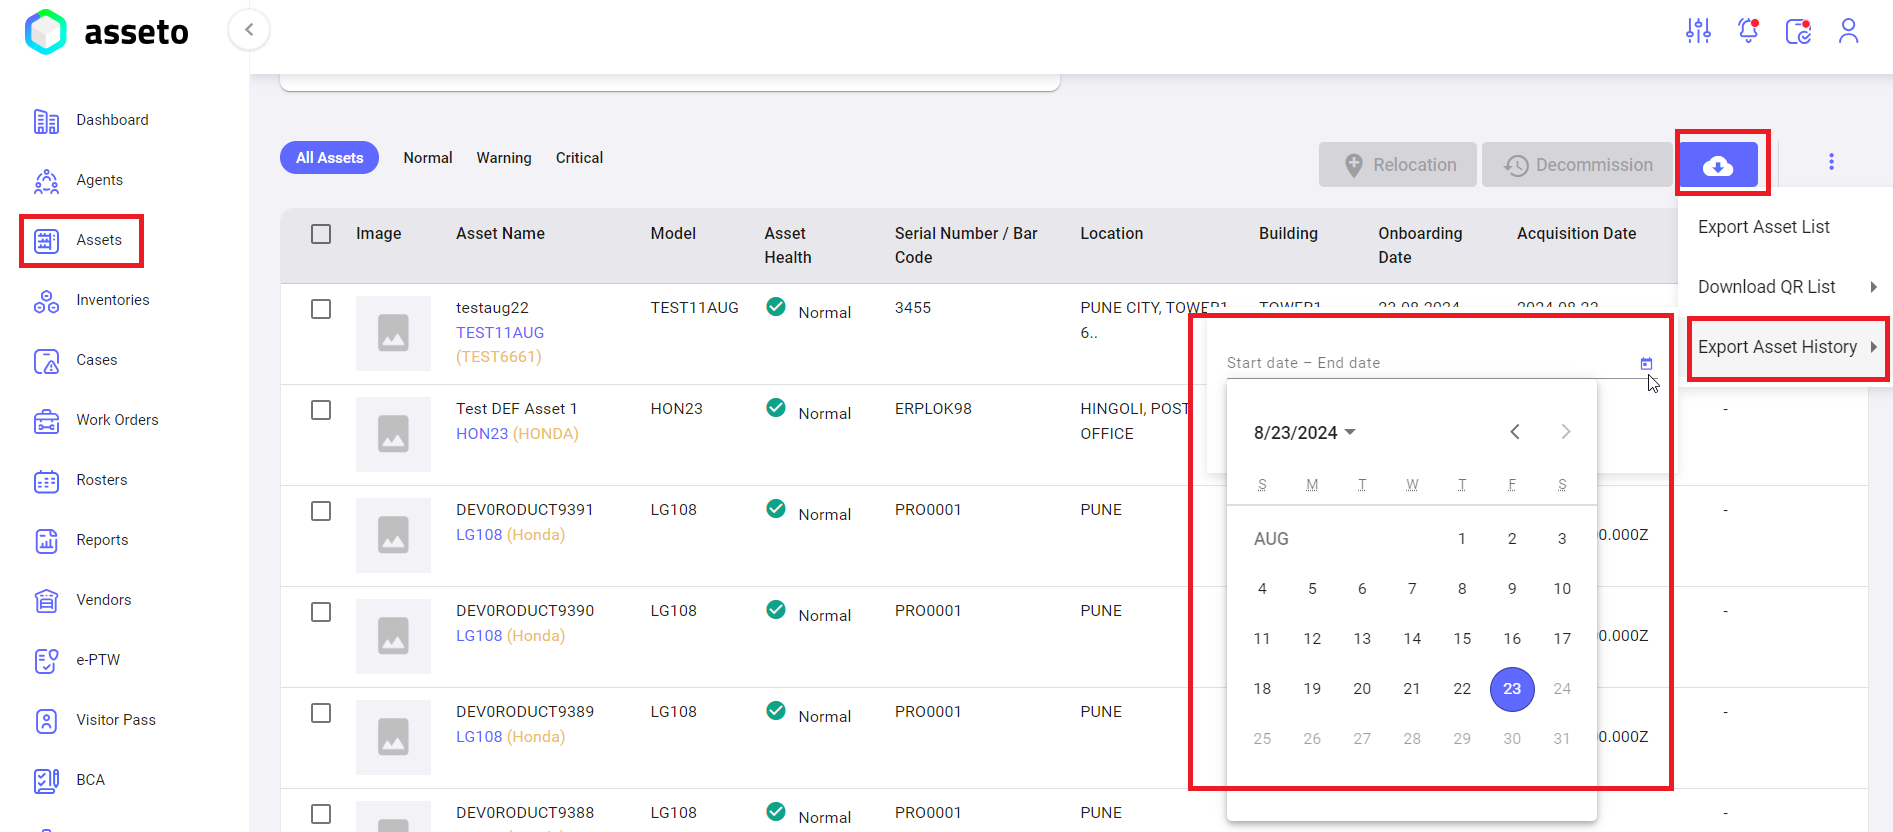
Click on “download history” button.
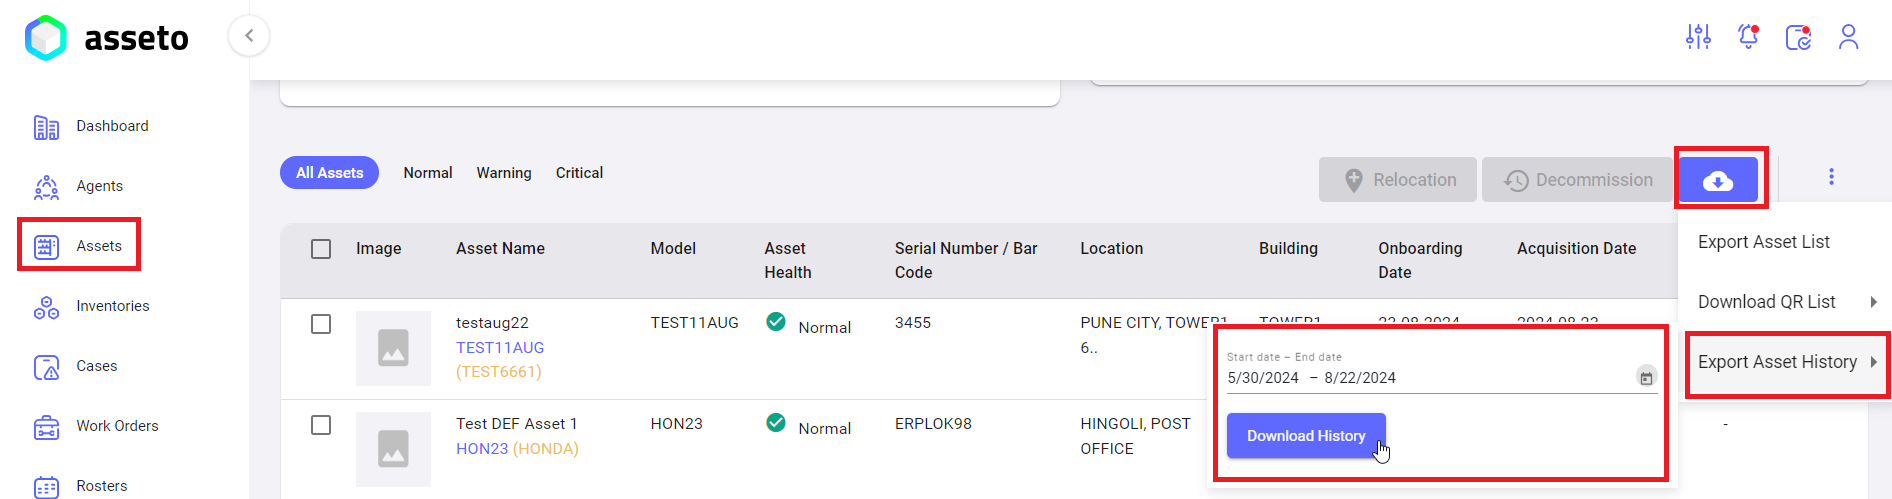
Assets list file will be downloaded into your local system.
4. List Icon: customize table view: You can customize the table by selecting the various columns and click on save button, then the selected columns populate in assets table with the data.
5. Asset Detail View: User can view detailed view of asset by selecting one asset from assets list from assets dashboard page.