3.5. Asset Detail View
Asset detail view:
Here, users can view detailed information about the asset (as shown in the following screenshots). Clicking on a specific asset in the asset list will navigate users to the asset detail view.
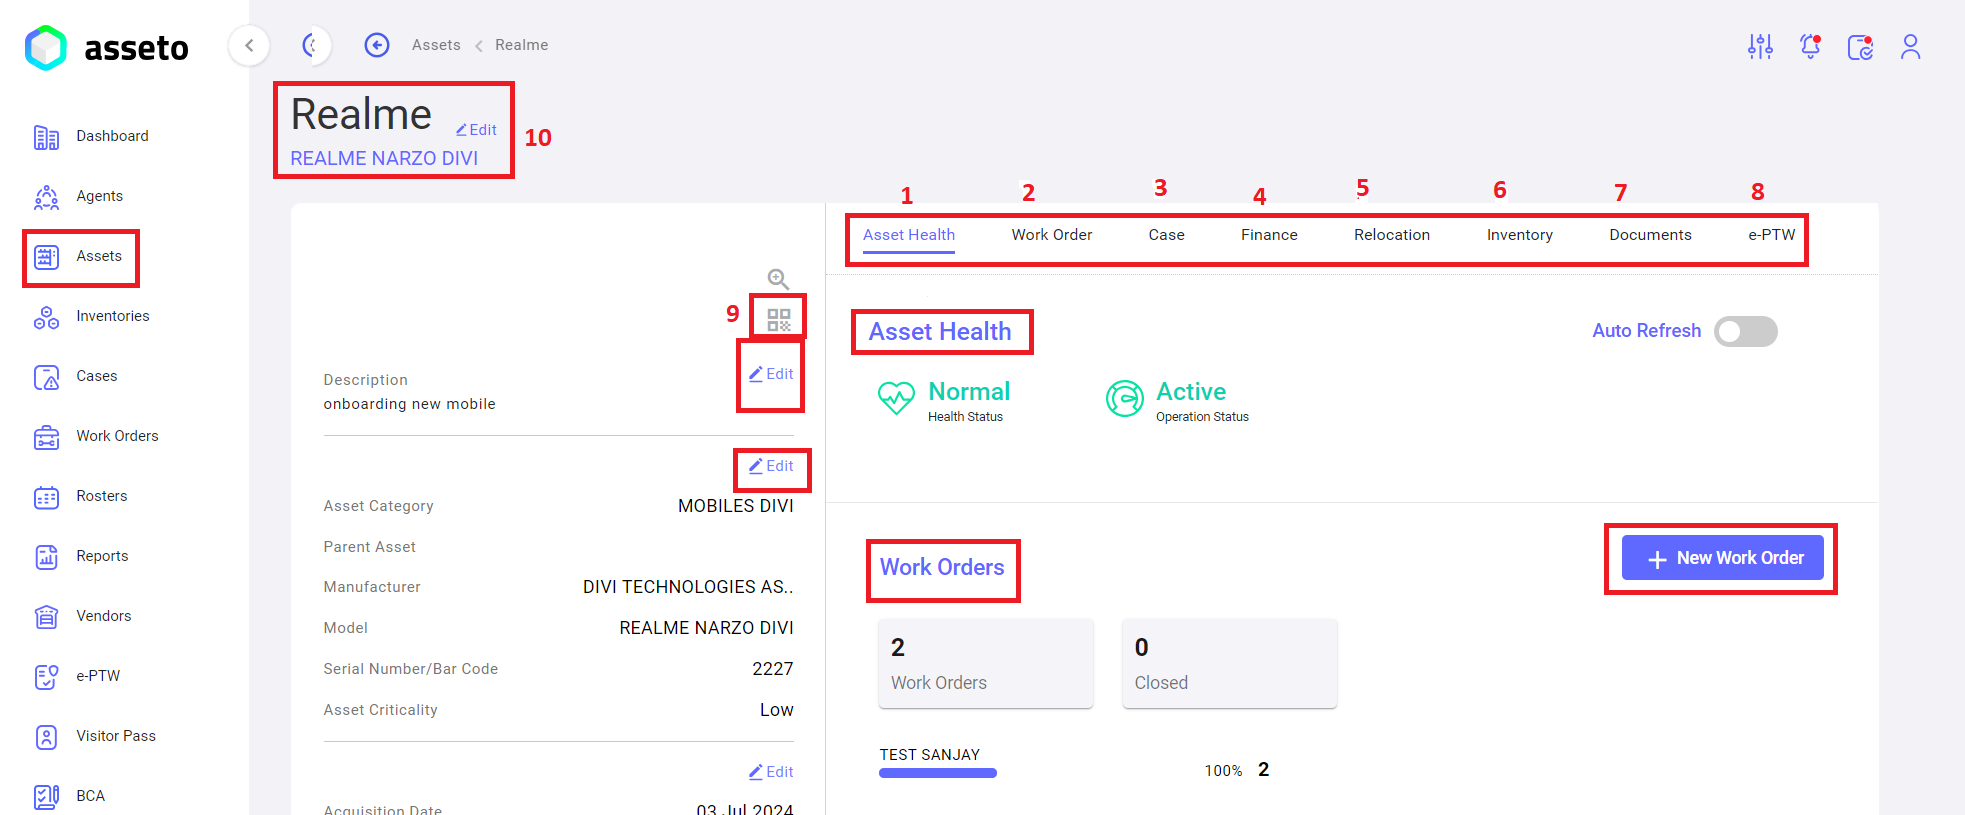
The following features and tabs are displayed. Clicking on a specific section will allow the user to navigate to that respective section.
-
- Asset health (default)
- Work order
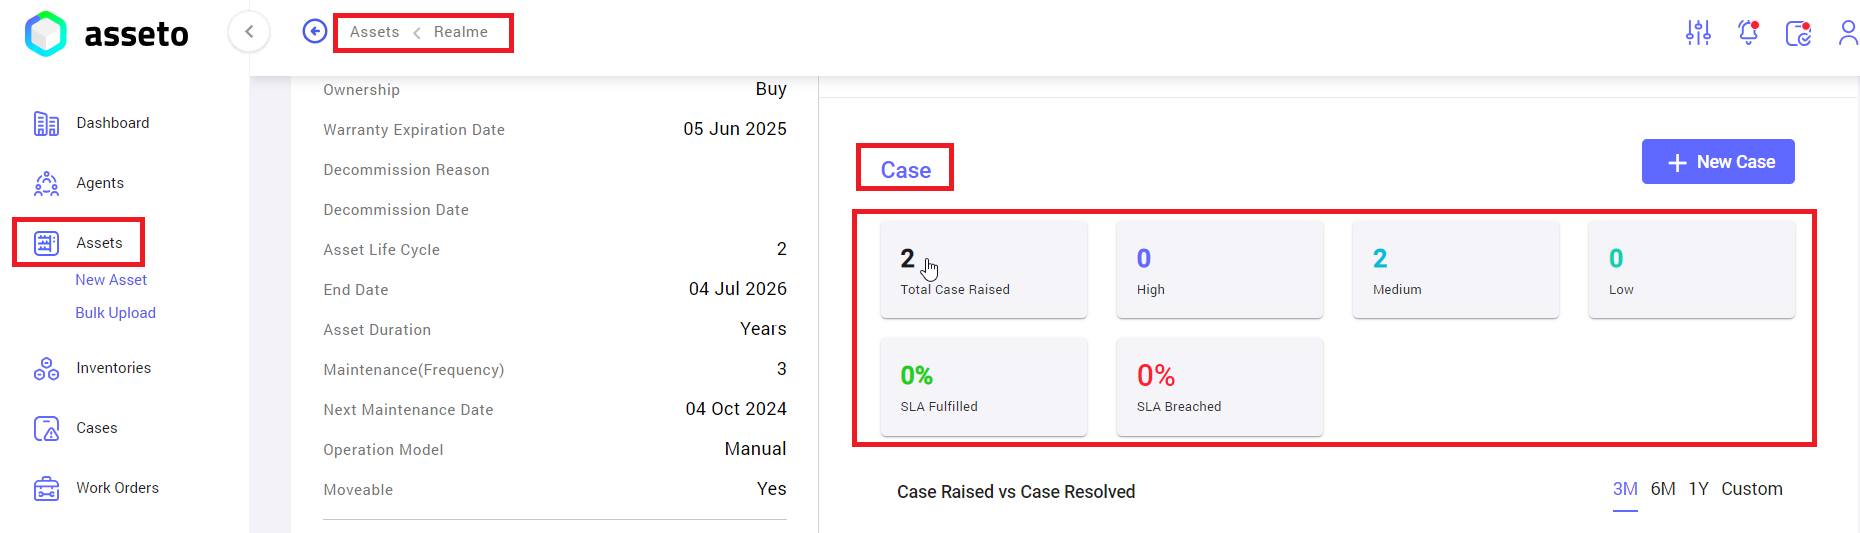
- Case
- Finance
- Relocation
- Inventory
- Documents
- E-PTW
1. Asset Health Section: Users can view the asset health information, including status categories such as normal, warning, critical, and whether the asset is active or inactive.
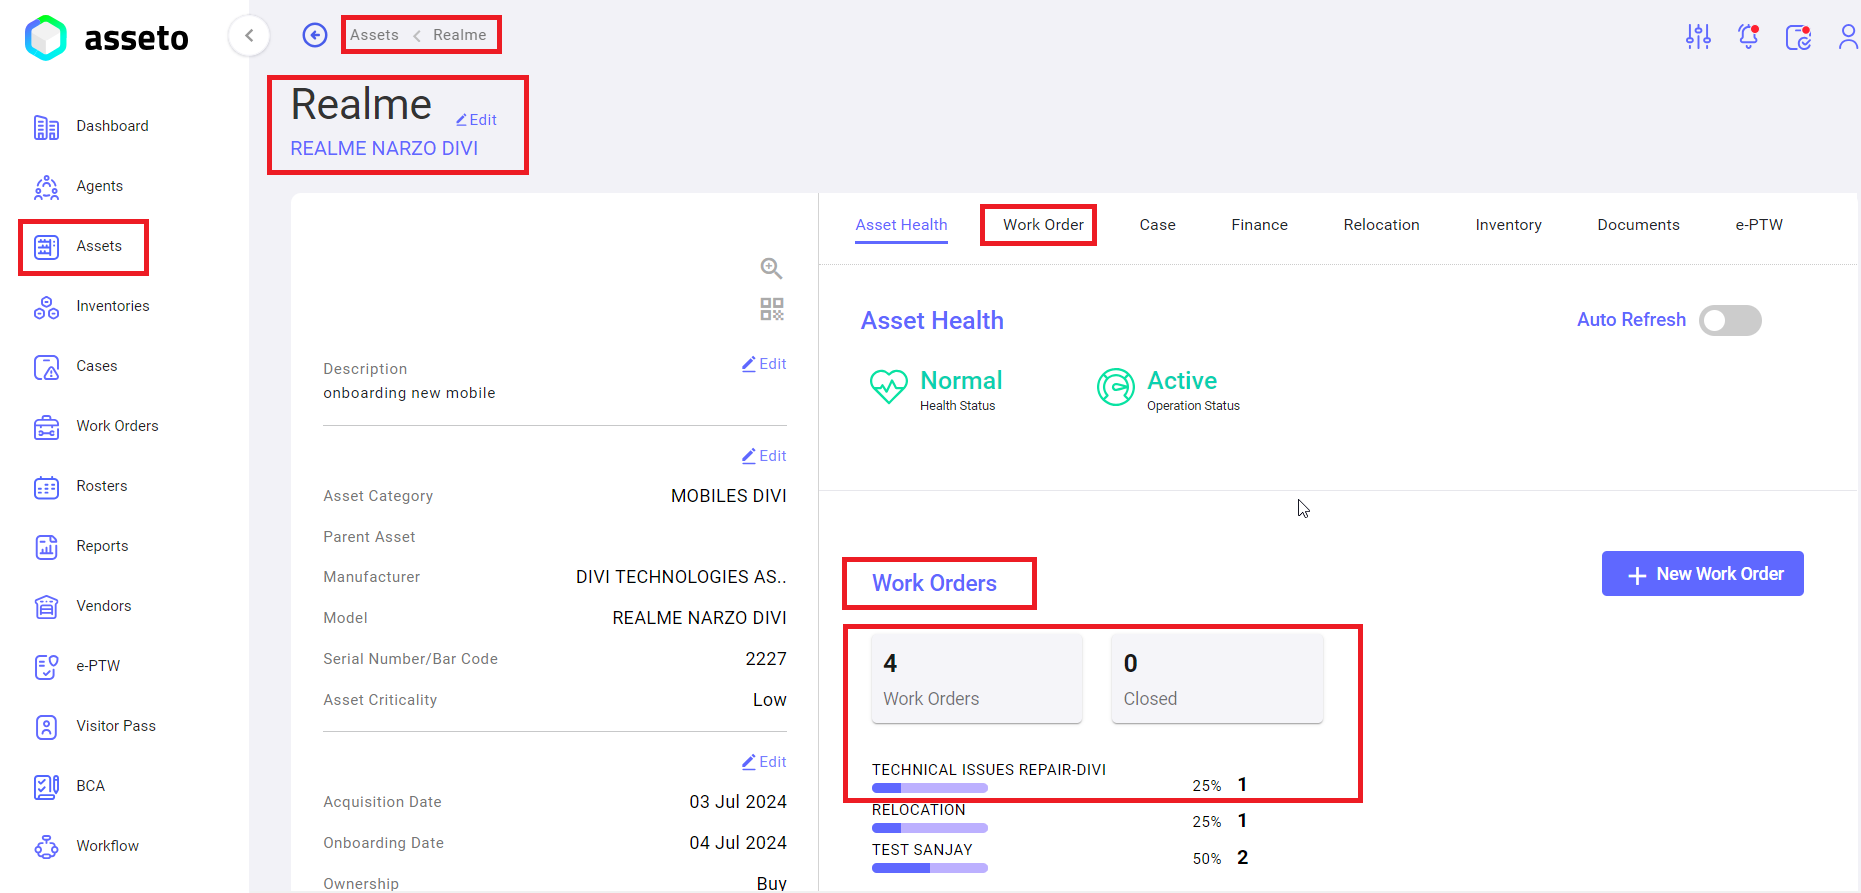
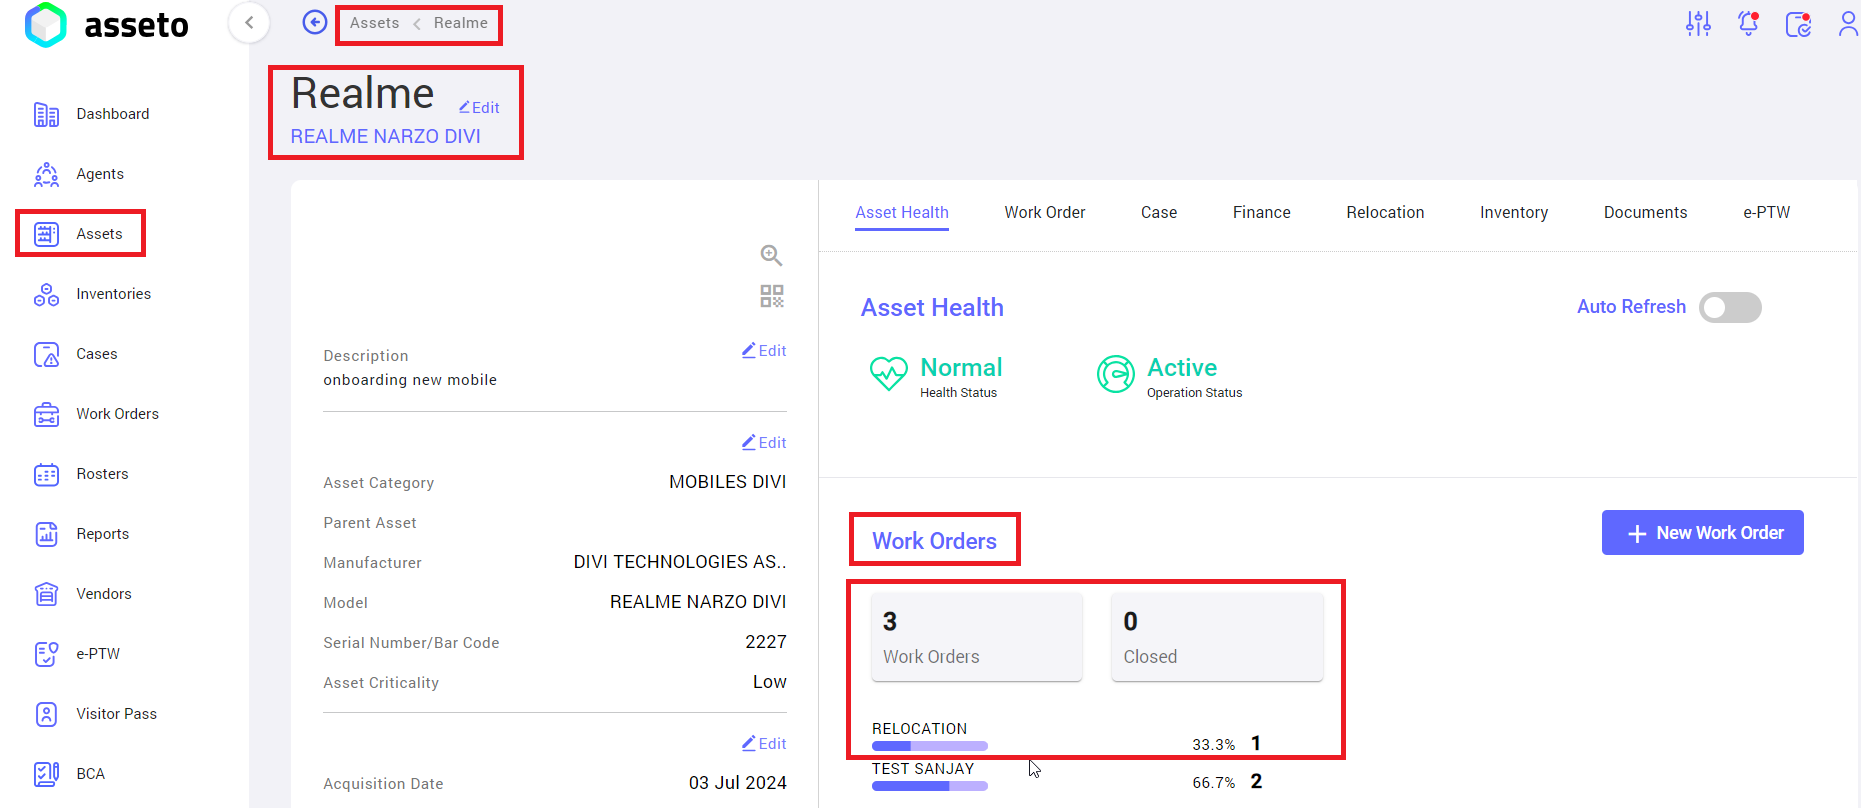
2. Work Order Section: Users can view the number of work orders and their associated statuses for the asset.
Clicking on the “Work Order” button (as shown in the above screenshot) will navigate the user to the new work order page to create a work order under the asset's name.
To request the Relocation of an asset, follow these steps:
Note: Refer to sections 6.2, "Pre-requisites for Work Orders Creation," and 6.3, "New Work Order," in the “6. Work Orders” module for more details.
Step 1: In the Work Orders settings module, add a new Category, SLA type (for both resolution and response), Auto Assignment Agent, and Auto Assignment Supervisor. Configure Resource Groups in the My Organisation module settings.
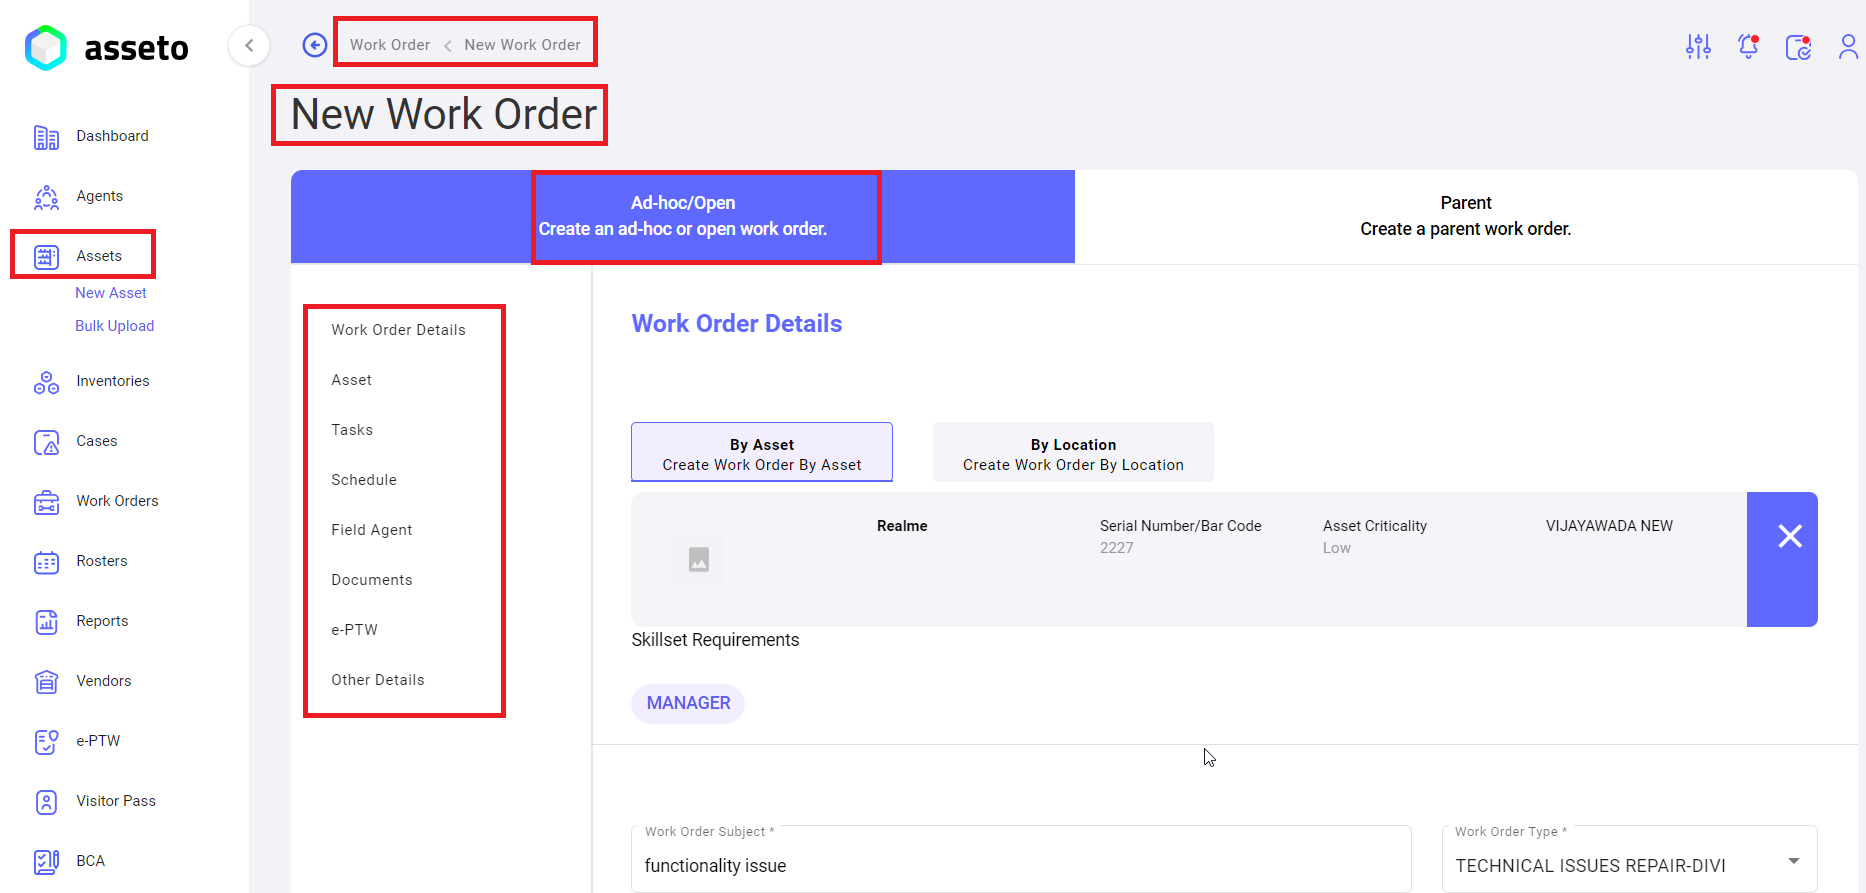
Note: Asset details will be auto-filled by the system
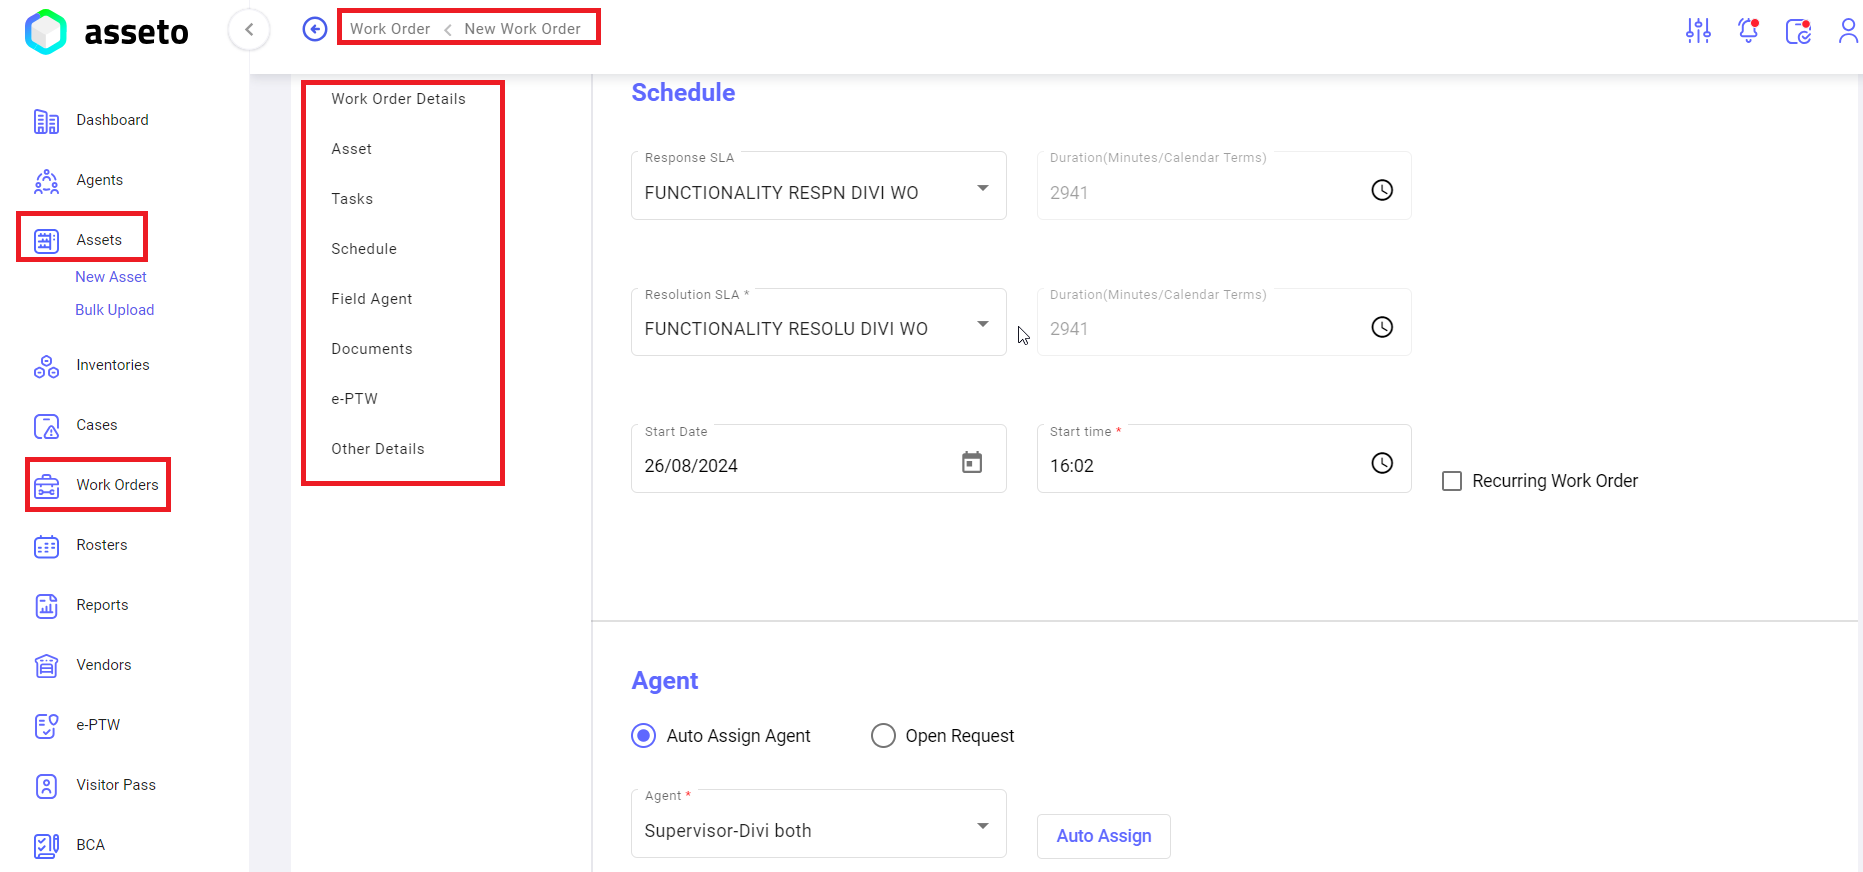
Ensure all mandatory fields are filled in to enable the "Save" button.
![]()
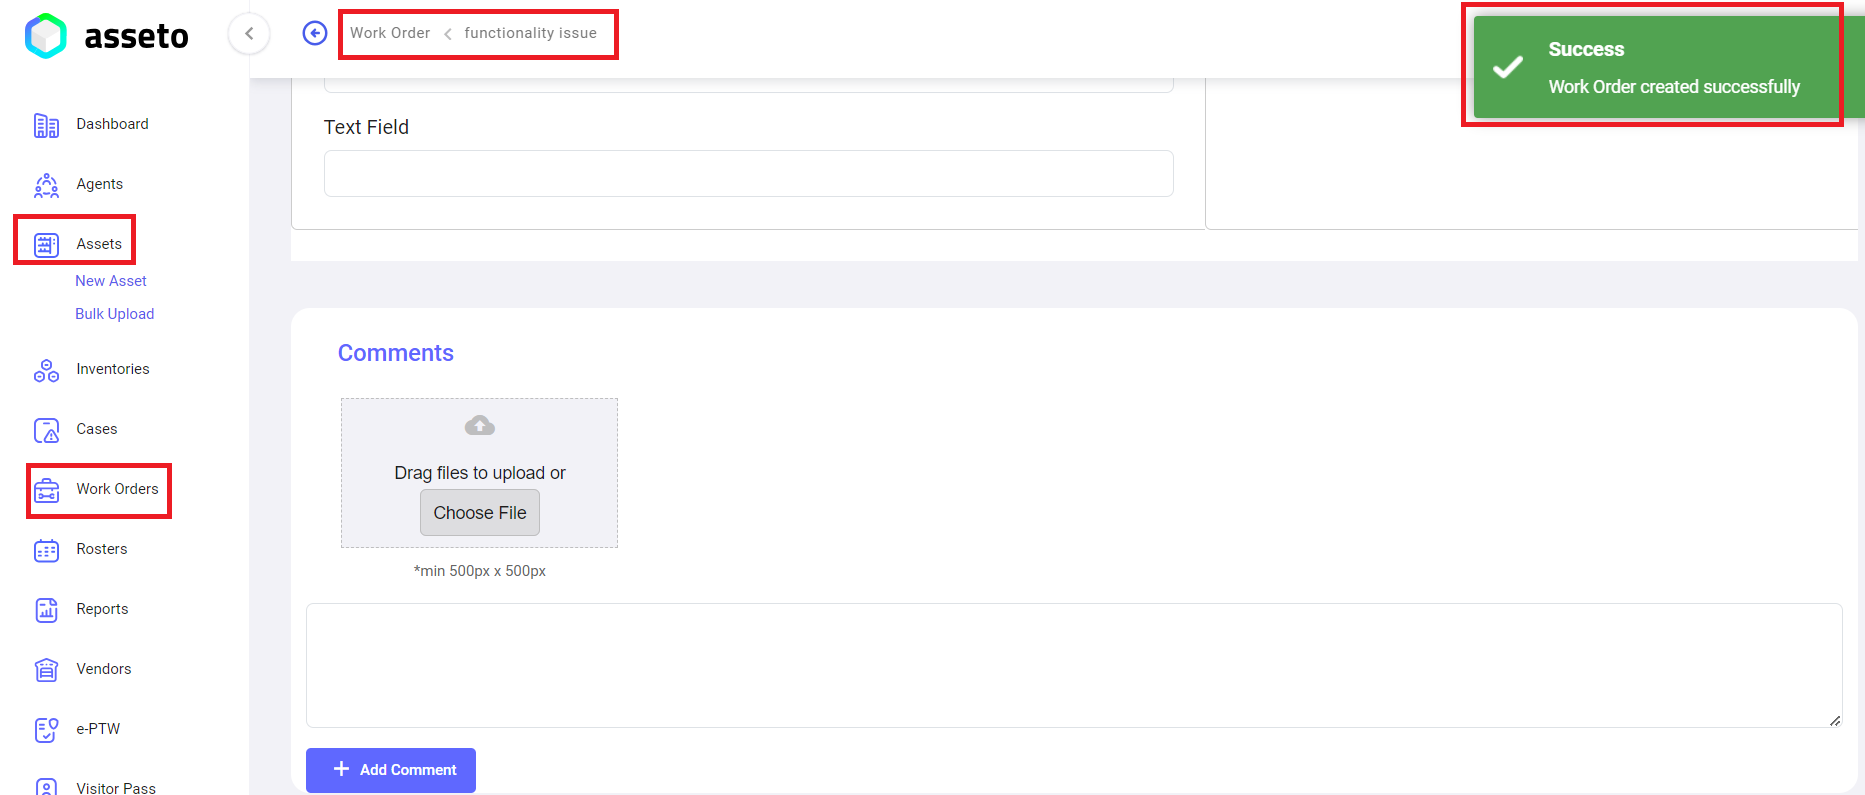
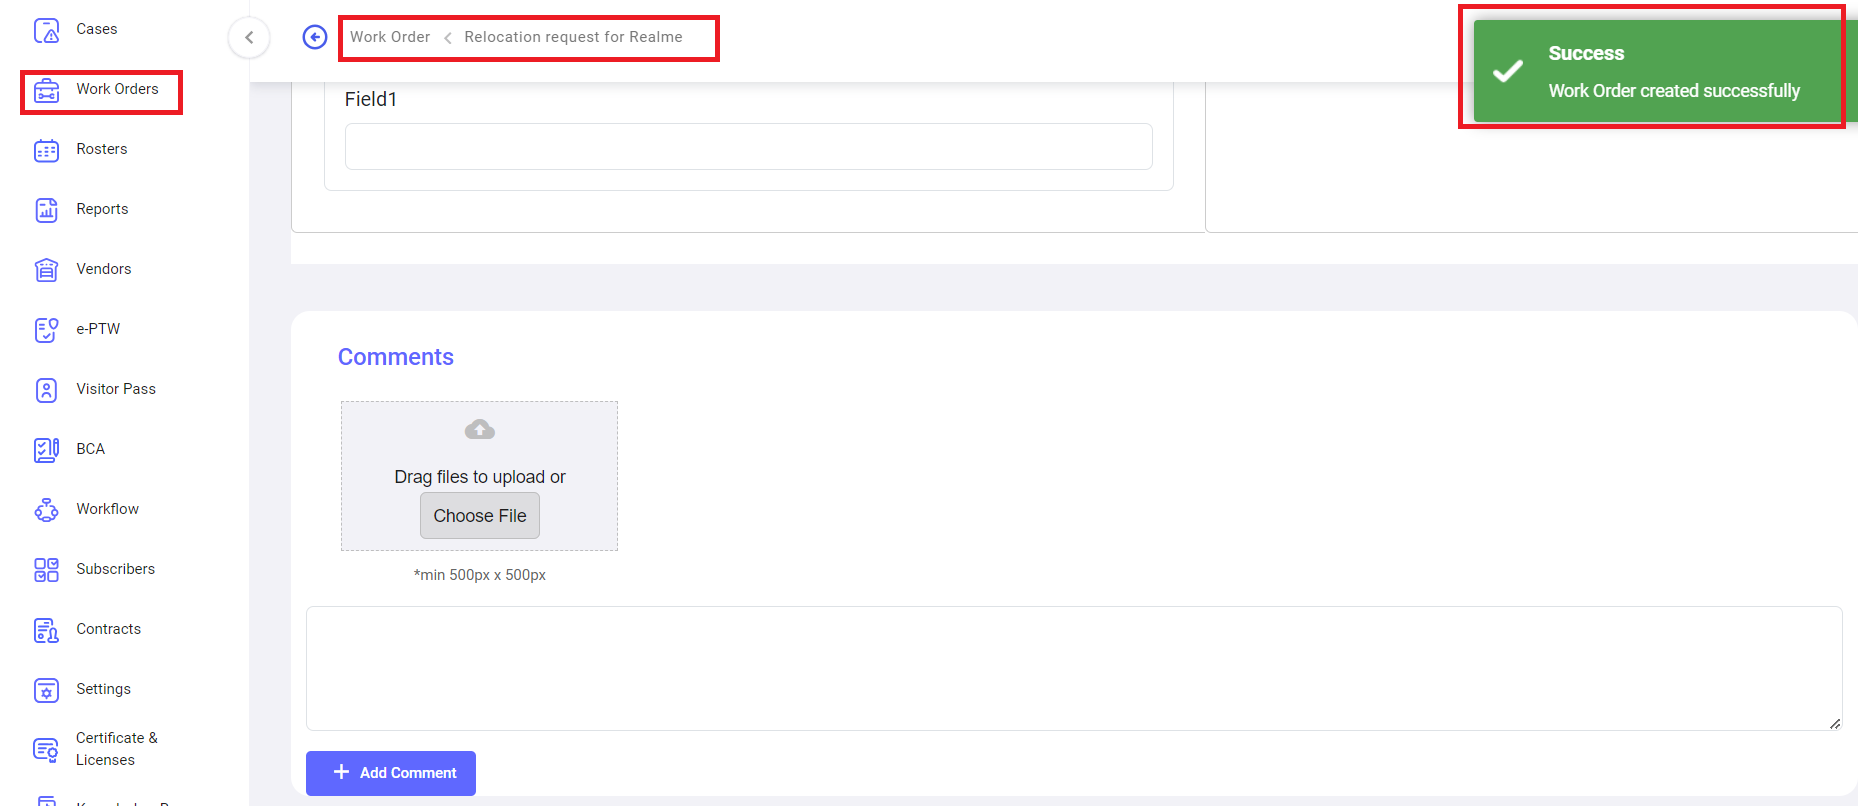
Click on the "Save" button. A confirmation message stating "Work order created successfully" will be displayed, and the system will navigate to the work order detail view page as shown in the following screenshot.
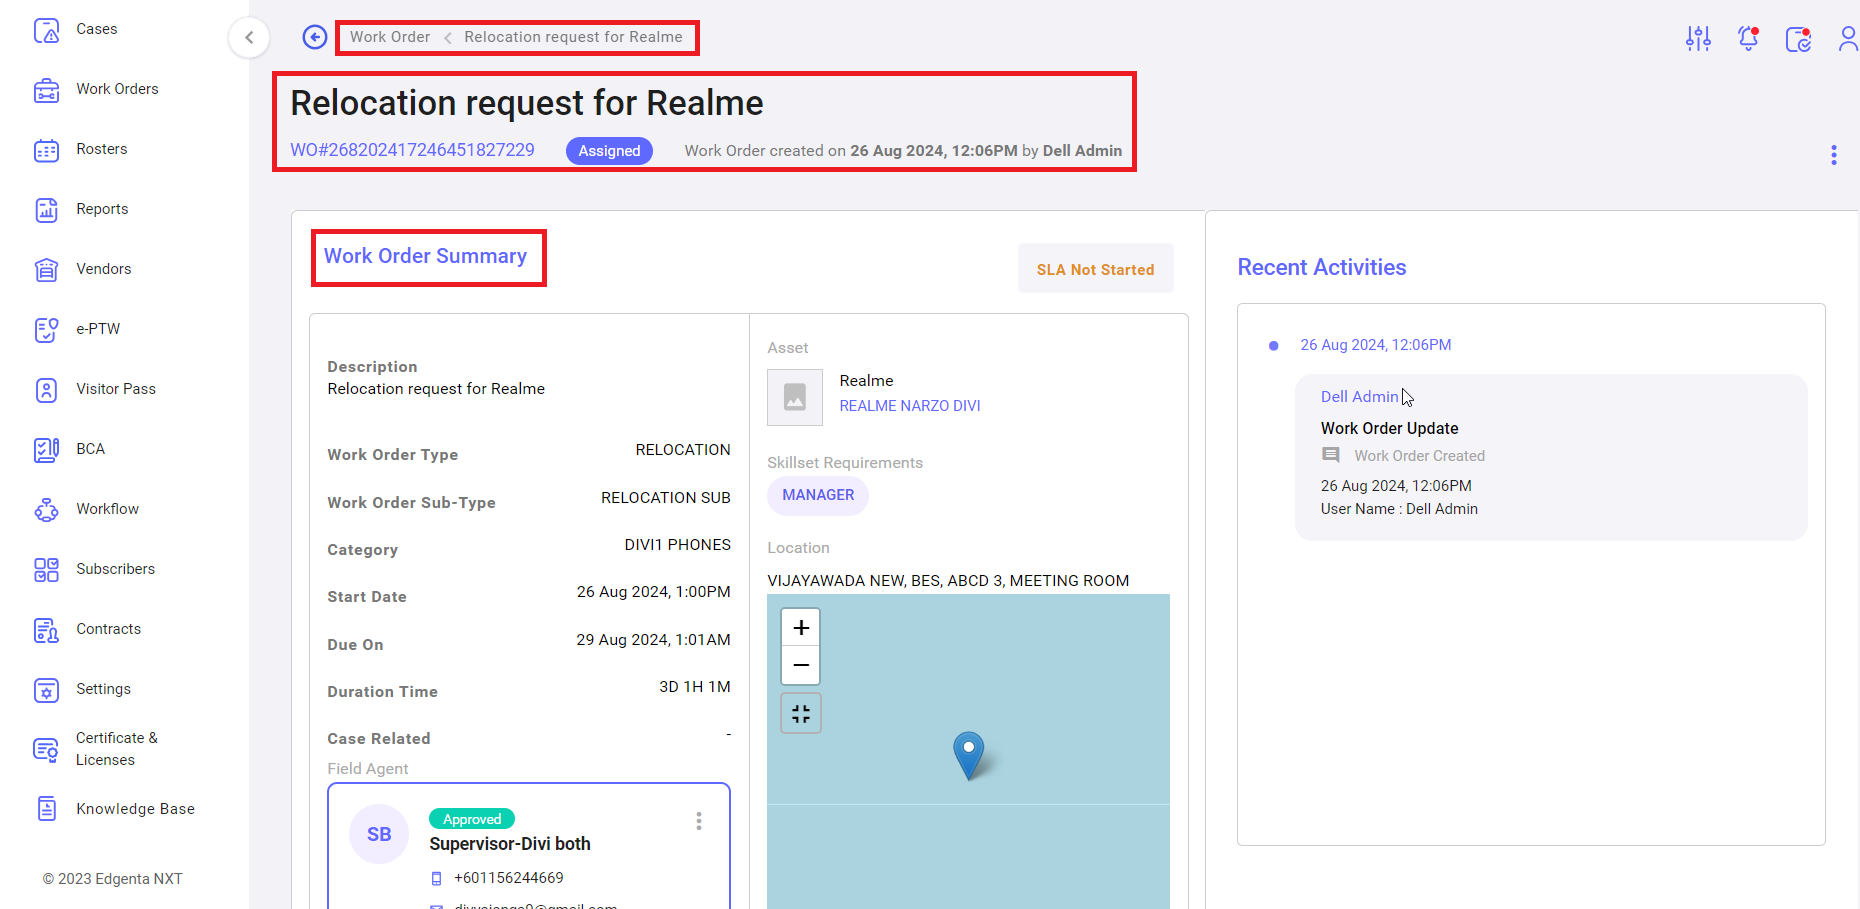
UserThe user can view the Workwork order details for an asset inon the work order view pagepage, as showndisplayed byin the following screenshot.
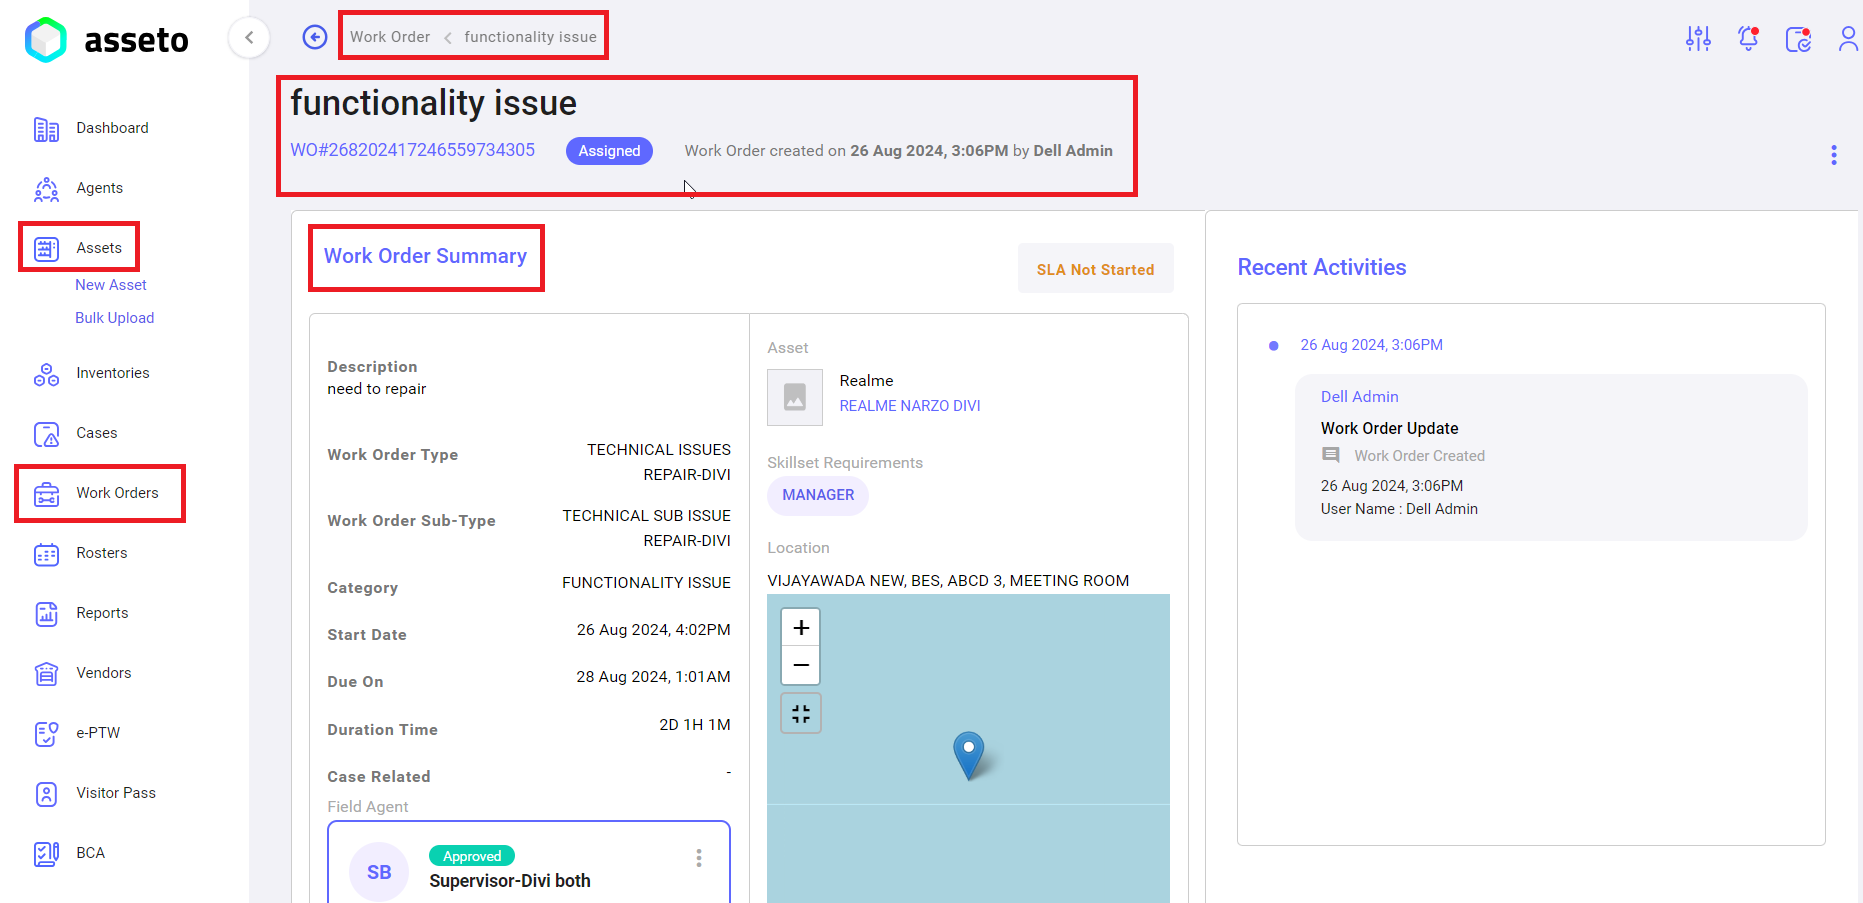
Step3Step 3: UserThe user can view the work order for an asset in the work orders section of the asset view pagepage, as shown byin the following screenshot.
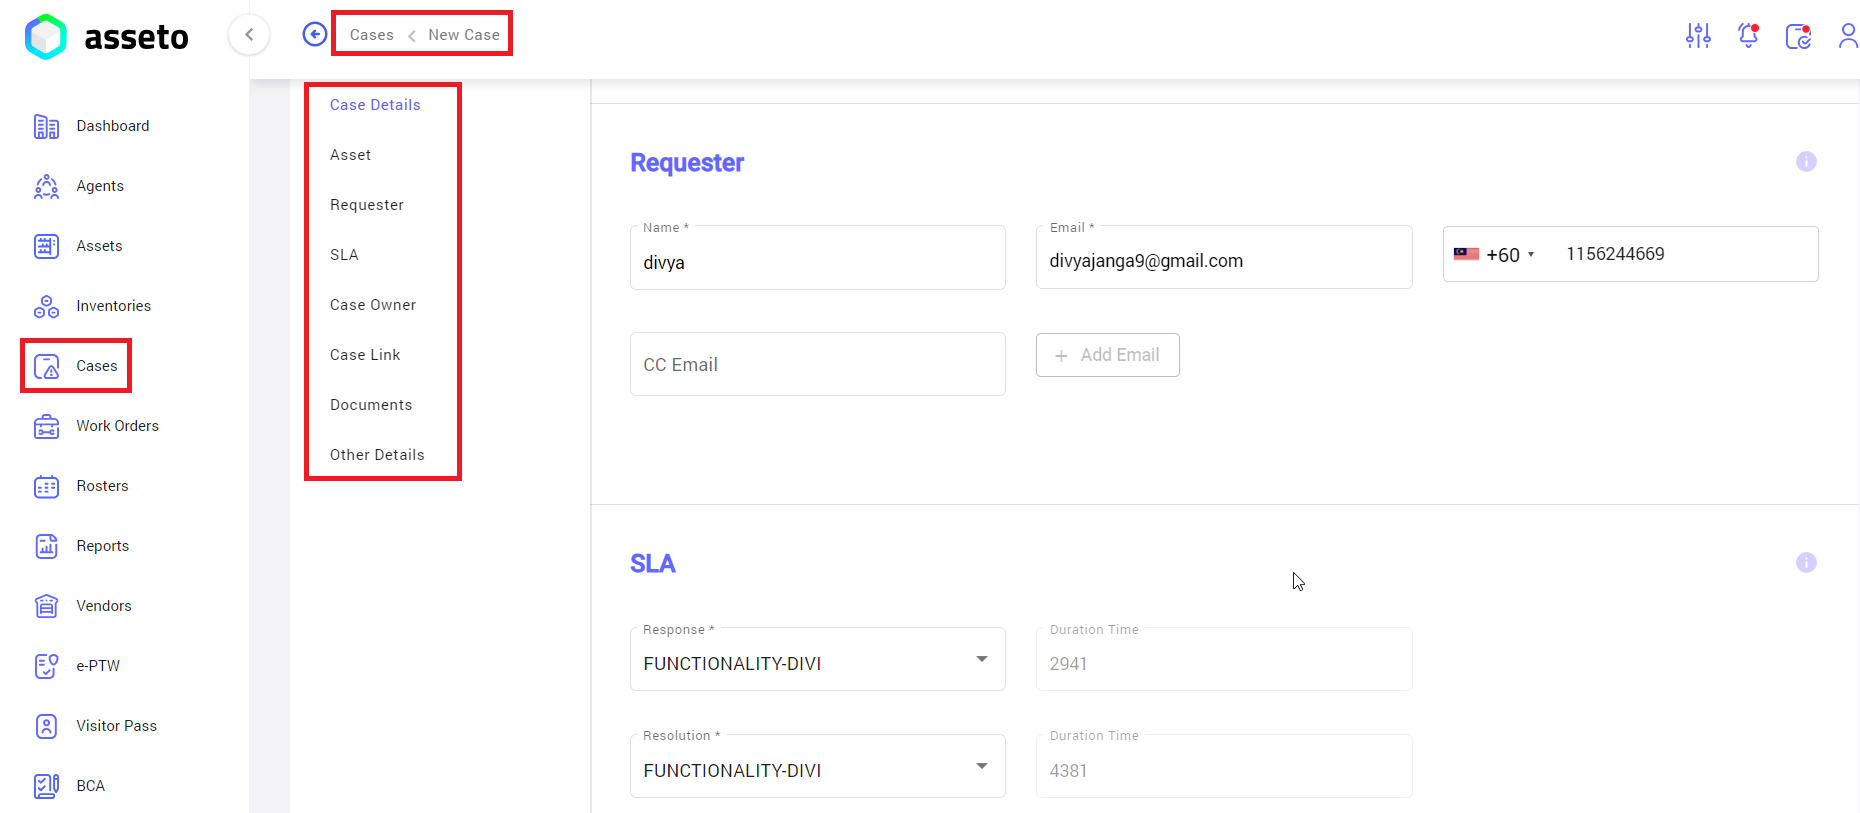
3. Case Section: Here user can view all the associated case with the asset.
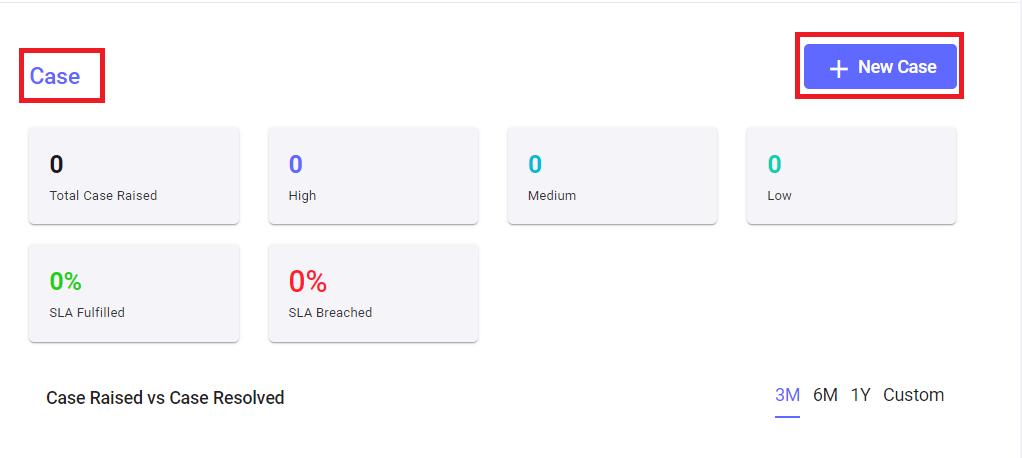
HereHere, wethe haveuser ahas featurethe option to create a new case for an asset by using the “New Case” button (as shown in the above screenshot). Clicking this button will navigate youthe user to the New Case page, where the asset details will beare displayed, allowing youthe tocreation createof a new case for the asset.
Please follow the steps below to request the Relocationrelocation of an asset.asset:
Note: For more information, please refer to sections "Pre-requisites for Case Creation," and "New Case," in the 5. Case module.
Step1Step 1: Add athe Casecase type, Casecase sub type,subtype, SLA Configuration,configuration, Caseauto-assignment for case owner Autoand assignment,agents, Agentand configuration, Casecase association configuration in the settingsSettings module-> Case section.module. Create an agent with casethe ownerCase Owner role to assignenable theautomatic assignment of a case owner auto assignment whilewhen creating a new case. Configure resource groups in the settingsSettings -> myMy Organisation feature.module.
Step2Step 2: Select an asset from the Assets module and click on it to view the asset details. Then, navigate to the Case section and click the “New Case” button to create a case under this asset.
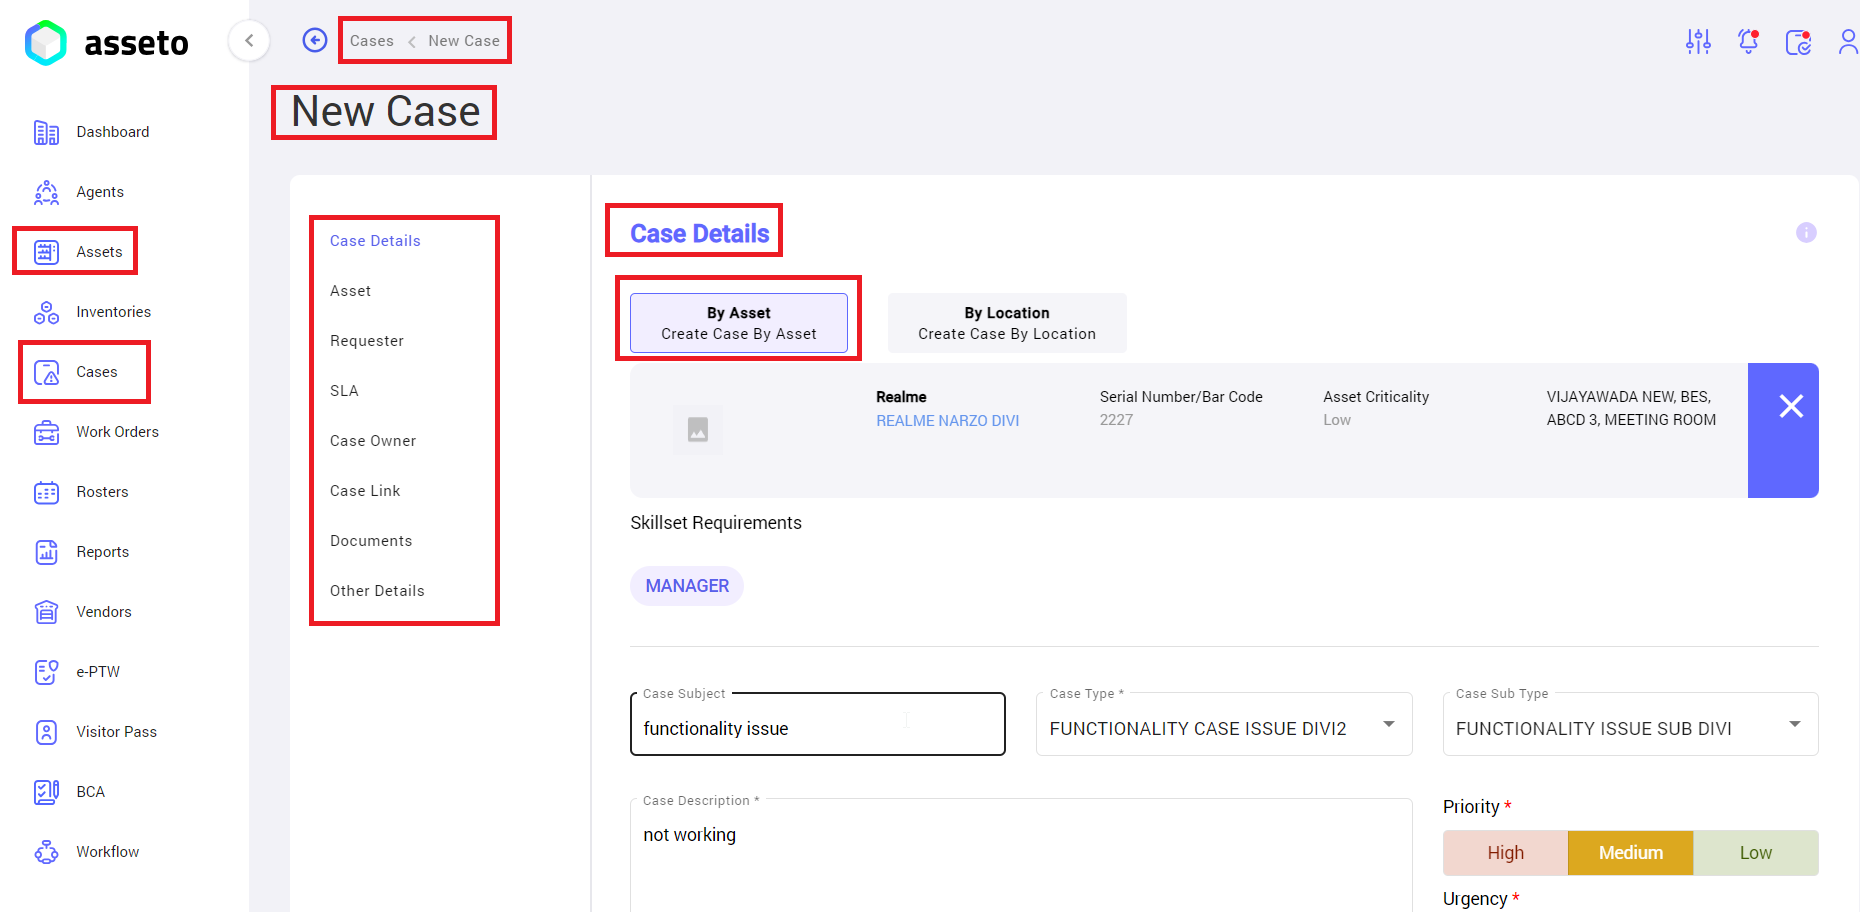
Asset Details are auto filled by system.
Next steps.
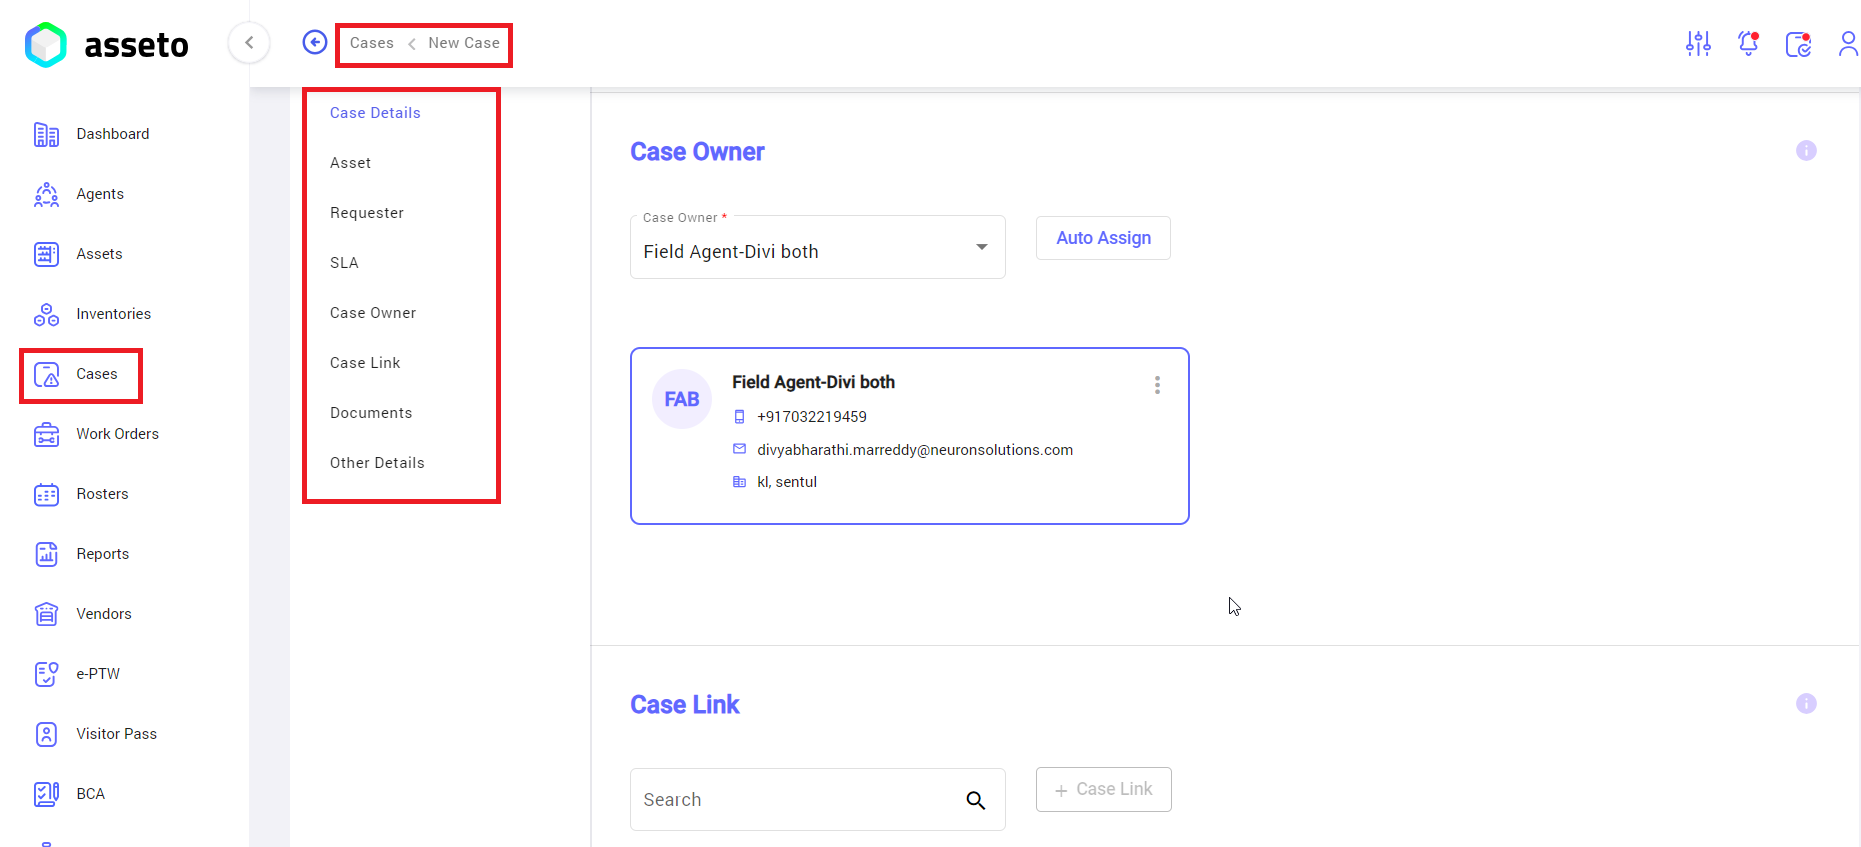
Fill thein all-all mandatory fieldsfields. thenThe only saveSave button will only be enabled.enabled once all required information has been provided.
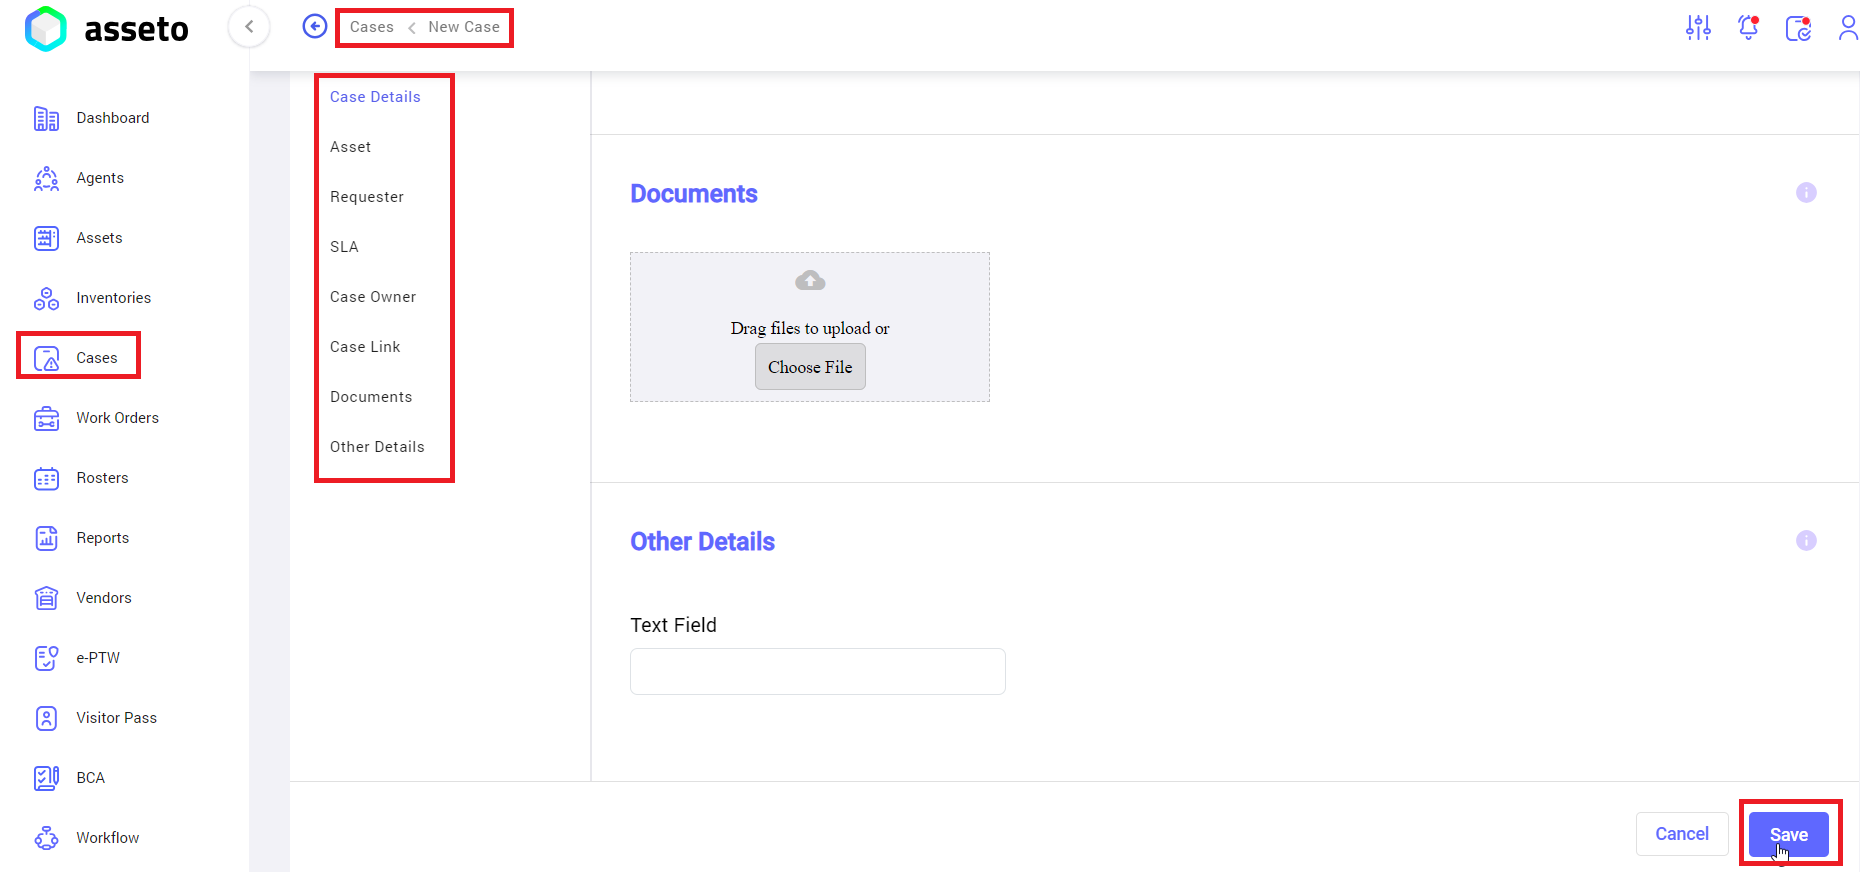
Click on “save”the button,"Save" button. A confirmation messagemessage, “"Case created successfully”successfully," messagewill displayedbe displayed, and the system will navigate to the Case detail view pagepage, as shown byin the following screenshot.

User
The user can view Casecase details for an asset inon the caseCase details view pagepage, as shown byin the following screenshot.
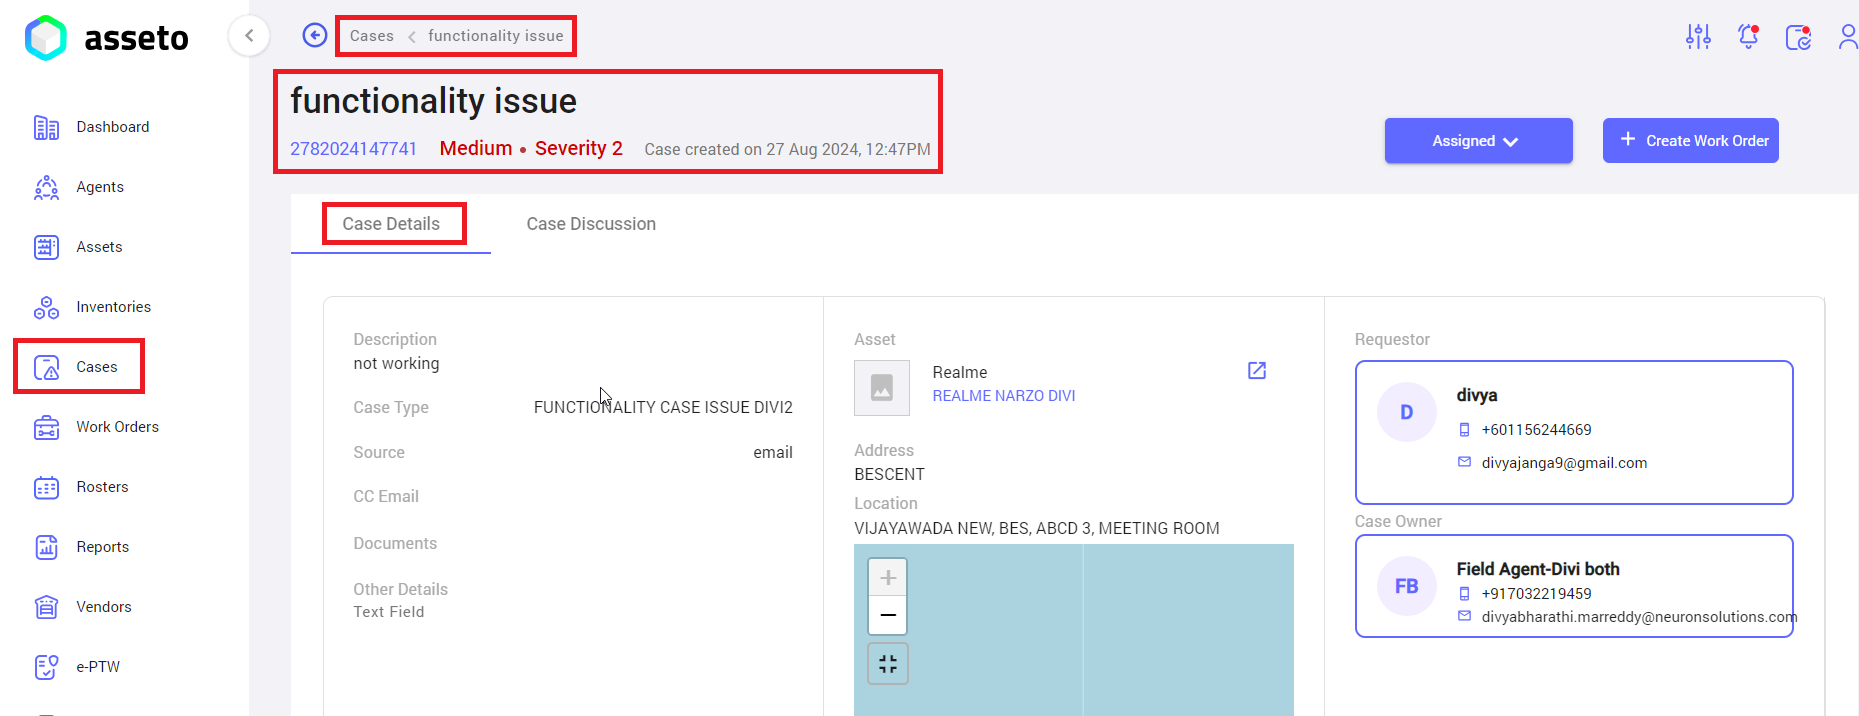
Step3Step 3: UserThe user can view the case details under the asset in the asset module caseCase section of the Asset module, as shown byin the following screenshot.
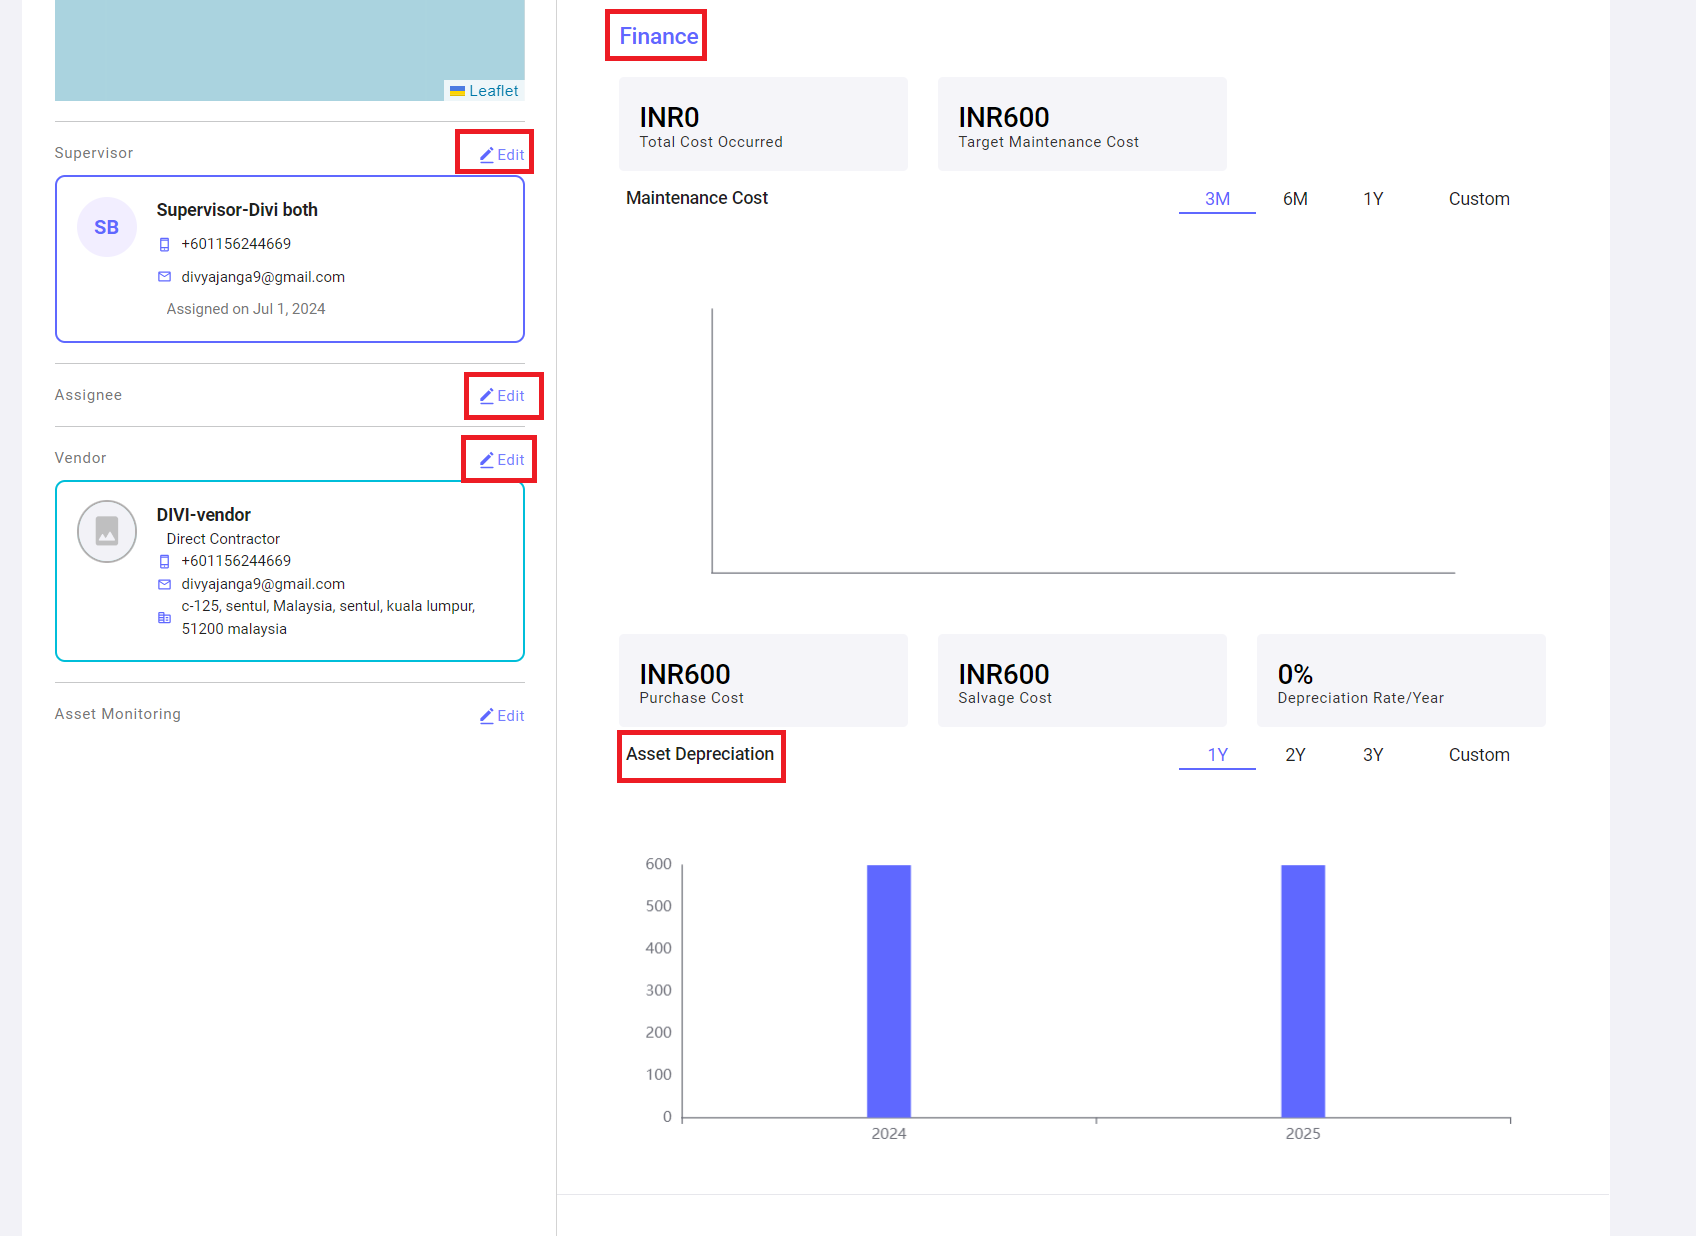
4. Finance Section: HereHere, users can view the financial information of the asset. Users can refine the data for 3M,3 6M,months, 1Y6 months, 1 year, or can customize the datesdate range to view the financeasset's financial data over the selected period. Based on the selectionselection, the graph wouldwill showdisplay the relevant financial data. WeUsers can also view thisthe assetasset's maintenance cost and asset depreciation raterate, as shown byin belowthe following screenshot.
5. Relocation Section: HereHere, the user can view the already raised relocation requests. By clicking on “the "New RequestRequest" button”button, the user can raise thea new requestrequest, and the system will beredirect redirectedthe youuser to workthe ordersWork Orders page.

When you click on the (Relocation) “New Request” button the system will navigate to a new work order page with some auto filled data of selected asset. Here you can fill remaining fields and click on save to apply for asset relocation.
Please follow the steps below to request the Relocation of an asset.
Note:Note: For more information, please refer to sections "Pre-requisites for Work Orders Creation," and "New Work Order," in the “6. Work Orders” module.
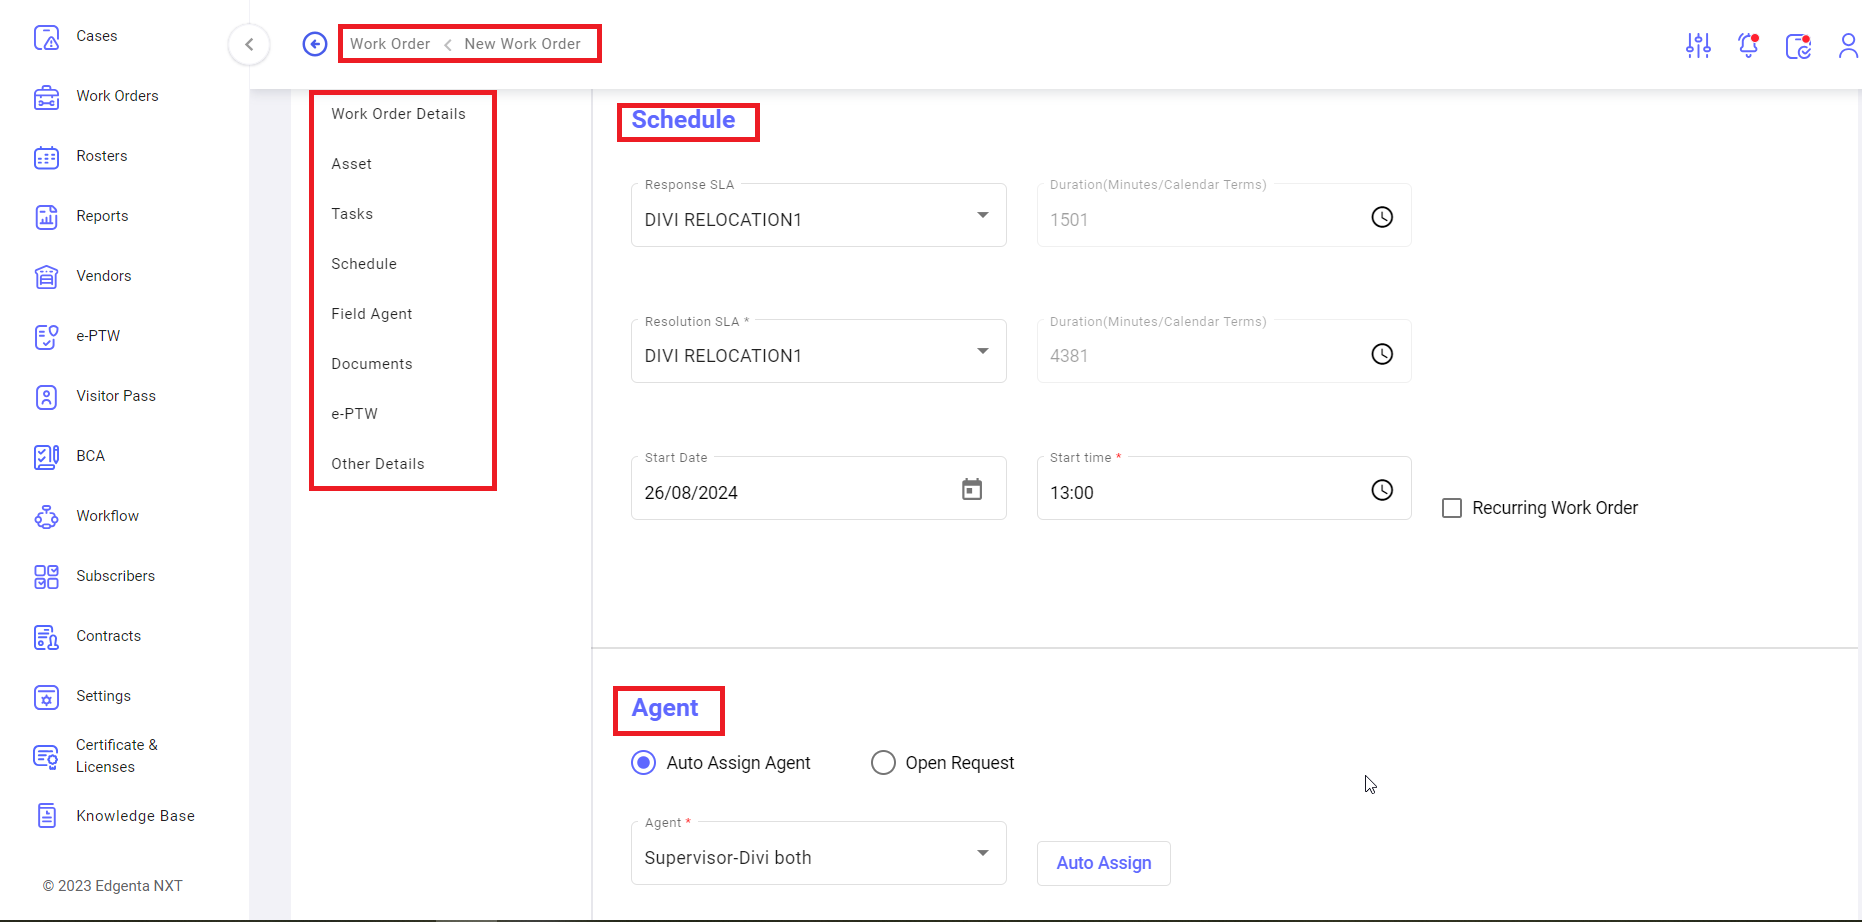
Step1Step 1 : Add a new Category, SLA type both resolution and response, Auto assignment Agent, Auto assignment Supervisor in the settings work orders module. Configure Resource groups in the settings My Organisation module.
Step2Step 2: Select an asset from the Assets module and click on it to view the asset details. Then, navigate to the Relocation section and click the “Relocation” button to add the relocation request of work order to asset.
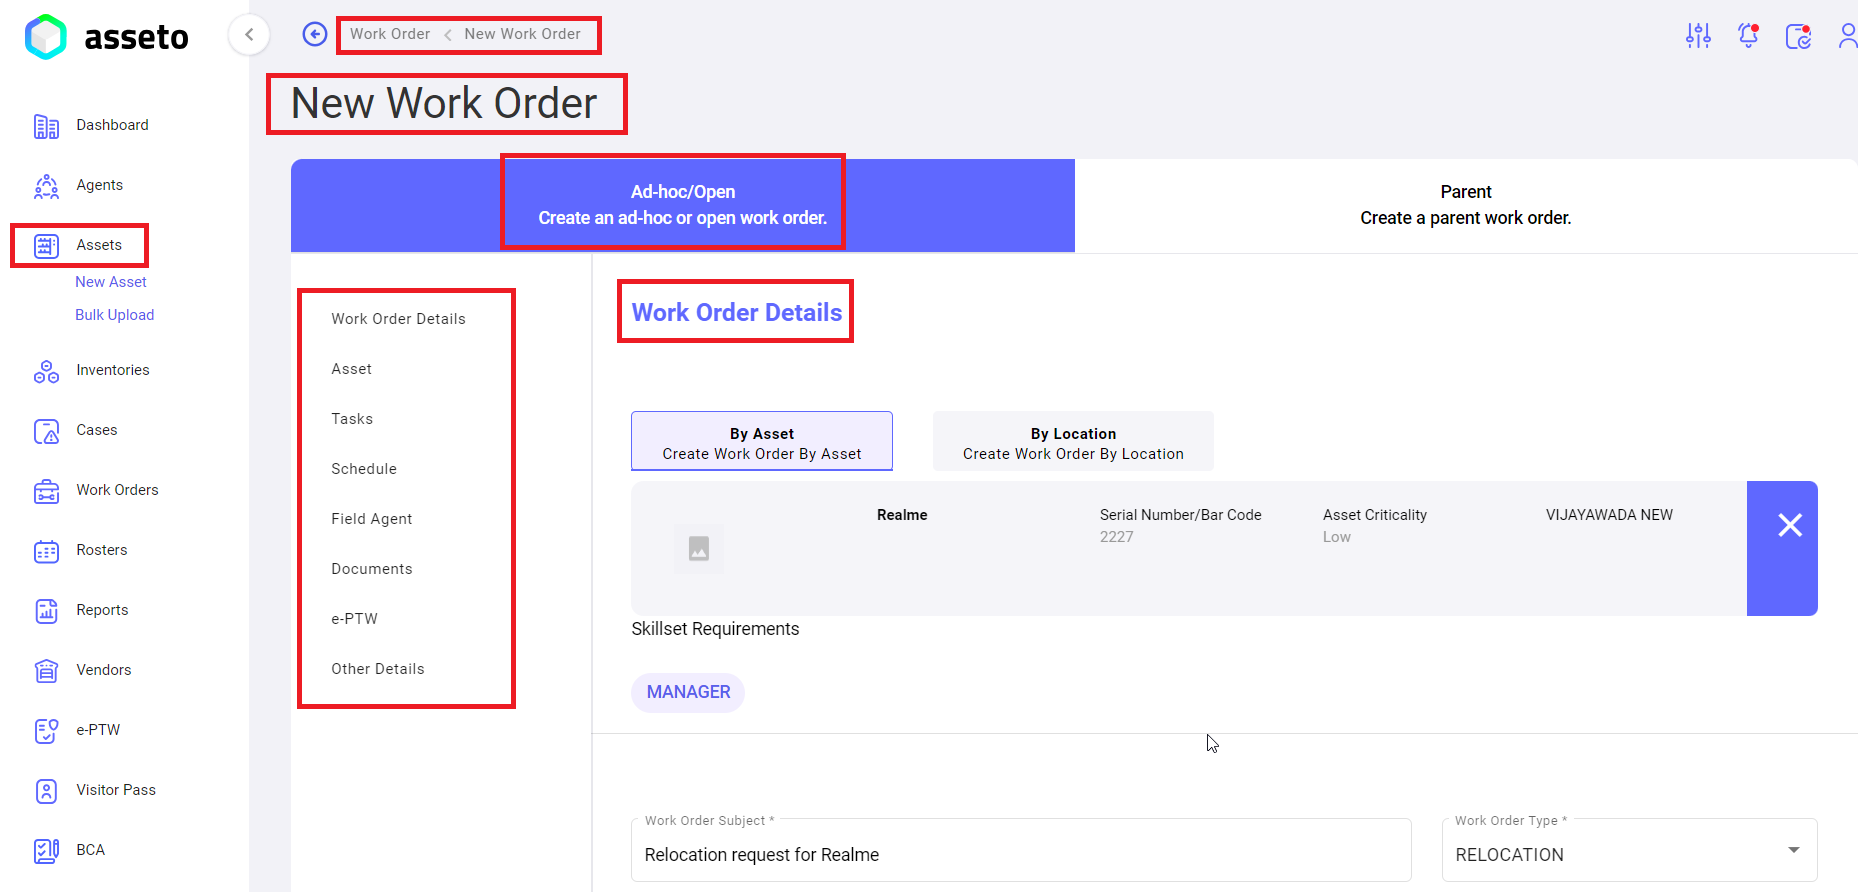
AboveNote: DetailsThe details in the relocation request form are auto auto-filled by the system.
FillEnsure thethat all-all mandatory fields are filled in. Only then onlywill savethe "Save" button will be enabled.

Click on “save”the button,"Save" button. A confirmation message “workstating "Work order created successfully”successfully" messagewill displayedbe displayed, and the system will navigate to workthe orderWork Order detail view pagepage, as shown byin the following screenshot.
Work
The work order for relocation,relocation details will be displayed on the details view pagepage, as shown byin the following screenshot.
Step3Step 3: UserThe user can view the relocation request under the asset in the workWork ordersOrders sectionsection, as shown byin the following screenshot.
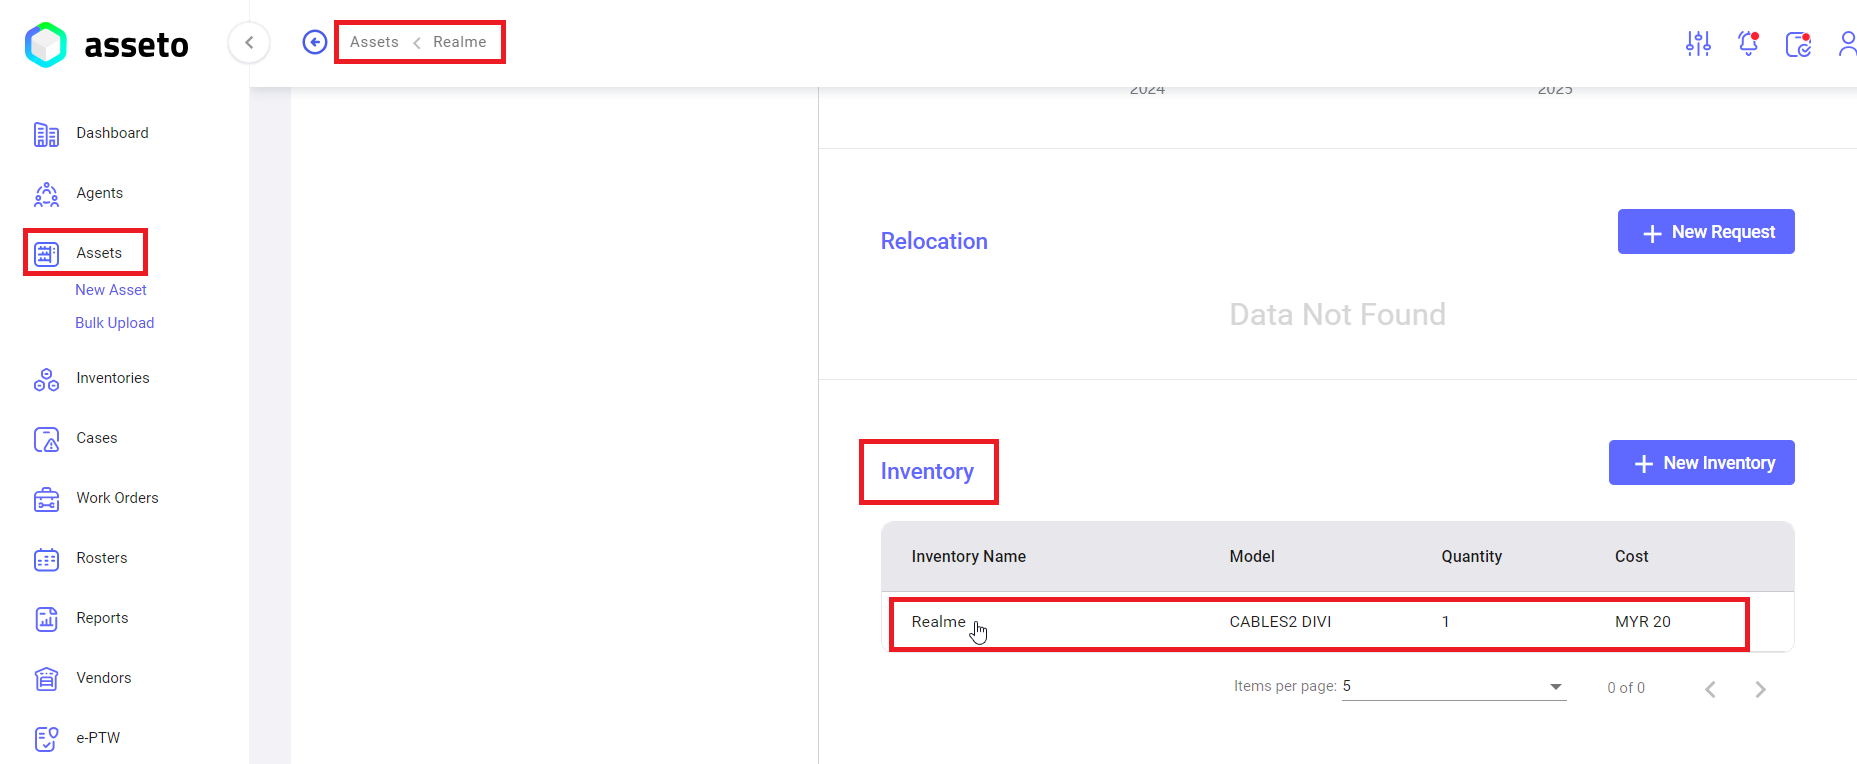
6. Inventory Section: all theAll inventories associated with thisthe selected asset will be displayed in this section.
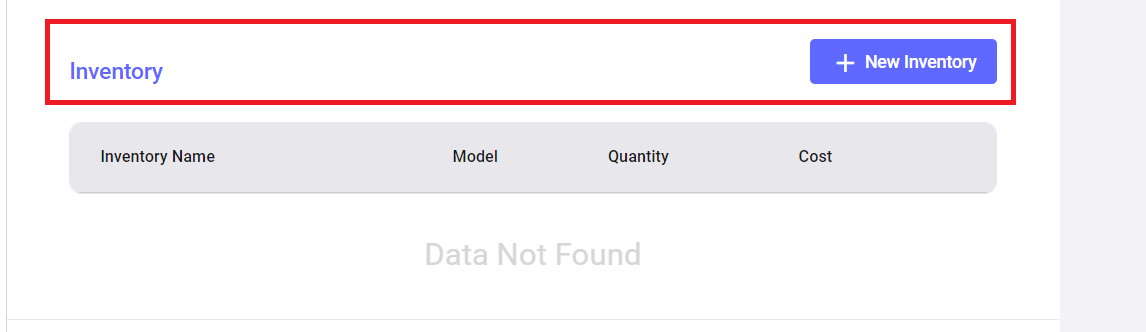
Users can add new inventories by clicking on the “New Inventory” buttonbutton, which will redirect the system willto be redirected tothe new inventory page.
Please follow the steps below to tag the inventory to thean asset.asset:
Note:Note: For more information, pleasedetails, refer to sections 4.2, "Pre-requisites for Inventory Creation," and 4.3, "New Inventory," in the “4. Inventories” module.
Step1Step 1: Add a new “SKU”SKU in the Inventory feature within the Settings modulemodule, as shown byin the following screenshots.
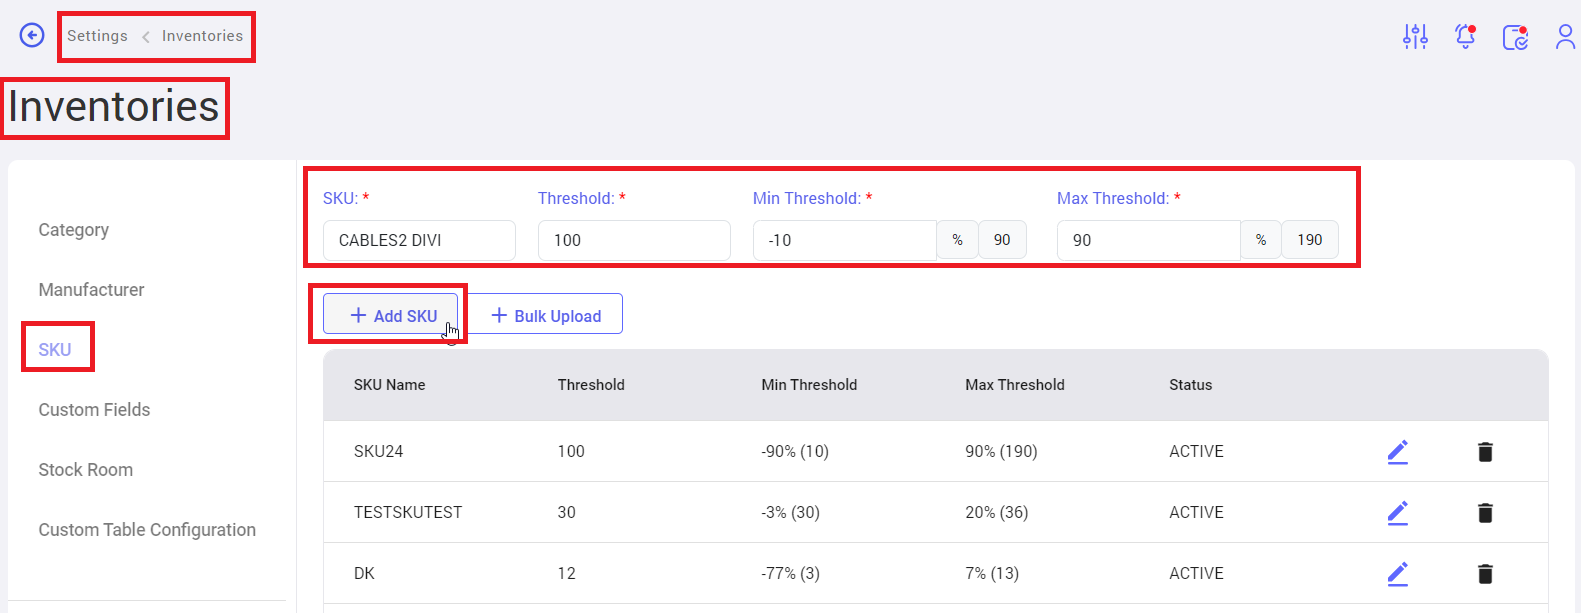
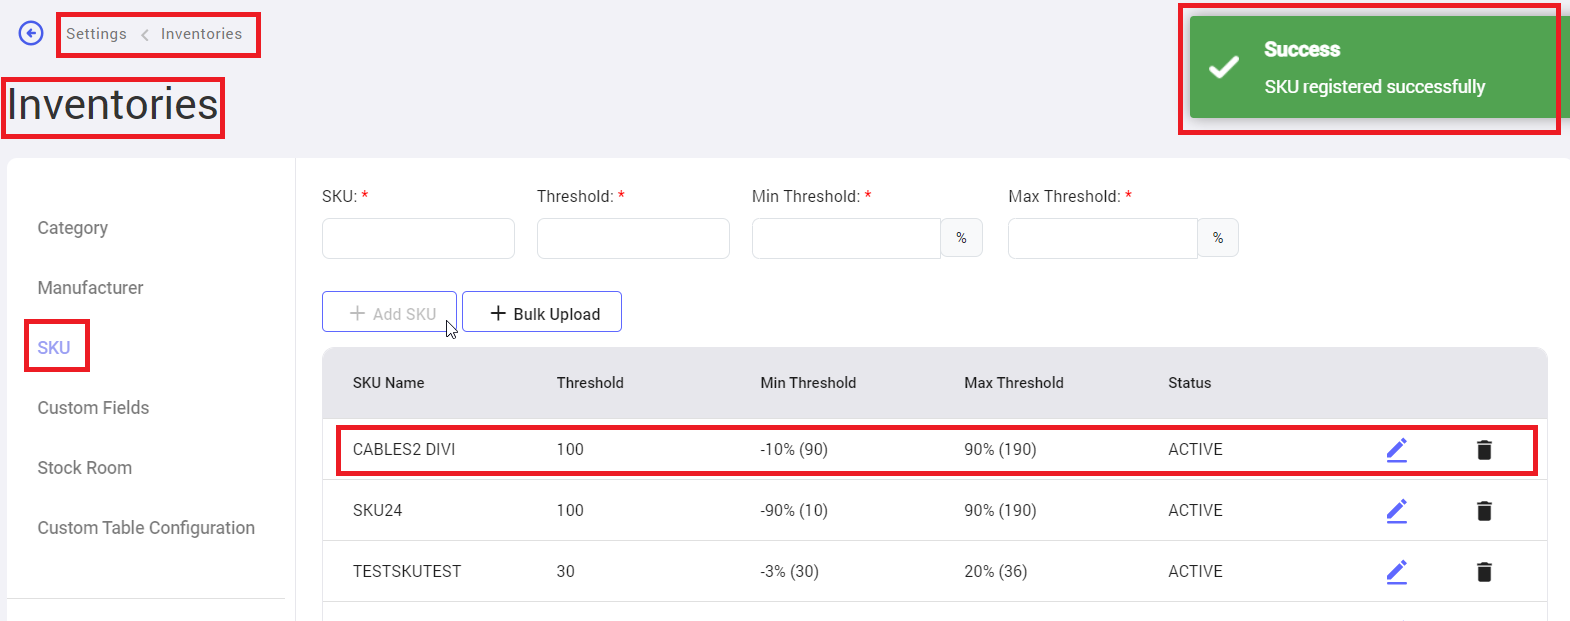
Fill thein all-all mandatory fields and click on the “Add SKU” button,button. A confirmation messagemessage, “"SKU registered successfully”successfully," will be appear. The registered SKU will then be displayed at the top of the SKU table.
Step2Step 2: Select an asset from the Assets module and click on it to view the asset details. Then, navigate to the Inventory section and click the “New Inventory”Inventory” button to add the inventory to the asset.
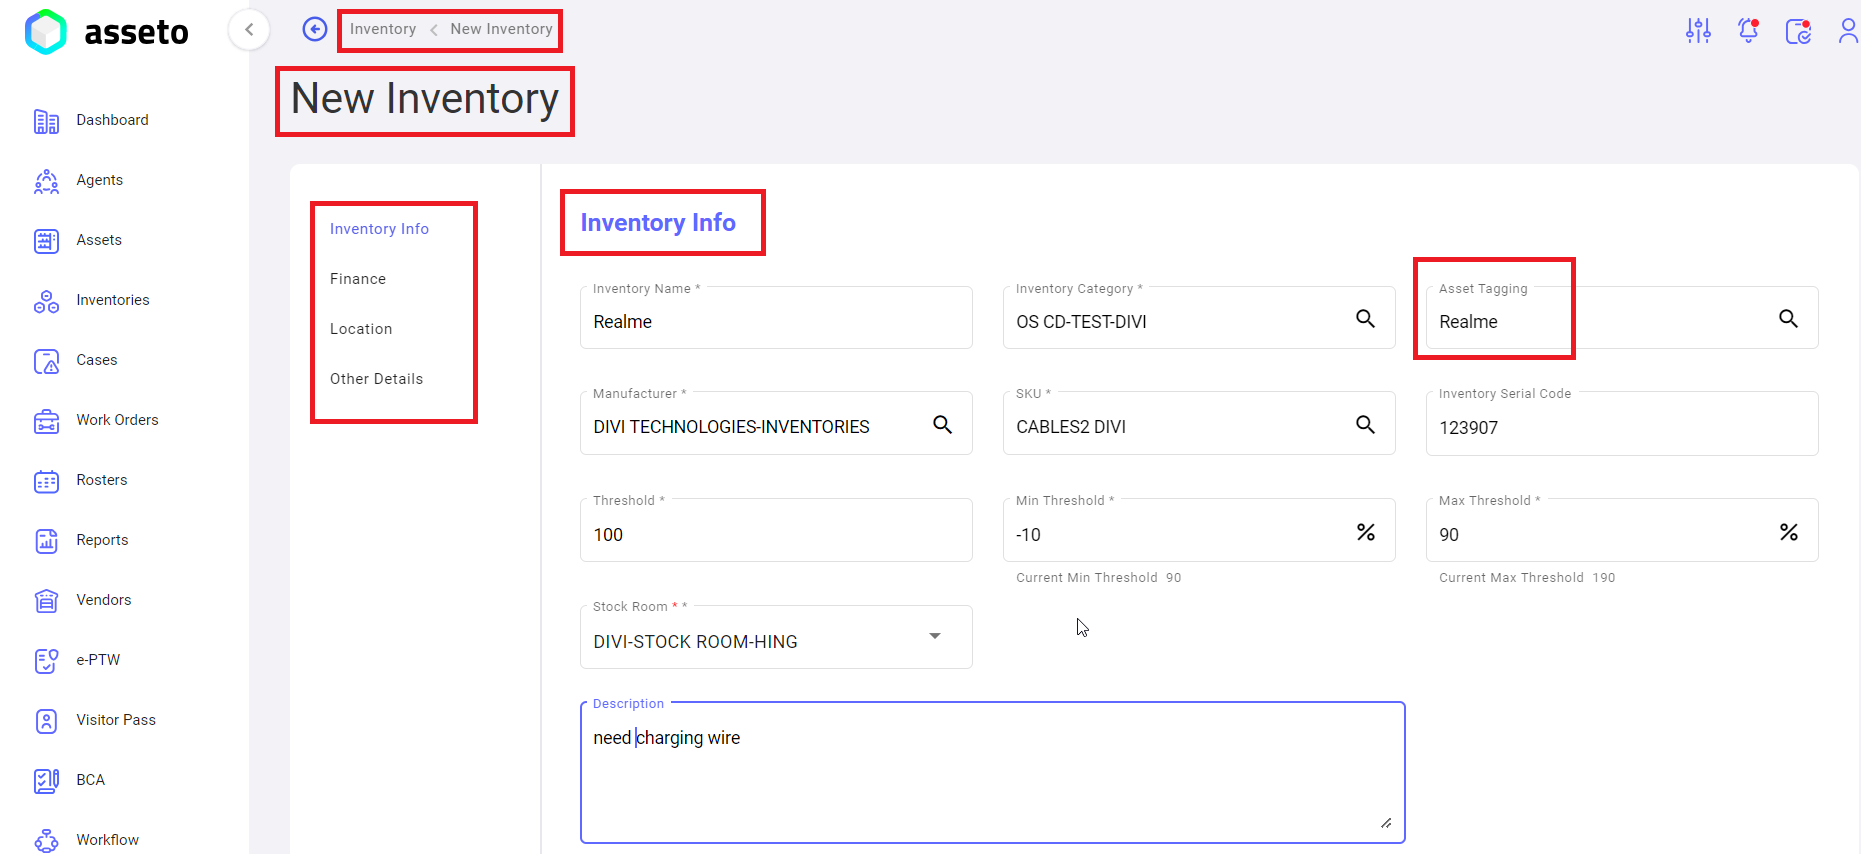
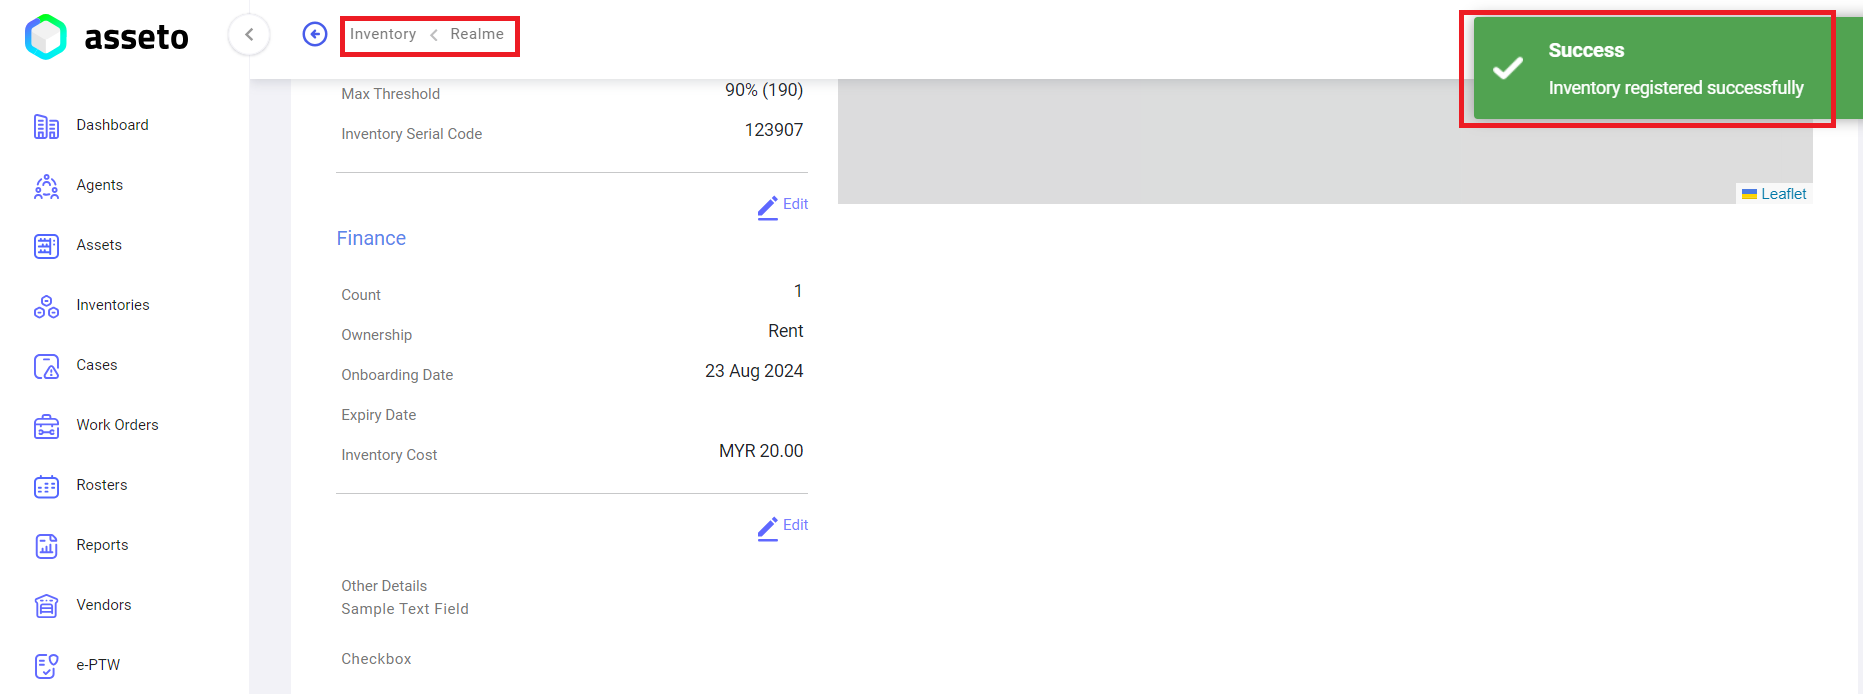
Note: The “Asset Tagging” field is automatically populated by the system. Fill in all the all-mandatory fieldsfields, thenand once completed, the “save”Save” button will be enabled.
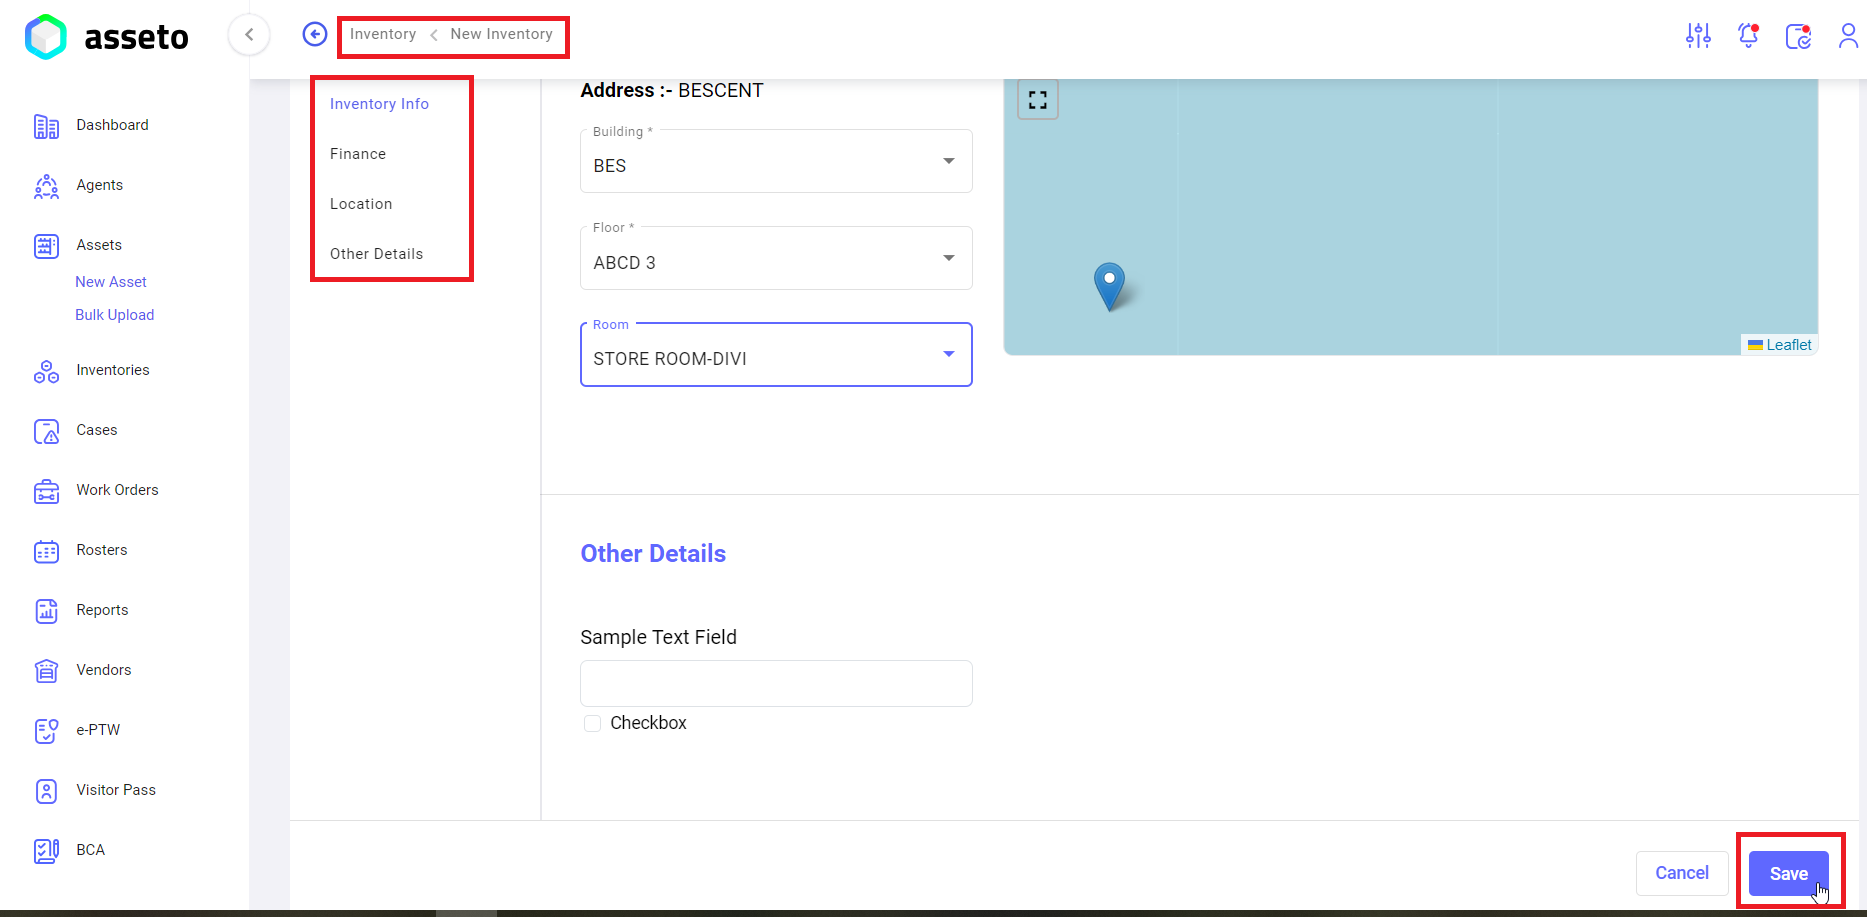
Click on the “save”Save” button,button. A confirmation messagemessage, “Inventory registered successfully”successfully,” will be displayeddisplayed, and the system will navigate to the inventory view page.
Step3Step 3: To view the inventory tagged to an asset, navigate to the Assets module, select the desired asset to view its details, and then go to the Inventory section. The tagged inventory details will be displayed there.
7. Documents Section: HereIn userthis addsection, documents using “New Documents” button andthe user can viewadd new documents alreadyby clicking the "New Documents" button. The user can also view and manage existing attached documents. ExistingTo documentsdownload willany beof downloadedthe byattached usingdocuments, the user can click the download buttonbutton, as shown byin the following screenshot.

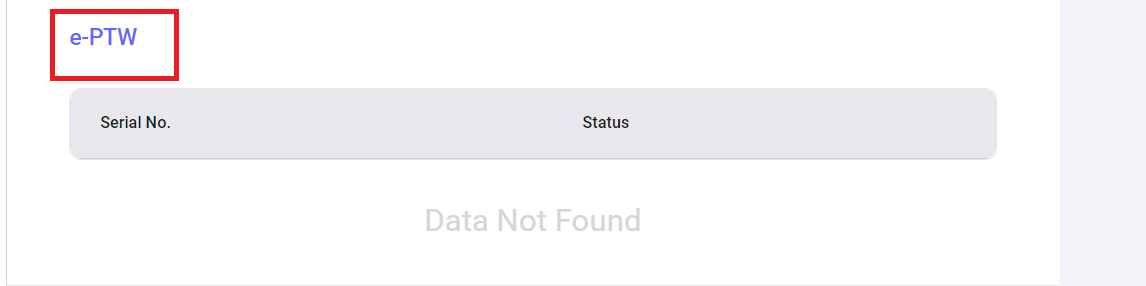
8. eE-ptw-PTW Section: (electronicThis permitsection allows users to work)manage electronic permits to work (ePTW) for thisthe asset.
99. A. Assetsset QR Code: ToQR downloadcode generated for the QRasset code.which can be downloaded.
When youthe clickuser clicks on the QR code icon, the QR codea window will be displayed withdisplaying the QR code andwill download,appear. The window will also feature a "Download QR codeCode" buttonbutton, allowing the user to download the QR.QR code for the asset.

10. Asset Edit: toTo edit/update the asset details, when you click on the edit iconicon. The system will navigate to the edit asset page.page, allowing the user to make and save changes.
11. Comments Section: Here userUsers can add new comments.comments in this section.

12. Active logLog sectionSection:: allAll activities onrelated to the selected asset would beare recorded here.in this section.
