2.2 Pre-Requisites For Agent Onboarding
To onboard agents, the user must configure roles, skillset, and resource groups in the settings module.
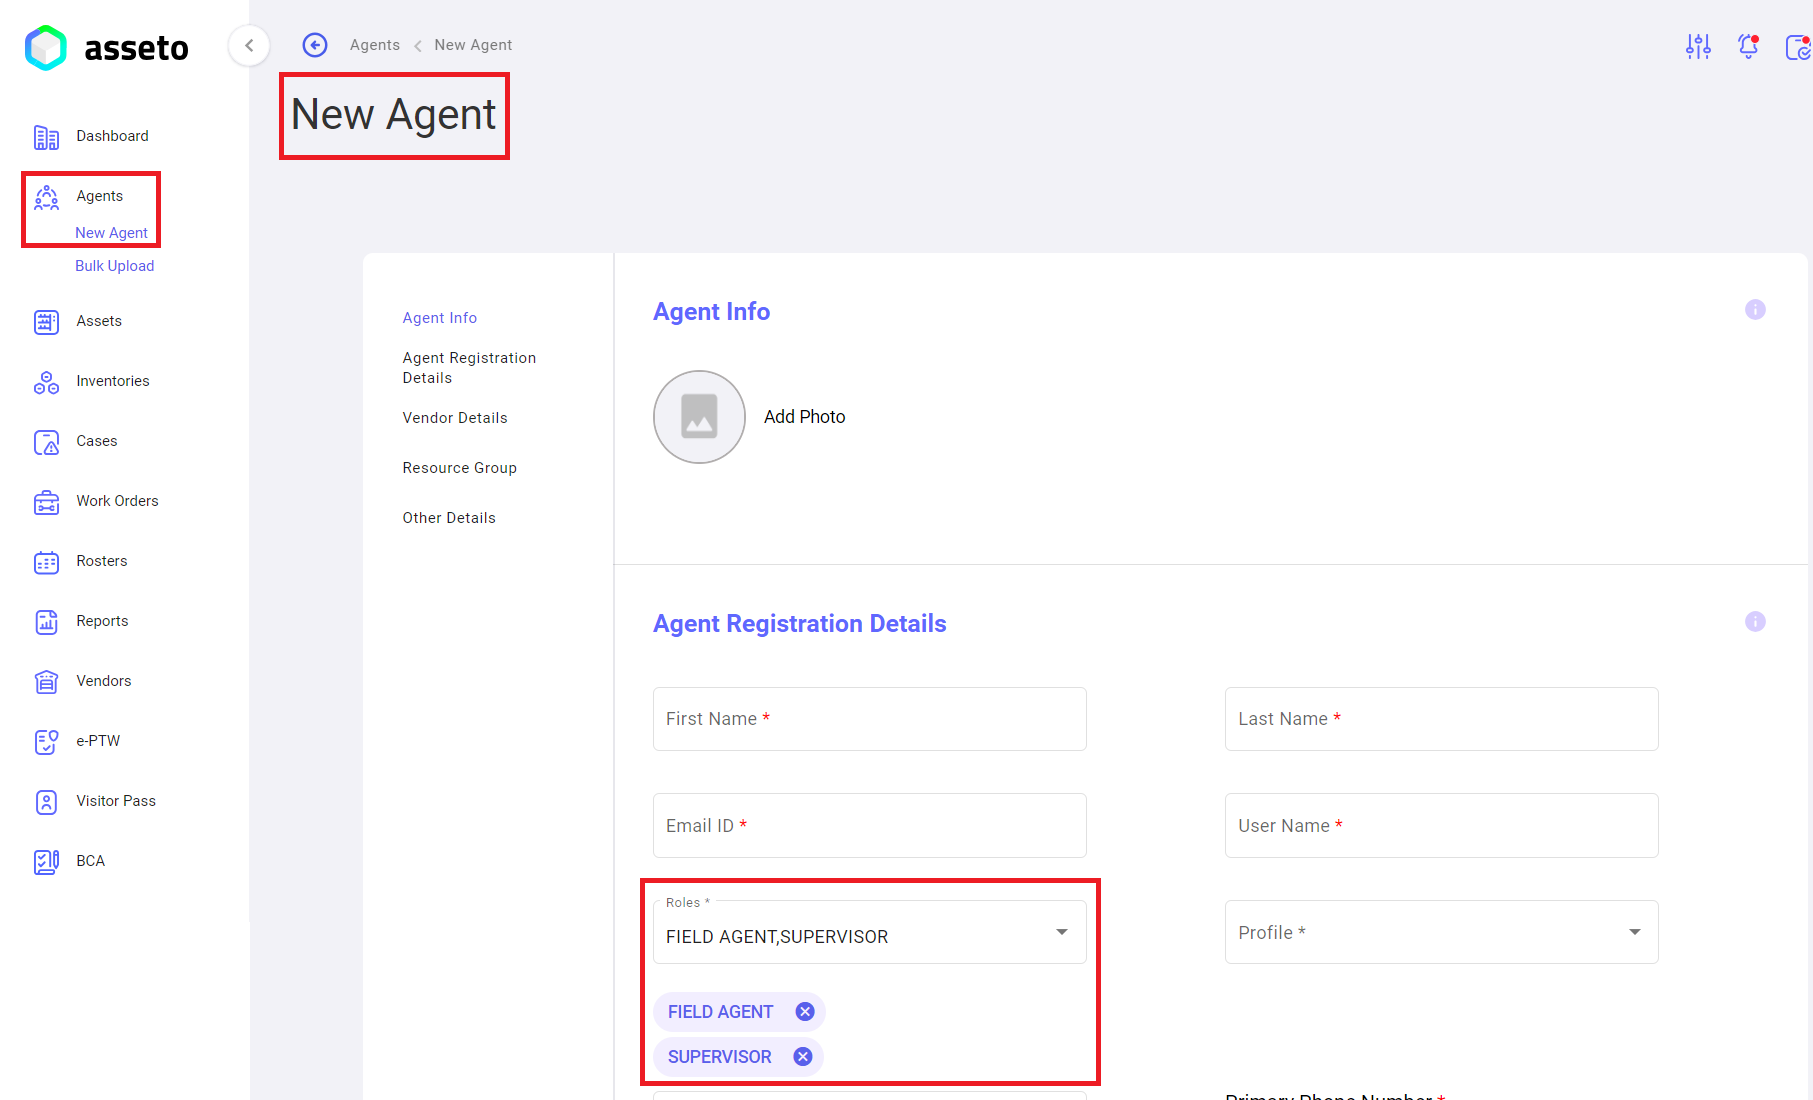
iii. Go to the Agents module and create a new agent with the Supervisor role.
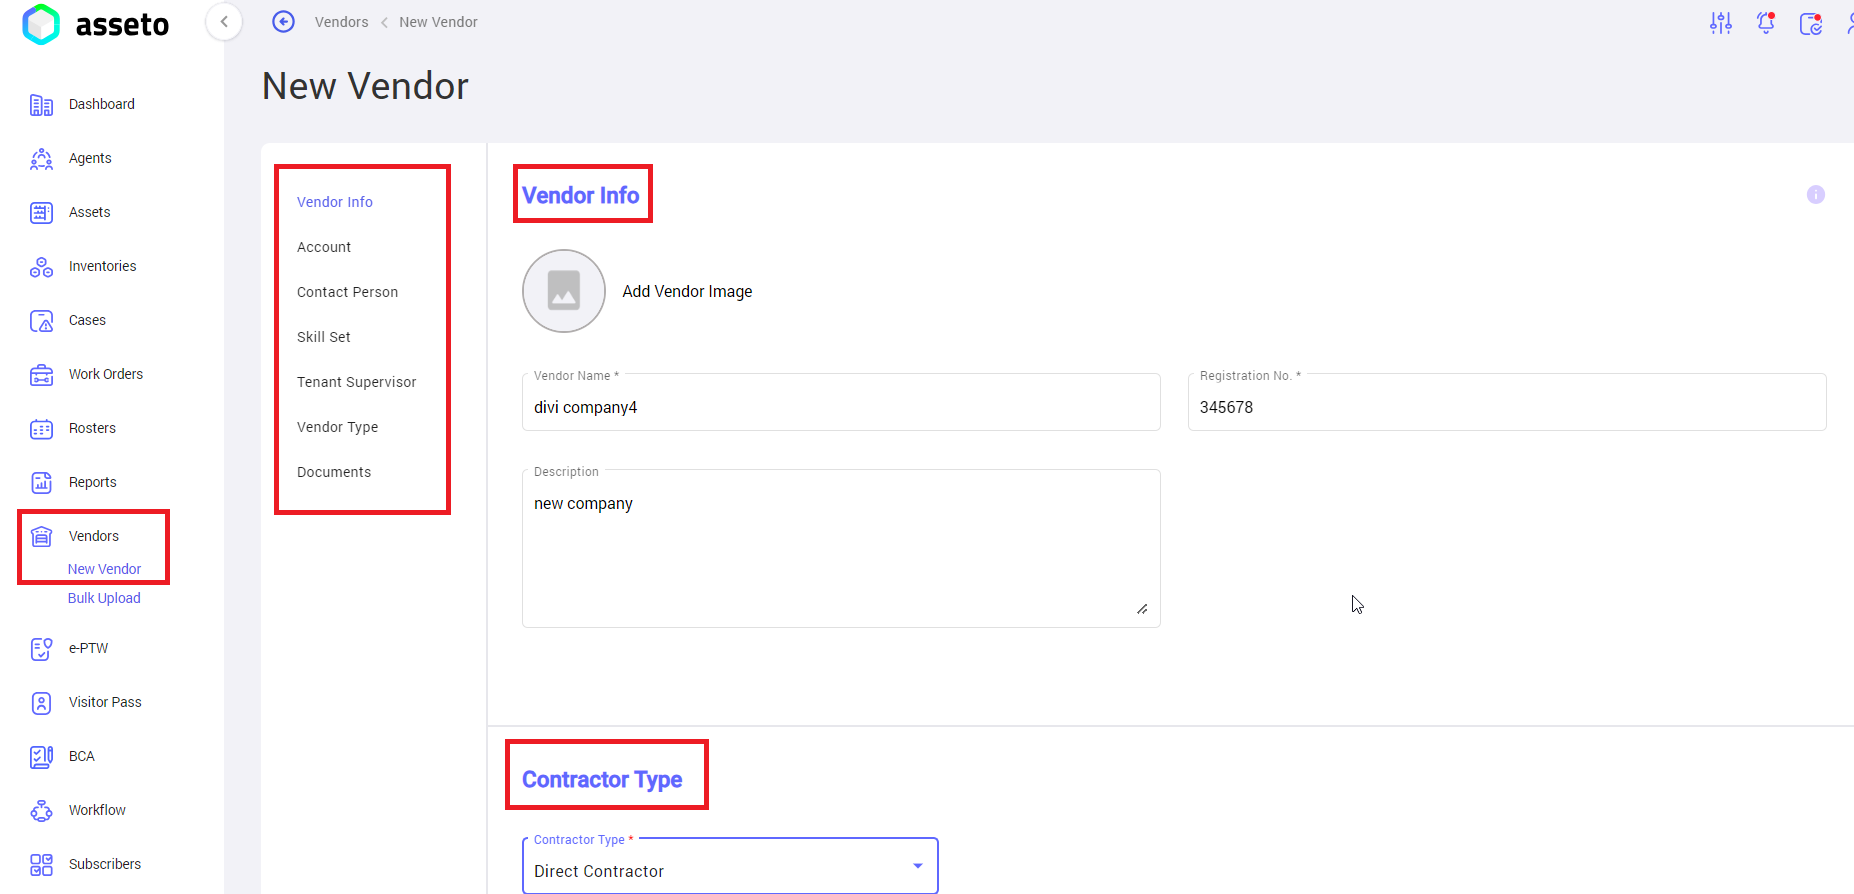
iv. Go to the Vendor module and create a new vendor beforehand.
i. Settings -> Agents -> Profile:
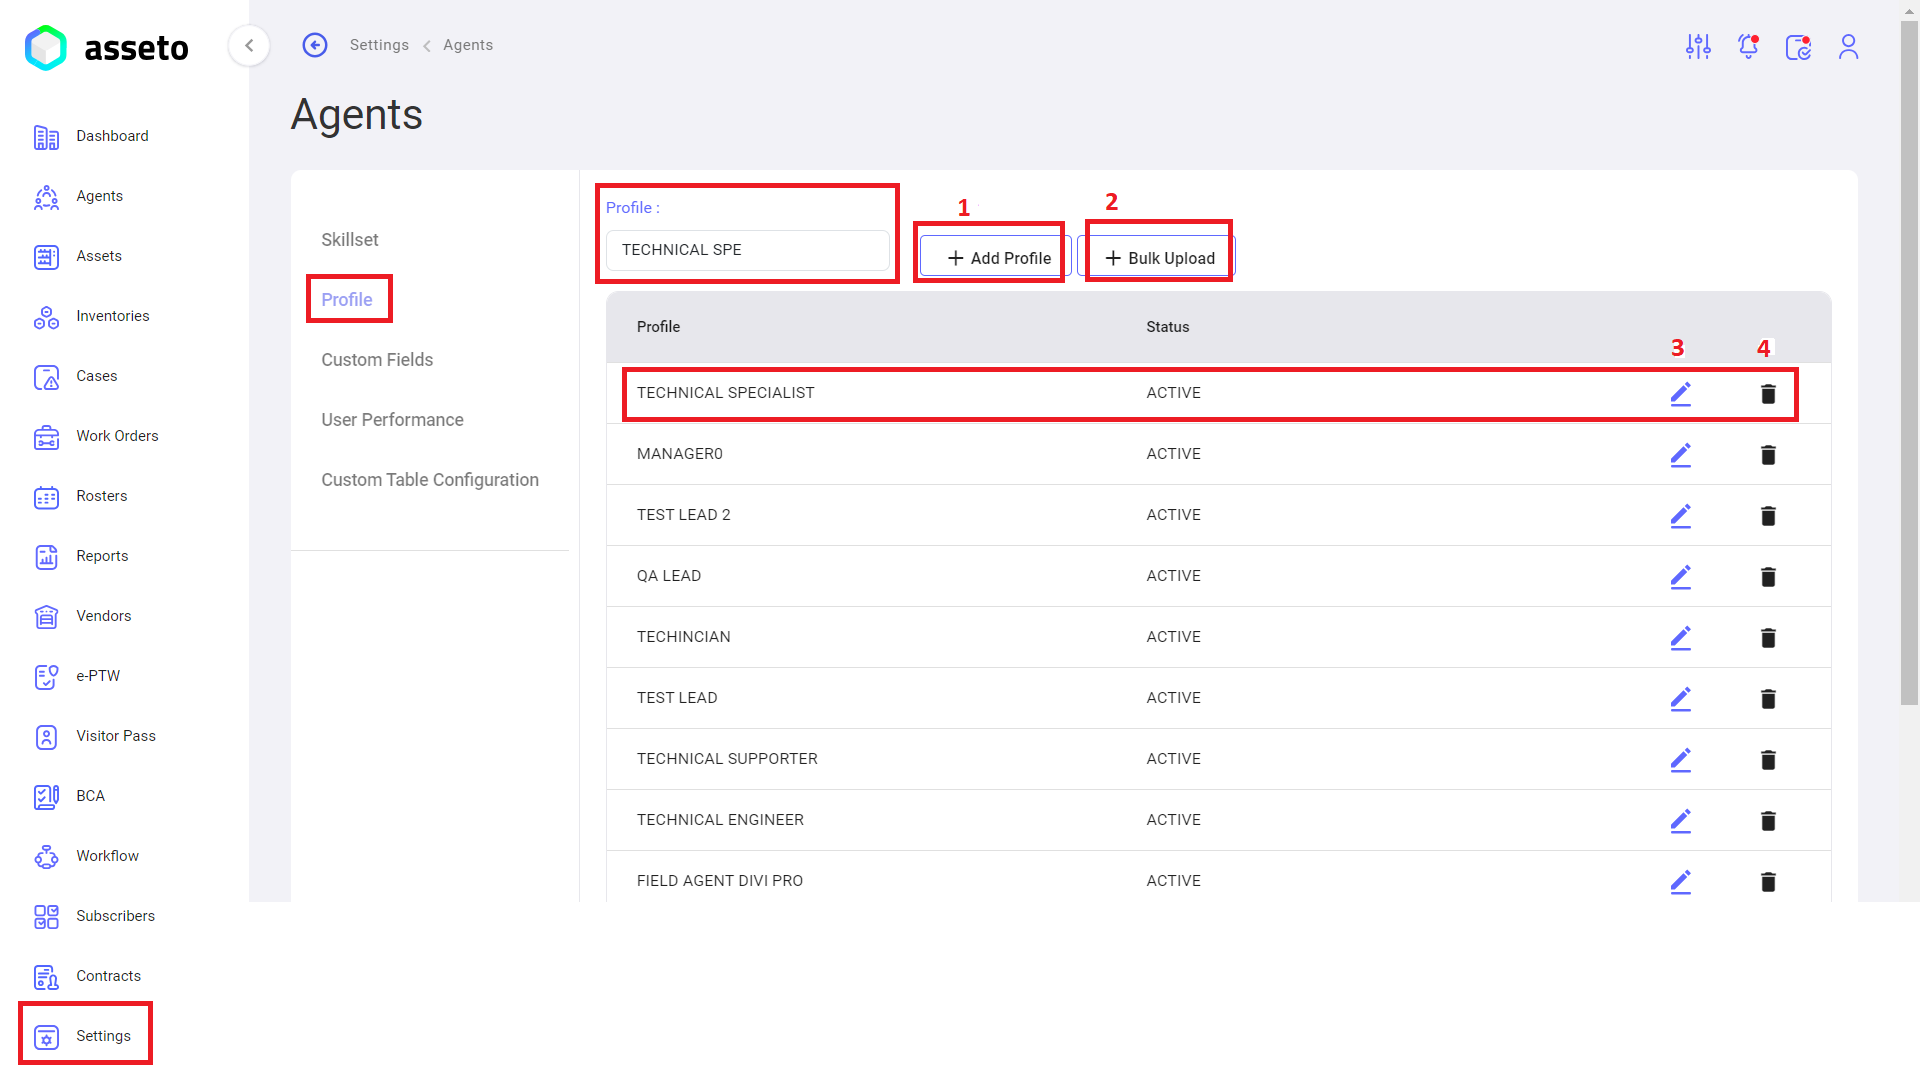
Add Profile: To create a profile, users can type in the text box and click the "Add Profile" button.
Profiles Bulk Upload: To create multiple profiles simultaneously, users can click the "Bulk Upload" button, download the CSV file, fill in the data, and upload the file to save multiple profiles.
Edit Profile: Users can edit an existing profile by clicking the edit icon in each row of the profile list.
Delete Profile: Users can delete an existing profile by clicking the delete icon in each row of the profile list.
Settings -> Agents -> Skillset:
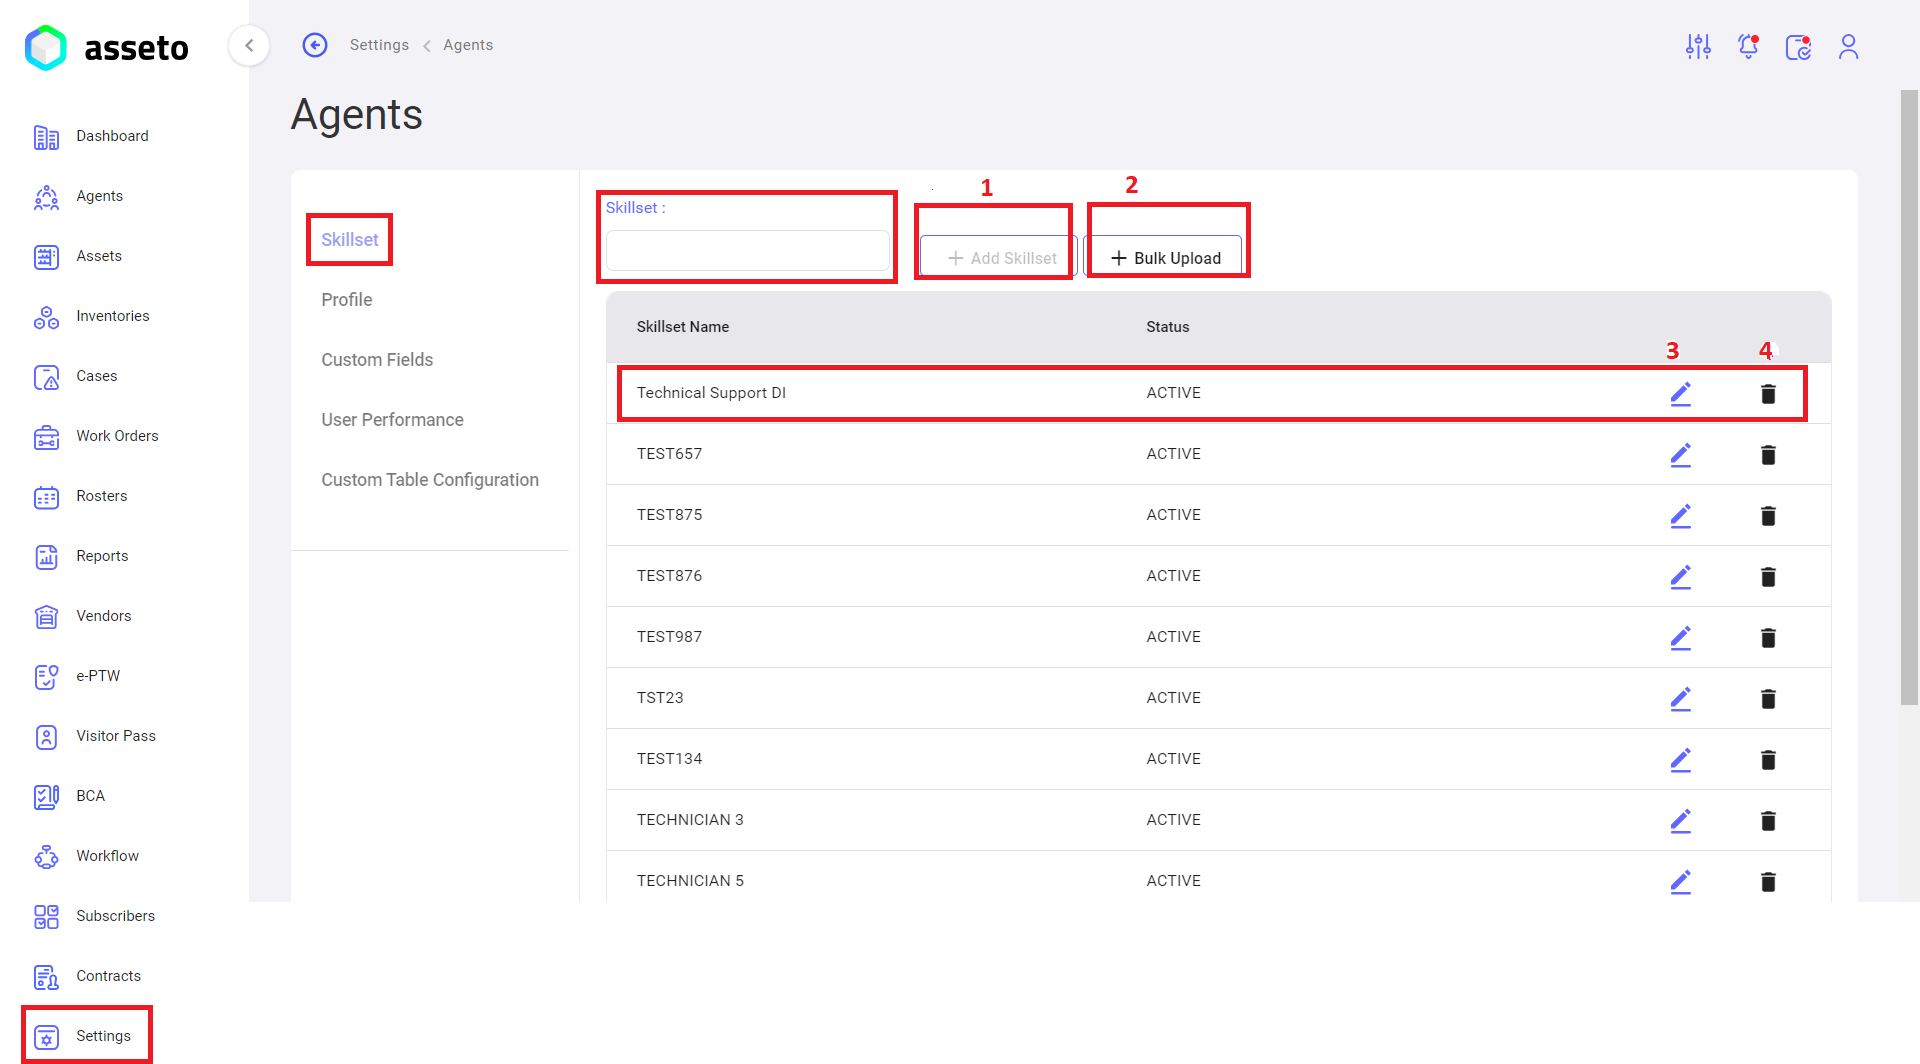
1. Add Skillset: Users can add a new skillset to use in various modules like agents and assets. To create a skillset, type in the skillset text box and click the "Add Skillset" button.
2. Skillset Bulk Upload: To create multiple skillsets at once, users can click on the "Bulk Upload" button, download the CSV file, fill in the data, and upload the file to save multiple skillsets.
3. Edit Skillset: Users can edit an existing skillset by clicking the edit icon available in each row of the skillset list.
4. Delete Skillset: Users can delete an existing skillset by clicking the delete icon available in each row of the skillset list.
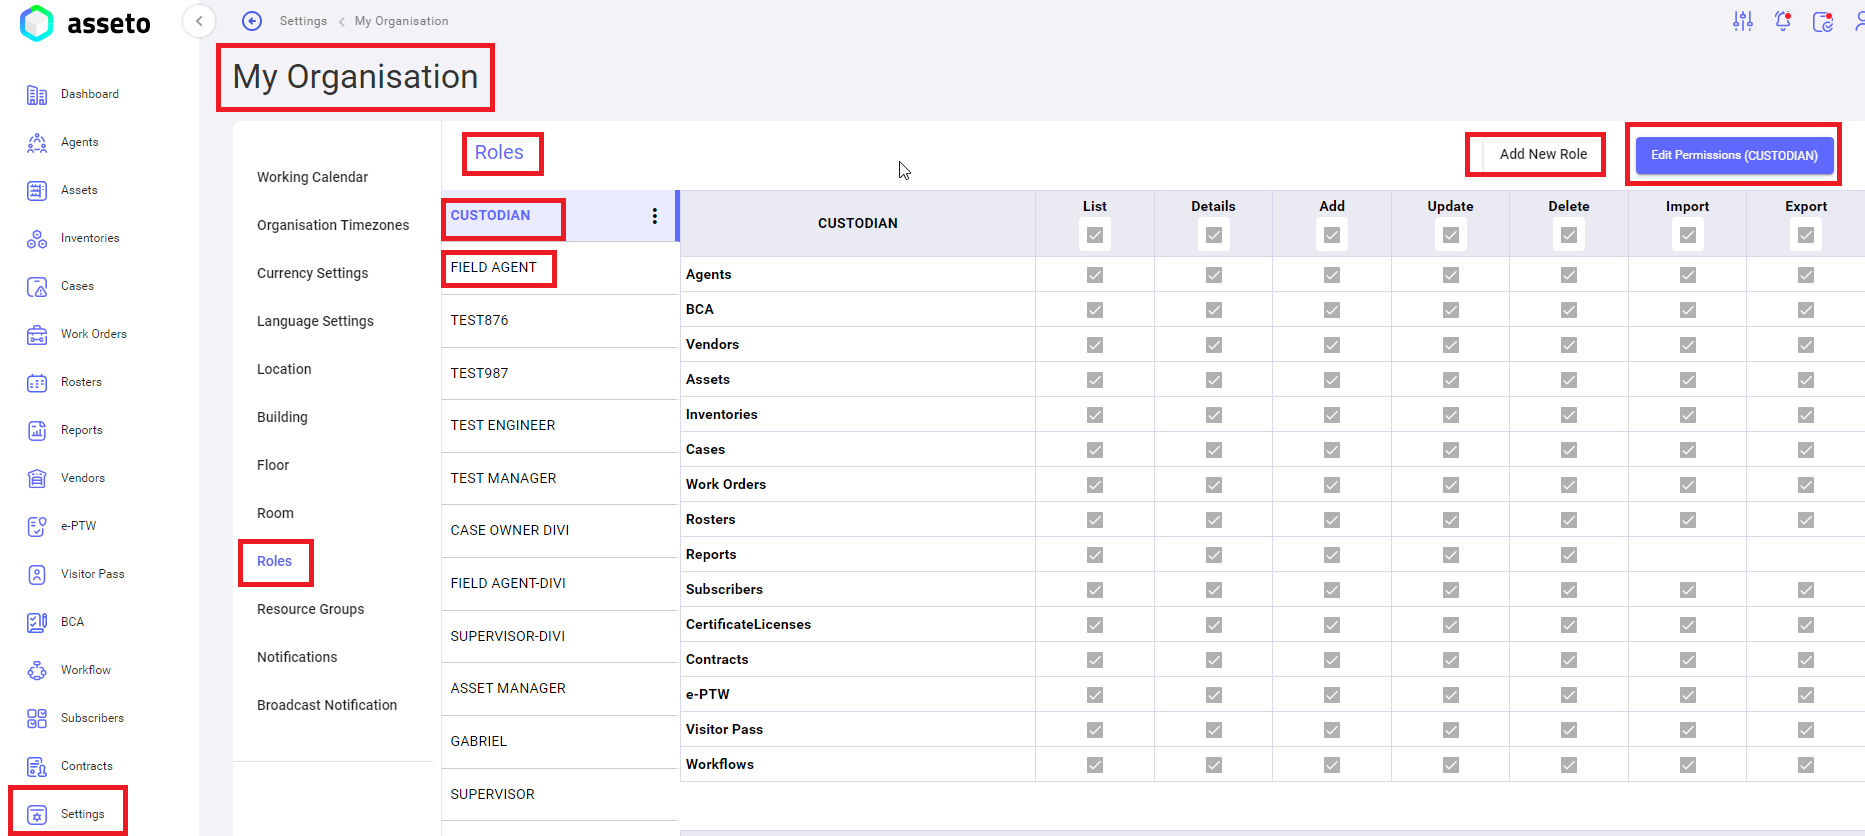
ii. Settings -> My Organization -> Roles:
Here, users can create a new role for onboarding, which can be utilised in various modules like agents and asset creation.
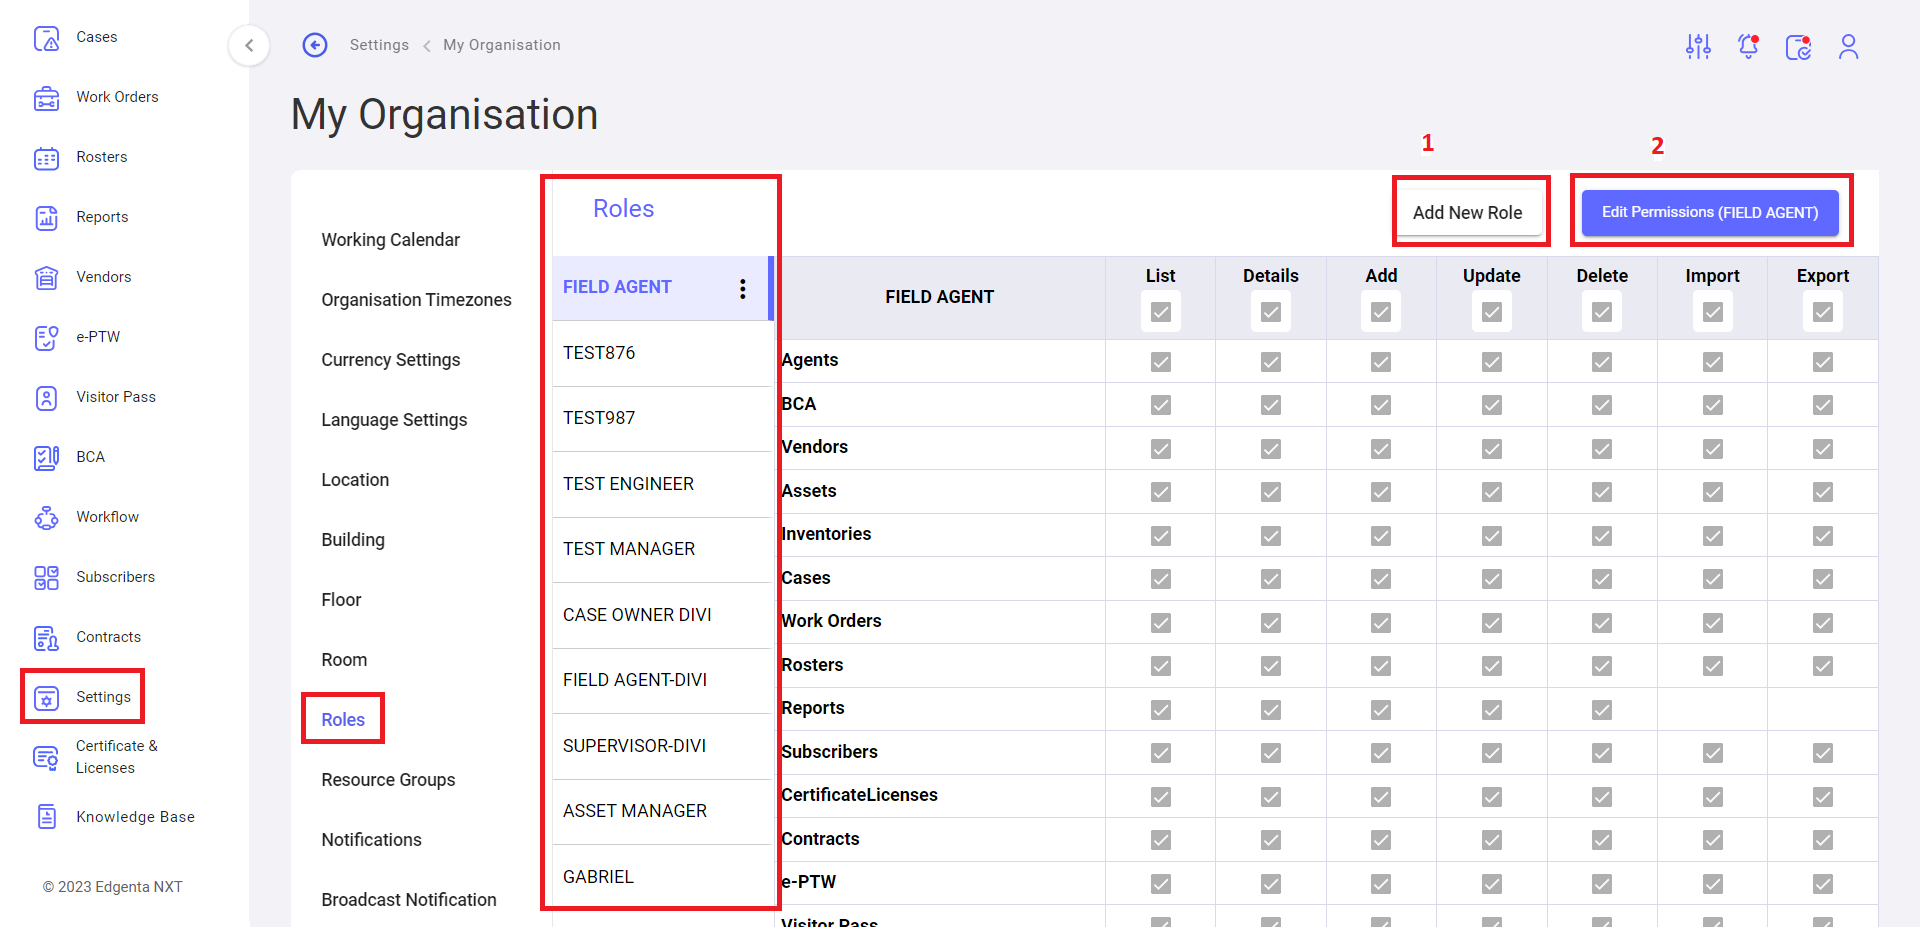
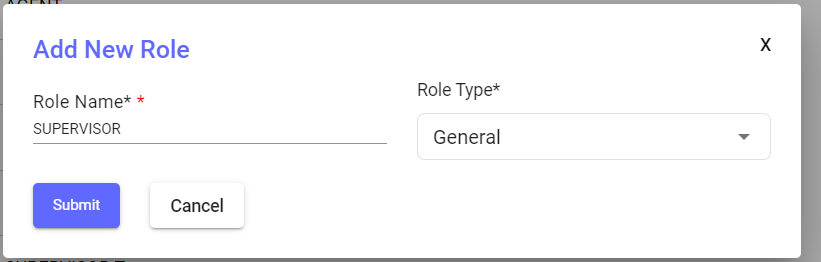
Add Role: Click on the add “new role” button provide role name and add role type (mandatory fields) as shown by below screenshot then click on submit button to save the role details.
2. Permissions: You can give permissions to role, click on edit permissions button select check boxes to give permissions for selected role which is created earlier as shown by below screenshot.
Settings -> My Organization -> Resource Groups:
You can create new resource group by clicking on the add resource group button, which we can use in various modules like agents and assets creation.
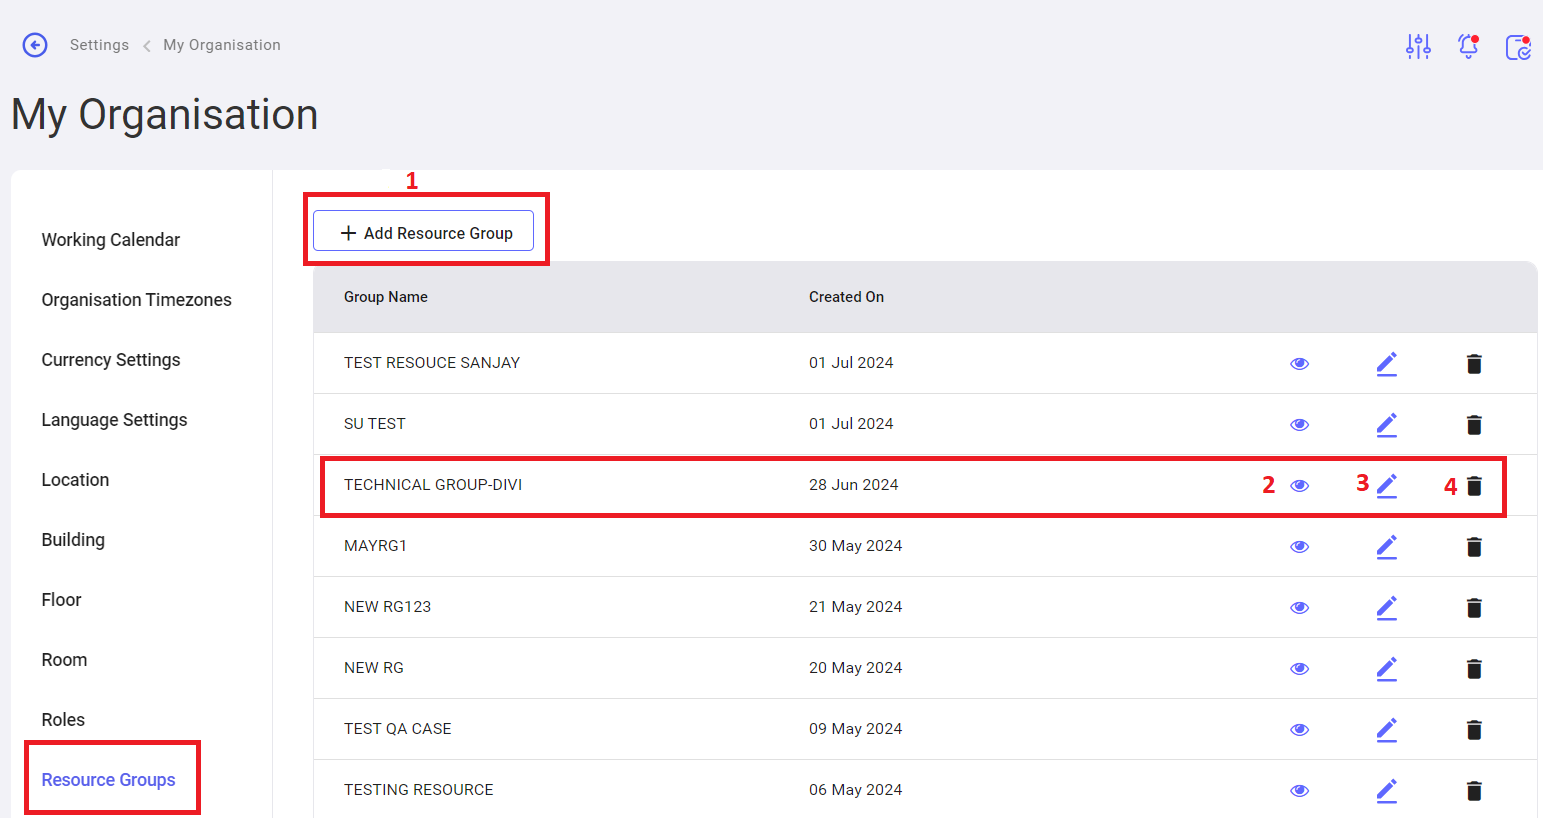
1. Create Resource Group: When you click on “add resource group” button following page will be displayed, fill the all-mandatory fields then only save button will be enabled, click on save button to save the resource group.

2. View Resource Group: Here you can view the selected resource group which was created earlier.
3. Edit Resource Group: Here you can edit the selected resource group which was created earlier.
4. Delete Resource Group: Here you can delete the selected resource group which was created earlier.
iii. Left menu -> Agents -> Create Agent with Supervisor Role:
Go to vendor module and create new vendor (to select vendor form dropdown while creating new agent/asset) fill the mandatory and non-mandatory fields to save the vendor details.
Note: For more details, please review 9. Vendor module 9.2. Pre-requisites for vendor creation and 9.3. New Vendor.