2.2 Pre-Requisites For Agent Onboarding
To onboard agents, the agents,user you have tomust configure roles, skillset, and resource groupgroups in the settings module.
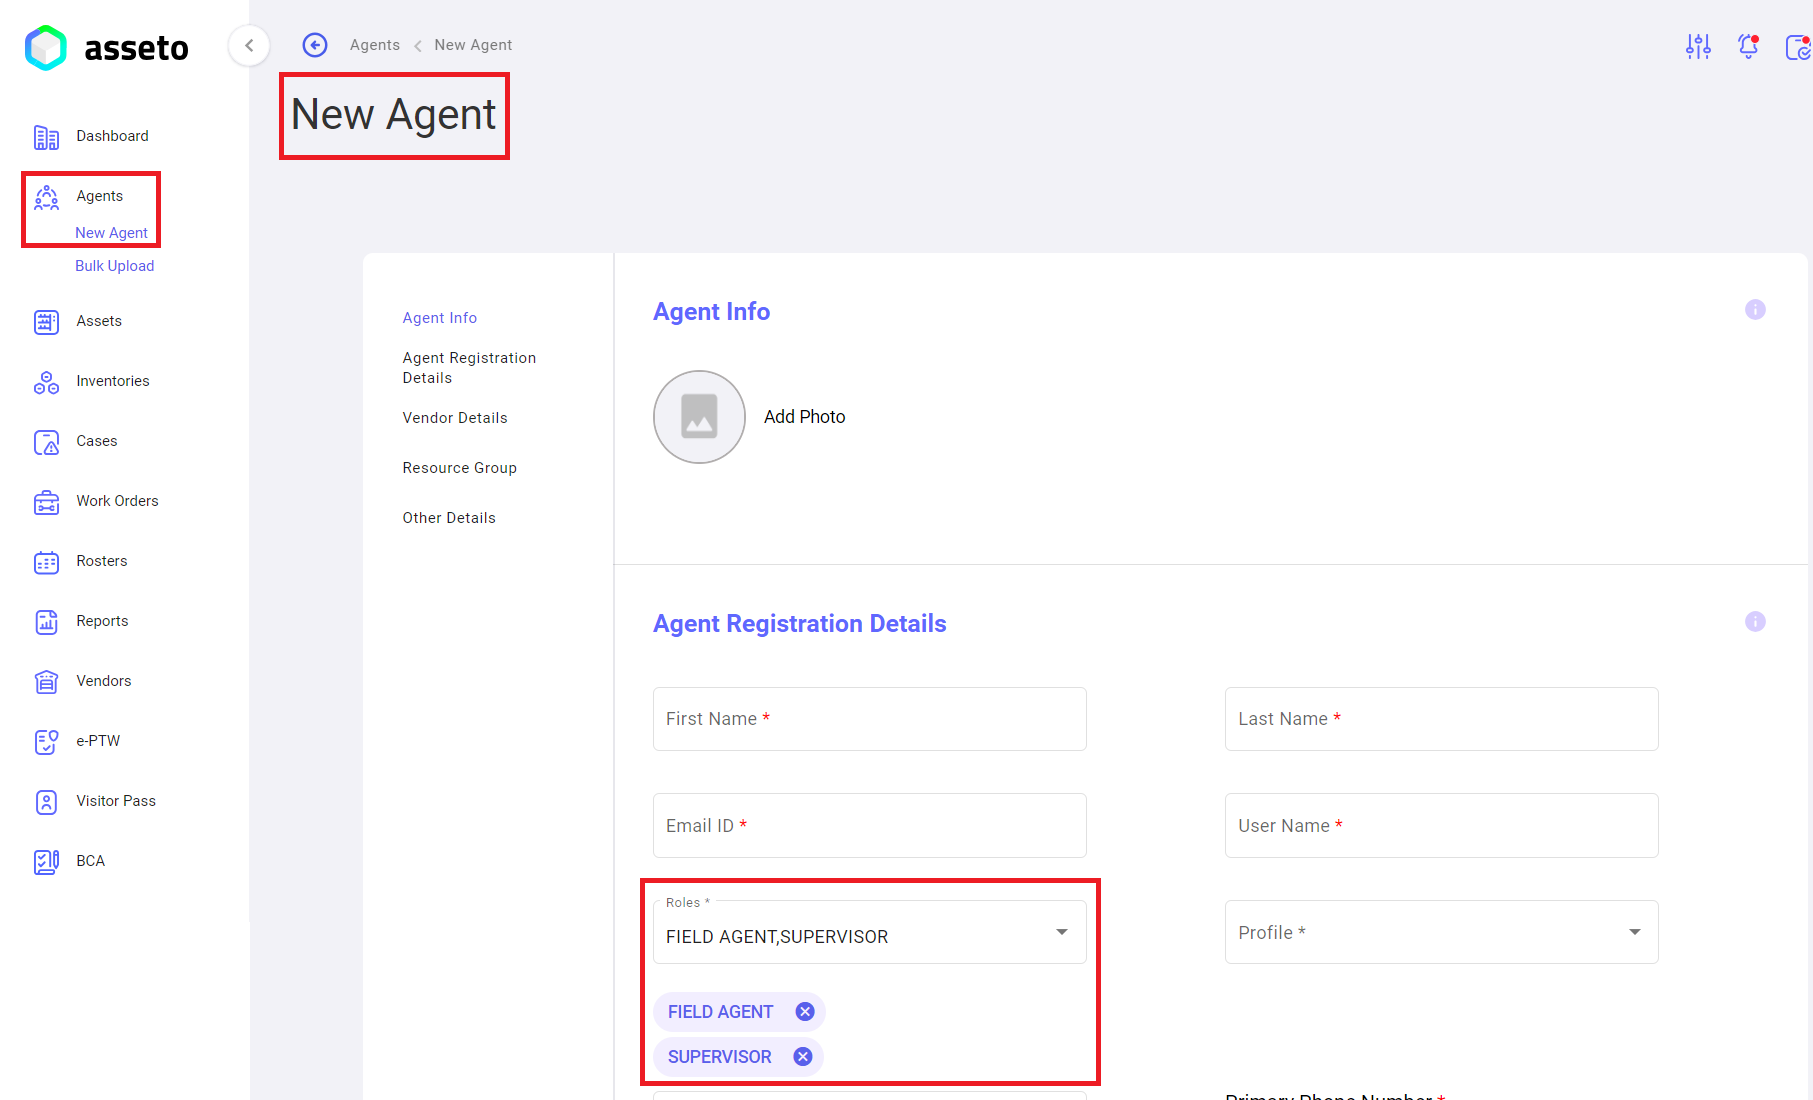
iii. iii. Go to agentsthe **Agents** module and create a new agent with the Supervisor role.
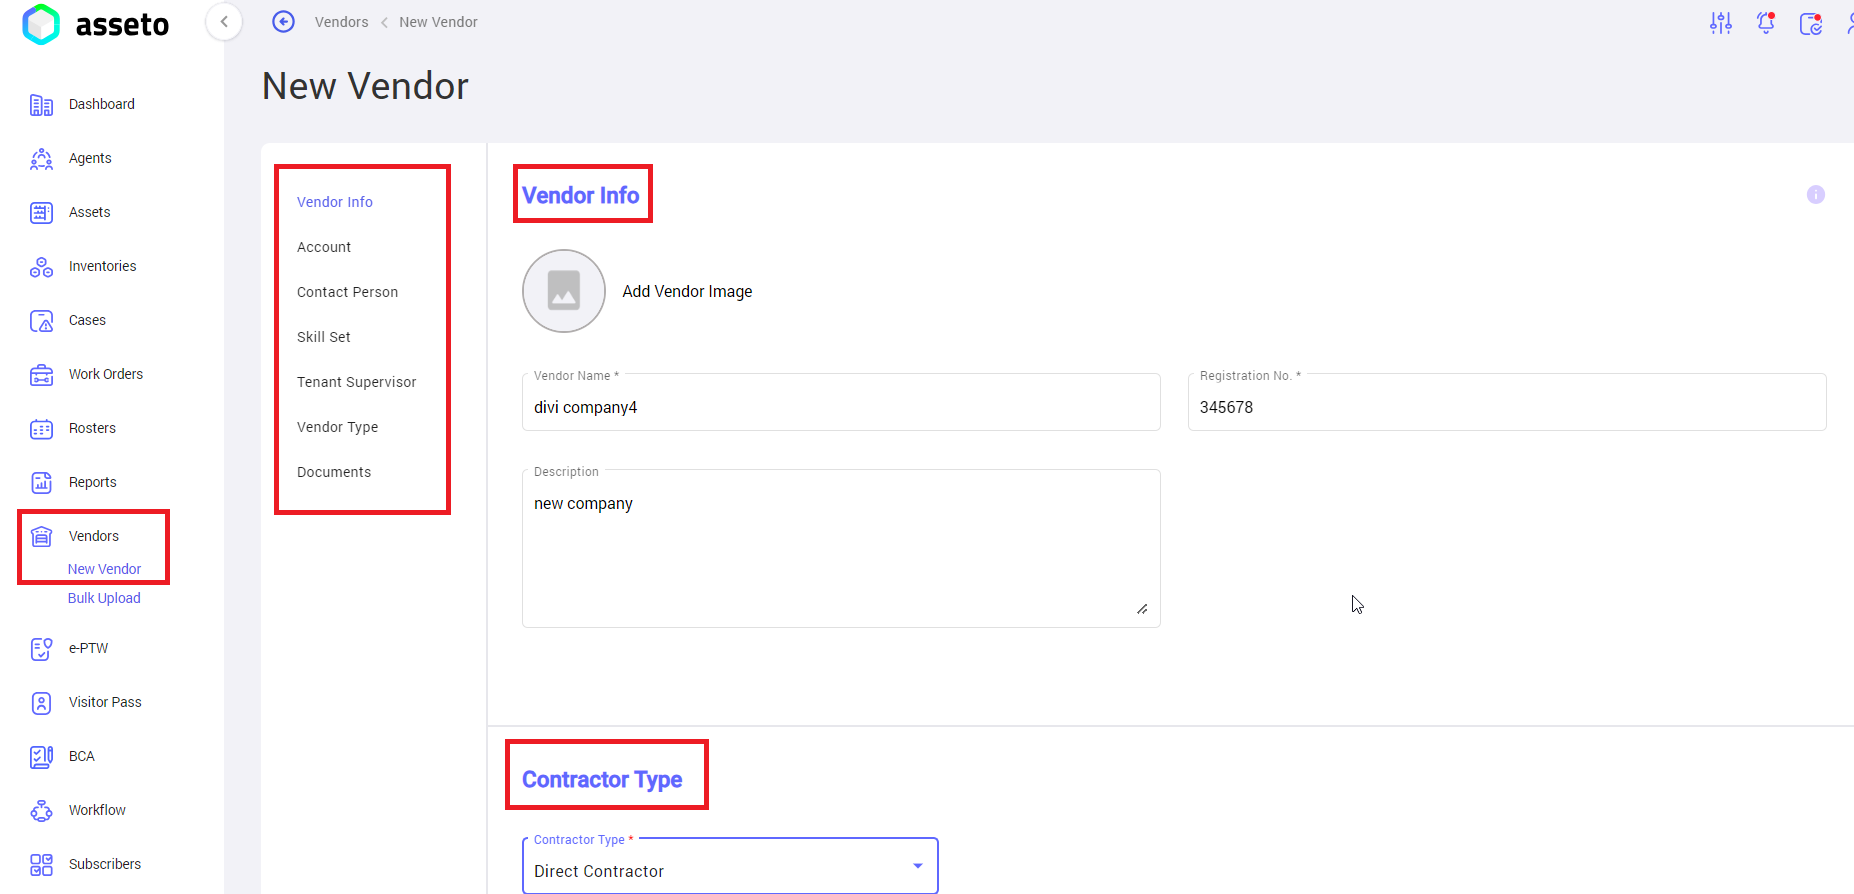
iv. iv. Go to vendorthe **Vendor** module and create a new vendor earlier.beforehand.
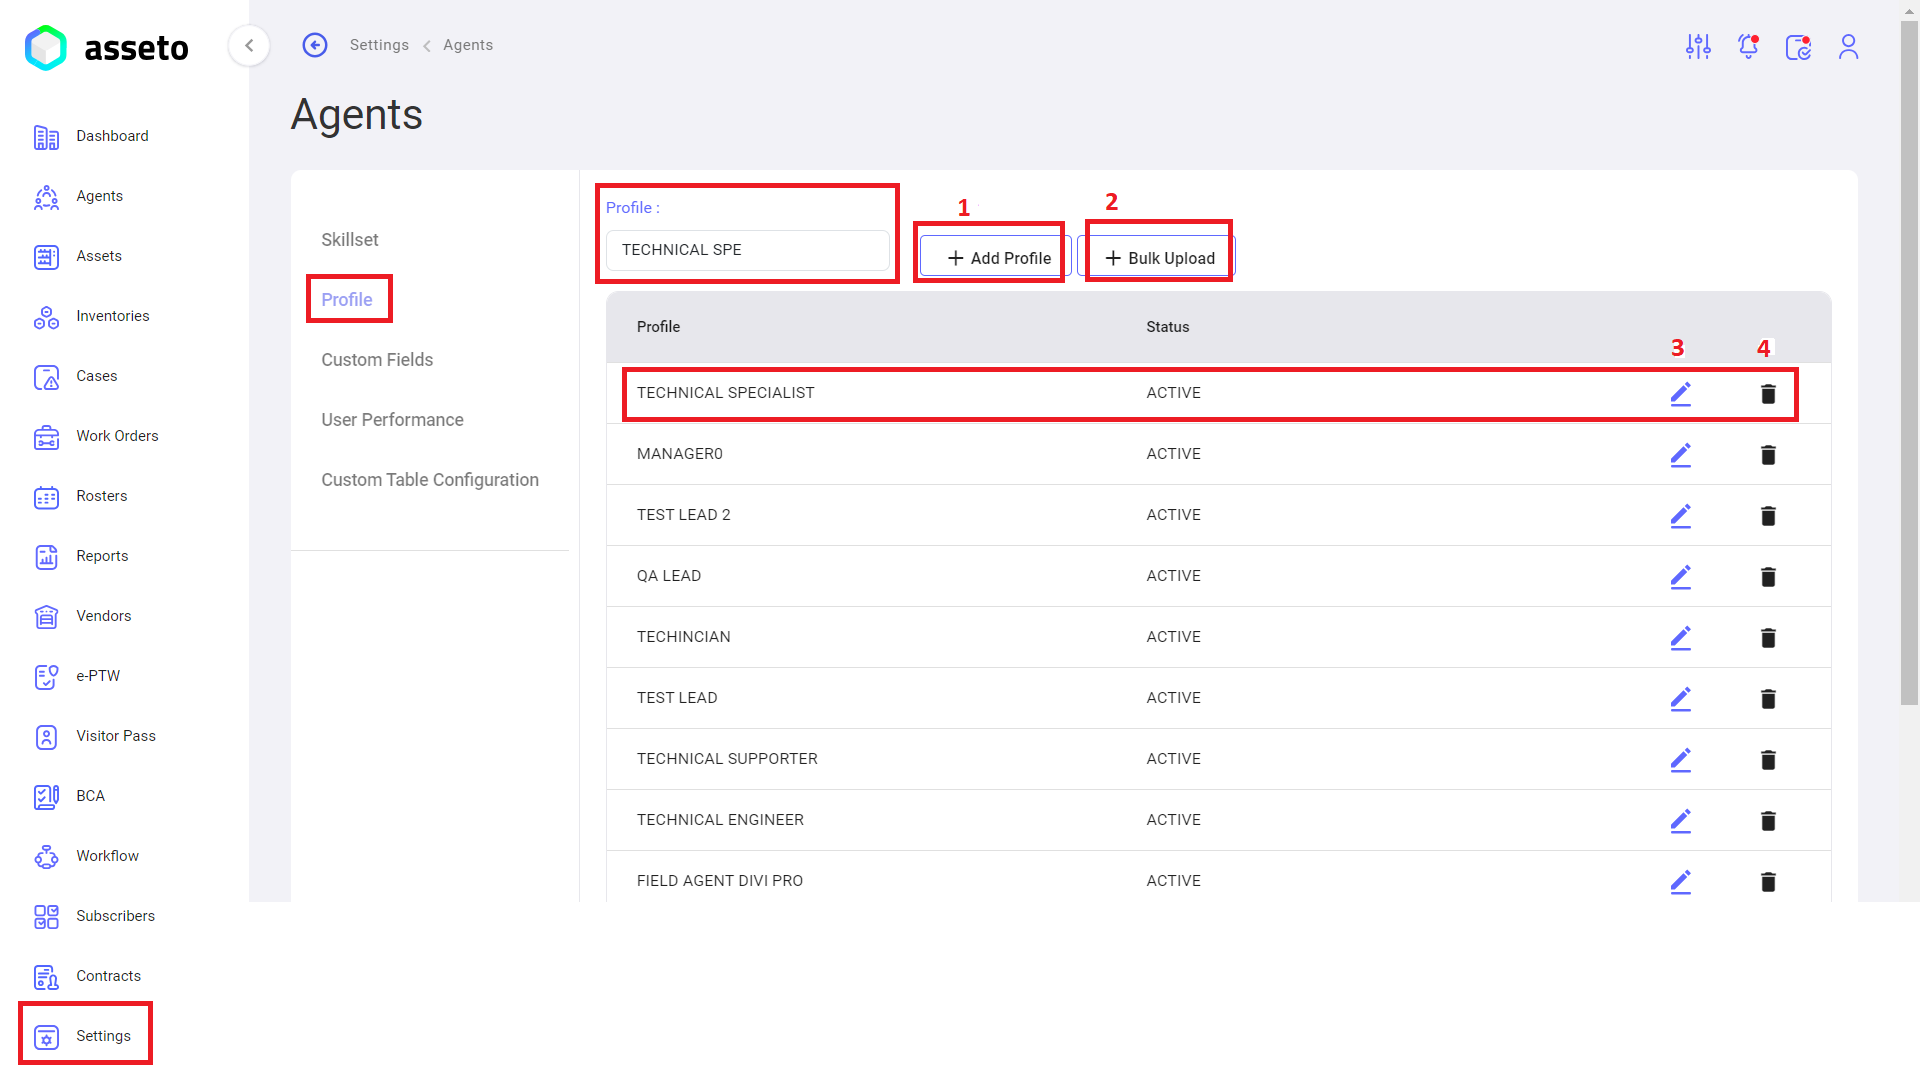
i. Settings -> agents -> Profile:
Add
profile:profile: To create profile, you can type in text box then click on “add profile” button.Profiles Bulk
Upload:Upload: To create multiple profiles at a time, click on bulk upload button, download csv file and fill the data then upload the file to save multiple profiles.Edit profile: You can edit the profile which is added earlier by clicking on edit icon available every row of profile list.
.
Settings -> agents -> Skillset:
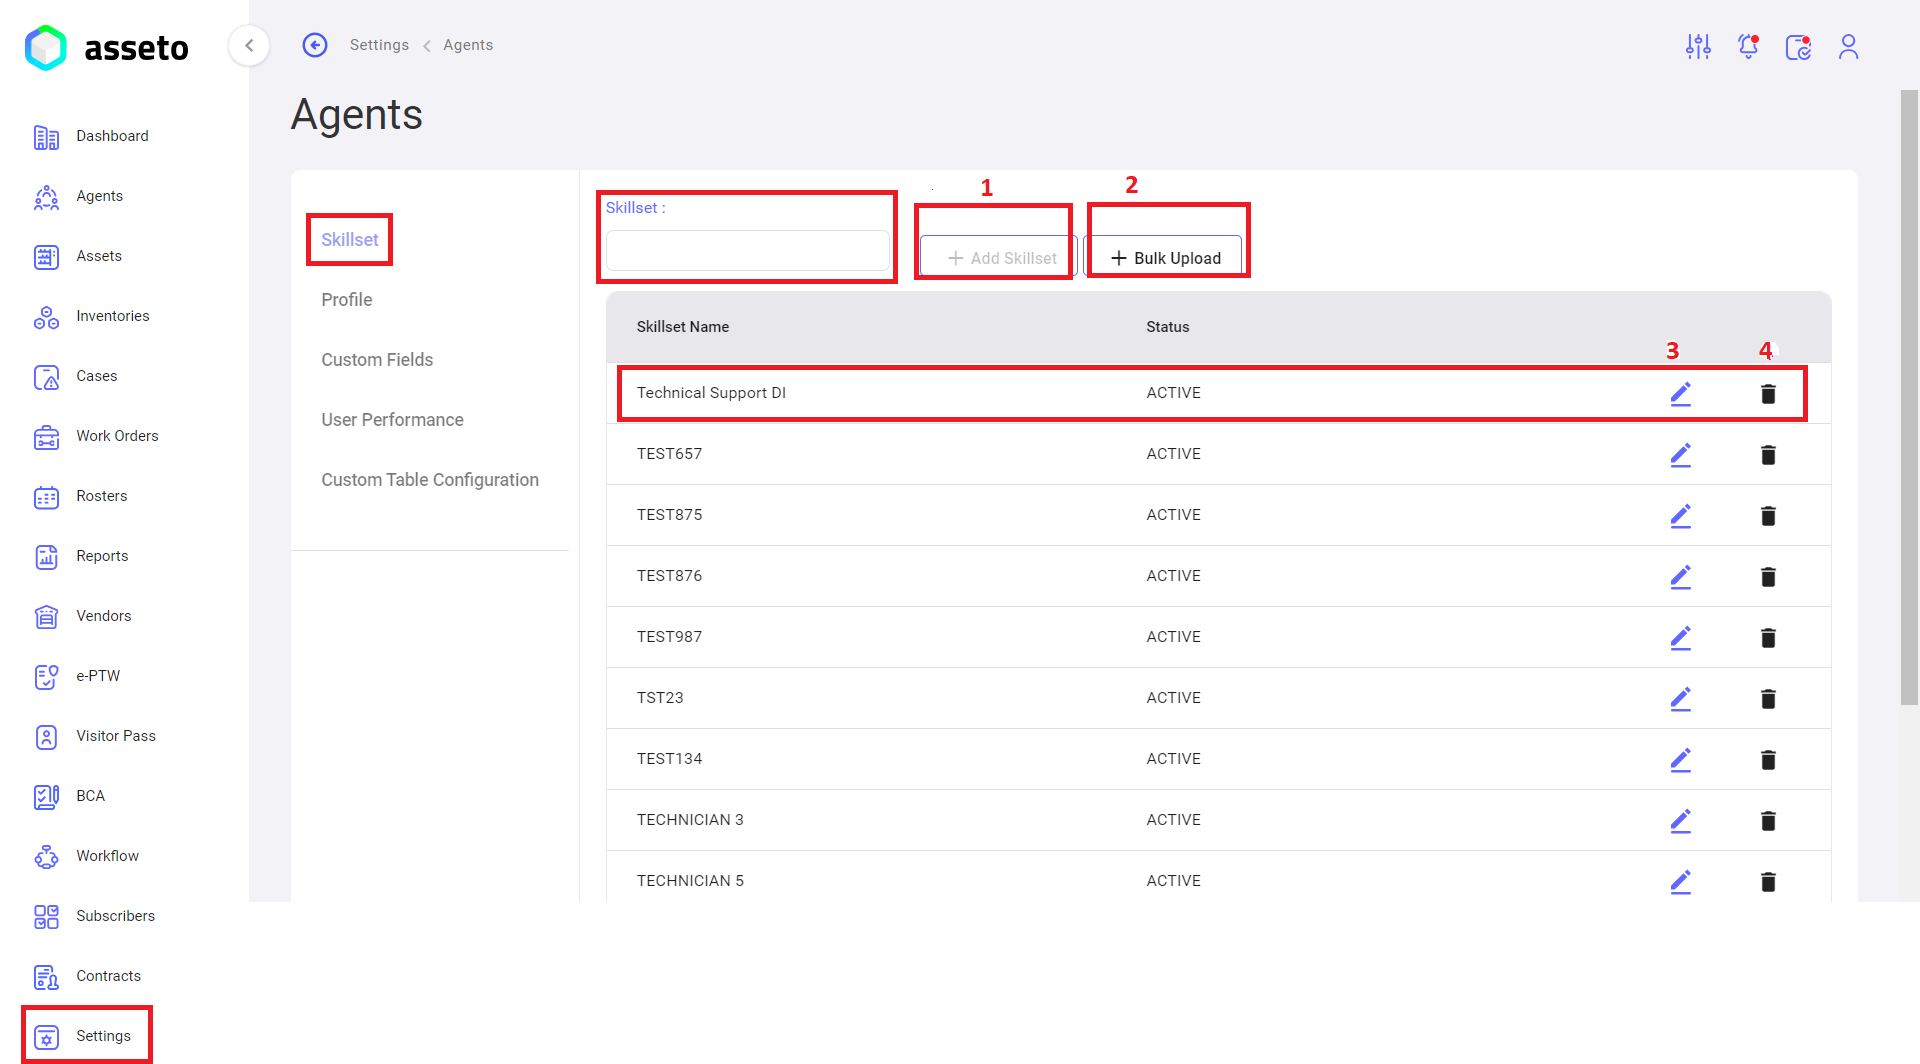
1. Add skillset: Here you can add new skillset to use in various modules like agents and assets. To create a skillset, you can type in skillset text box then click on “add skillset” button.
2. Skillset Bulk Upload: To create multiple skillsets at a time, click on bulk upload button, download csv file and fill the data then upload the file to save multiple skillsets.
3. Edit Skillset: You can edit the skillset which is added earlier by clicking on edit icons available in every row of skillset list.
4. Delete Skillset: You can delete the already added skillset by clicking on delete icons available in every row of skillset list.
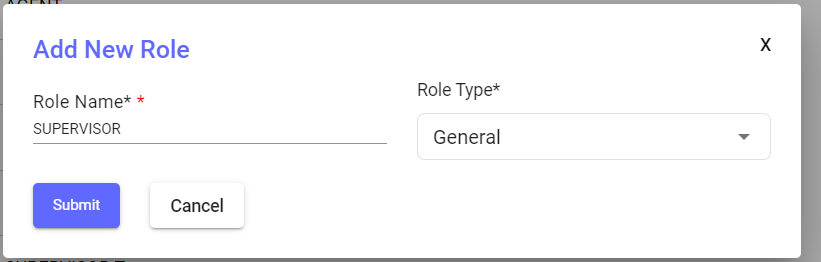
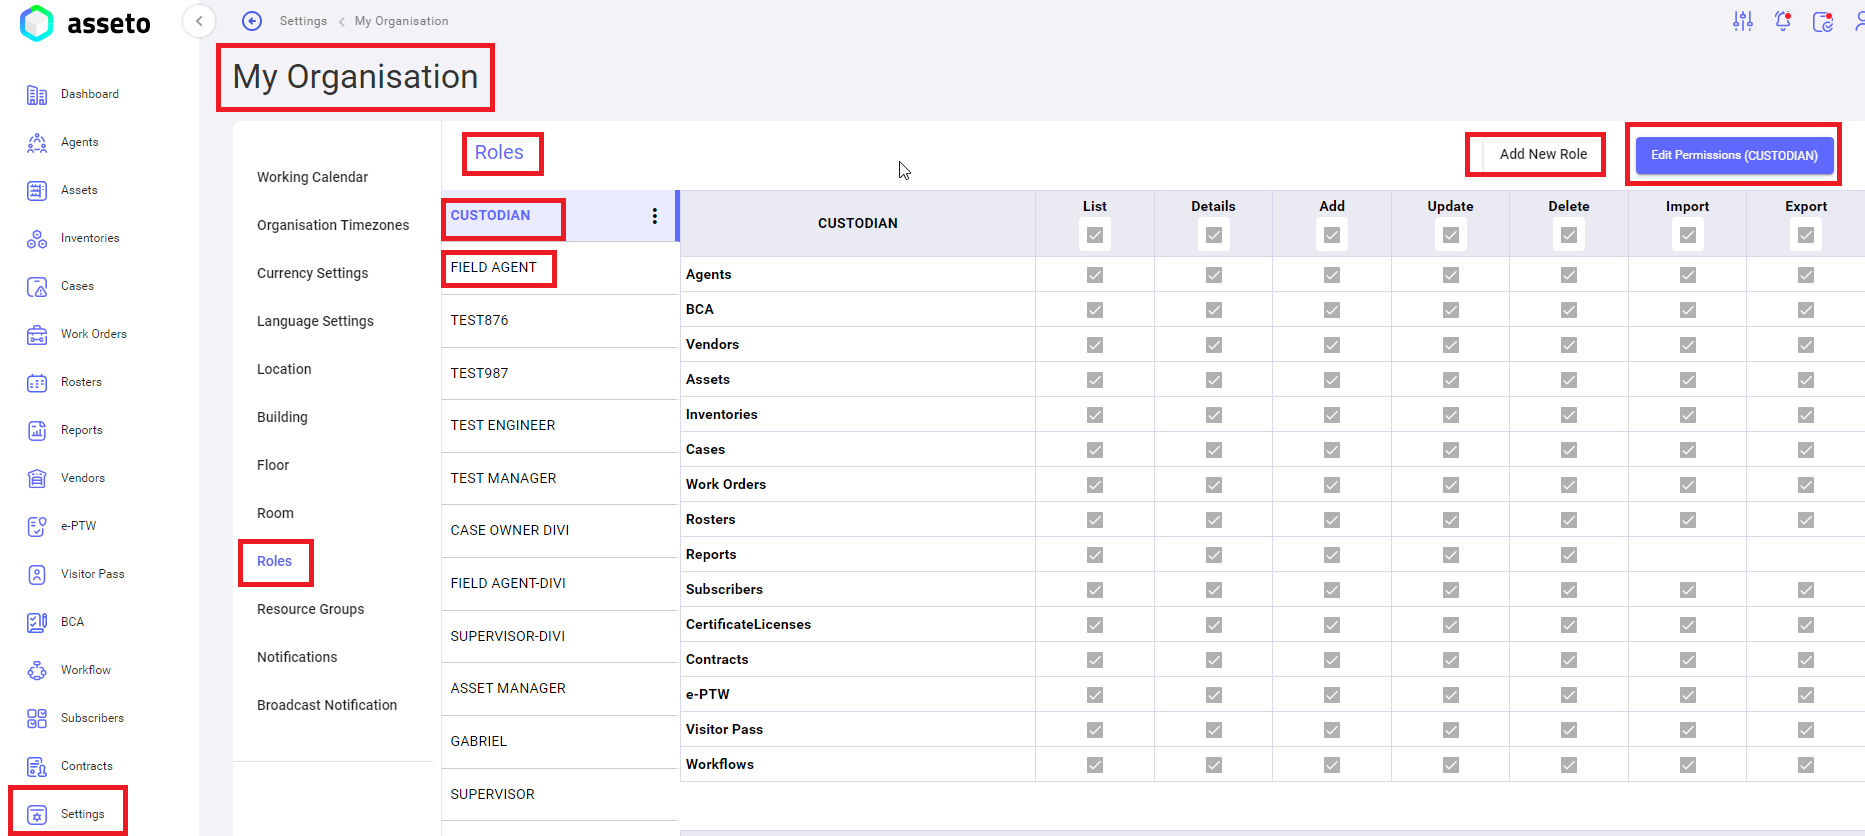
ii. Settings -> My Organization -> Roles:
Here you can create a new role for users onboarding, which we can use in various modules like agents, assets creation.
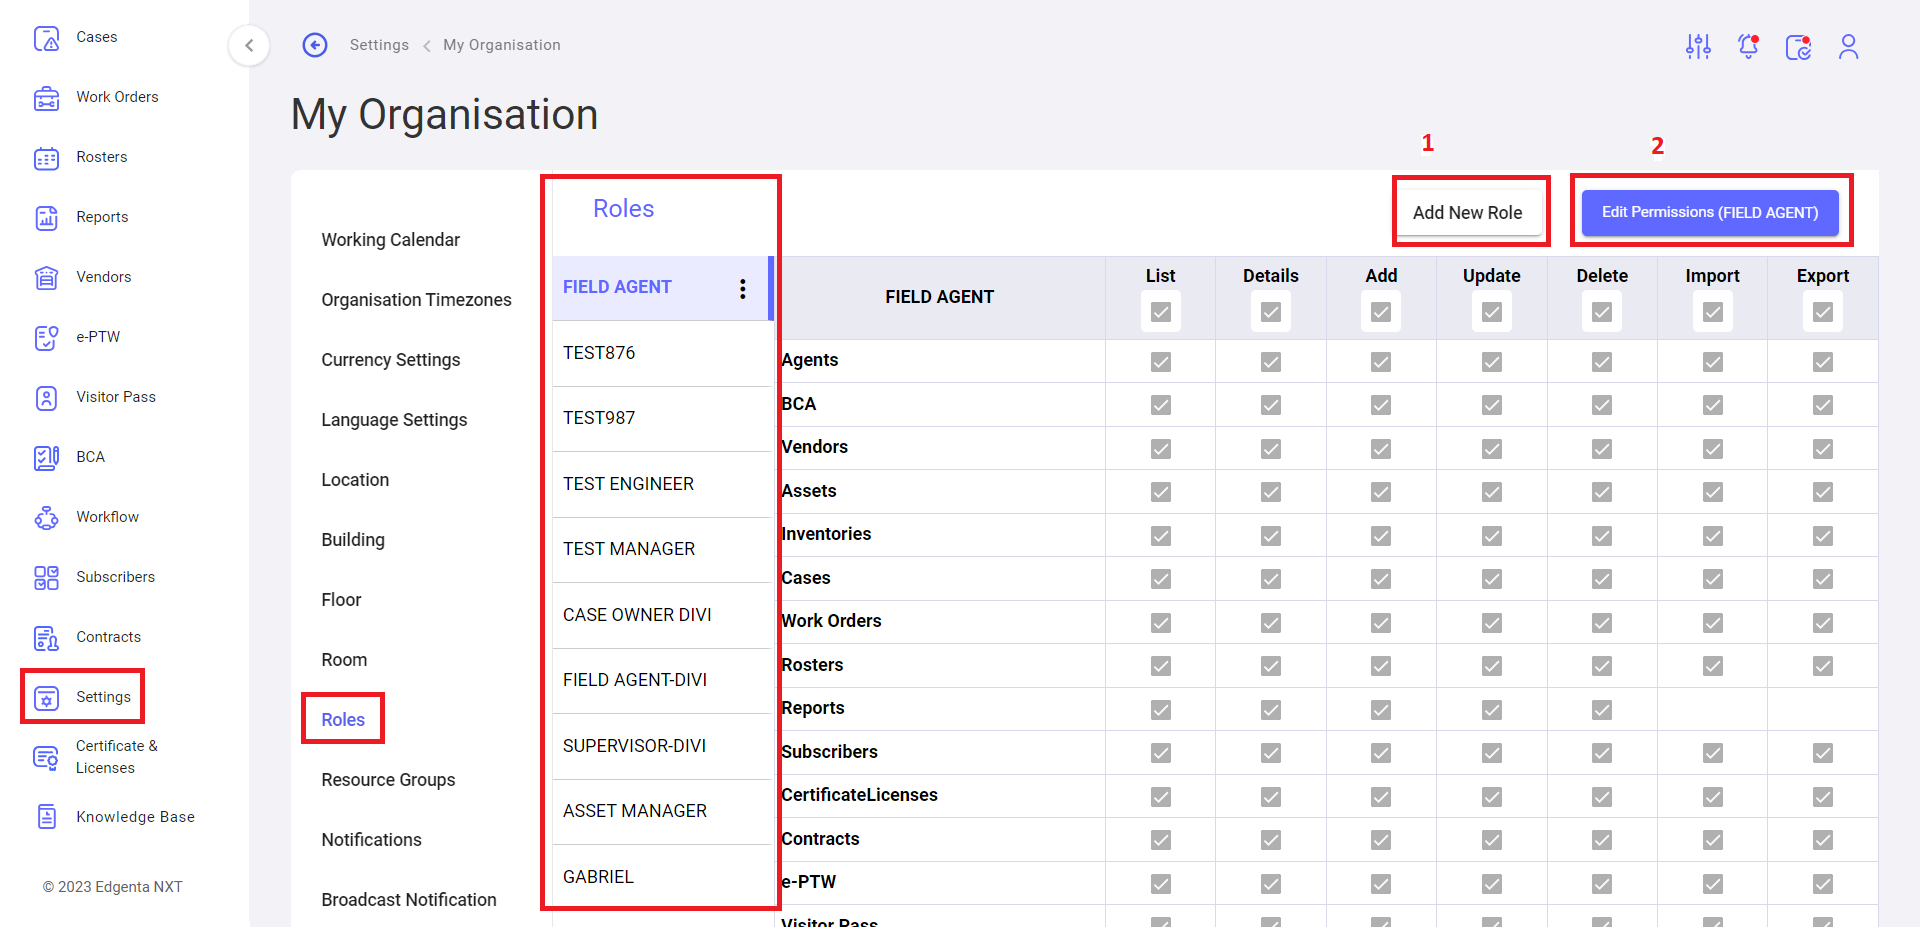
2. Permissions:Permissions: You can give permissions to role, click on edit permissions button select check boxes to give permissions for selected role which is created earlier as shown by below screenshot.
Settings -> My Organization -> Resource Groups:
You can create new resource group by clicking on the add resource group button, which we can use in various modules like agents and assets creation.
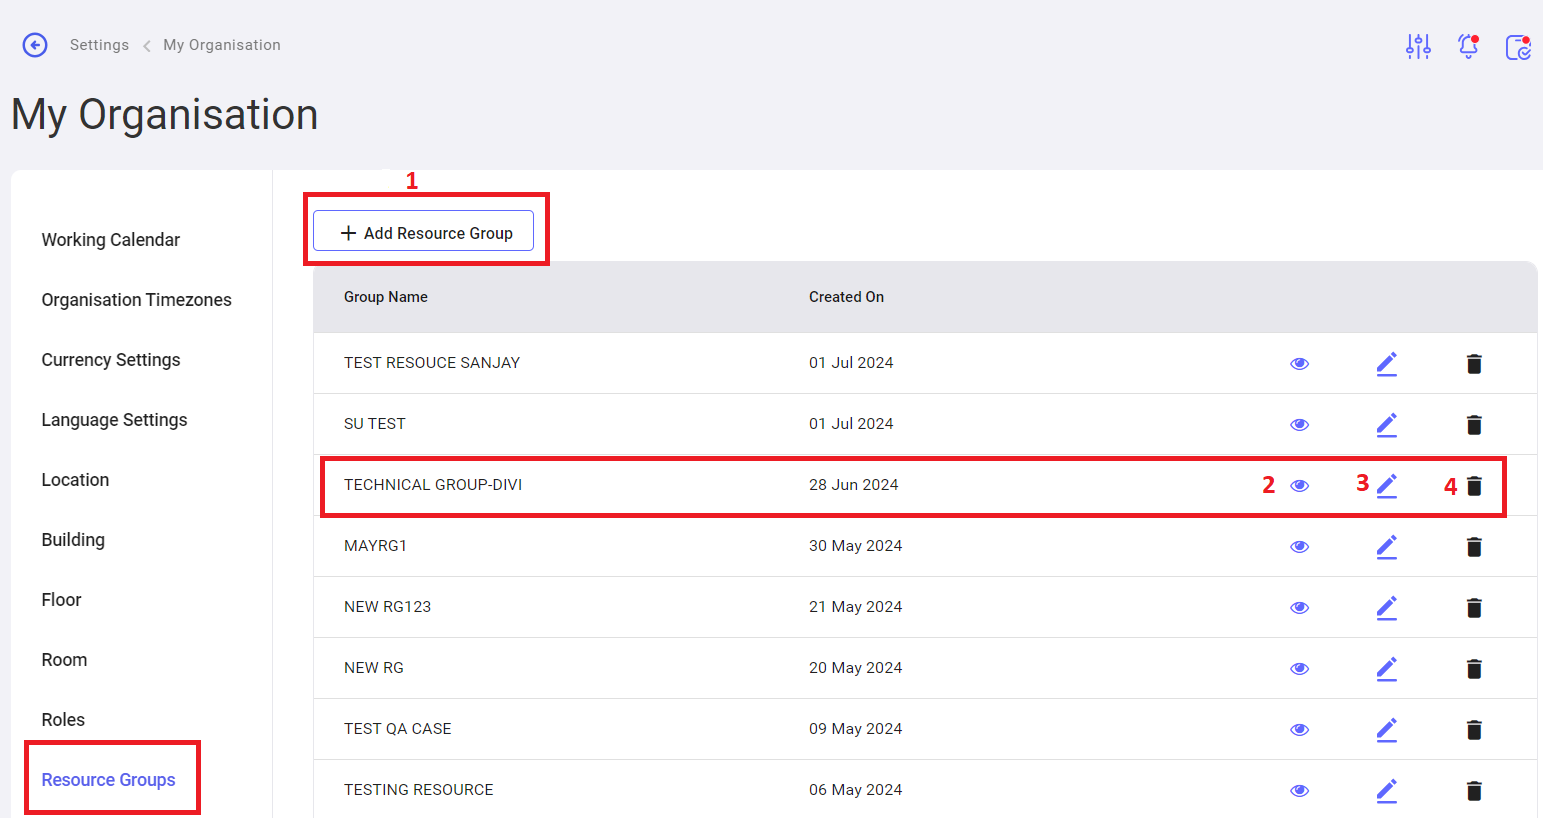
1. Create Resource Group: When you click on “add resource group” button following page will be displayed, fill the all-mandatory fields then only save button will be enabled, click on save button to save the resource group.

2. View Resource Group: Here you can view the selected resource group which was created earlier.
3. Edit Resource Group: Here you can edit the selected resource group which was created earlier.
4. Delete Resource Group:Group: Here you can delete the selected resource group which was created earlier.
iii. Left menu -> Agents -> Create Agent with Supervisor Role:
Go to vendor module and create new vendor (to select vendor form dropdown while creating new agent/asset) fill the mandatory and non-mandatory fields to save the vendor details.
Note: For more details, please review 9. Vendor module 9.2. Pre-requisites for vendor creation and 9.3. New Vendor.