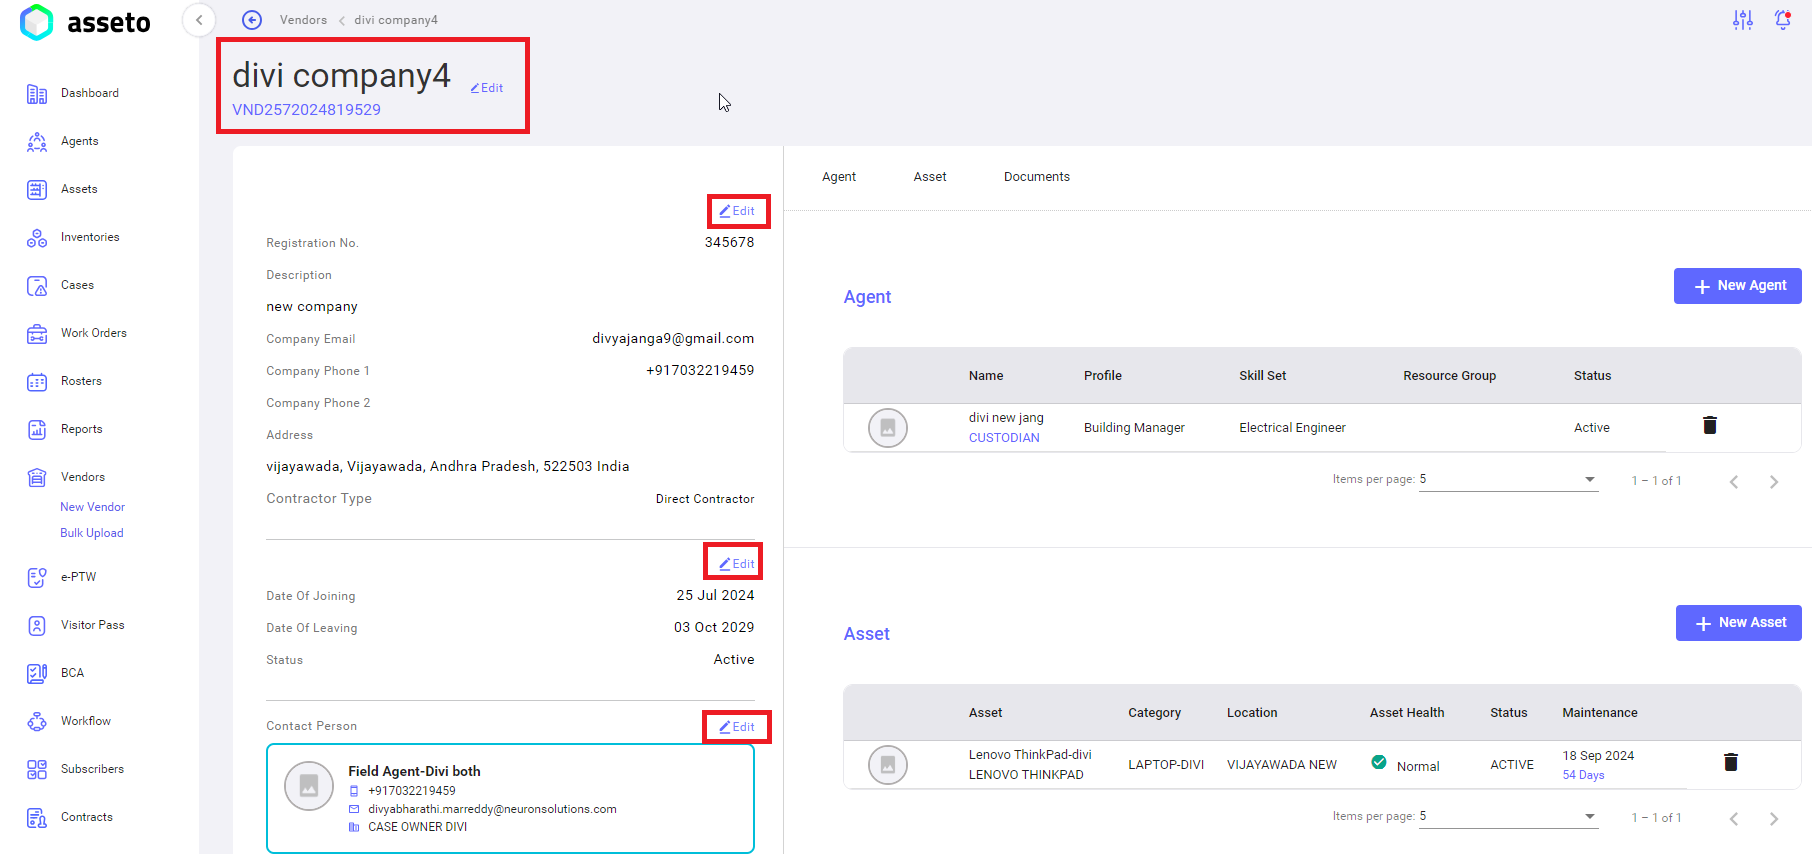
# 9.5. Vendor Edit
In vendor detail’s view page, we have an option to edit and update the vendor details by clicking on edit icon (available nearby vendor name top left side of vendor view page).
And we can edit individual sections vendor info, contact person, skillset….by clicking on respective edit icons.
[](http://ec2-3-7-68-25.ap-south-1.compute.amazonaws.com/uploads/images/gallery/2024-08/vendor-edit1.png)
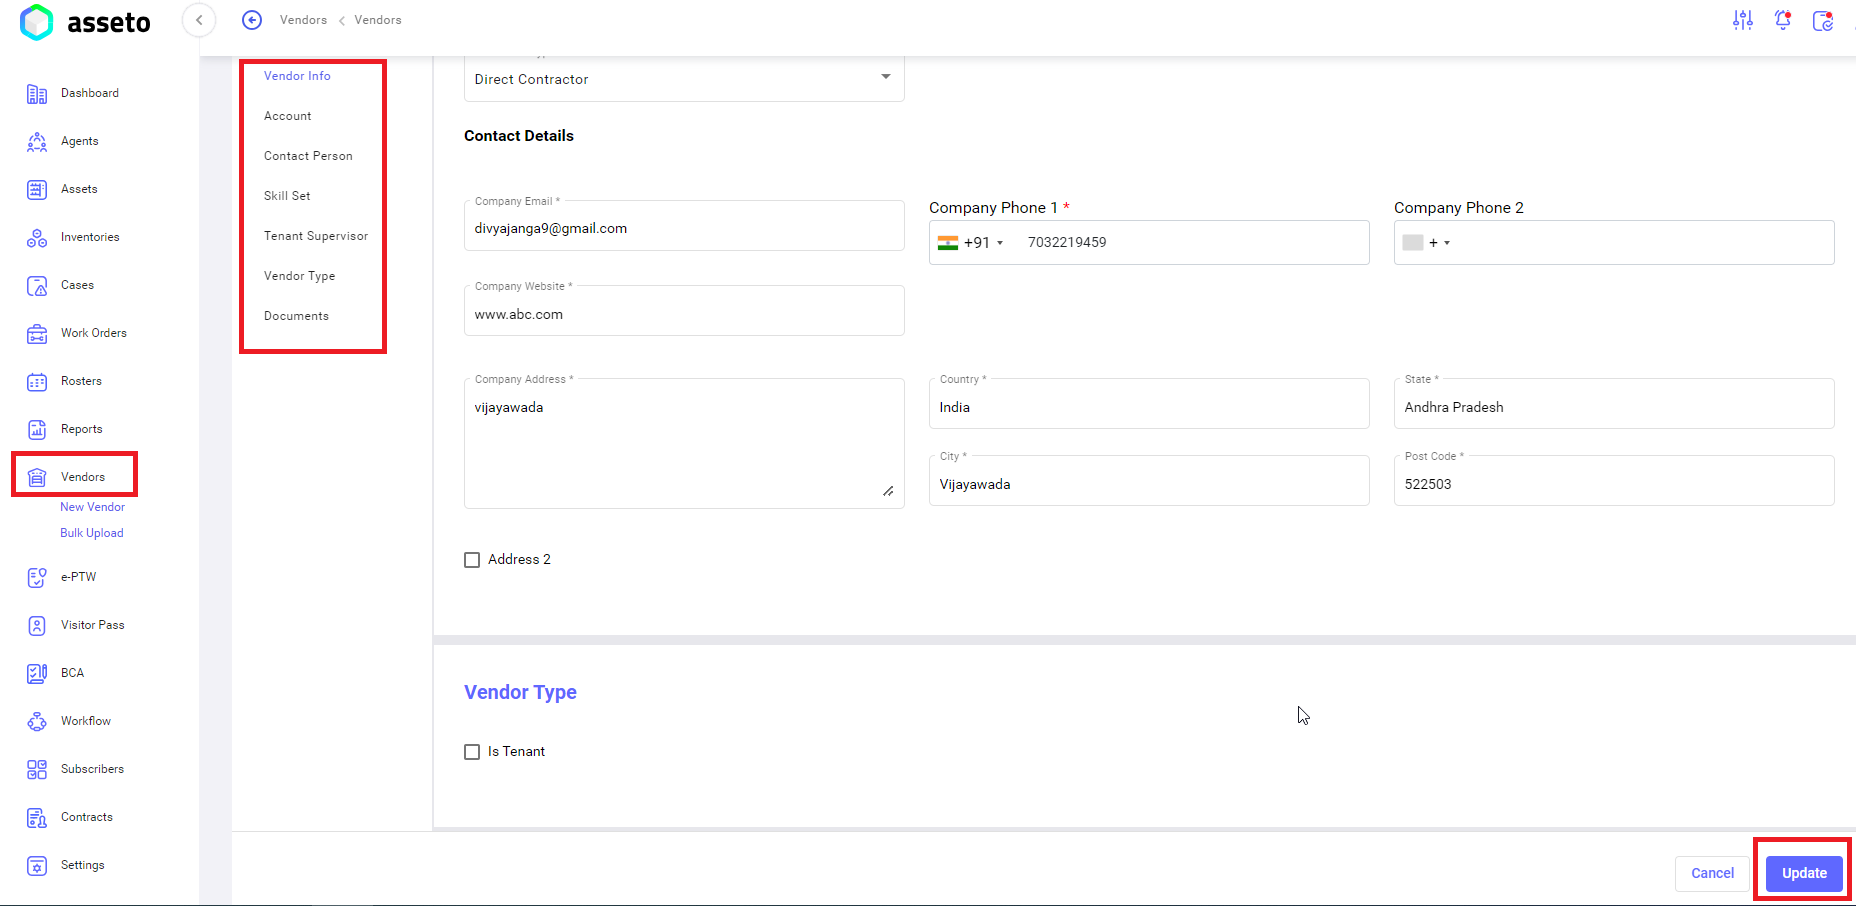
When you click on the edit icon, the system will navigate to vendor edit page.
[](http://ec2-3-7-68-25.ap-south-1.compute.amazonaws.com/uploads/images/gallery/2024-08/vendor-edit2.png)
Here users can edit/update the vendor details.
[](http://ec2-3-7-68-25.ap-south-1.compute.amazonaws.com/uploads/images/gallery/2024-08/vendor-edit3.png)
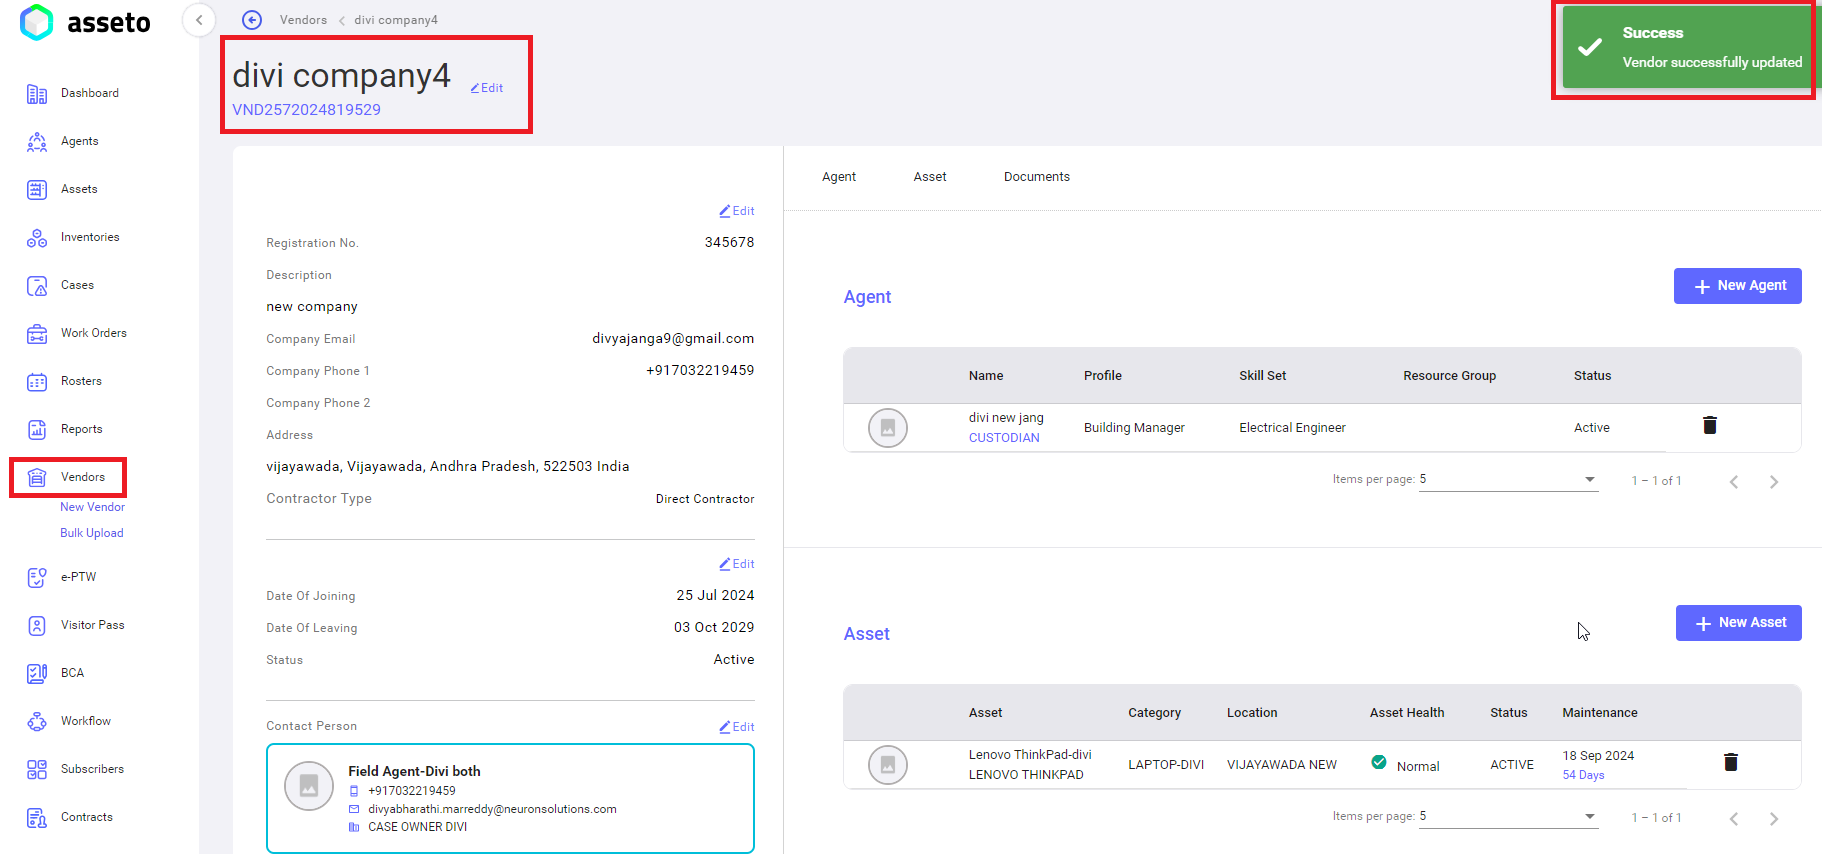
Edit the data and click on ‘update’ button at the bottom of the page.
System will navigate to vendor detail view page and “vendor successfully updated” confirmation message will be displayed.
[](http://ec2-3-7-68-25.ap-south-1.compute.amazonaws.com/uploads/images/gallery/2024-08/vendor-edit4.png)