# 9.3. New Vendor
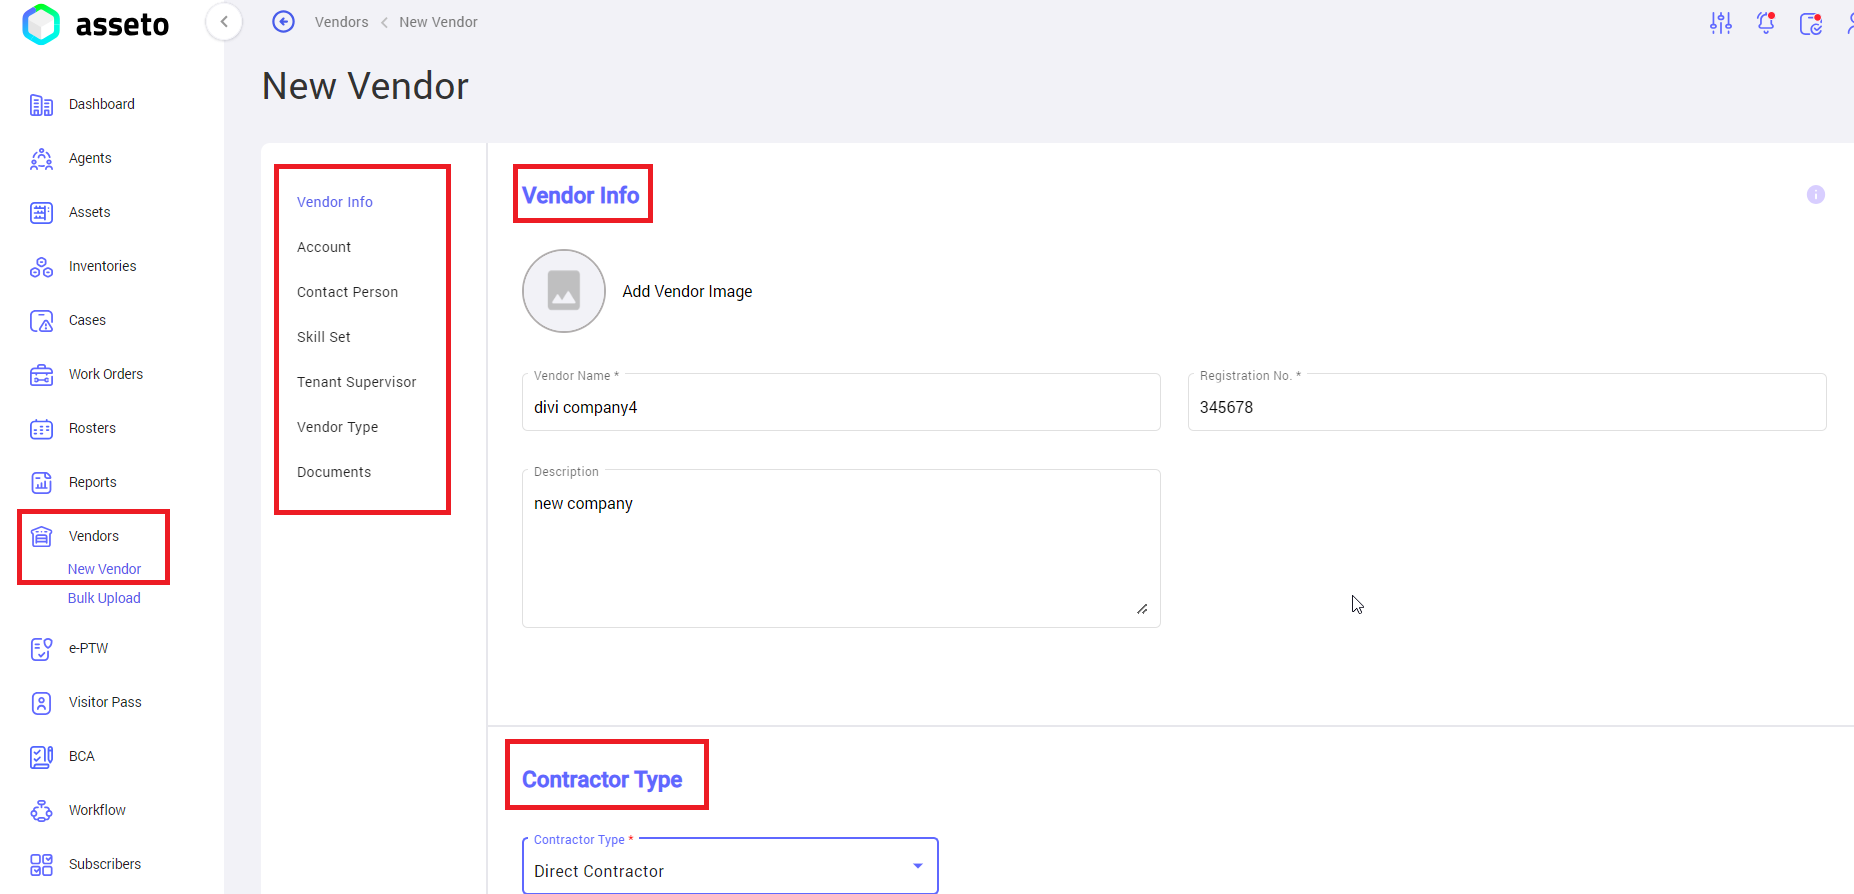
To onboard the new vendor, we can use this module.
[](http://ec2-3-7-68-25.ap-south-1.compute.amazonaws.com/uploads/images/gallery/2024-08/kKLvendor-new1.png)
**Contractor Type:** Vendors are classified as either direct contractors or subcontractors (with the parent contractor being the direct contractor). When a user selects a subcontractor, a list of direct contractors will be displayed in the parent contractor dropdown for selection.
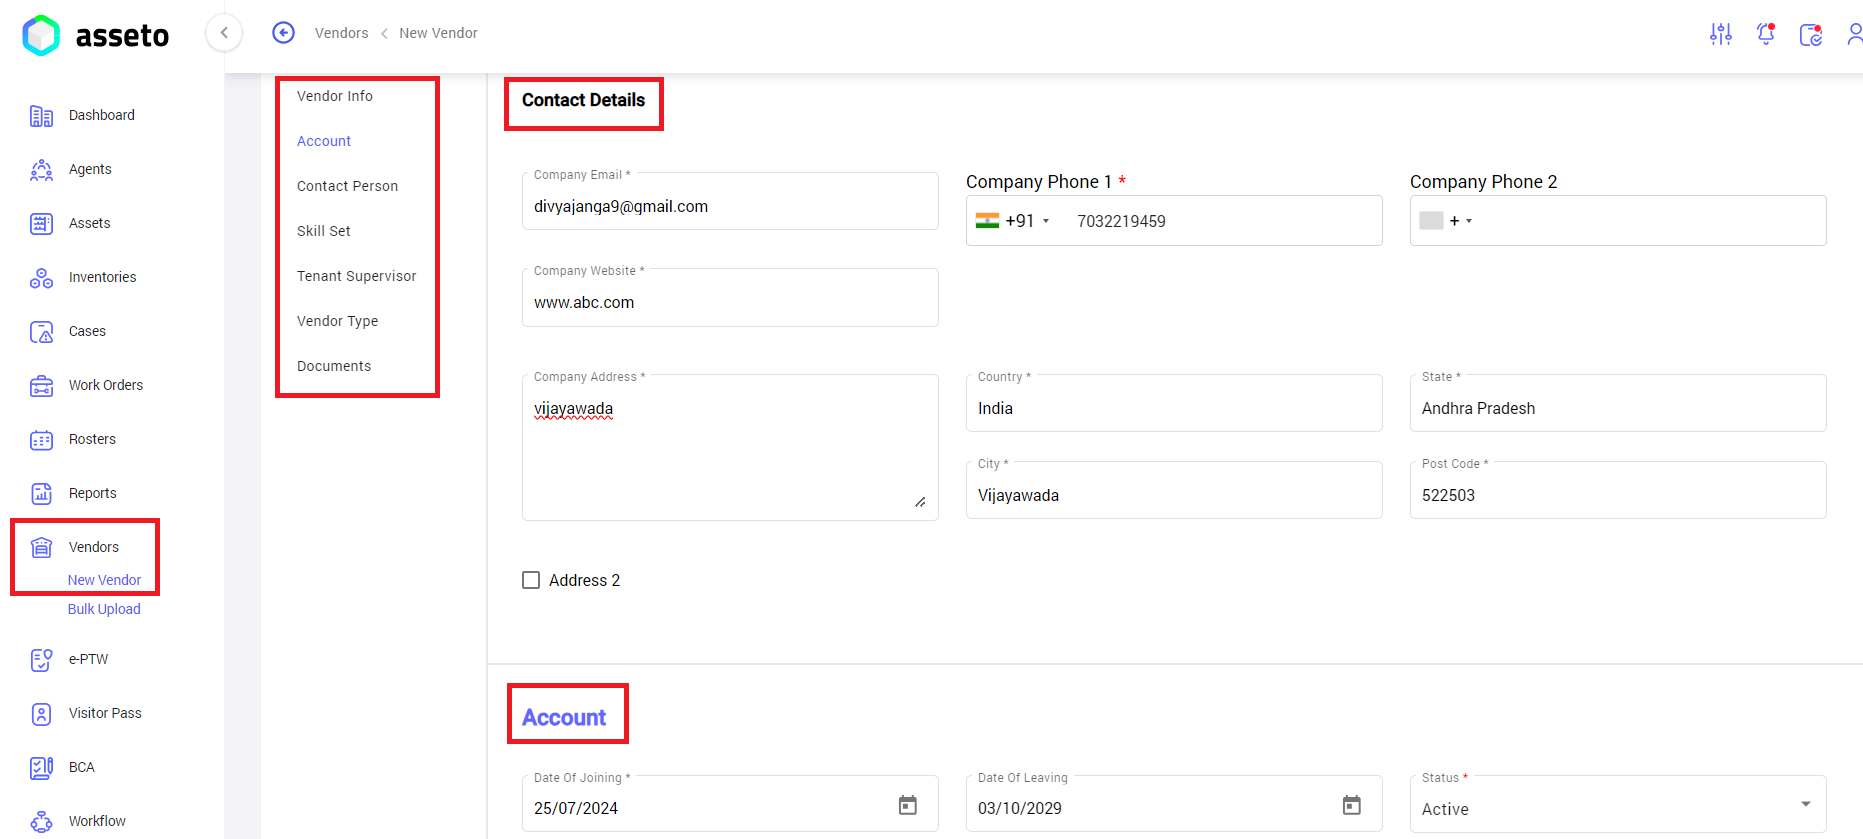
Fill the all-mandatory fields.
[](http://ec2-3-7-68-25.ap-south-1.compute.amazonaws.com/uploads/images/gallery/2024-08/v3Wvendor-new2.png)
**Contact Details**: User can add contact person by selecting from the (existing agent in this application) list. This person will serve as the contact for the vendor company.
[](http://ec2-3-7-68-25.ap-south-1.compute.amazonaws.com/uploads/images/gallery/2024-08/vendor-new5.png)
Fill the agent’s name in the search box and select relevant agent name from dropdown (existing user/agent in this application) then click on assign button.
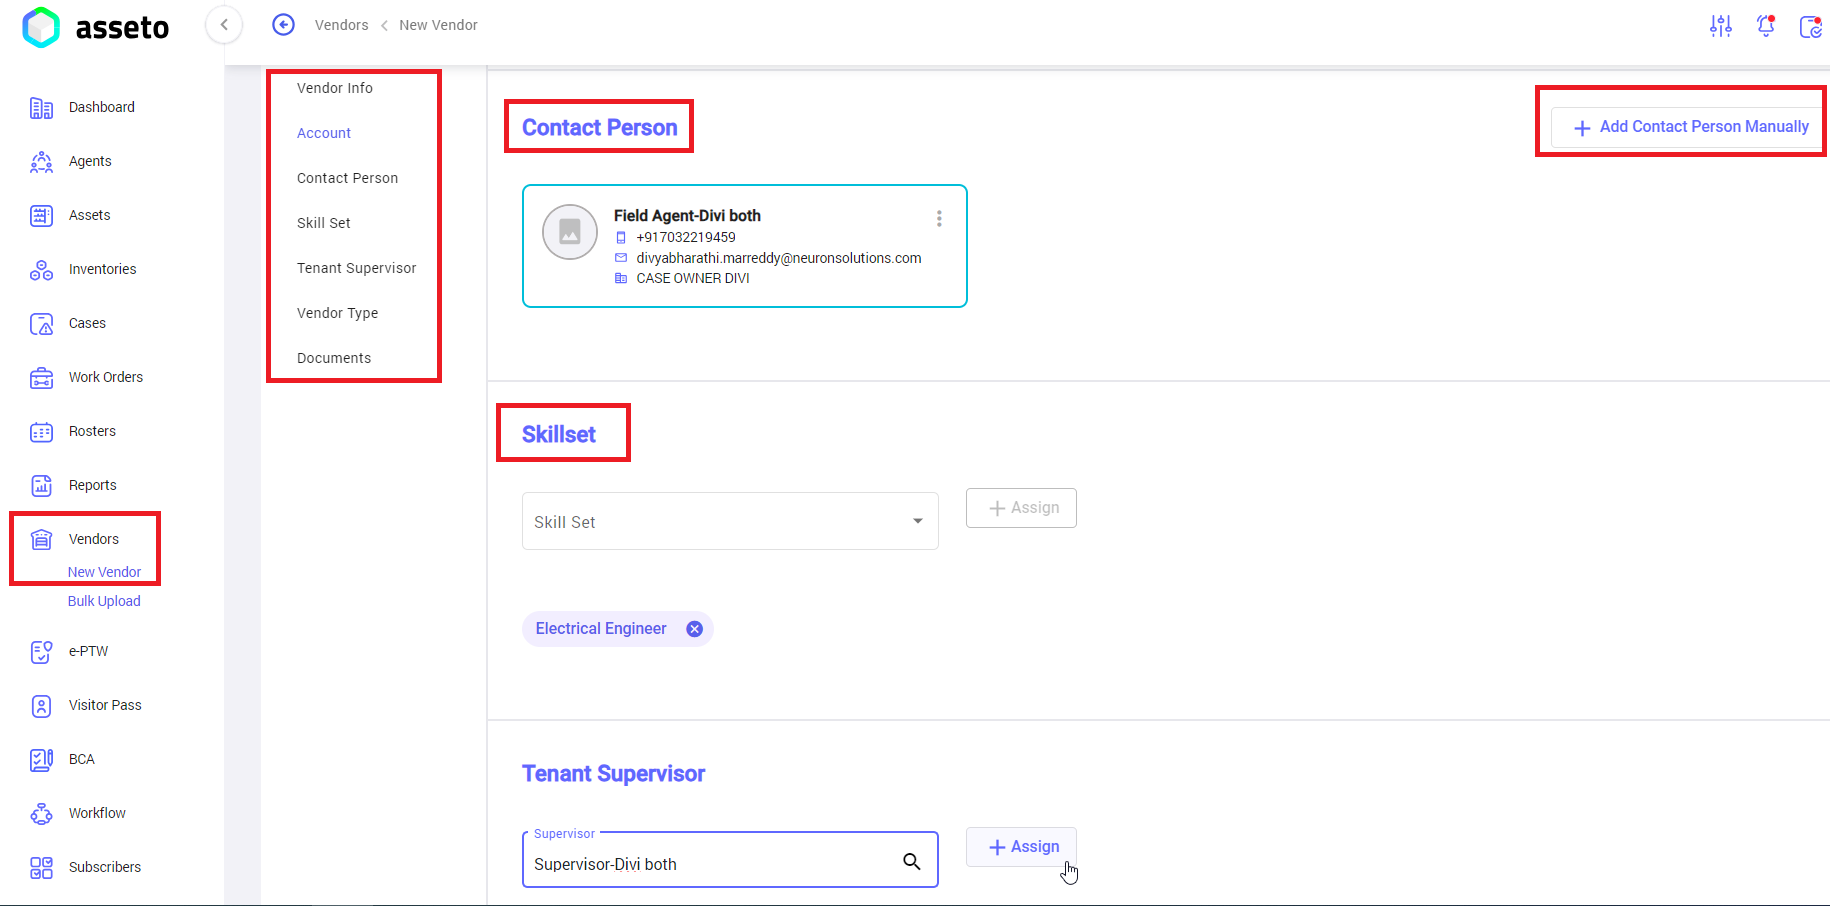
Your contact person details will be added on contact person filed as shown by following image.
[](http://ec2-3-7-68-25.ap-south-1.compute.amazonaws.com/uploads/images/gallery/2024-08/vendor-new3.png)
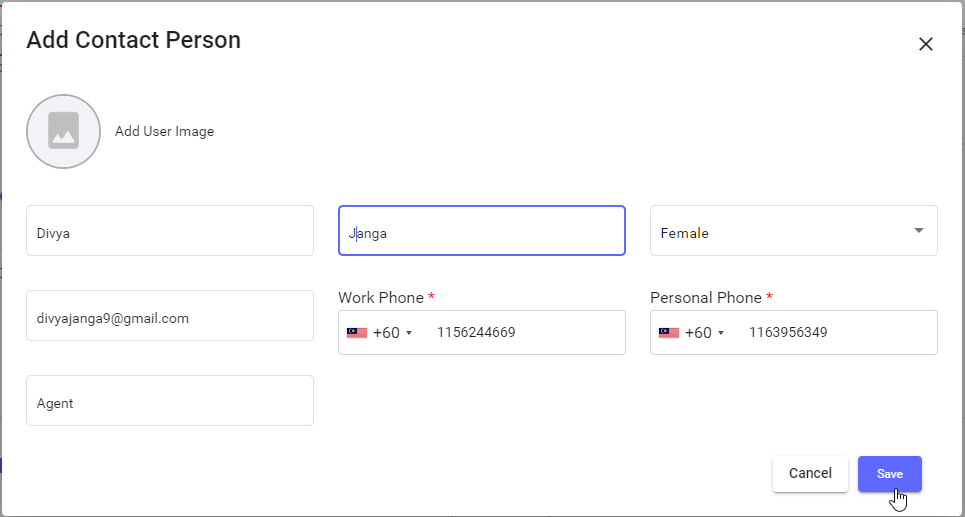
User can add “contact person” manually by clicking on “Add contact person manually” button if that person doesn’t exist in this this asseto application. the following page will be displayed.
[](http://ec2-3-7-68-25.ap-south-1.compute.amazonaws.com/uploads/images/gallery/2024-08/vendor-new4.png)
Add contact person details and click on save, details will be added in contact person field as shown by below screenshot.
[](http://ec2-3-7-68-25.ap-south-1.compute.amazonaws.com/uploads/images/gallery/2024-08/vendor-new6.png)
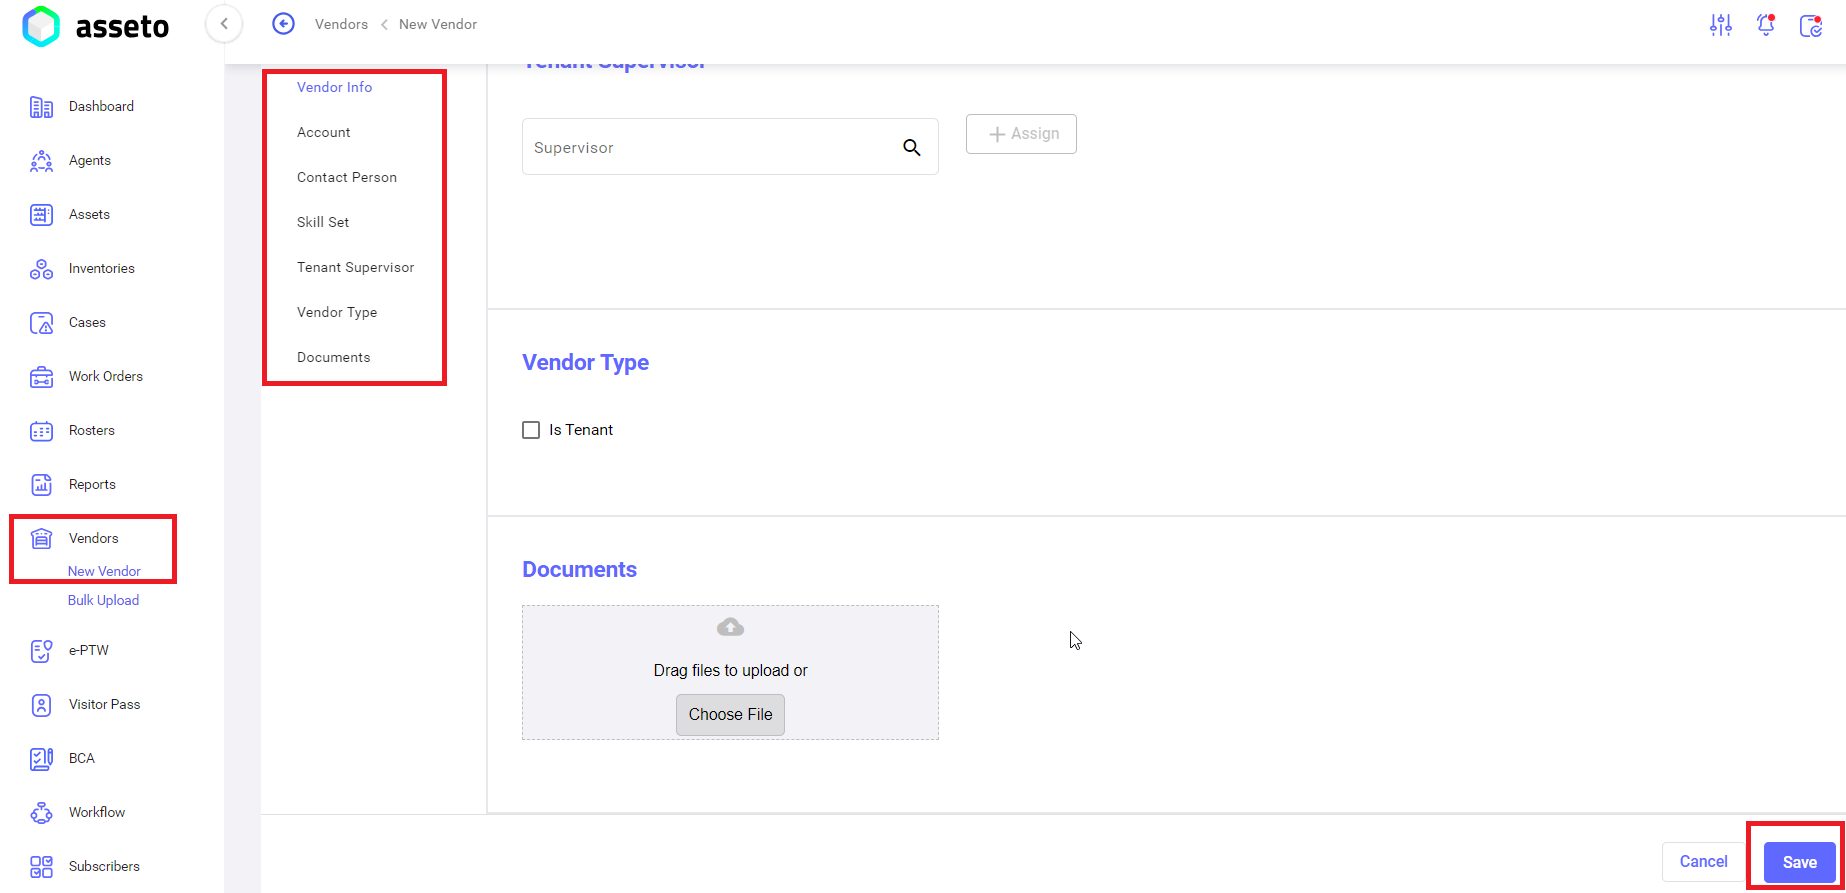
**Tenant Supervisor**: The person responsible for managing and overseeing this vendor. Select from the search bar and click on assign button to add.
**Documents field**: Any documents related to this vendor user can add here.
Click on “save” button.
[](http://ec2-3-7-68-25.ap-south-1.compute.amazonaws.com/uploads/images/gallery/2024-08/vendor-new7.png)
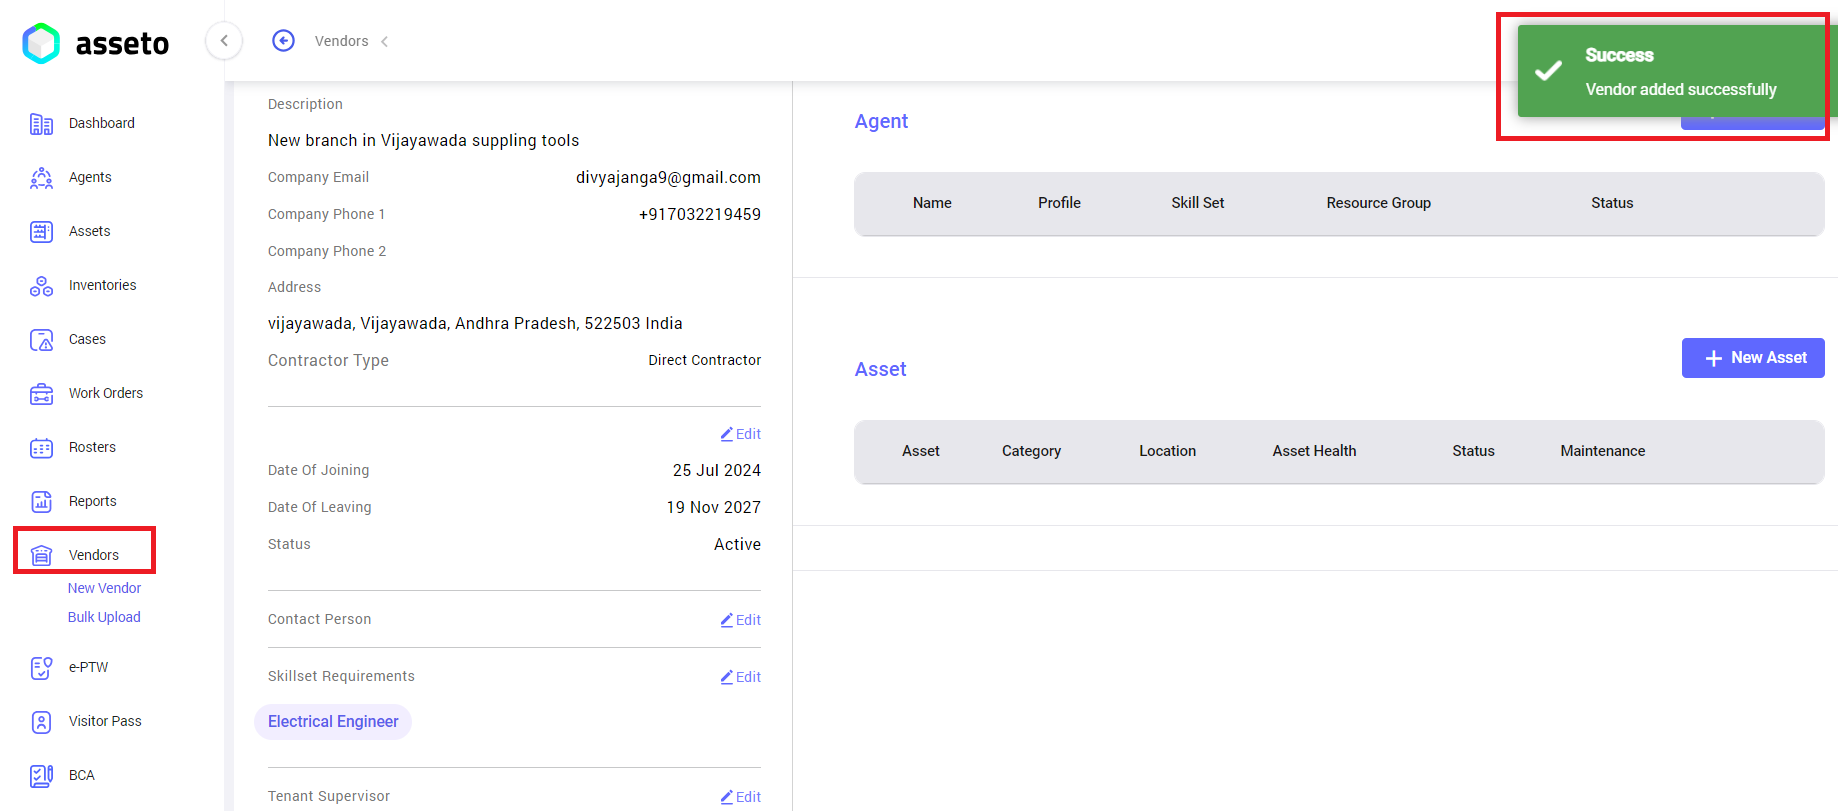
Confirmation message will be display “Vendor added successfully” and system navigate to vendor detail view page as shown by following screenshot.
[](http://ec2-3-7-68-25.ap-south-1.compute.amazonaws.com/uploads/images/gallery/2024-08/vendor-new8.png)