# 4.3. New Inventory
**New inventory creation process:** Using this feature, the user can onboard or register new inventories into the system.
**Left Menu -> Inventory -> New Inventory**
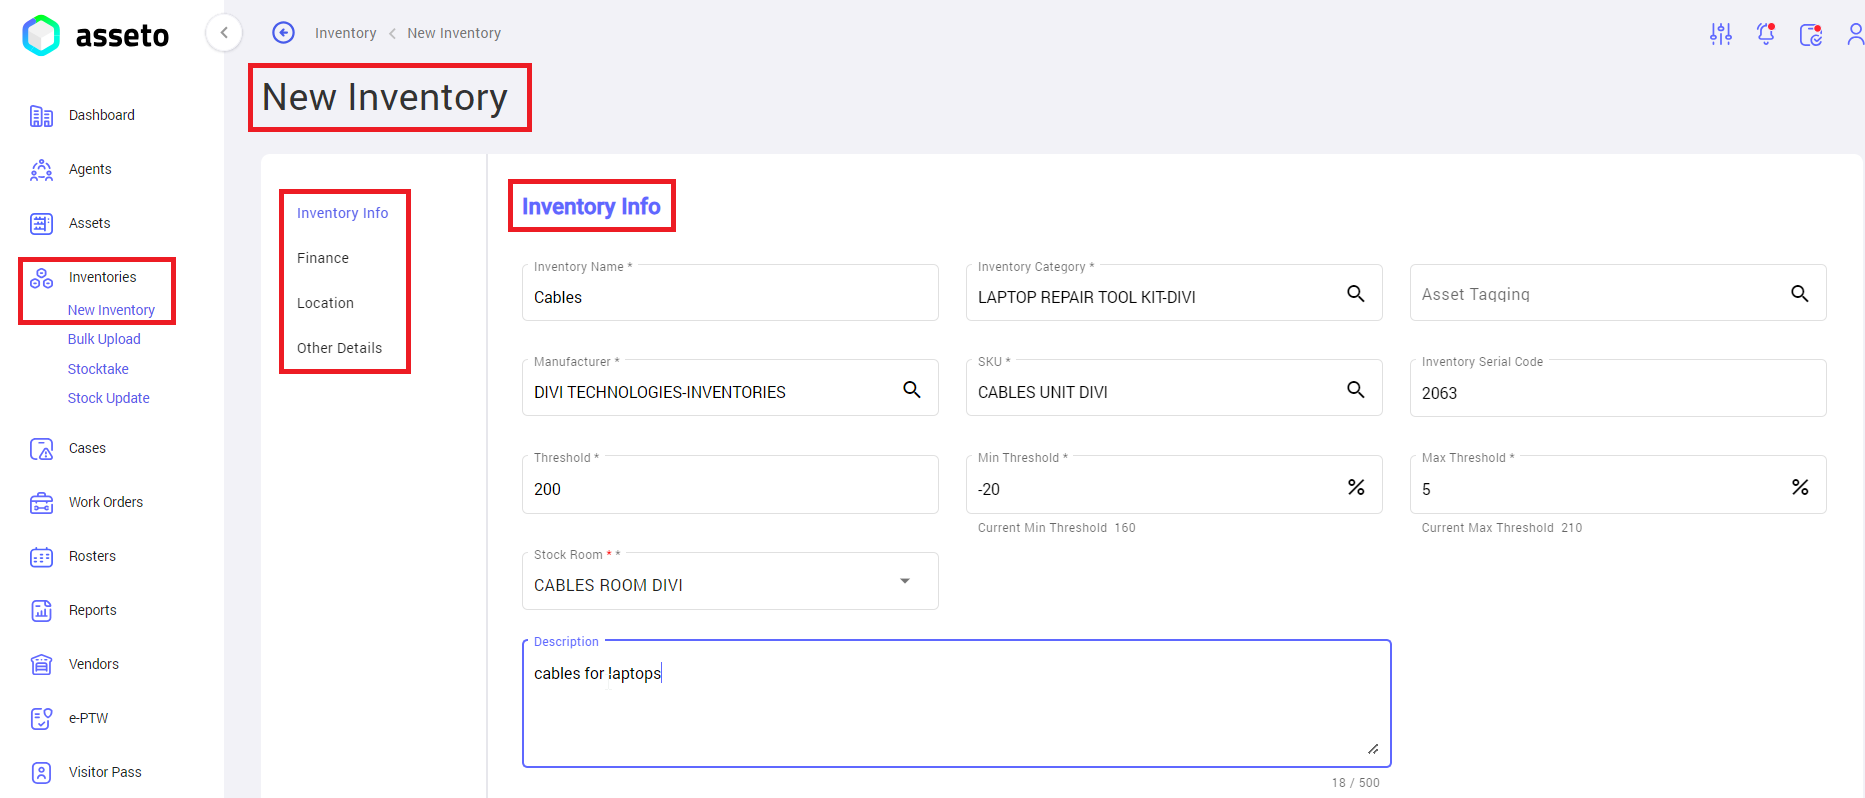
A list of sections under the new inventory page will be available, by clicking on the specific section will be navigating to the respective section.
[](https://kb.asseto.ai/uploads/images/gallery/2024-09/new-inventory1.png)
Fill the mandatory fields.
**Note**: Every inventory has individual SKU and Stock Room, for every inventory type we must create separate SKU and Stock Room in settings.
[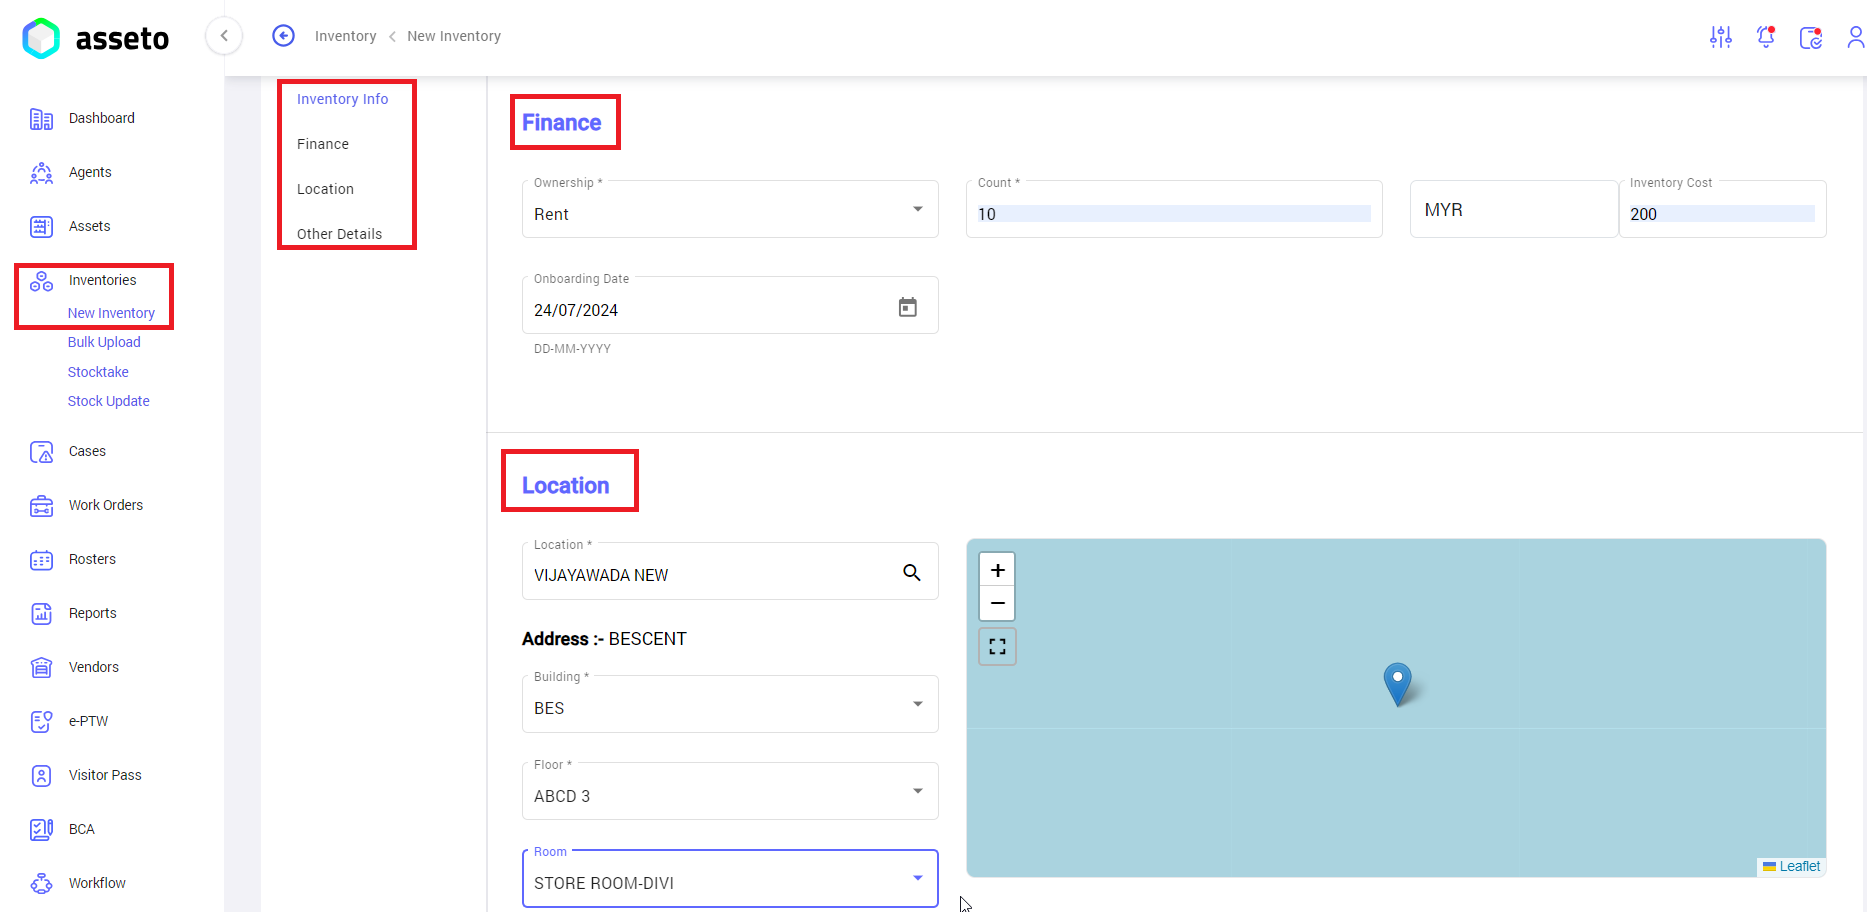](https://kb.asseto.ai/uploads/images/gallery/2024-09/new-inventory2.png)
Fill all mandatory fields then only “save” button will be enabled.
[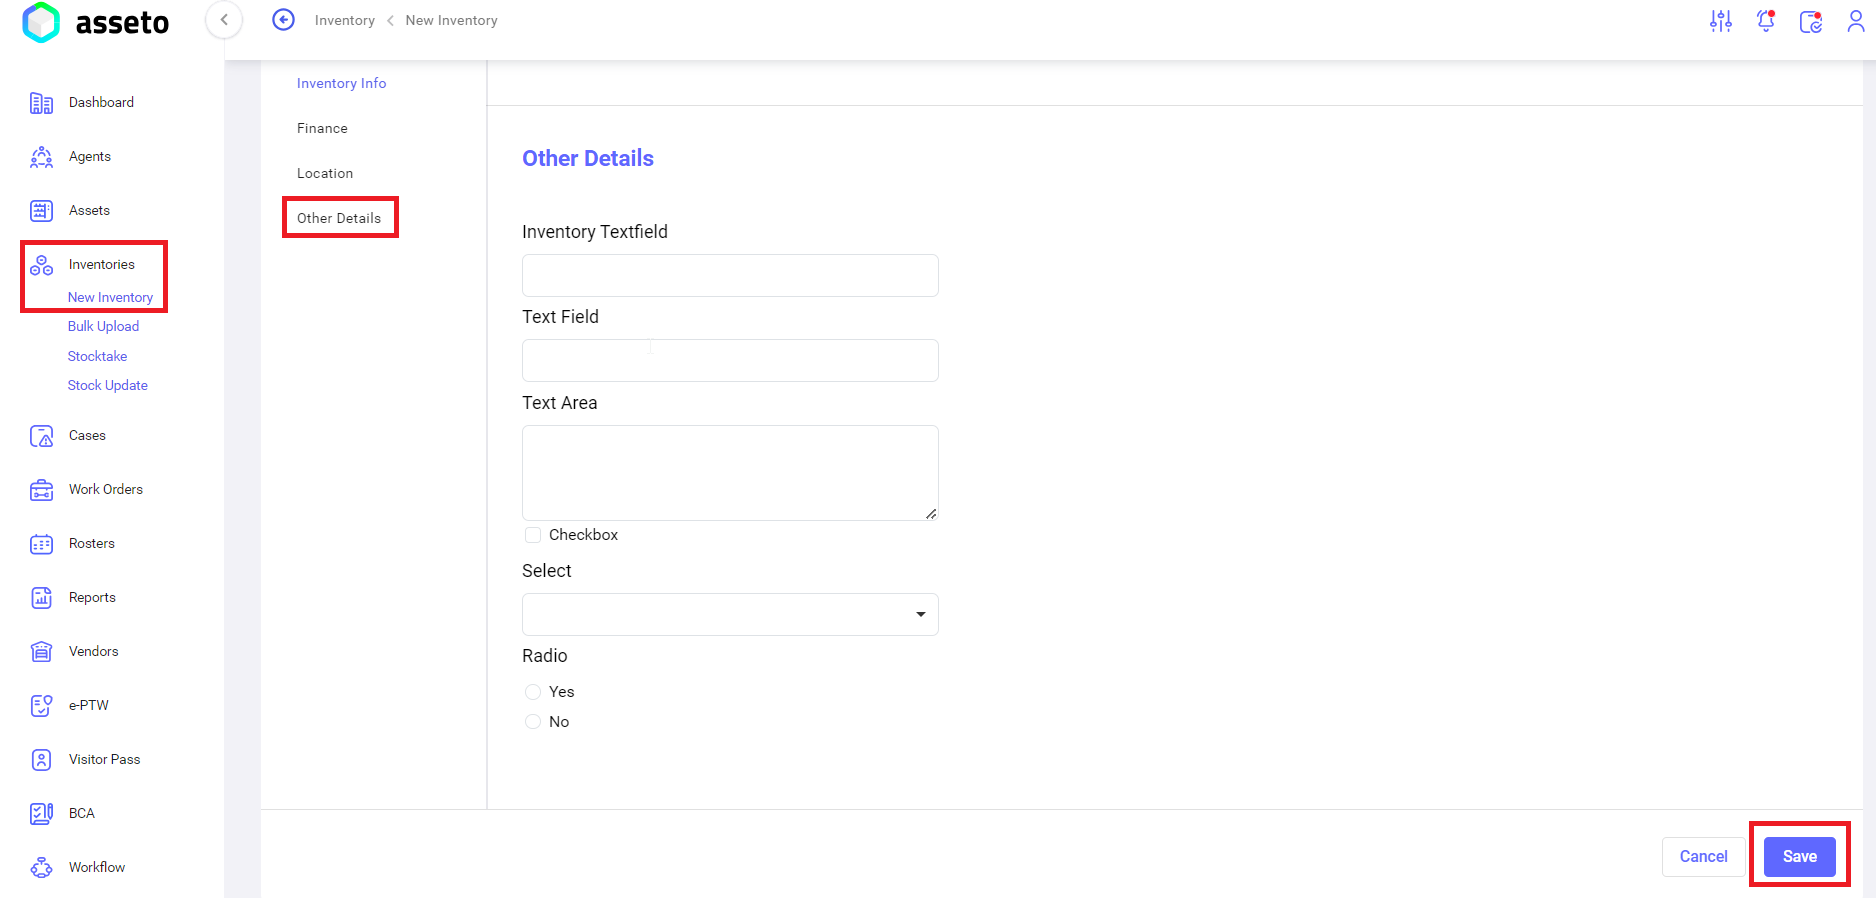](https://kb.asseto.ai/uploads/images/gallery/2024-09/new-inventory3.png)
Click on the save button, “Inventory created successfully” confirmation message will be displayed.
[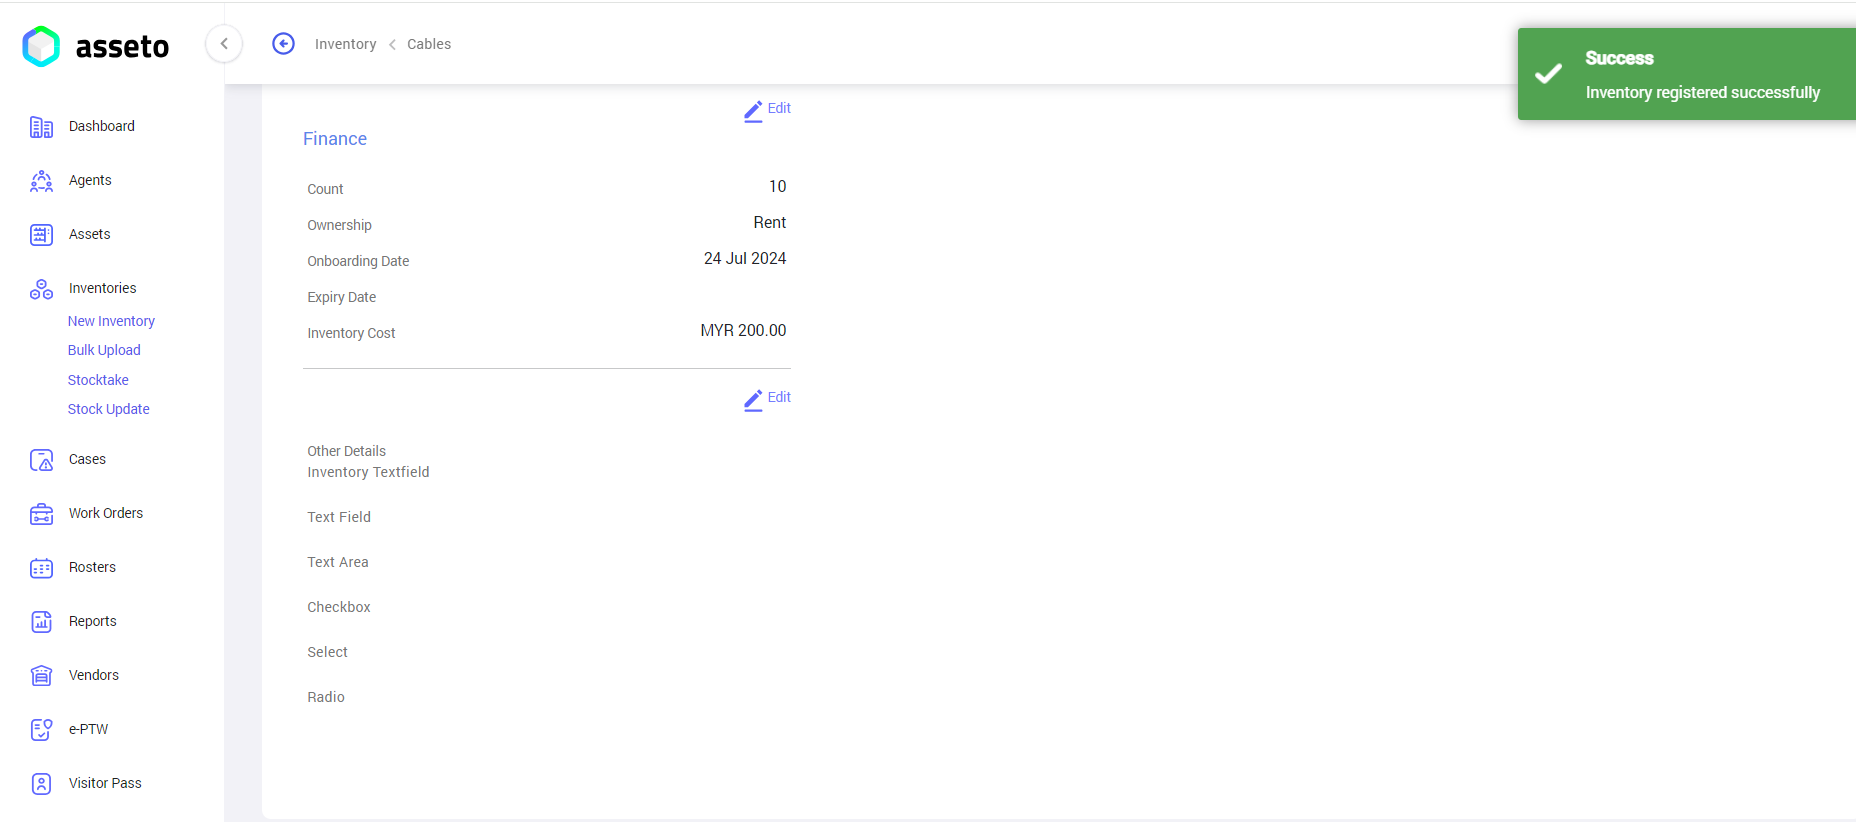](https://kb.asseto.ai/uploads/images/gallery/2024-09/new-inventory-4.png)
Registered inventory will be displayed on the inventory list.
[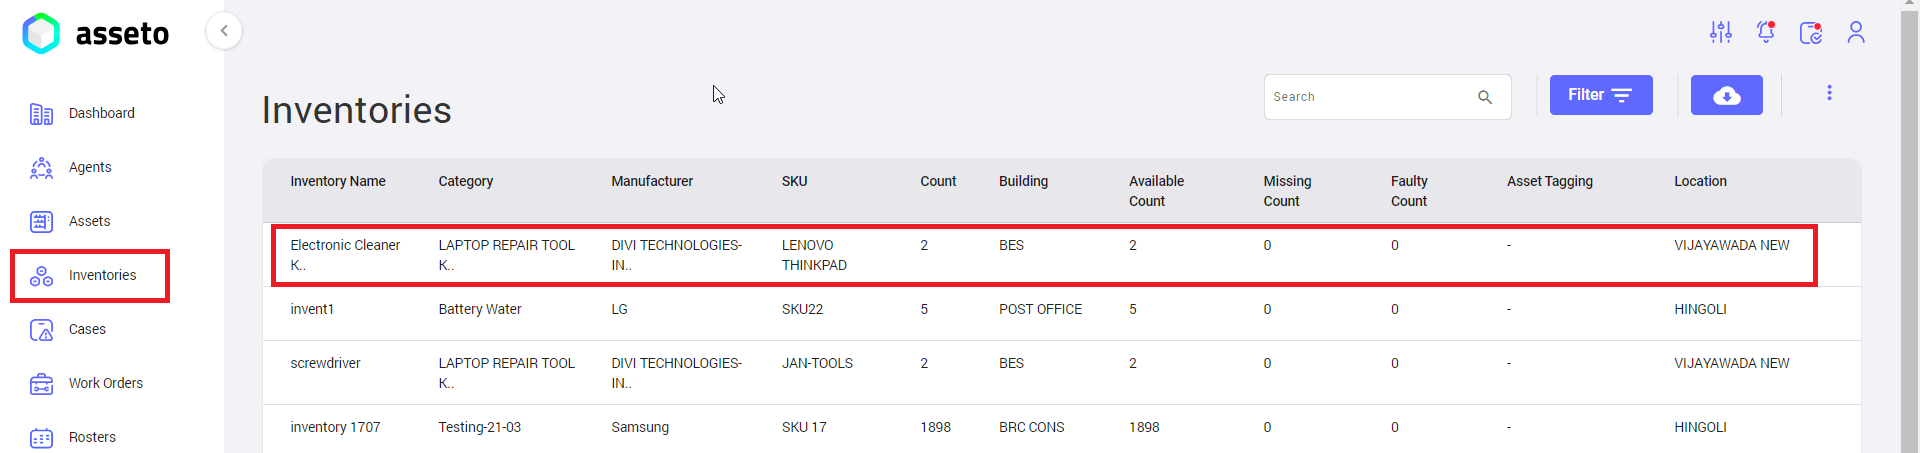](https://kb.asseto.ai/uploads/images/gallery/2024-09/new-inventory4.png)
---