6. Work Orders
1. Overview
Overview:
A Work order serves as a formal document used in various sectors to instruct specific tasks to complete within a specific period. Work Orders provide clarity, accountability, and proper execution of work within an organization.
2. Work Order Dashboard
Work Order Dashboard:
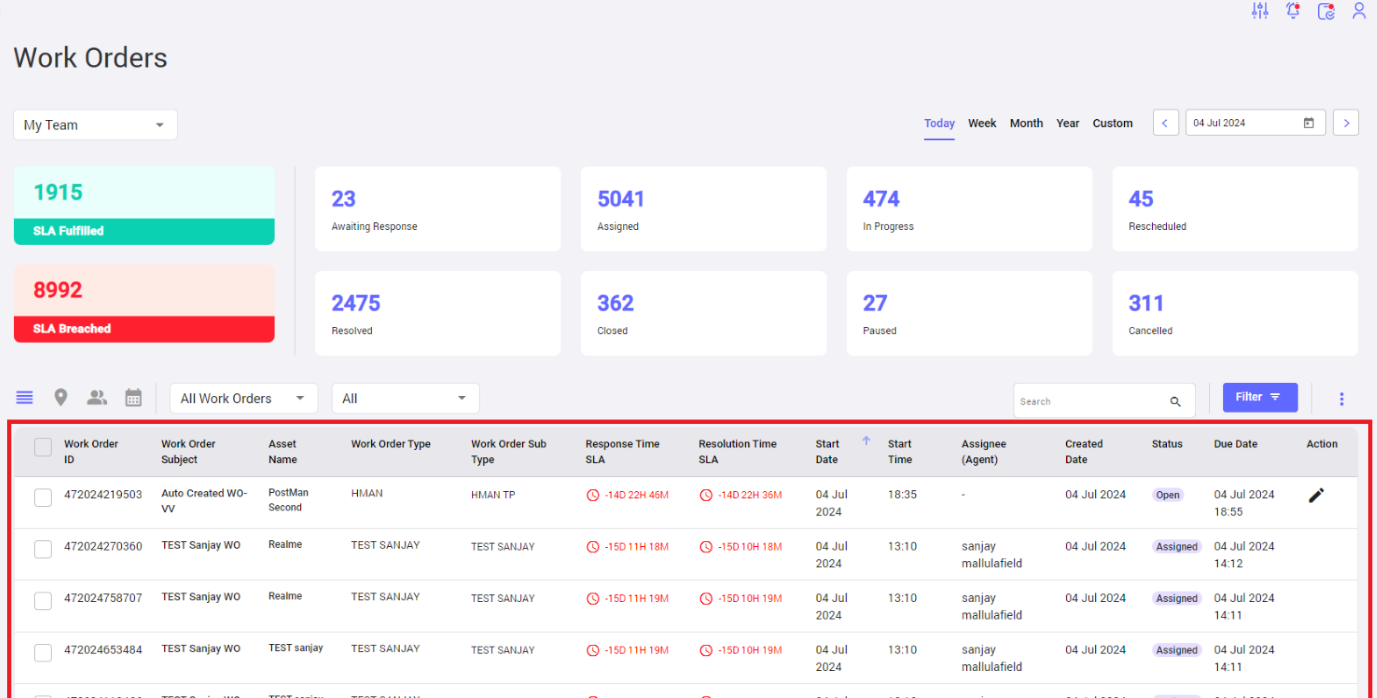
By clicking on the Work Order module from the platform, the Work order list dashboard will appear. The dashboard contains the following details below:

- List of Work orders for Today (Current day) / Week / Month / Year based on the user selection.
- The Date section with Calendar icon: To show the date based on the frequency that the User selects. The frequencies are Today, Week, Month, Year, Custom.
- Different statuses of Work Orders and count against each status of the Work order is displayed.
- 4 lines icon: to show the dynamic table which displays the list of work orders and related information.
- Location icon: which shows the Location.
- User interface icon: To shows the details of Agents and Work order details of the Agents.
- Calendar icon: To show scheduled Work order details.
- Work Order Type drop down: Filter parameters based on different types of Work orders.
- Work Order Status drop down: To filter the Work order by statuses like Active WO, SLA Breached, Closed WO.
- Search: To search specific Work order.
- Filter: To apply filter condition based on different parameters. I.e., Work order, Asset, Location and Others.
- 3 Dots icon: To show additional features. I.e., New schedule, Generate Work order details report, Generate Work order summary report, customize table view.
3. Prerequisites
Prerequisites
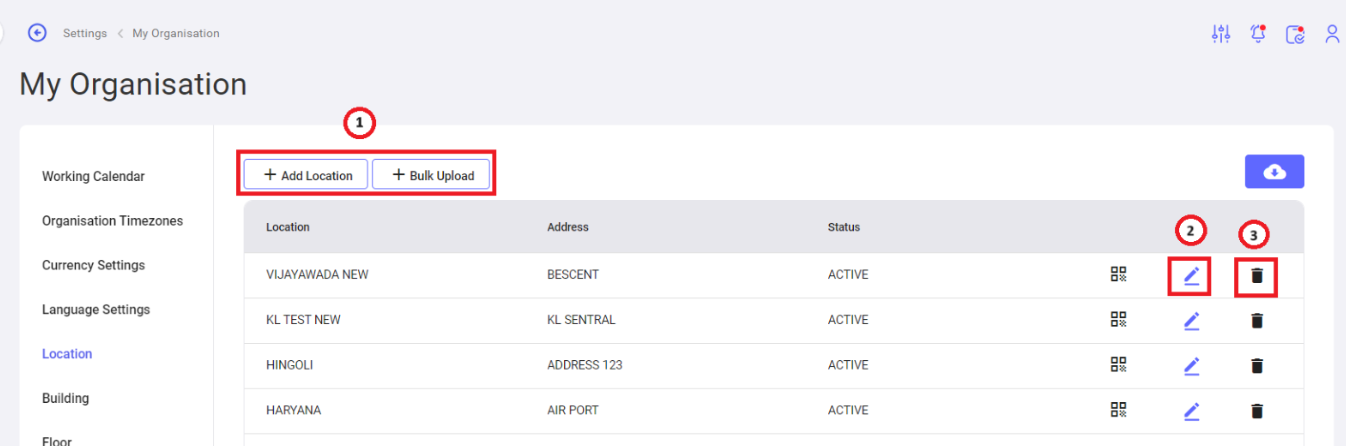
Location Configuration:
It's important to configure Location in the Work Order creation process, for identifying work location and to identify the Agents available to take up the task in the specific location to expediate the task completion.
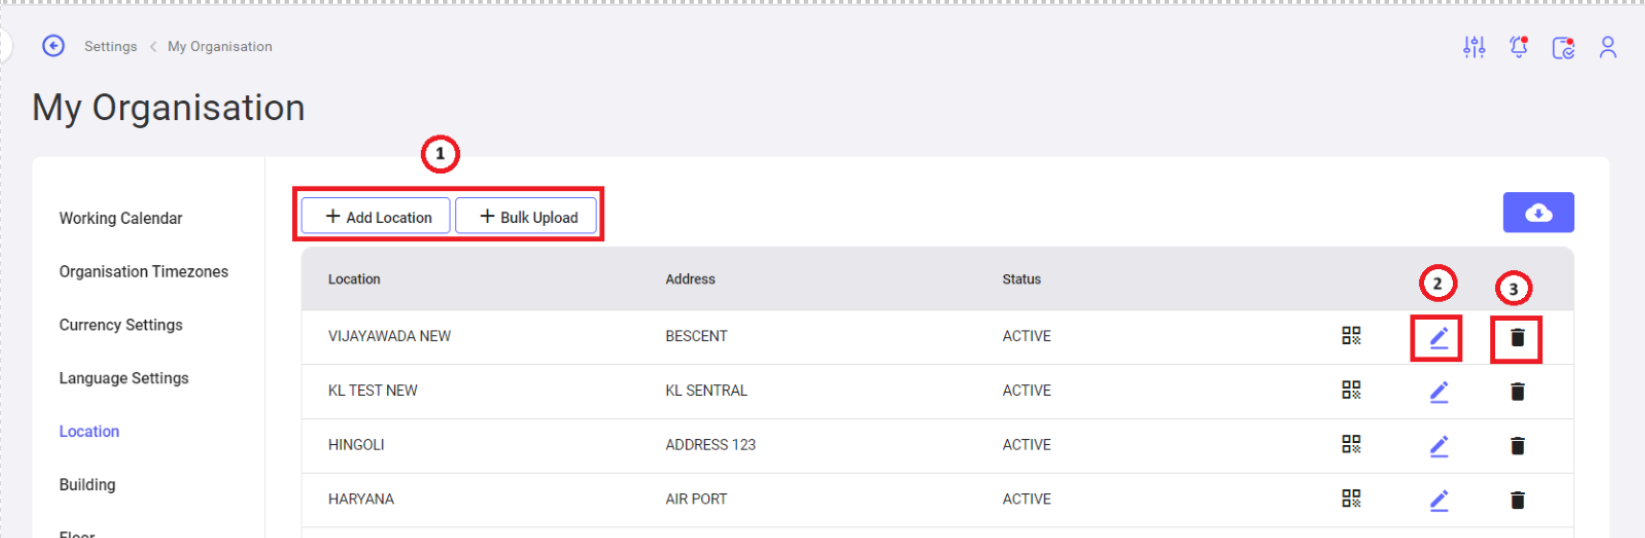
- Add Location and Bulk Upload: These are the 2 options to configure Location in an application. Add location is used to configure one location whereas Bulk upload is used to configure list of location in bulk.
- Edit icon: To edit the existing Location.
- Delete: To delete the Location.
Location based configuration:
Based on the Location, building, floor and room can be configured. Based on the Location that the User selects, building, floor and room fields get auto populated in Work Order creation page.
Work Order - Type configuration:
Work Order type configuration is essential to other configurations, such as SLA, Task Template, Auto assignment rule, etc.
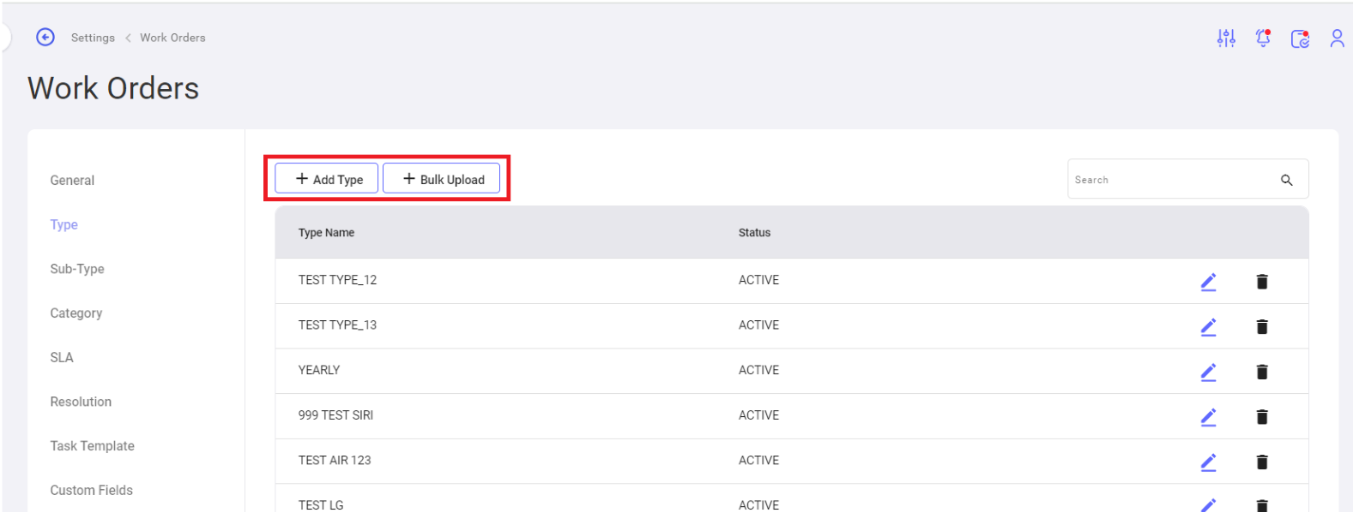
- Add Type: To add individual Work order type.
- Bulk Upload: This is used to add Work order types in bulk.
Work Order - Sub type configuration:
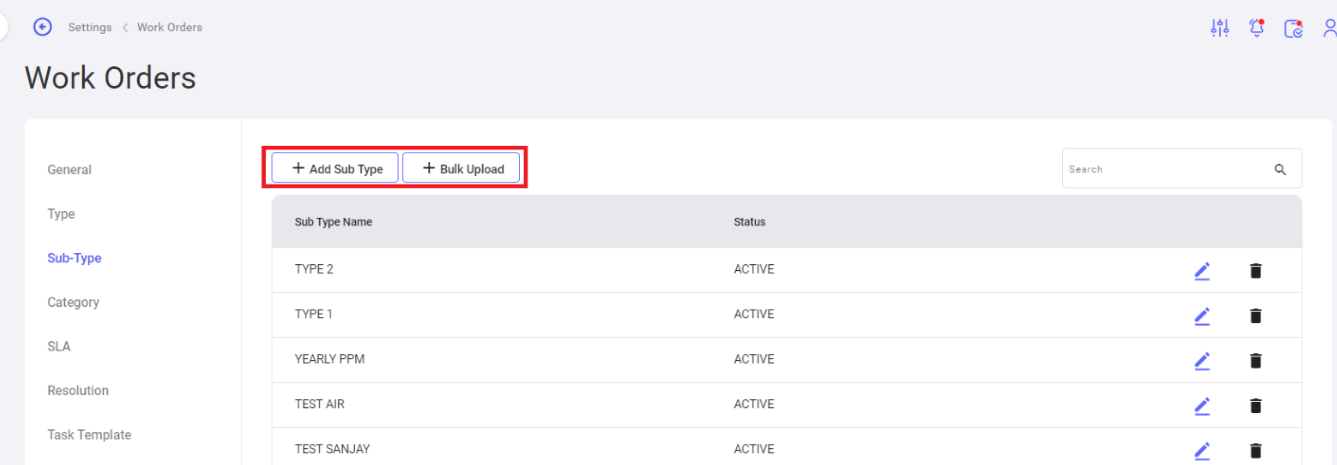
- Add Sub Type: To add individual Work order sub type.
- Bulk Upload: This is used to add Work order sub types in bulk.
Resource Group Configuration:
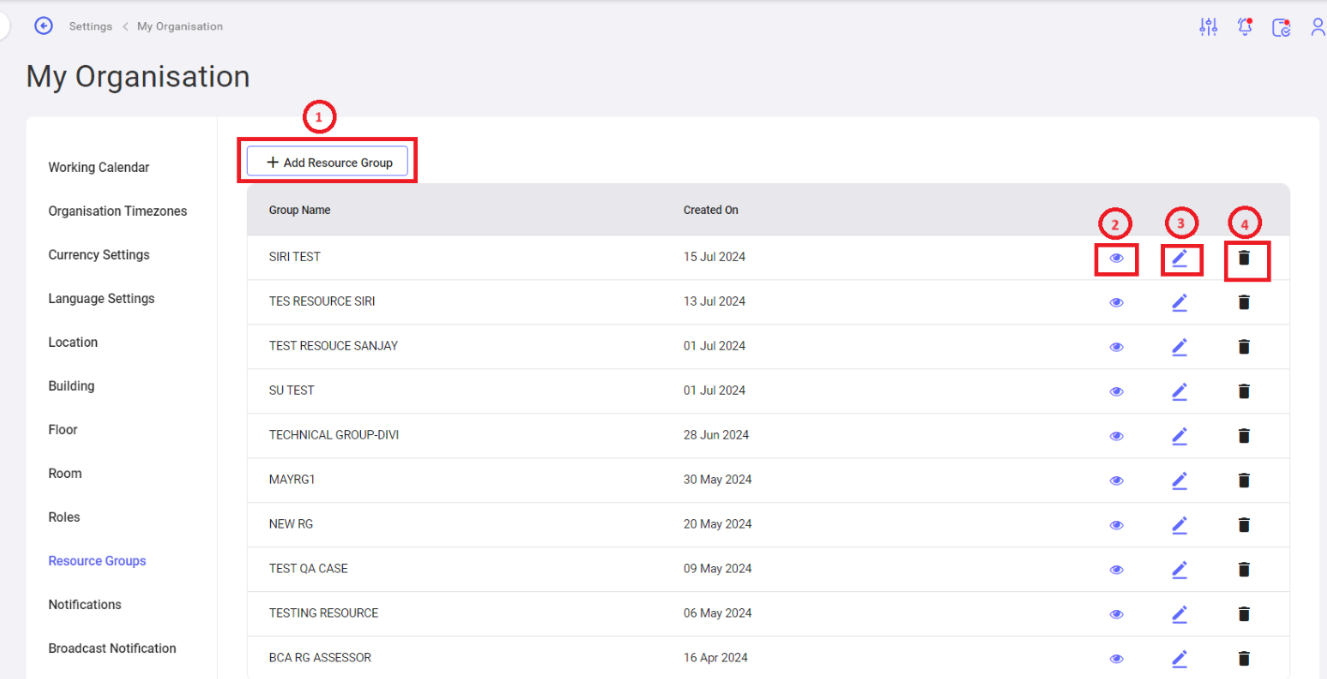
- Add Resource Group: To configure new resource group based on different parameters like location, asset, inventory, case, work order and agent.
- View icon: To view the specific resource group configuration.
- Edit icon: To edit the specific resource group.
- Delete icon: To delete the specific resource group.
Task Template Configuration:
Task template configuration helps a User to view a Task template associated with selected Work Order type in Work Order creation page. This is configured mainly for field Agent to specify the task to be completed & update progress / related remarks. This will be displayed both in Web app & mobile app.
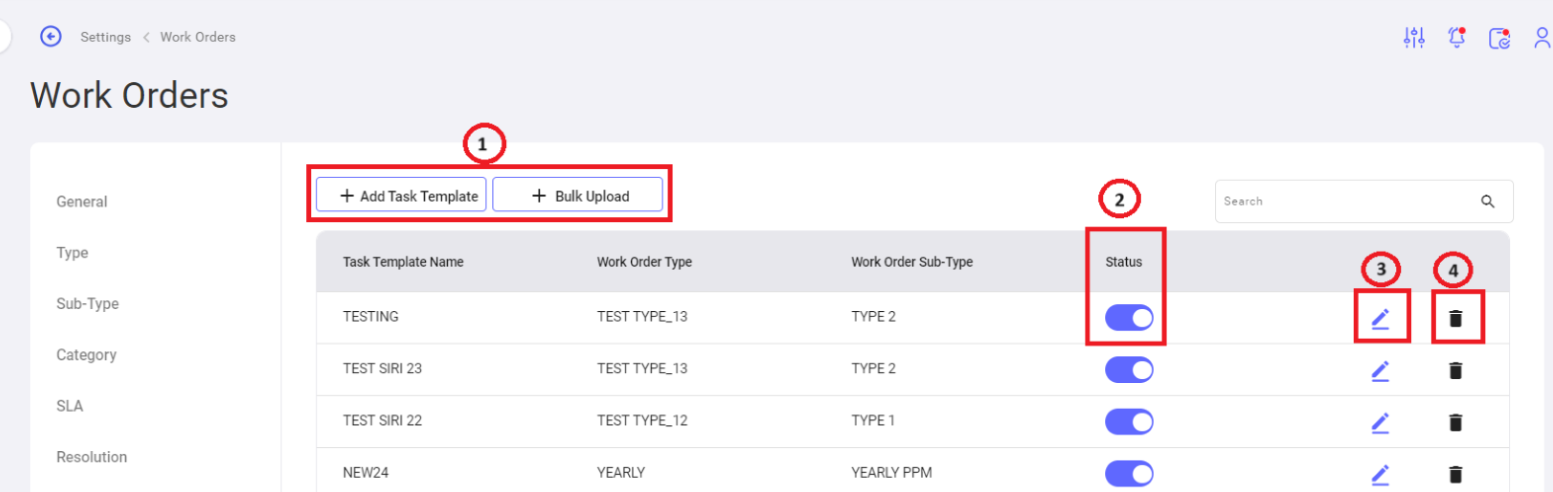
- Add Task Template and Bulk Upload: To create task template individually or in bulk. Work order type and work order sub types are mandatory to create a Task template. Based on this configuration task template will be displayed on the Work order creation page.
- Status: It represents the status of the Task template. I.e., Active and Inactive.
- Edit icon: To edit the specific task template.
- Delete icon: To delete the specific task template.
Auto Assignment Agent Configuration:
Based on the criteria defined in the Auto assignment rule, Work order will be assigned to the field agent is the concept of Auto Assignment Agent Configuration.
Ex: Agent with specific skillset, within specific distance, availability as per the roster, rating (quality of work) configured on the settings module, Work order will be assigned.
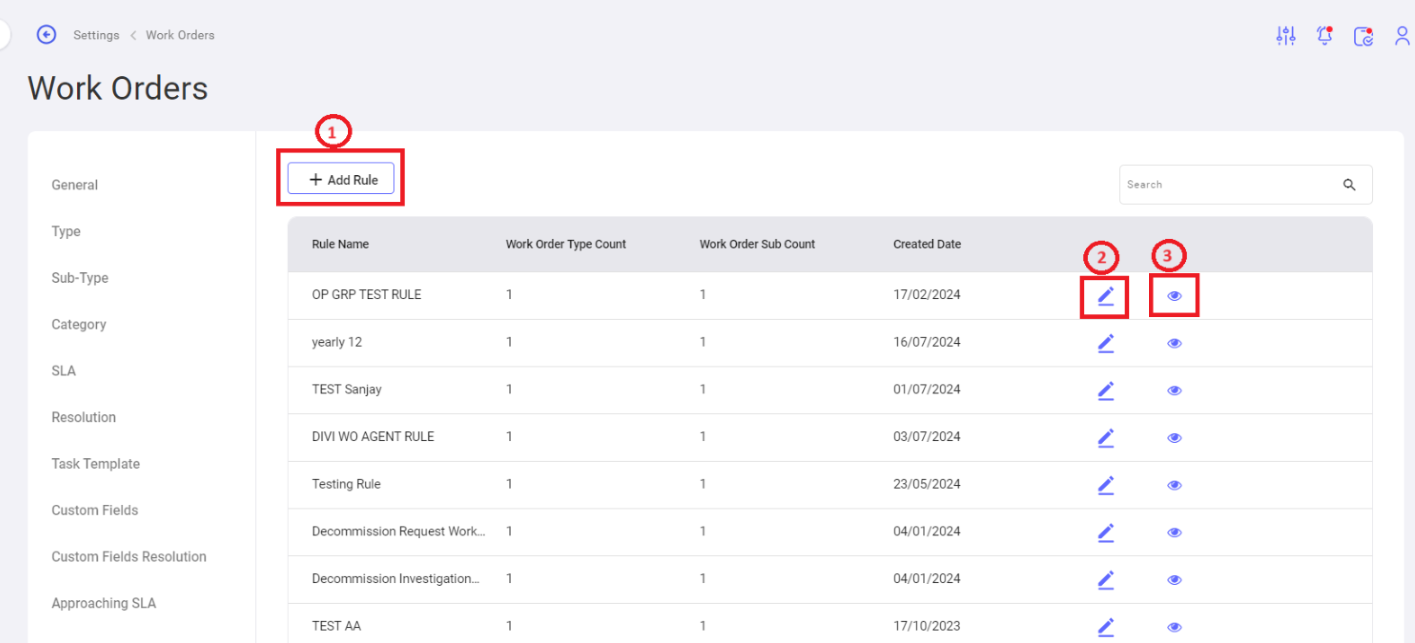
- Add Rule: To add the rule for Auto assignment of an Agent with certain parameters like Threshold, work order type, work order sub type, skill set etc.
- Edit icon: To edit the specific auto assignment rule.
- View icon: To view the specific auto assignment rule.
Auto Assignment Supervisor Configuration:
Based on the criteria defined in the Auto assignment rule, Work order will be assigned to the supervisor is the concept of Auto Assignment Supervisor Configuration. Ex: Supervisor with specific skillset, within specific distance, availability as per the roster, rating (quality of work) configured on the settings module, Work order will be assigned.
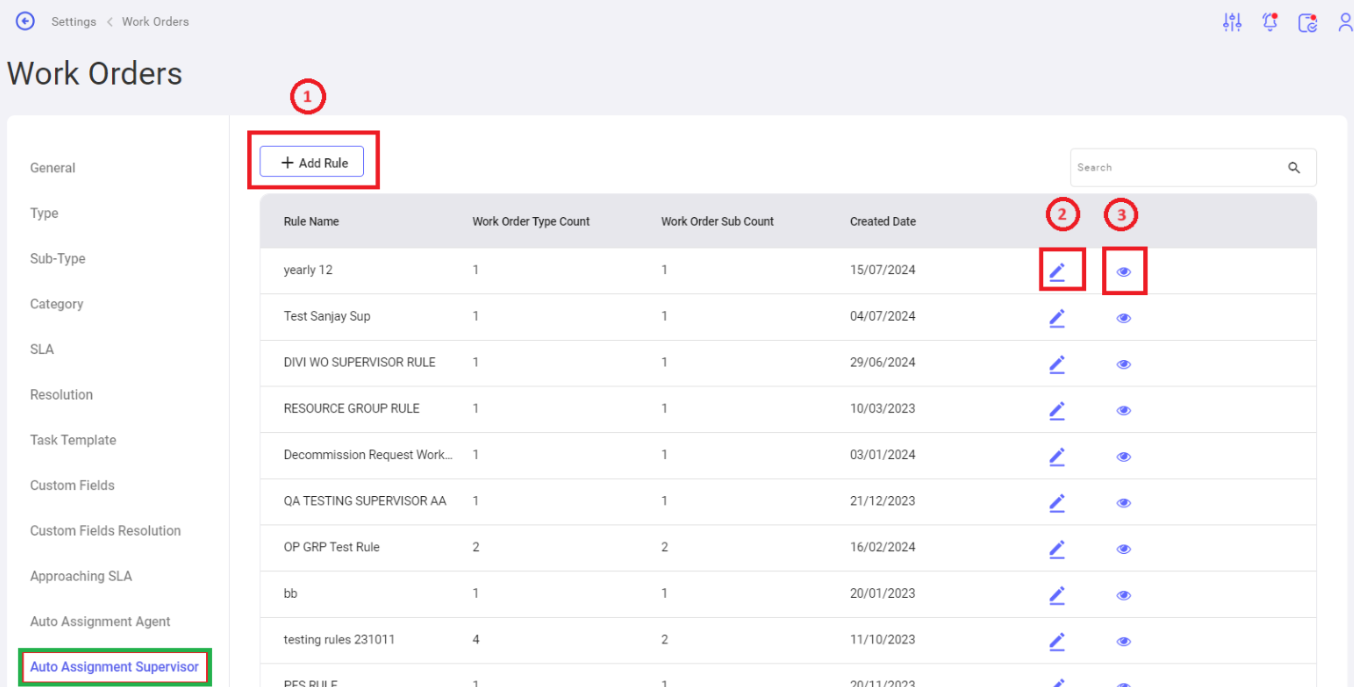
- Add Rule: To add the rule for Auto assignment of Supervisor with certain parameters like Threshold, work order type, work order sub type, skill set etc.
- Edit icon: To edit the specific auto assignment rule.
- View icon: To view the specific auto assignment rule.
Response & Resolution SLA Configuration:
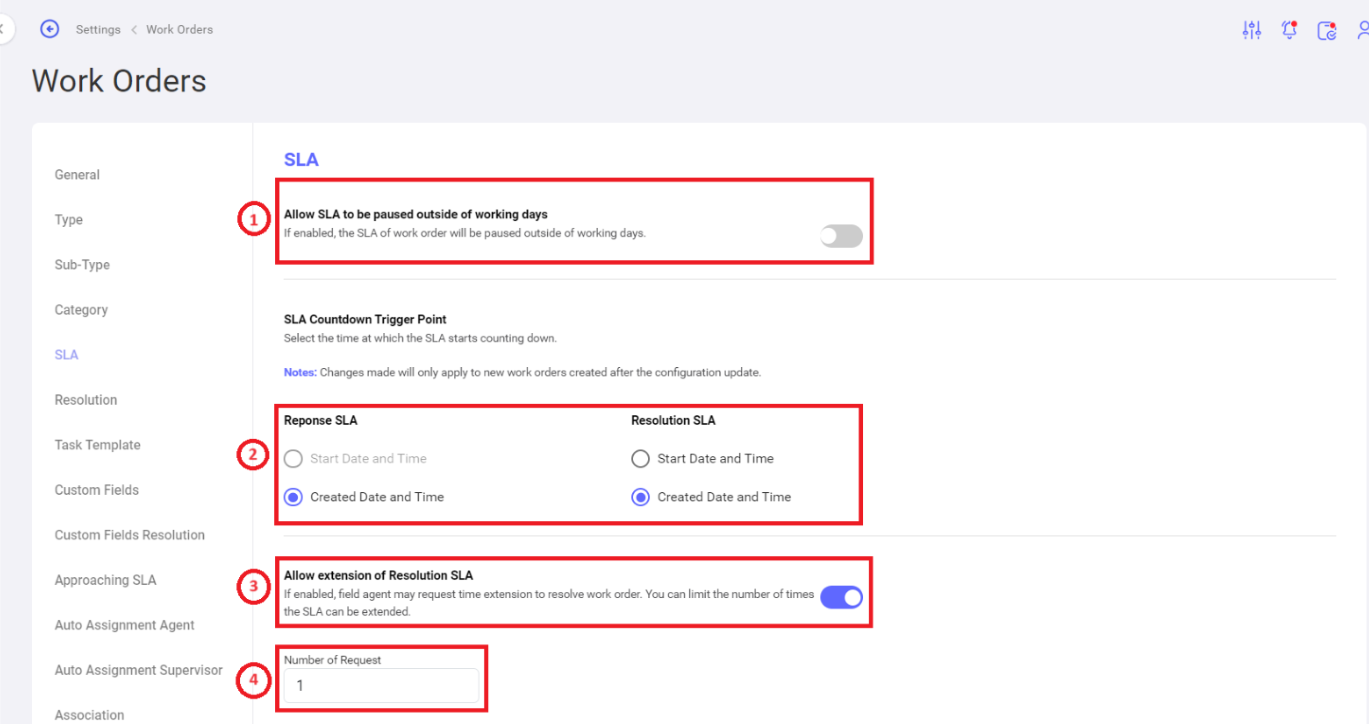
- Allow SLA to be paused outside of working days: It represents whether to pause the SLA of the work order outside of working days. This also impact on pausing SLA of the work order when is goes beyond the working hours.
- SLA Countdown Trigger Point: To update the SLA Countdown Trigger Point.
- Allow extension of Resolution SLA: By enabling this option, agent will be given a flexibility to request time extension for resolving the work order.
- Number of Request: To define the time extension count for agent in resolving the work order.
SLA Configuration:
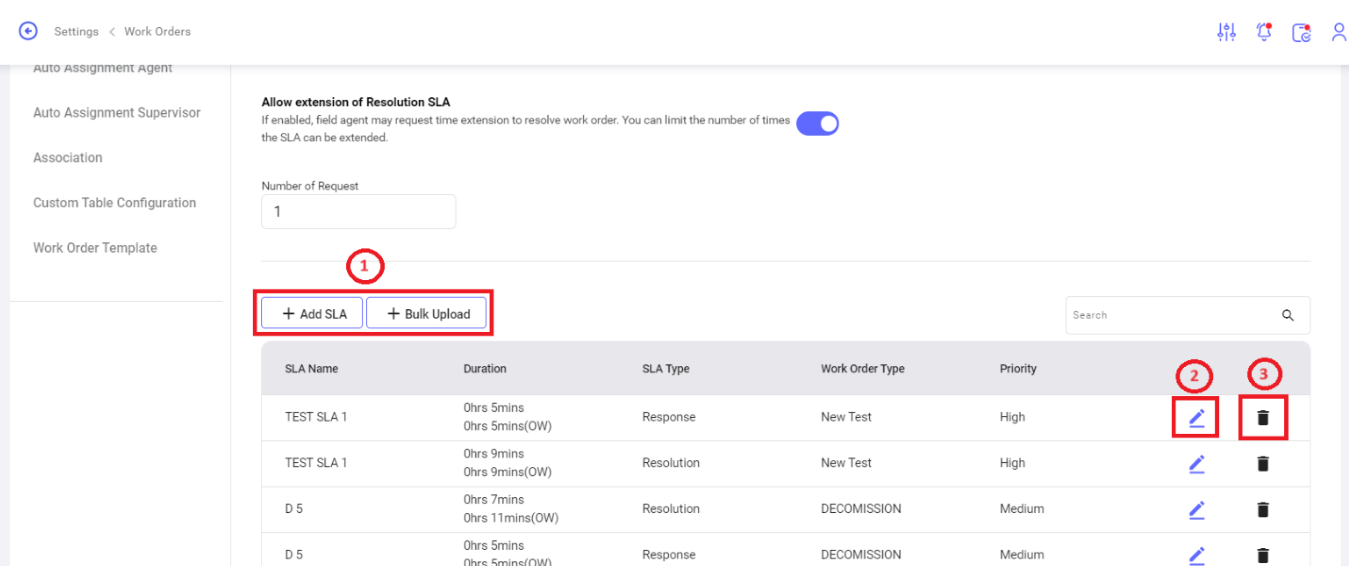
- Add SLA and Bulk Upload: To add Response SLA and Resolution SLA individually or in bulk.
- Edit: To edit the specific Response SLA / Resolution SLA
- Delete: To delete the specific Response SLA / Resolution SLA.
SLA Creation Page:

- Users can define the SLA name as required.
- User can select the Work Order type & sub-type to associate the SLA with.
- Users can select Work Order category which will be displayed on selecting Work Order type.
- Priority drop down contains: High, Medium, Low. Users can select one among these.
- Users must select the SLA type. Whether it's a Response or Resolution SLA.
- Users can select the duration format. Hour & Time / Calendar Terms.
- Hour & Time: User can define the number of days (Out of 30days), Hours & Minute.
- Calendar Terms: User can choose this option to count the SLA using different frequencies. Ex: End of the day (11:59pm), End of Week (Sunday 11:59pm), End of 2nd Week, End of the Month etc. The system calculates automatically based on the frequency configured based on the start date the User selects in the Work order creation page.
Work Order Template Configuration:
Configure Work order templates required for Association configuration. This template is used in the Auto Work order creation process from Case.
Association Configuration:

-
Case & Work Order Custom Association: To assign certain case types and sub-types with a specific work order template. This configuration assists for efficiency in case-related work order creation.
-
Auto-Generate Work Order: This toggle is providing flexibility to automate the Work order creation process for the Case types & sub-types specified in the association's configuration.
-
Add Association: To add associations. The user must select the Case type, sub-type, severity & priority and then select the Work order template from the pre-configured Work order template list to complete the Association configuration.
4. New Work Order.
Work Order Flow:

New Work Order:
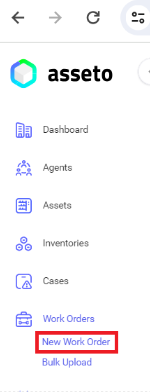
Create New Work Order:
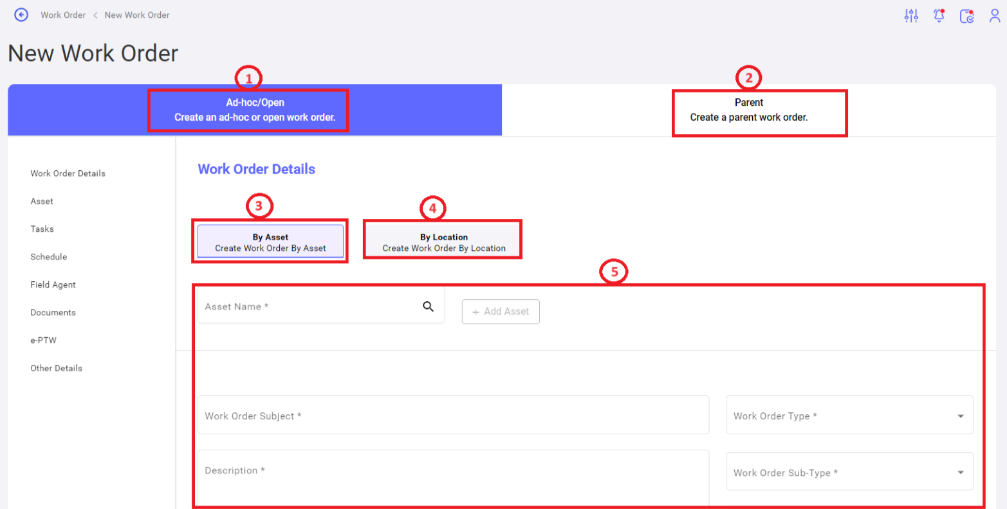
- Ad-hoc / Open: To create an ad-hoc or open work orders.
- Parent: To create parent work order. One Parent work order can have multiple child work orders.
- By Asset: To create Asset based Work orders.
- Asset Name: It's a Mandatory field. List of values configured in the settings can be viewed by typing the 2 letters in the Asset field.
- Add Asset: This option is used to add the Asset. On selecting the Asset from the list, this option will become able to use. Add Asset will result in showing the Asset Image, Asset Name, Serial Number / Bar Code of the Asset, Asset criticality and Location. Cancel symbol is used to remove the added Asset.
- By Location: To create Work orders based on the Asset Location.
- Fill all mandatory and non-mandatory fields. Based on the configuration the field values will auto populate for the fields like.
- Work Order Sub-Type & Category by selecting the Work Order Type.
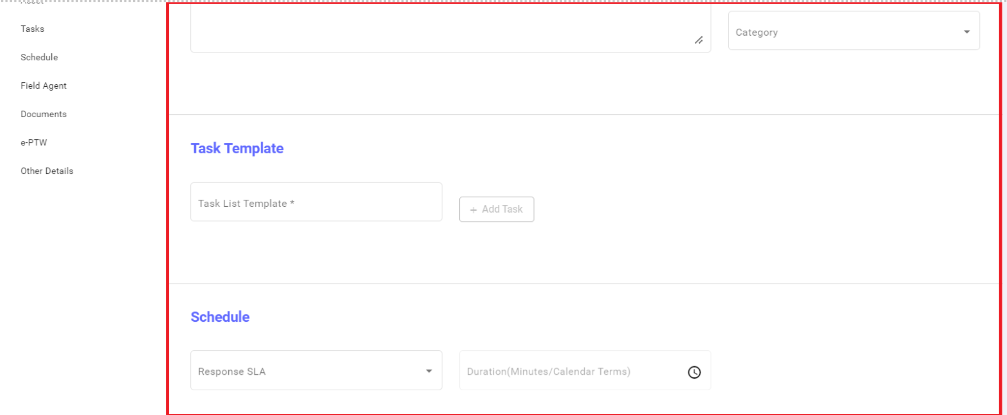
- Task Template by selecting Work Order Type.
- Response SLA & Resolution SLA.
- Auto Assignment Agent.
- Auto Assignment Agent.
- Auto Assignment Agent.
Section Wise Details:
- Work Order Details: This section contains Work order details like, Asset / Location details, Work order subject, type, sub-type, category & description.
- Task Template: Task template is a mandatory field used to assign a task to the Agents. It contains task details & fields required to be updated by the field agent over task completion.
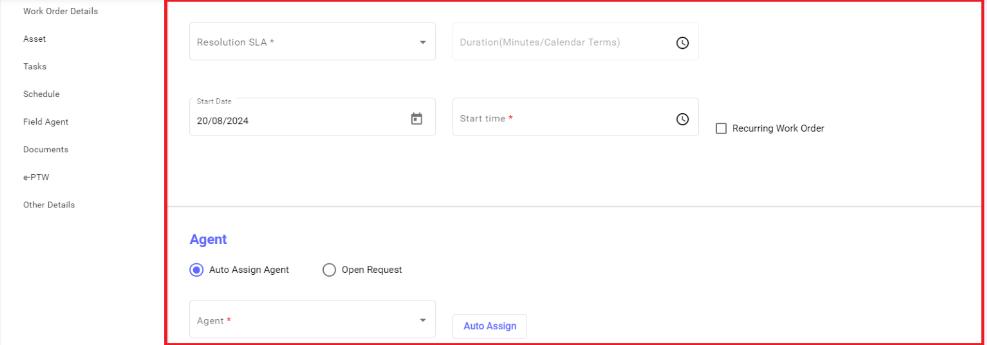
- Schedule: It displays the Resolution & Response SLA details as configured in the settings. Based on the Start date that the User selects, the SLA calculation gets calculated automatically based on the configuration.
- Agent: We have 2 options in the Agent section. I.e., Auto assign & Open request. Auto assignment will work based on the Auto assignment agent configuration. Open request option provides a flexibility to Agents to accept. Notification of Work order creation will be triggered to all the Agents & Agents can decide whether to pick or not.
- Child Work Order Group: This section will populate only for Work Orders on Parent – child hierarchy. Work orders can be grouped either based on Assets or Locations. Multiple assets / locations are to be selected for creating child Work orders.
-
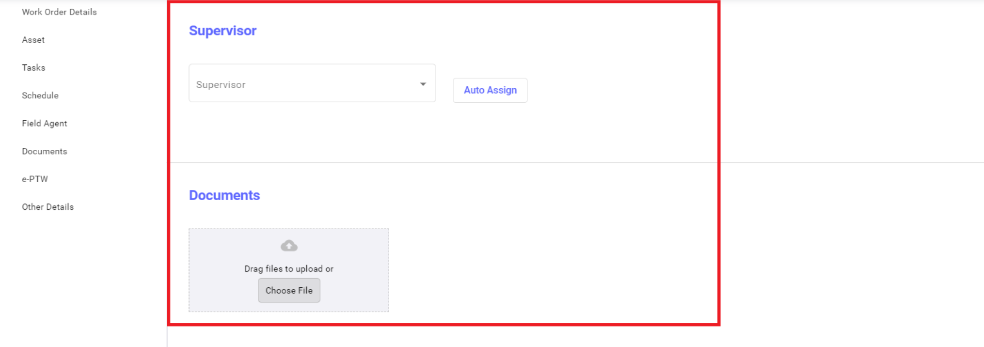
Supervisor: Work Orders will be assigned to the Supervisor who fulfils the Auto assignment rules criteria.
-
Documents: This section is used to upload related documents.
-
e-PTW: Used to apply e-PTW for specific Work Order.
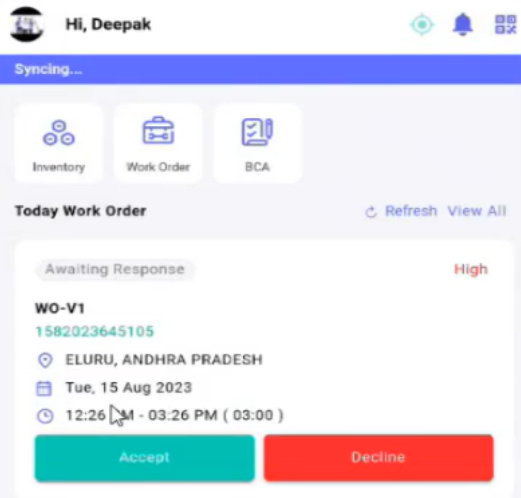
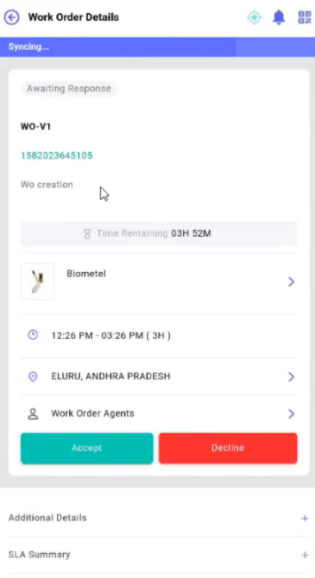
Mobile App View: Field Agent:
Ad-hoc work order displayed in the Mobile app. Field Agent can Accept or Decline the request.
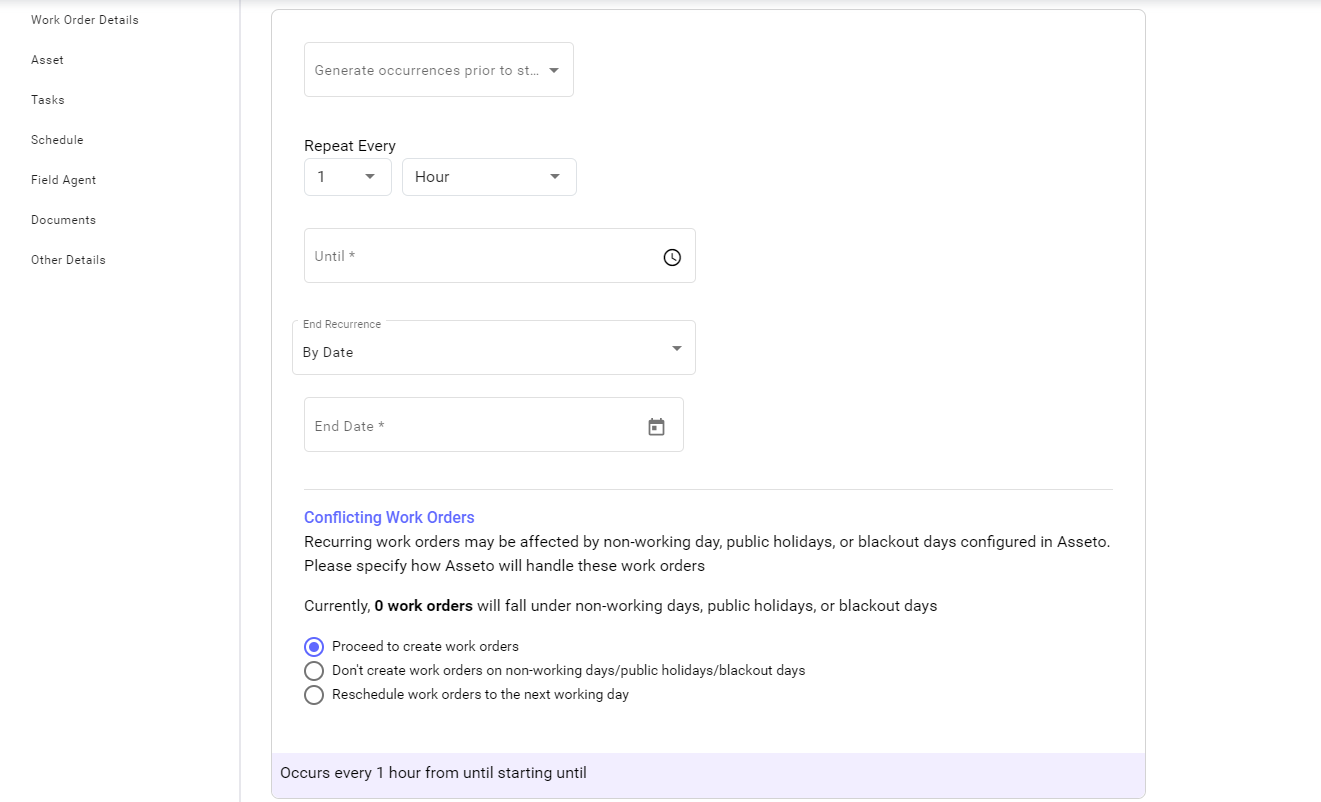
Create Recurring Work Order:
To create recurring work orders, select the Recurring Work Order check box from the new work order creation page.
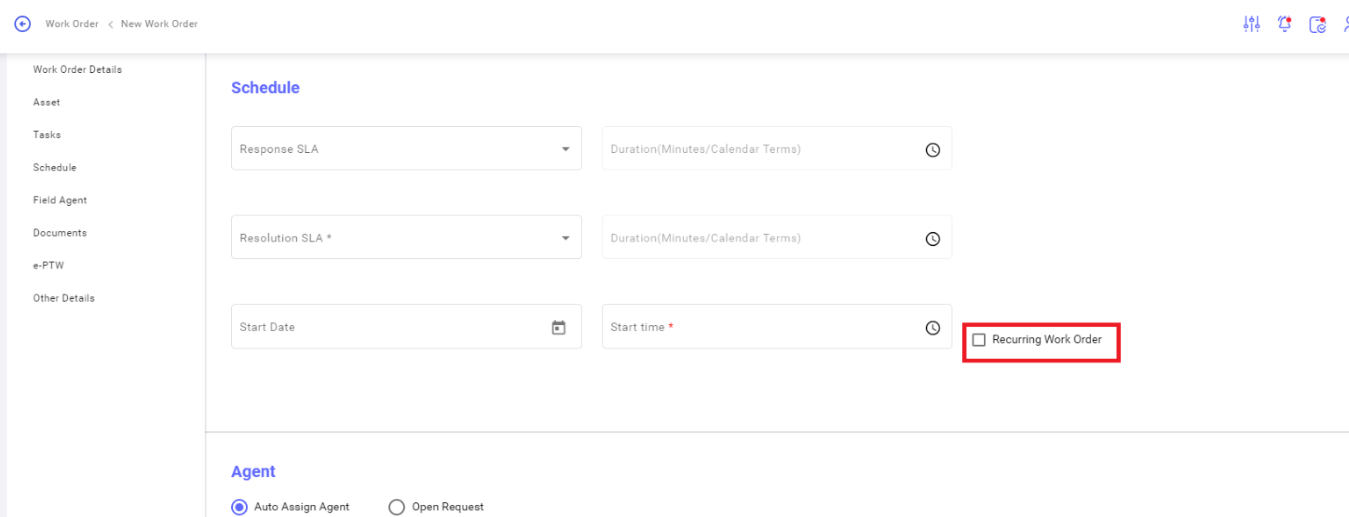
Selecting Recurring Work Order check box displays the recurring work order parameters. It provides the flexibility to the User to schedule work orders for future periods.
5. Bulk Upload
Bulk Upload:
This feature is to create work orders in bulk. Bulk upload is a 3-step process. The following are the steps followed in Work order bulk upload.
- Preparation: Bulk Upload template can be downloaded.
- Pre-Check: To check for any errors in the uploaded sheet.
- Processing: To see the progress on the bulk upload process.
Below are the steps to create work orders in bulk.
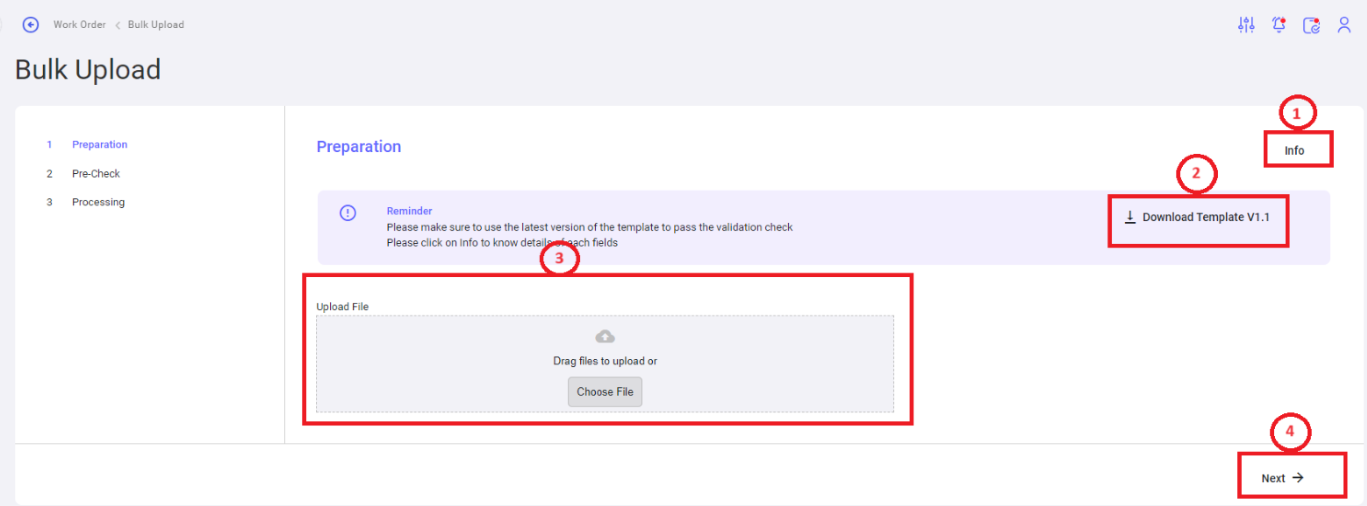
- Info: Provides the validation information required to fill the template.
- Download Template: It's a predefined template used to key in data. Date update should match the validation provided in the Info.
- Upload File: To upload updated template. The file can drag or upload using the choose file option.
- Next: To move the upload file process to pre-check step.
List View:
Work orders created newly from new work order or bulk upload features will be displayed on the Work order dashboard in the List view.