11. Visitor Pass
Overview:
Visitors Pass is basically an identification card or a document issued to an individual to visit specific location. Ex: Guest pass, Officers temporary pass etc. This basically contains the details like Visiting person name, visit date etc.
We have 4 concepts under Visitor Pass:
- Visitor Pass Dashboard
- New Visitor Pass
- Applications
- Visit Log
- 1. Visitor Pass Dashboard
- 2. Pre-requisites
- 3. New Visitor Pass
- 4. Applications
- 5. Visit Log
- 6. Visitors Pass Flow
1. Visitor Pass Dashboard
Dashboard:
It contains widgets of statuses or statistics. It also contains the count against each status.
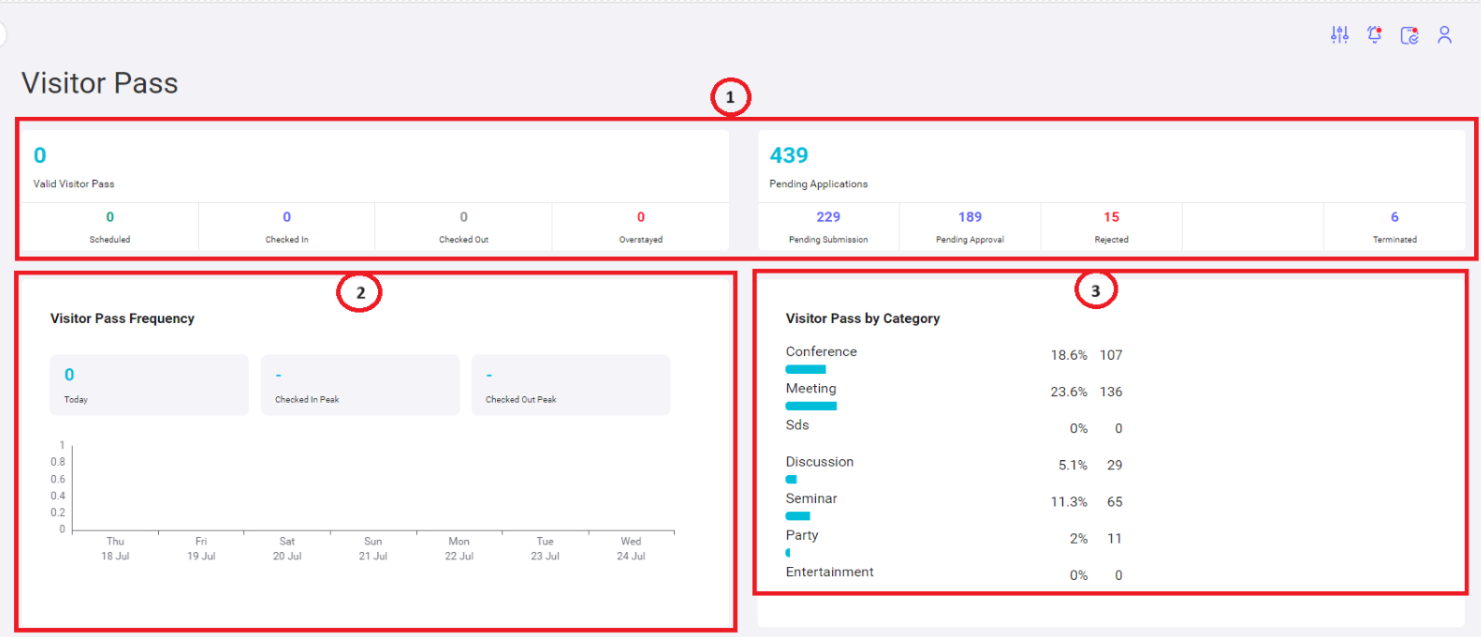
- Widgets: To show the different status and count against each status.
- Visitors Pass Frequency: To show the statistics based on the frequency.
- Visitors Pass by Category: To show the statistics of Visitor Pass by Category.
2. Pre-requisites
Pre-requisites:
- Configure Location
- Configure Person in Charge
- General Configuration
- Visitor Check List Configuration
- Template Configuration
1. Configure Location:
Location should be configured in My Organization settings:
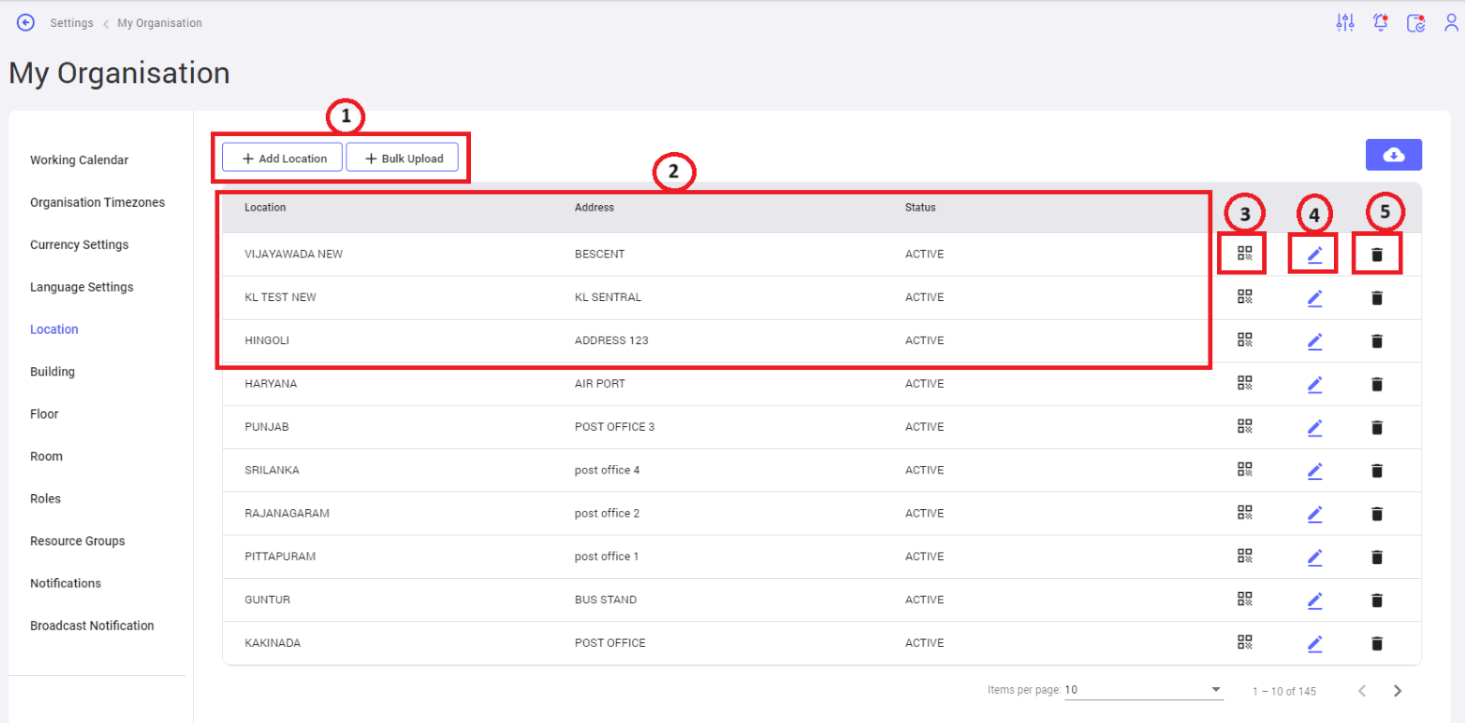
- Add Location & Bulk Upload: To add individual location and list of location in bulk. Location related parameters to be updated during location configuration such as location name, address, latitude, longitude. It also includes configuration like, building, floor, room.
- List view: To display the list of Location configured.
- QR Code: To scan.
- Edit icon: To edit the location.
- Delete icon: To delete the location.
2. Configure Person in Charge:
Person in Charge is the person who approves or rejects the visitor pass for specific location based on the configuration. Person in Charge configuration page includes the following.
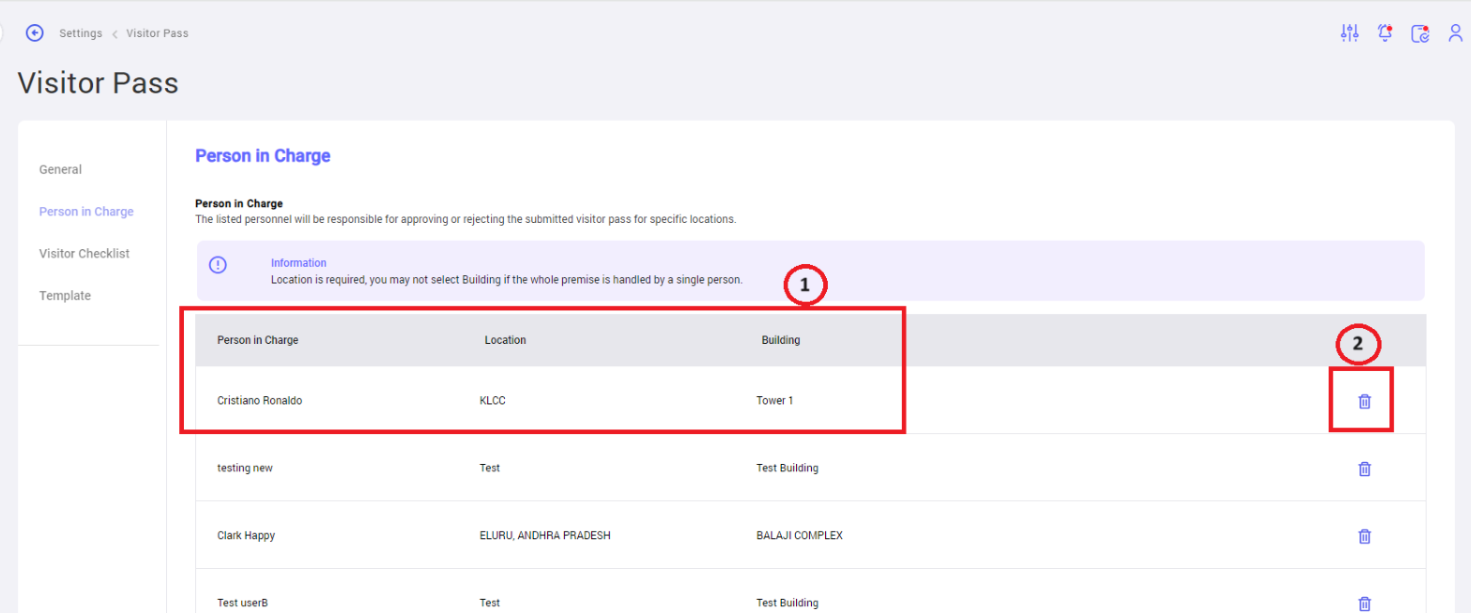
- List View: To display the list of Person in Charge configured.
- Delete icon: To delete the specific Person in Charge.
3. General Configuration:
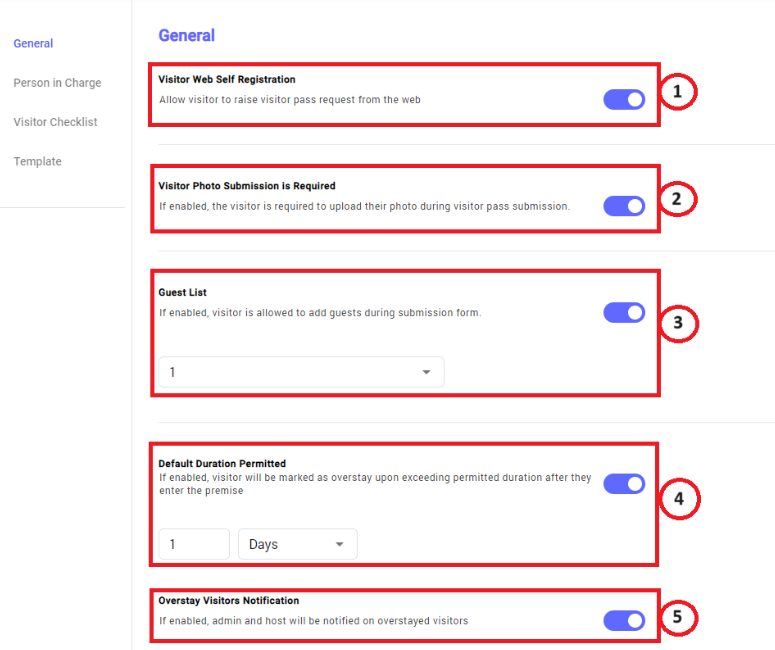
- Visitor Web Self Registration: Whether to Allow visitor to raise visitor pass request from the web.
- Visitor Photo Submission is Required: Whether to allow the visitor is required to upload their photo during visitor pass submission.
- Guest List: To set the limit for visitors to add guests during submission form.
- Default Duration Permitted: To set limit for visitor to mark on overstay upon exceeding permitted duration after they enter the premise.
- Overstay Visitors Notification: Whether to notify admin and host on overstayed visitors.
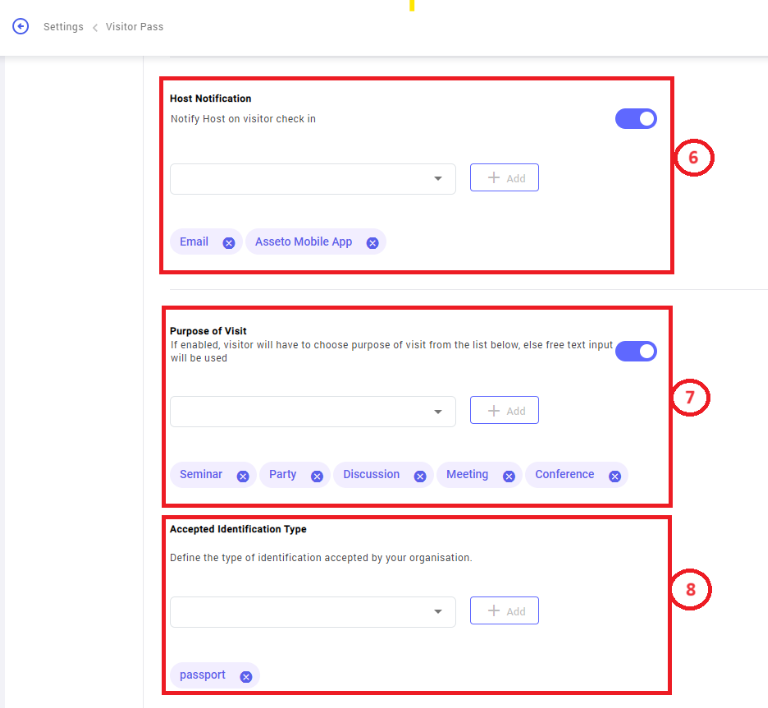
- Host Notification: Whether to notify Host on visitor check in and select the notification channel. I.e., SMS, Email, Asseto Mobile App.
- Purpose of Visit: To show or hide the purpose of visit drop down on Visitor pass creation page and its list of values.
- Accepted Identification Type: To define the identification types to be accepted by an Organization for Visitor pass.
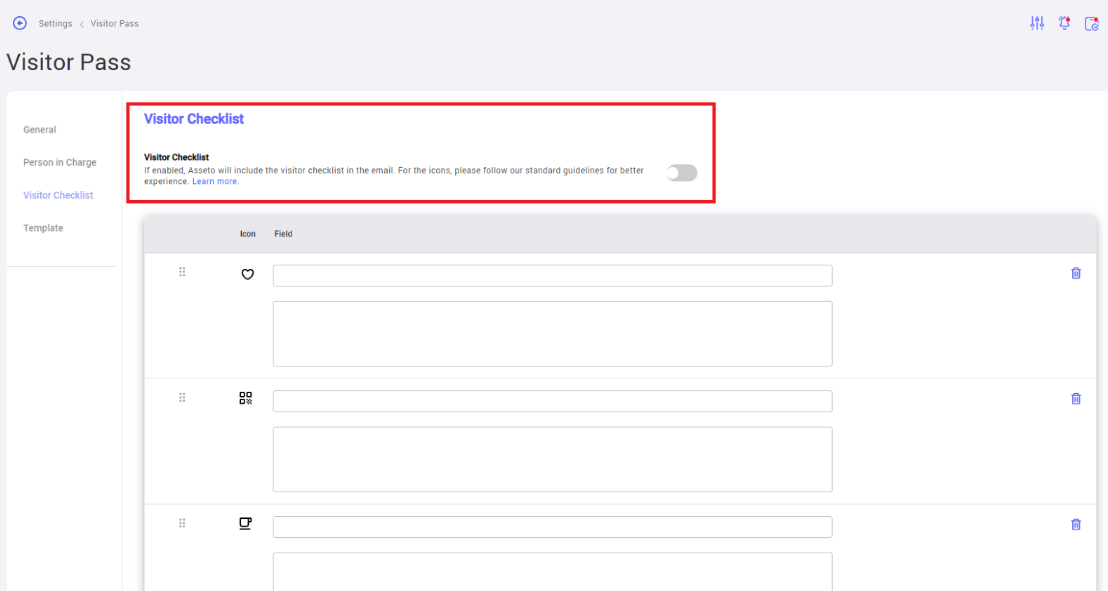
4. Visitor Check List Configuration:
This configuration defines whether to include checklist in the email or not.
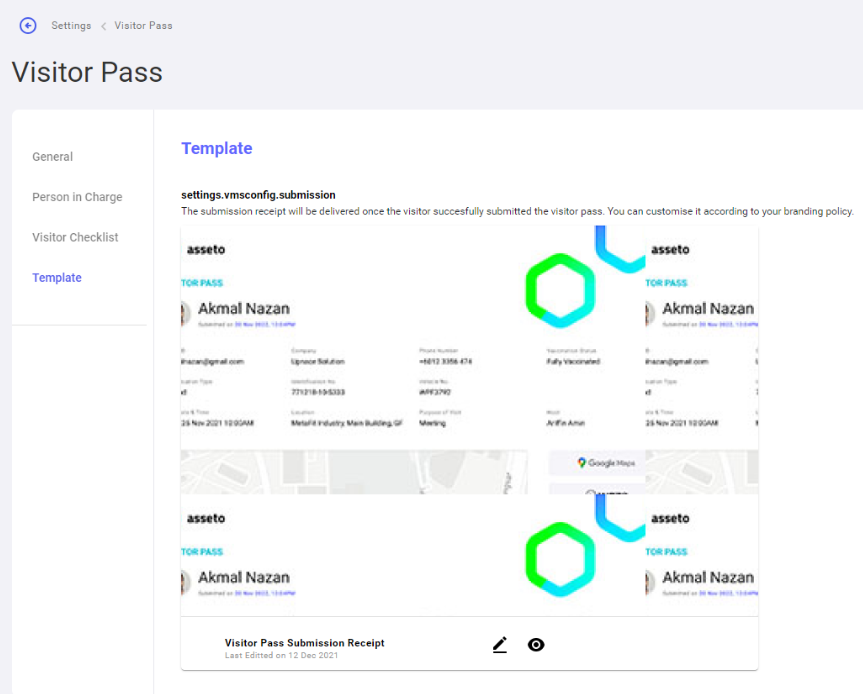
5. Template Configuration:
Once a visitor successfully submits the visitor pass, the submission receipt should be delivered. Using this feature, templates can be configured for submission receipt.
3. New Visitor Pass
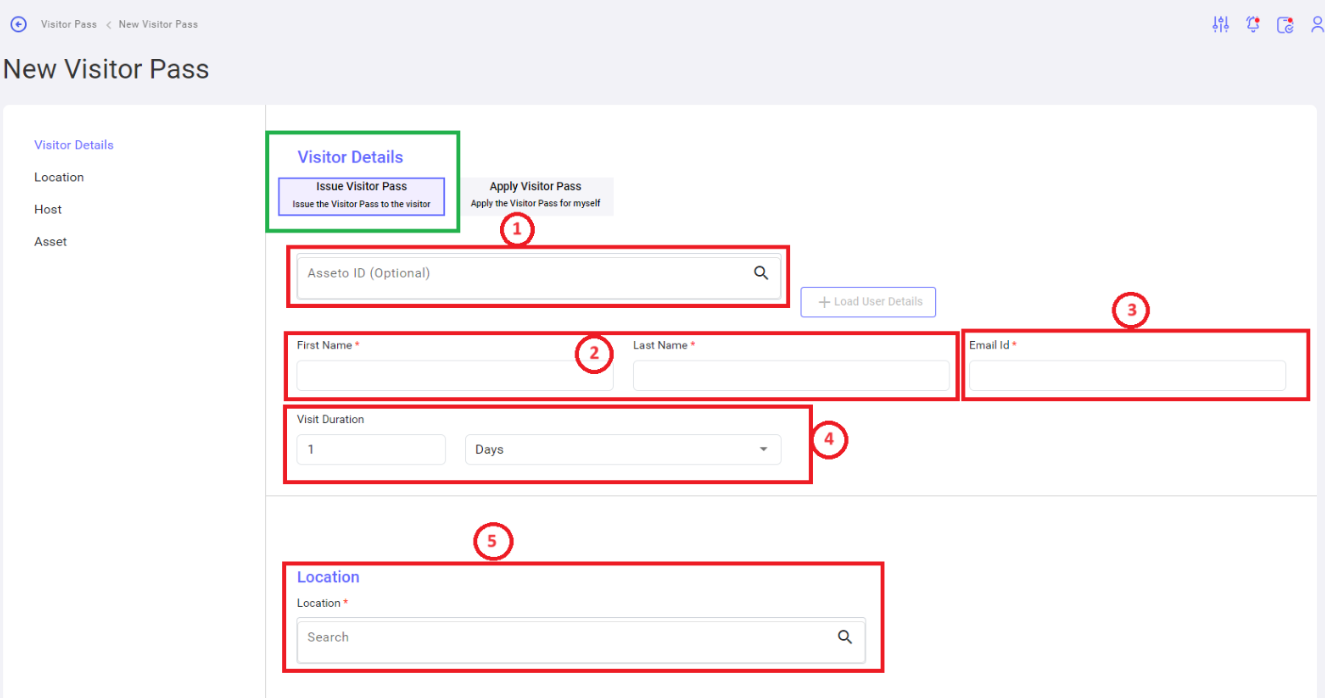
New Visitor Pass:
The new Visitor Pass page is for creating or issuing visitor passes. 2 types of Visitors can be created, and the details are as follows:
-
Issue Visitor Pass: To the external person.
-
Apply Visitor Pass: To create Visitor pass for the person in an organization or who logged in.
Issue Visitor Pass:
Under Issue Visitor Pass on New Visitor Pass creation page, key in all the information about the external person to whom the Visitor pass to be issued. The parameters involved in Visitor Pass creation process are as follows:
-
Asset ID: Its unique ID of an Asset.
-
First Name & Last Name: Name of the Visitor.
-
Email Id: Email address of the Visitor.
-
Visit Duration: Duration of the visit and the frequency.
-
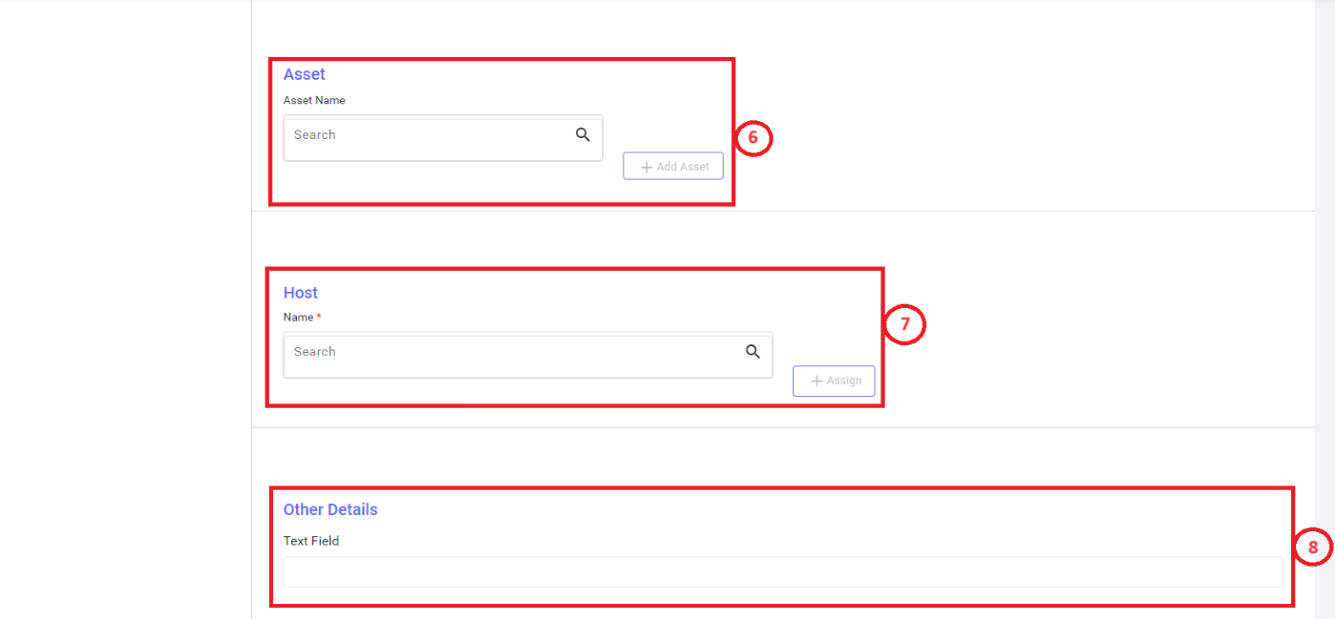
Location: To define the visiting location.
-
Asset name: To define the name of the Asset.
-
Host: To select the Host name. Select the host from the drop down and click on to assign.
-
Other details: Custom fields will be displayed on the other details section.


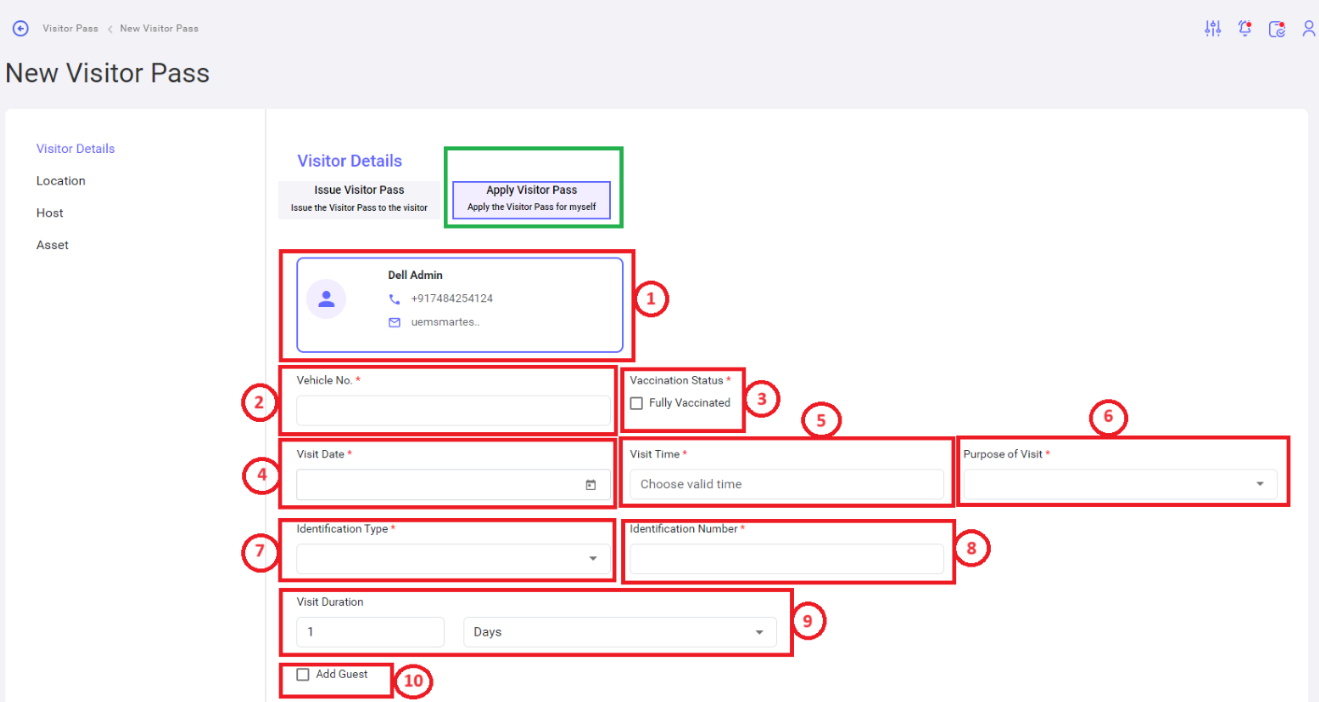
Apply Visitor Pass:
Apply Visitor Pass on New Visitor Pass creation page is used to create / apply for Visit pass for self or the person in an organization. Below are the required details in Visit Pass application submission process.
-
Name: As the Visit Pass application is created for self, the name of the Visitor gets auto populated.
-
Vehicle No: To define the Vehicle number in which the Visitors are visiting the location.
-
Vaccination Status: To confirm on vaccination status before the visit.
-
Visit date: To define the date of Visit.
-
Visit time: To define the time of Visit.
-
Purpose of visit: To define the purpose of visiting the specific location. Applicant can choose the option from the pre-configured list of values.
-
Identification: To mention the type of Identification on Visit.
-
Identification Number: To define the Identification number based on the identification type the Applicant chooses.
-
Visit Duration: To define the visit duration with frequency.
-
Add Guest: To add additional persona for Visiting the location. If the Applicant select the check box, additional guest details also should be added.
-
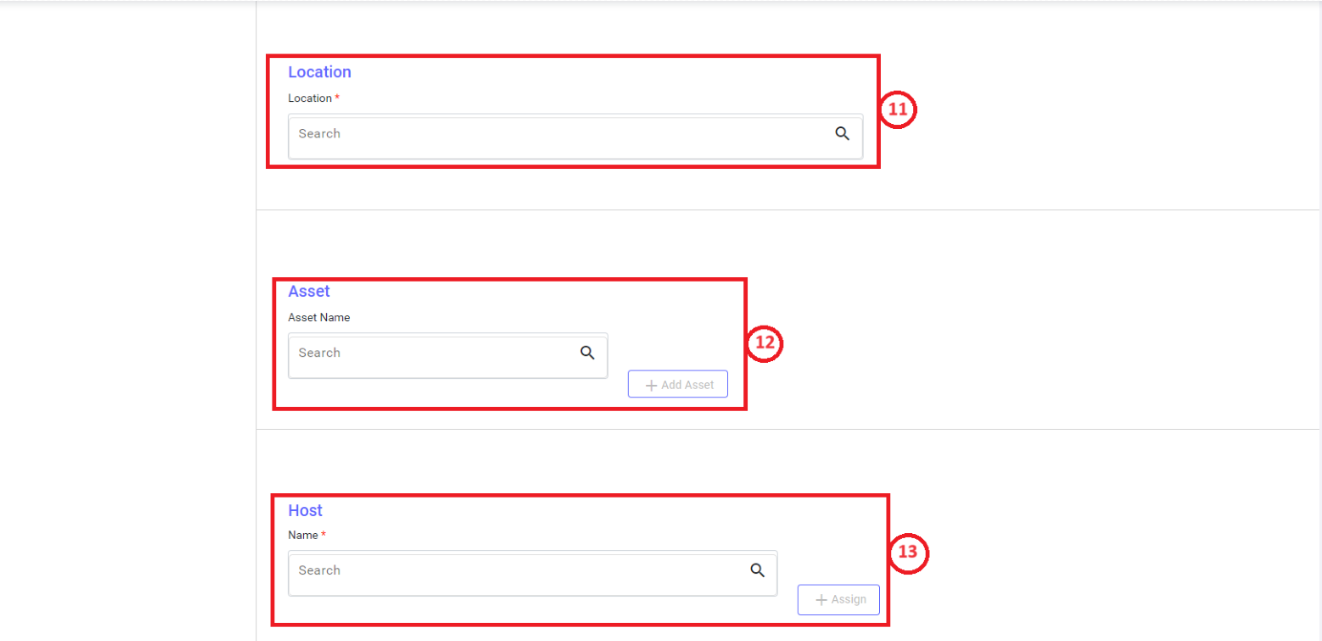
Location: To define the visiting location.
-
Asset name: To define the name of the Asset.
-
Host: To select the Host name. Select the host from the drop down and click on to assign.


4. Applications
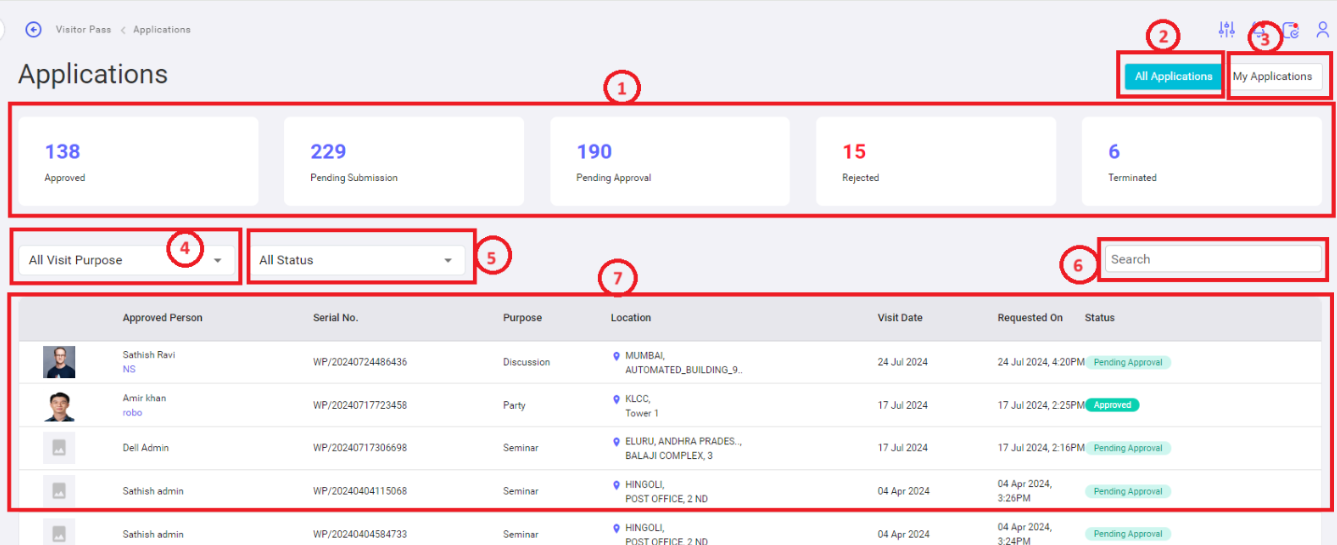
Applications:
The application page displays all the applications created by different users in an dynamic table with the required fields and values. Below the additional details of Applications dashboard:
-
Status Widget: It provides information on the number of records against each status.
-
All Application: All applications will be displayed on the Application dashboard on clicking on All application option.
-
My application: Clicking on to this User can view all the application created by self.
-
Visit Purpose: This provides the flexibility to filter the records with specific Visit purpose.
-
Status: This provides the flexibility to filter the records with specific status.
-
Search: This is to search for a specific application by typing a key work.
-
List View: List of Applications are set in a dynamic table to show all basic details of an application.
5. Visit Log
Visit Log:
Visit Log records and displays the Visitors details for specific period with all the details. It includes the name of the visitor, check-in date & time, check-out date & times, location etc. Below are the details displayed on the Visit Log page.
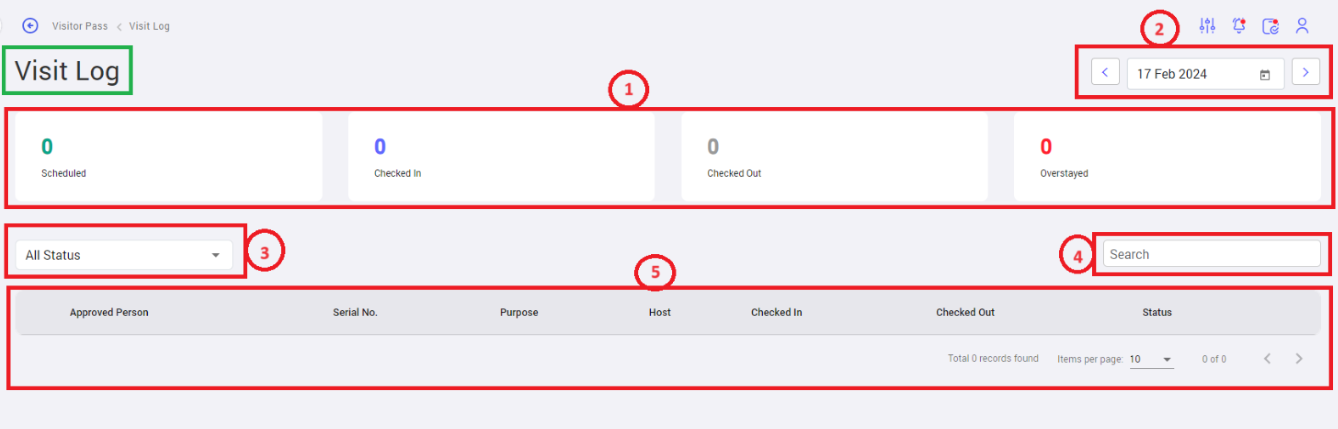
-
Status Widget: It displays the statuses, scheduled, check in, check out and overstayed with count against each status.
-
Date: To show the specific date for which the visit log is displayed.
-
Status: To filter the records with specific status.
-
Search: To search for a specific record with key word.
-
List view: It displays the applications based on the filter parameters defined by the user with basic details of application.
6. Visitors Pass Flow
Step 1: Initiate Visitors Pass.
-
List View: After the Visitor Pass initiation, the form will be shown in the dynamic table in Application dashboard.
-
Status: The status of the Visitor Pass will be “Pending Submission”
Step 2: Submit Application form.

-
List View: After the Visitor Pass initiation, the form will be shown in the dynamic table in Application dashboard.
-
Status: The status of the Visitor Pass will be “Pending Approval”
Step 3: Approve / Reject.
Approver receives the notification & will be directed to the Approve / Reject page as shown in the below screen shot.

- Approve: To Approve the Visitor pass.
- Reject: To Reject the Visitor pass.
- 3 Dots Icon: Cancel Visitor pass button will be displayed. Clicking on the Cancel option, Approver must select a valid reason for the pass cancellation & submit to complete cancellation process.