10. Work Permit
- 1. Overview
- 2. Pre-requisites
- 3. Work Permit / Applications Dashboard
- 4. New Work Permit
- 5. Visit Log
1. Overview
Overview:
Work Permit basically means a formal process of providing permission to the workers to work in a specific location in a restricted scheduled period. These are used for coordinating and maintaining safe working conditions.
2. Pre-requisites
Location Config:
Configure roles by navigating to Settings >> My Organization. Location configuration includes region, section, floor and room.
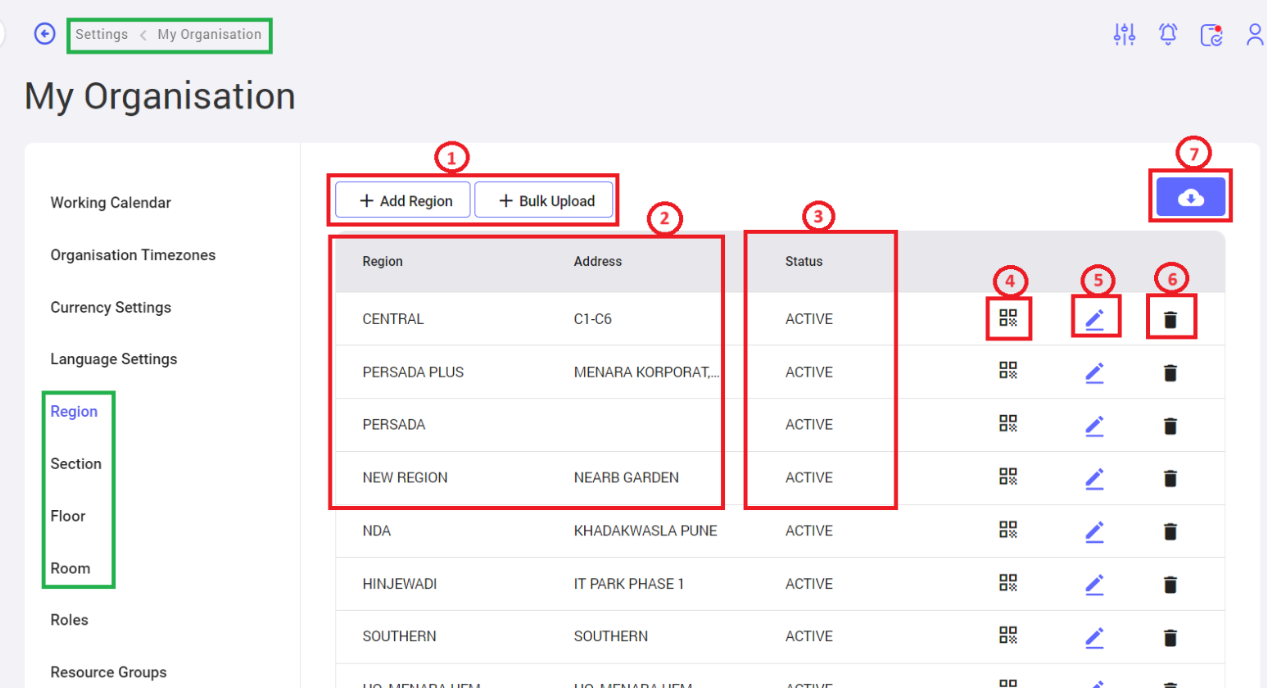
- Add Region & Bulk Upload: These options are used to add individual regions or add regions in bulk.
- List View: To display list of regions configured.
- Status: To describe the status of the region. Whether active or inactive.
- QR Code Icon: To view the QR code.
- Edit: To edit specific region.
- Delete: To delete specific region.
- Download Icon: To download QR code list with or without image:
Resource Group Config:
Configure Resource Group by navigating to Settings >> My Organization >> Resource Groups.
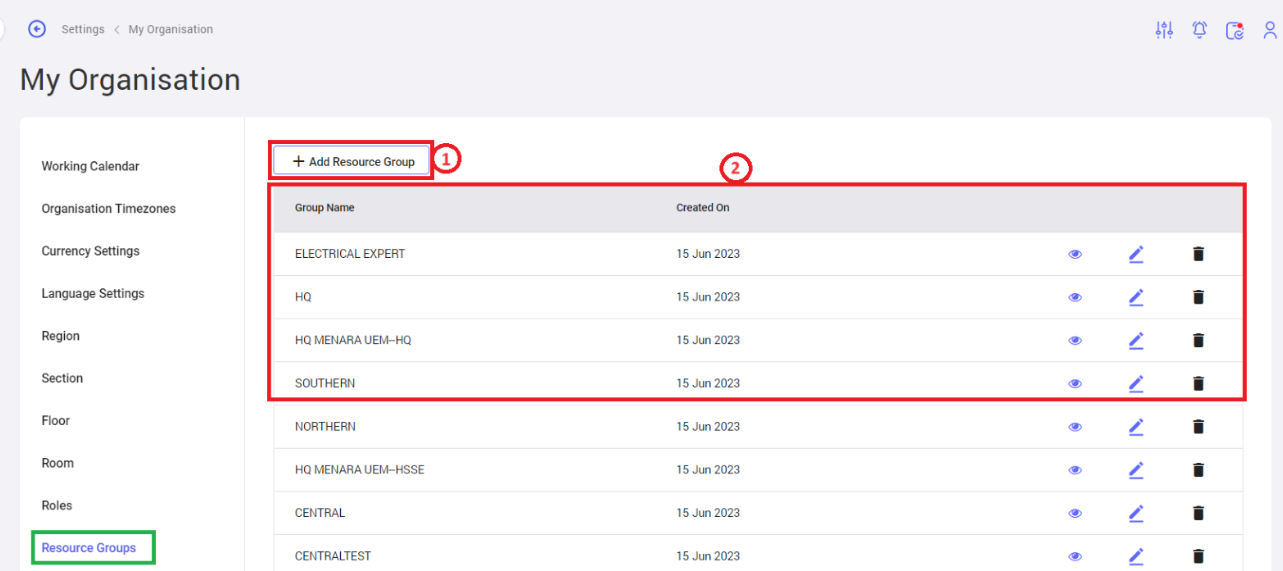
- Add Resource Group: Create a Resources group with location & Agent skill sets parameters. Tag this Resource groups to Agents, so that based on the location that the coordinator selects during WP initiation, Agent's list will auto-populate in the drop-down.
- List View: List of Resource groups displayed in the dynamic table with creation date, view icon (to view the details), edit icon (to edit), delete icon (to delete).
Role Config:
Configure roles by navigating to Settings >> My Organization.
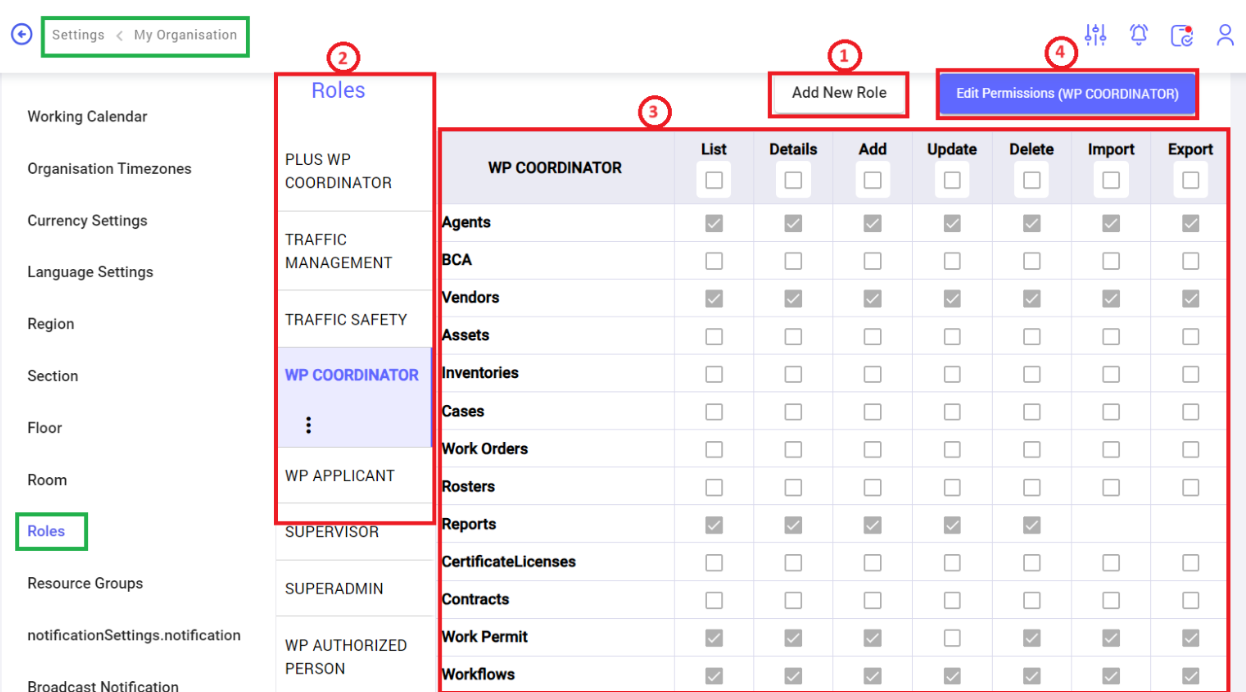
- Add New Role: To add a new role, click on to this option. Users can define the role name they need & select the role type for that role.
- Roles: Display the list of roles configured.
- Modules Access: To provide access to specific modules to perform specific actions. Here Permissions can be provided for list view, details view, add, update, delete, import and export.
- Edit Permissions: Edit Permissions enables edit functionality on permission access portion. It also provides save & cancel buttons to save changes or cancel changes.
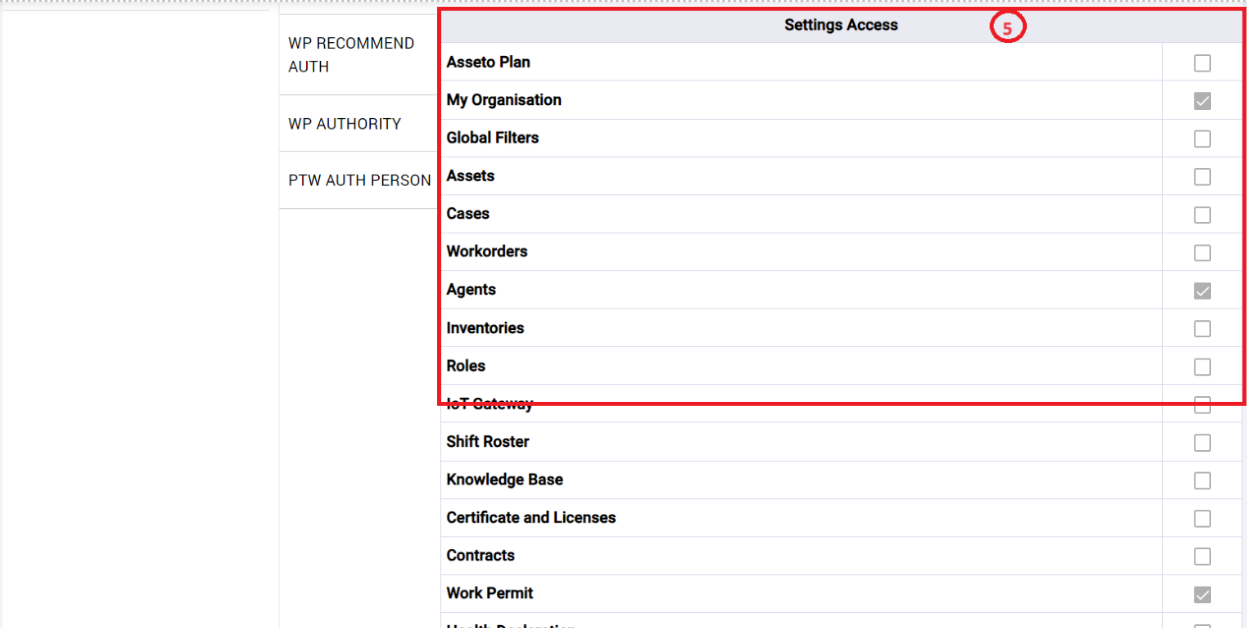
- Settings Access: To provide settings access to the specific role.
Scope Config:
Configure scope by navigating to Settings >> Work Permit.
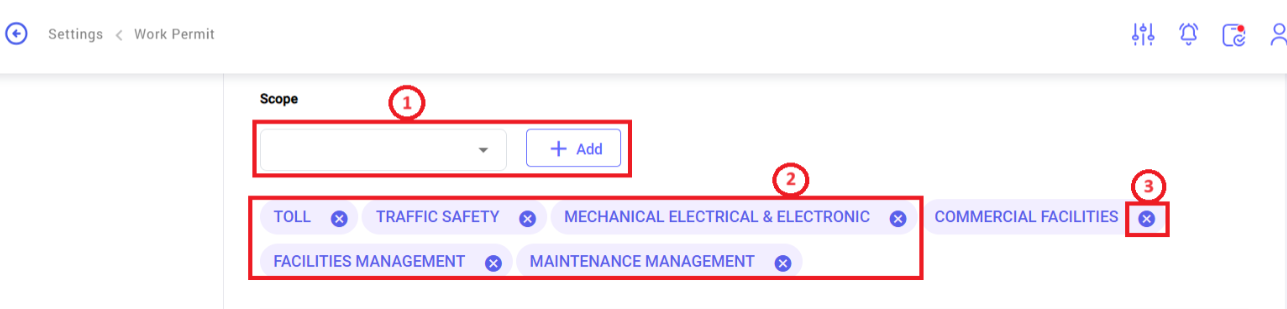
- Add Scope: Scopes will be listed in the drop-down menu. Scope drop-down shows the list of skill sets configured in settings. Users can select the scope & click on Add option.
- Scopes: Scopes added by Users are shown below the Scope field.
- Cancel Icon: To remove the specific scope.
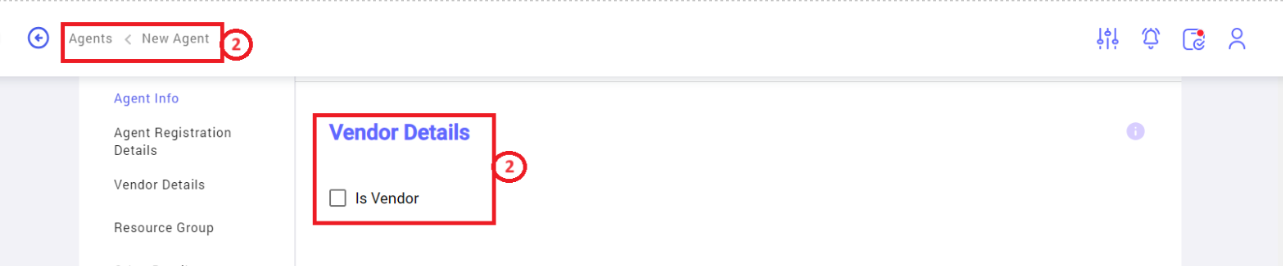
Vendor Config:
Configure Vendors from 2 sources. The details are given below.
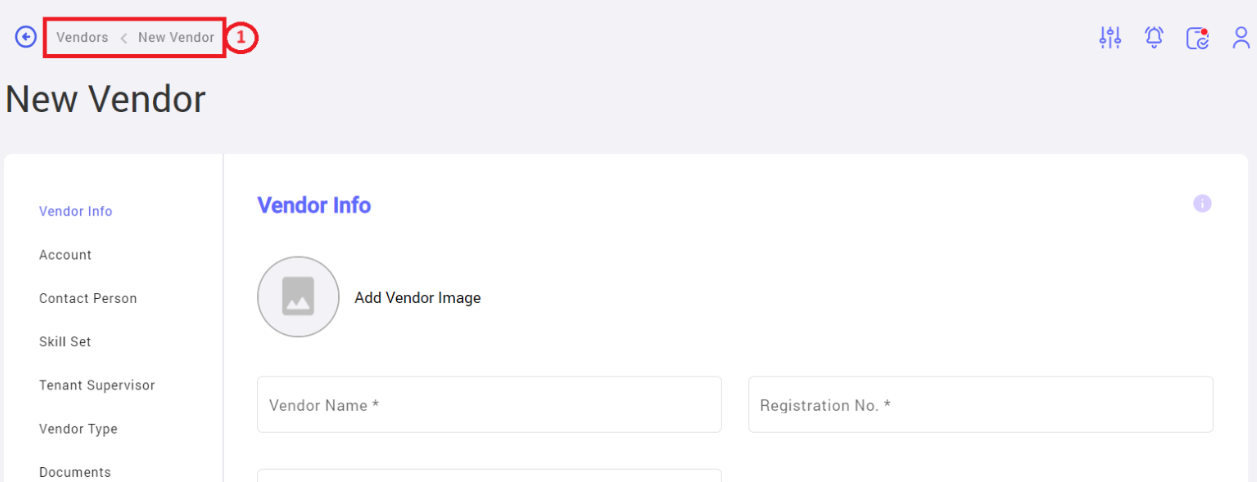
- Vendor Module: Vendor can be configured by navigating to the module, Vendors >> New Vendor. Key in all the required inputs & save.
- Agents Module: Vendor also can be configured from Agent module. Select the “Is Vendor” check box from Agent creation page. The Agent is an application is also considered as a Vendor.
Workflow Config:
Configure Workflows related to WP / PTW triggers by navigating to Workflow >> New Workflow.
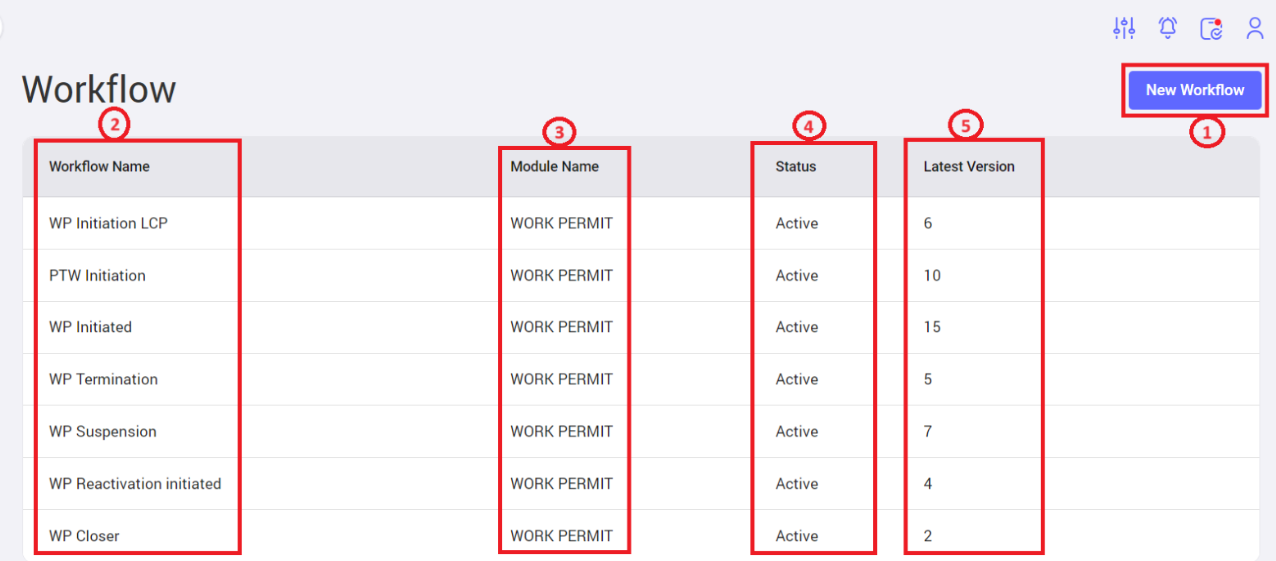
- New Workflow: To create a new Workflow.
- Workflow Name: To display the name of the workflow the User defined.
- Module Name: The module selected by the User to build the Workflow. Select Work Permit to create workflow.
- Status: To describe the status of the Workflow. Whether active or inactive. The Workflow will trigger only if it is in an active status.
- Latest Version: To display the Version number of the Workflow. Latest version of the Workflow will trigger on User action.
PTW Category Config:
PTW Category can be configured by navigating to Settings >> Work Permit >> Work Permit Option.
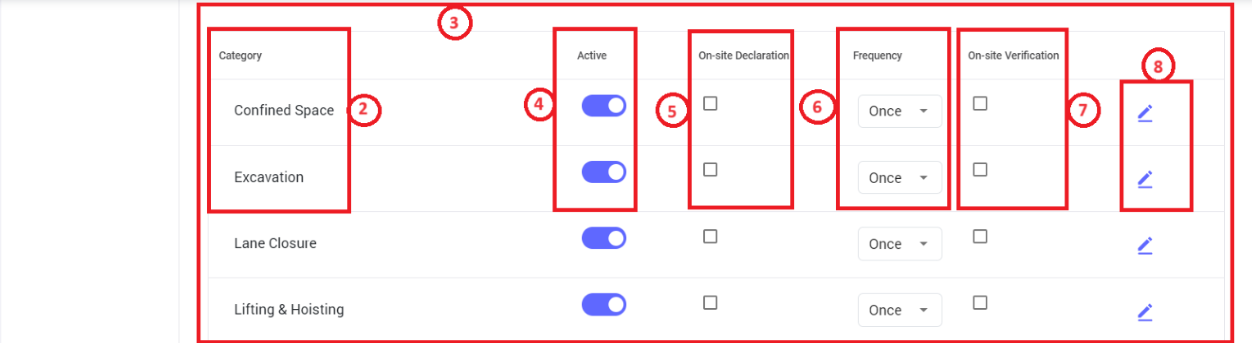
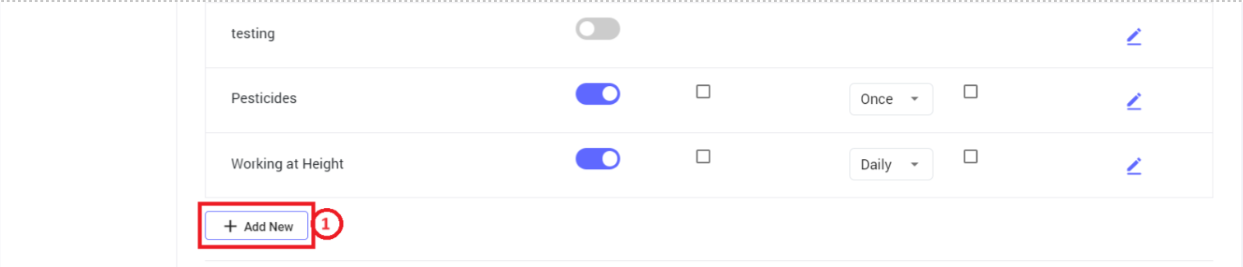
- Add New: To create a new category.
- Category: To view the Categories configured.
- List View: To display the list of categories configured in settings with related information.
- Status: Toggles describe the status of the category. Active & Inactive are the statuses available.
- On Site Declaration: To describe on-site declaration for specific PTW category Required or not.
- Frequency: To view the frequency for specific category type. Once & daily are the current options available.
- On-site Verification: To describe on-site verification for specific PTW category Required or not.
- Edit Icon: To edit the specific Category configuration.
Support Document List Config:
Support Document List can be configured by navigating to Settings >> Work Permit >> Work Permit Option.
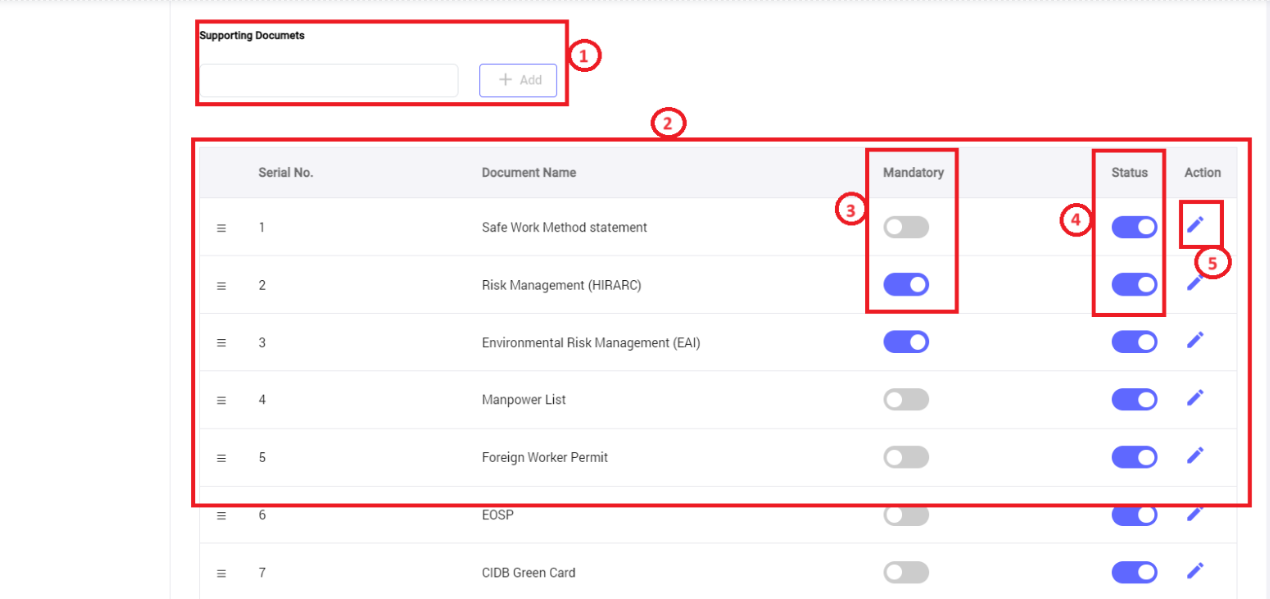
- Add Option: Used to add new Support document name.
- List View: To display all Support documents names in a dynamic table.
- Mandatory: To describe whether the specific support document upload is mandatory or optional.
- Status: If the toggle is enabled, the support document will be visible on Contractor form. If disabled, the specific document will not be displayed.
- Edit Icon: To edit specific support document details.
3. Work Permit / Applications Dashboard
Work Permit / Applications Dashboard
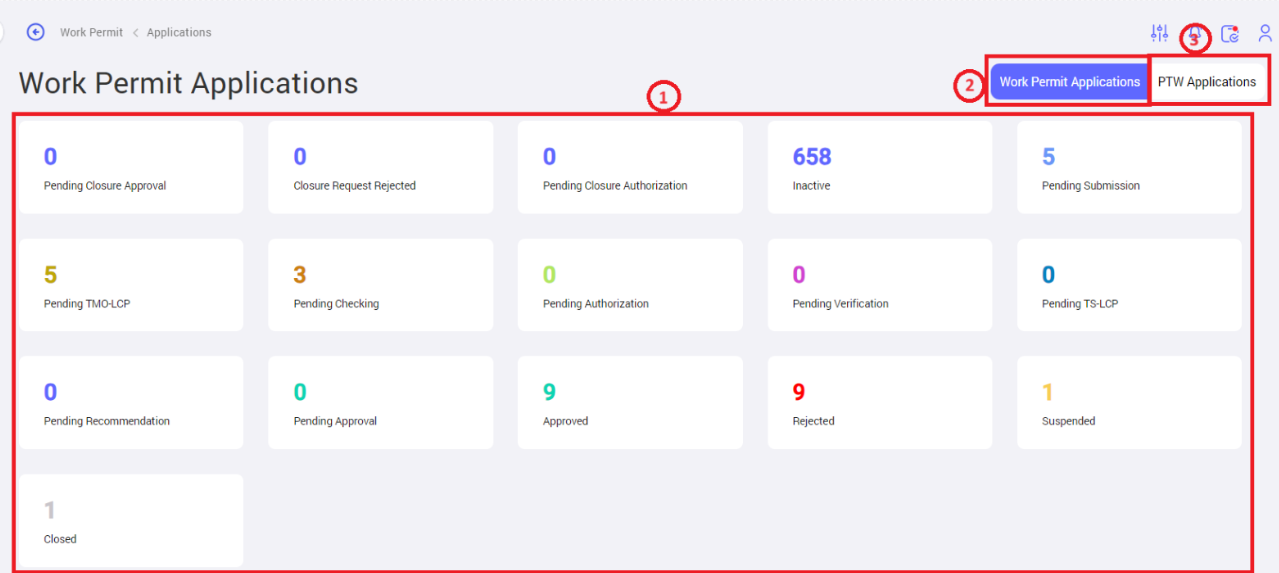

- Widgets: To display the number of records against each status on the page.
- Work Permit Applications: To view Work Permit Applications in the dynamic table.
- PTW Applications: To view PTW Applications in the dynamic table.
- Status Drop-down: To filter the list of records by selecting the required status & view
- List View: Dynamic table displays the list of Work Permit application / PTW application. It displays all related information of Work Permit application / PTW application.
- Custom Date: To customize the date to view the list of Work Permit application / PTW applications.
- Search: To search for a specific Work Permit application / PTW application.
4. New Work Permit
New Work Permit
Work Permit / PTW can be created by navigating to Work Permit >> New Work Permit.
There are 3 roles involved in the WP / PTW Application form approval process.
- Coordinator – To Initiate the form.
- Applicant – To submit the form.
- Approvers – To Approve / Reject the form.
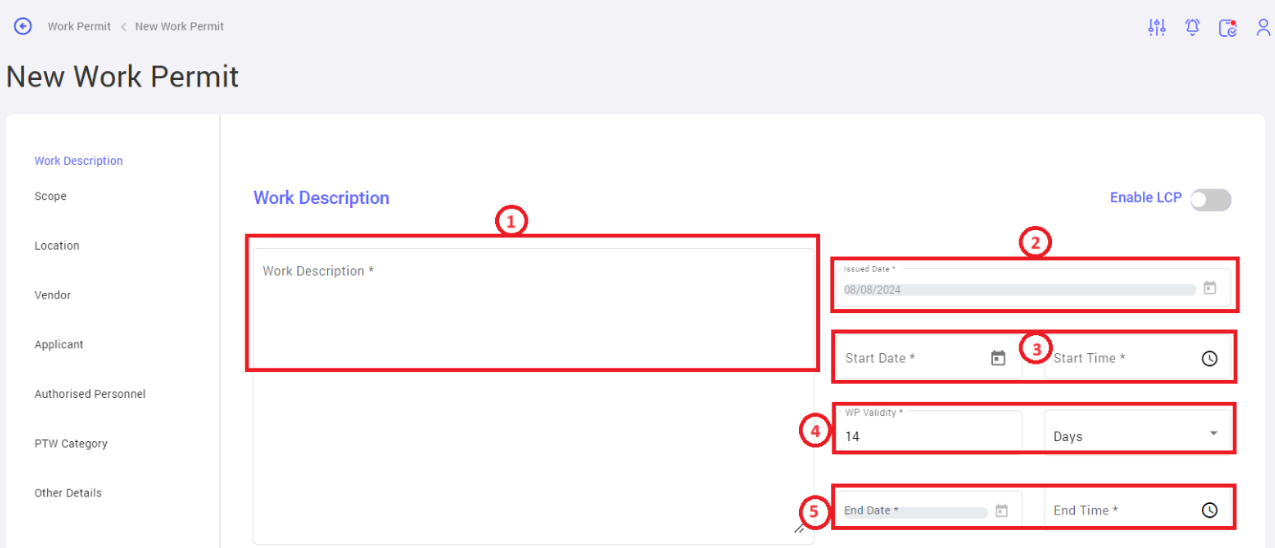
Step 1: Coordinator initiates the Work Permit Application / PTW Application.
- Work Description: Coordinator can define the work description in this field.
- Issue Date: Issue date will auto populate with the current date.
- Start Date & Time: Coordinator can define the work start date and time.
- WP Validity: Coordinator should input the number & select the frequency from the drop-down.
- End Date & Time: End date will auto populate based on the WP Validity selection. Coordinator should define the time.
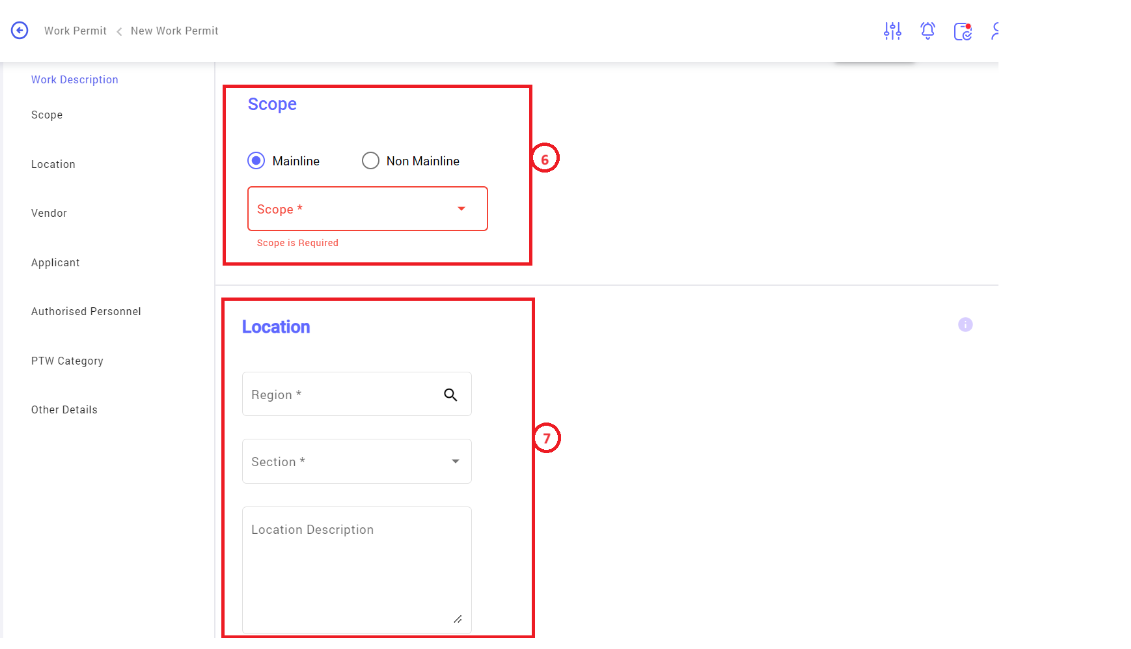
- Scope: Coordinator should be able to select the required scope from the drop-down list.
- Location: Coordinator should be able to select the required Location from the drop-down list.
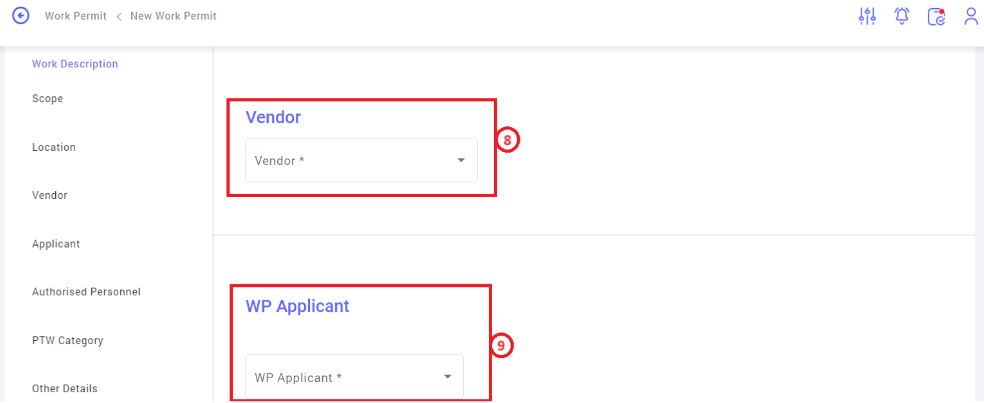
- Vendor: List of Vendors will be displayed in the drop-down. Coordinator should be able to select a specific Vendor from the list.
- WP Applicant: List of WP Applicant will be displayed in the drop-down. Coordinator should be able to select a specific WP Applicant from the list.
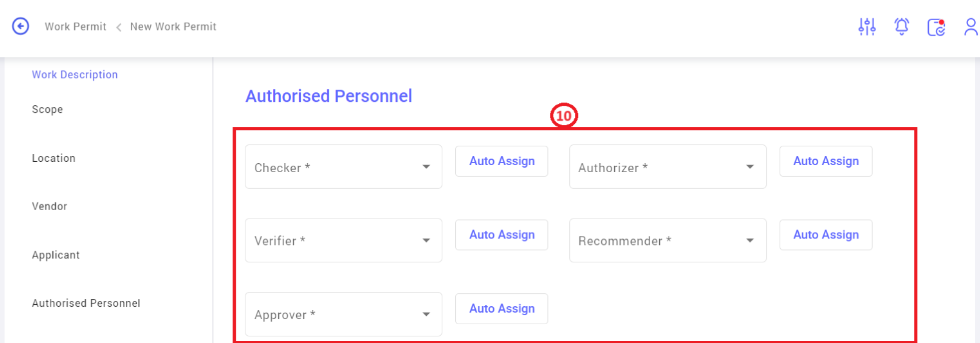
- Authorized Personnel: To select the Approvers to approve the Application form.
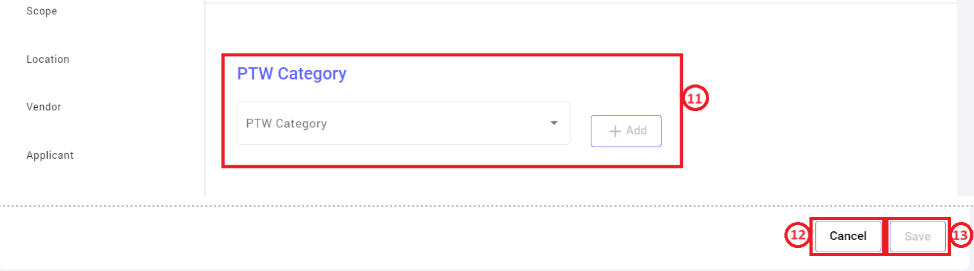
- PTW Category: To select the PTW Category.
- Cancel: To cancel the Application draft.
- Save: To save the Application form.
Step 2: Applicant will be notified to submit the WP Application / PTW Application initiated by the coordinator.
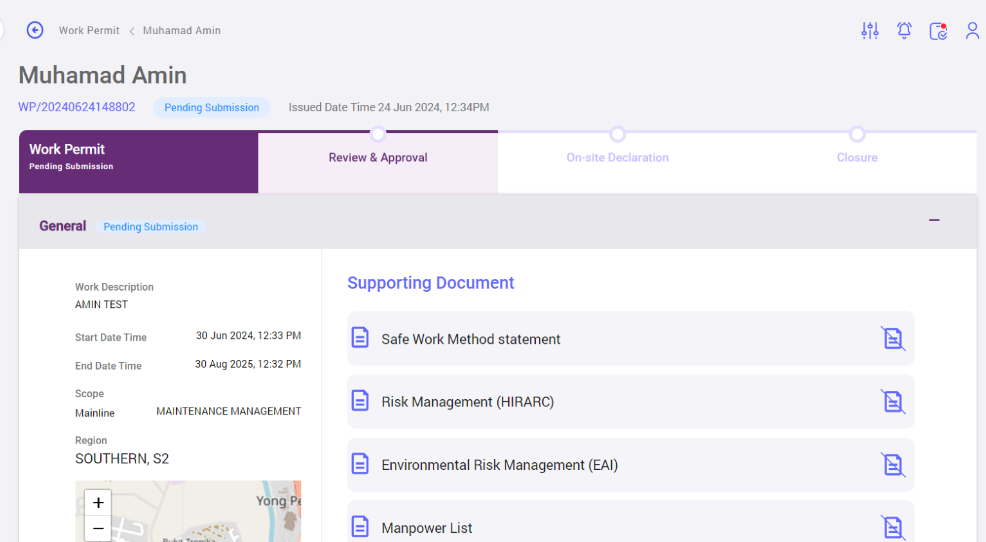
Support documents attached can be viewed on the application details page. The Application's status will be Pending submission until the Applicant submits the application form.
After the Application submission, the status will change to Pending checking.
Step 3: Approvers will be notified to Check, Authorize, Verify, Recommend & Approve the WP Application / PTW Application submitted by the Applicant.
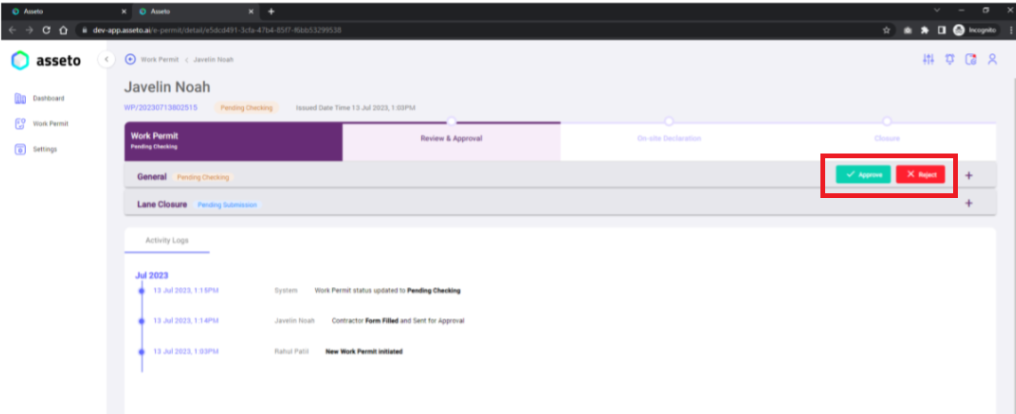
Approve / Reject button displayed in the details page for Approvers. Approvers perform the required action. Notifications will be triggered to the respective approvers on each step of the approval process.
5. Visit Log
Visit Log:
Users can view Visit Log details of Visitors by navigating to Work Permit >> Visit Log.
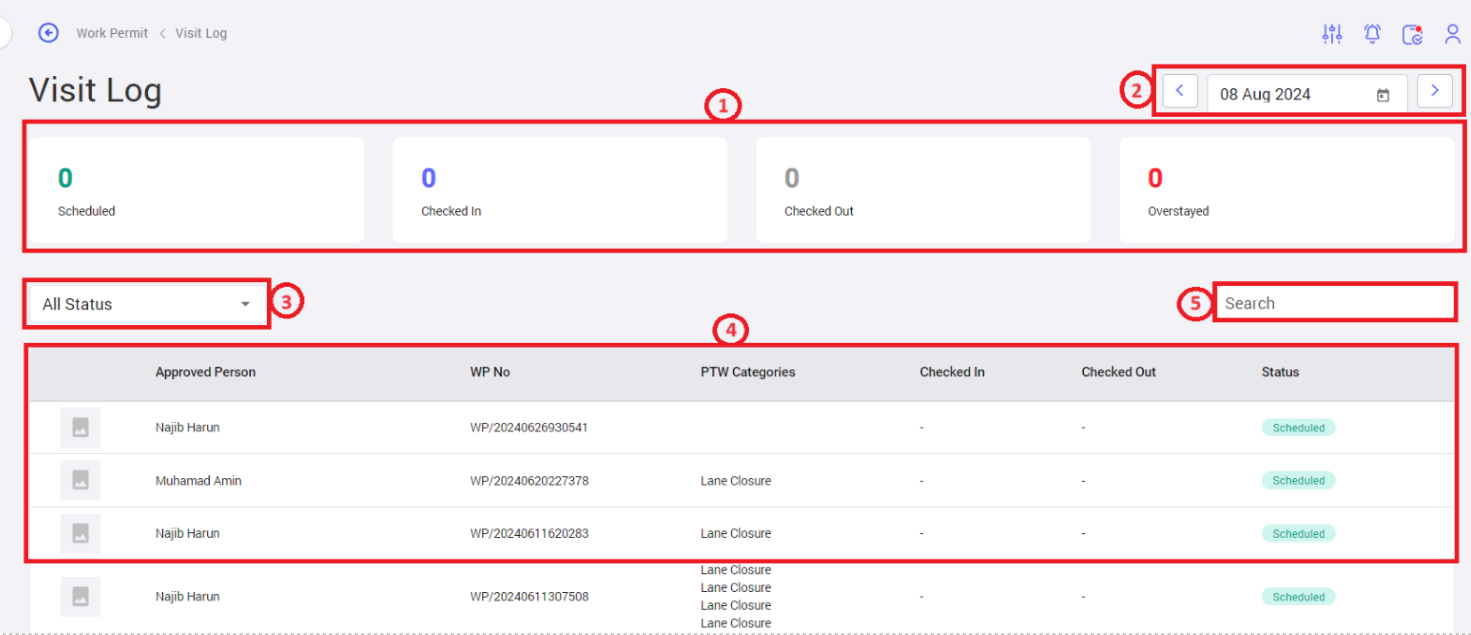
- Widget: It displays the number of records against the statuses, scheduled, checked in, checked out and overstayed.
- Date: User can select the date to view the record of specific day.
- Status Drop-down: To filter out the list of records to view specific record with specific status based on the selected status from the drop-down.
- List View: To display the records in a dynamic table with related information like, WP No, PTW categories, Check in & checkout details, status.
- Search: To search specific records with key words.